This module allows the users to carry out inventory transactions from within the SFDC screens. To access these options, not only must the SFDC module be activated, but the user must also have permission to access the Material section of the SFDC module. This is set up via the employee’s status. The employee status is configured in the List Maintenance section of Progress as shown below.
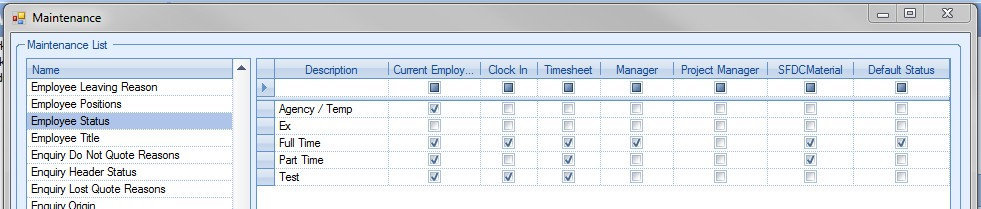
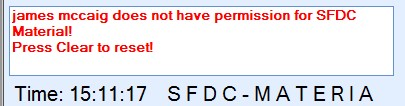
The SFDC MATERIAL option must be ticked against the employee status for any employees with that status to access this section via the SFDC module. If the user does not have the appropriate access, and they try to access the SFDC Material section, the user is presented with a warning message highlighting this.
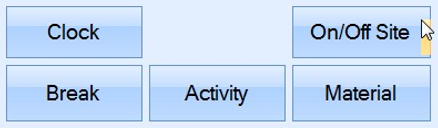
The SFDC Material section is accessible from within the standard SFDC module. If available, the user will have a MATERIAL option available at the bottom of the SFDC window as shown below.
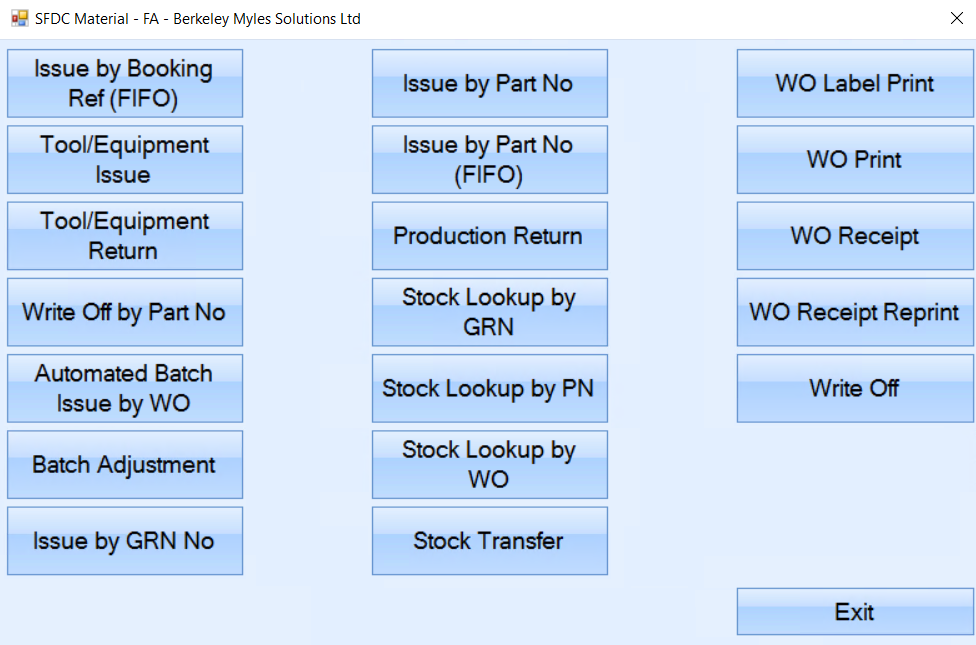
Once this option is selected, Progress opens a second SFDC window specifically for the material transactions. An example is shown below.

The LABOUR option at the bottom of this screen will allow the user to return the focus to the standard SFDC window used for jobbing on and off work order operations.
To use the material options within SFDC, the user simply has to enter their employee ID and then click the ACTIVITY option. This will present the user with a list of the available material options.
Issue by Booking Ref (FIFO)
This option allows the user to issue material to a Booking Reference based on "first in, first out" (FIFO) principle. This will issue the booking reference material based on oldest material first. The system will continue to issue each batch, oldest to newest, until the specified quantity has been issued.
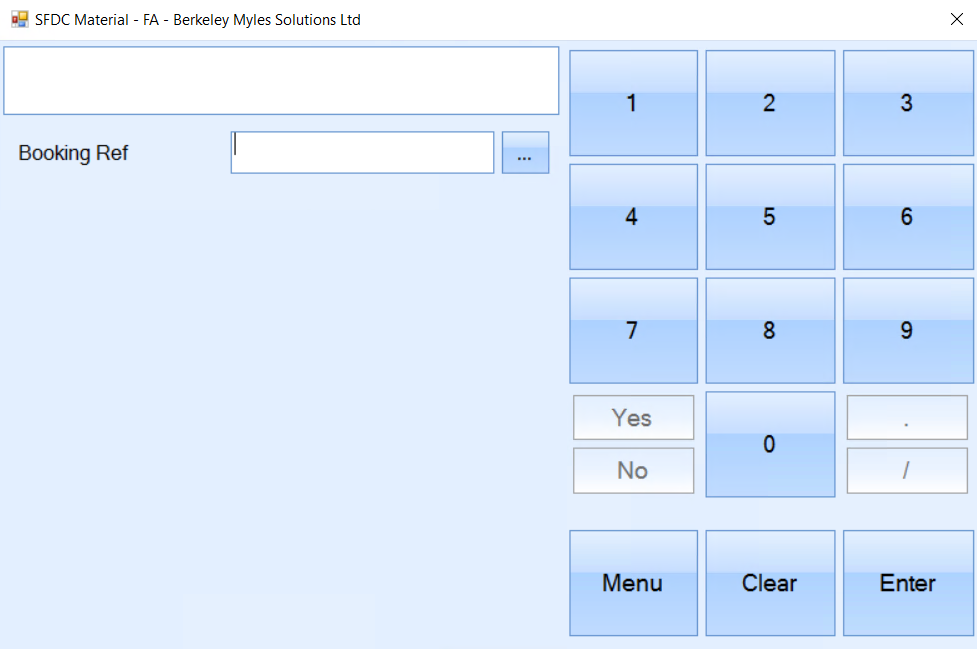
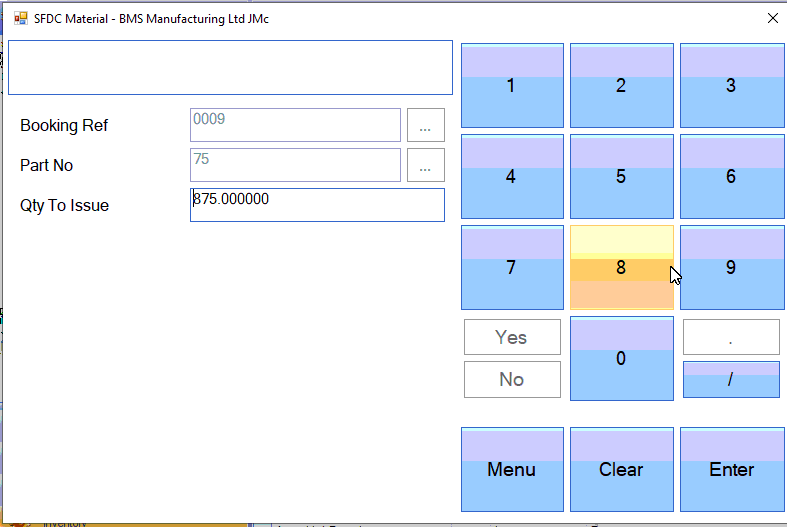
The user will be prompted for the booking reference number first.

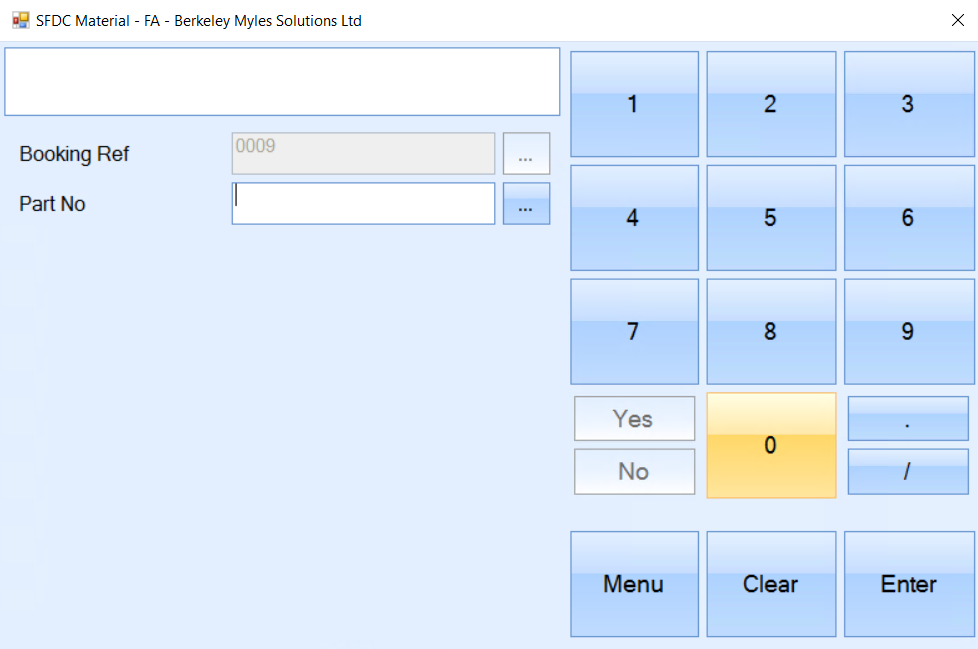
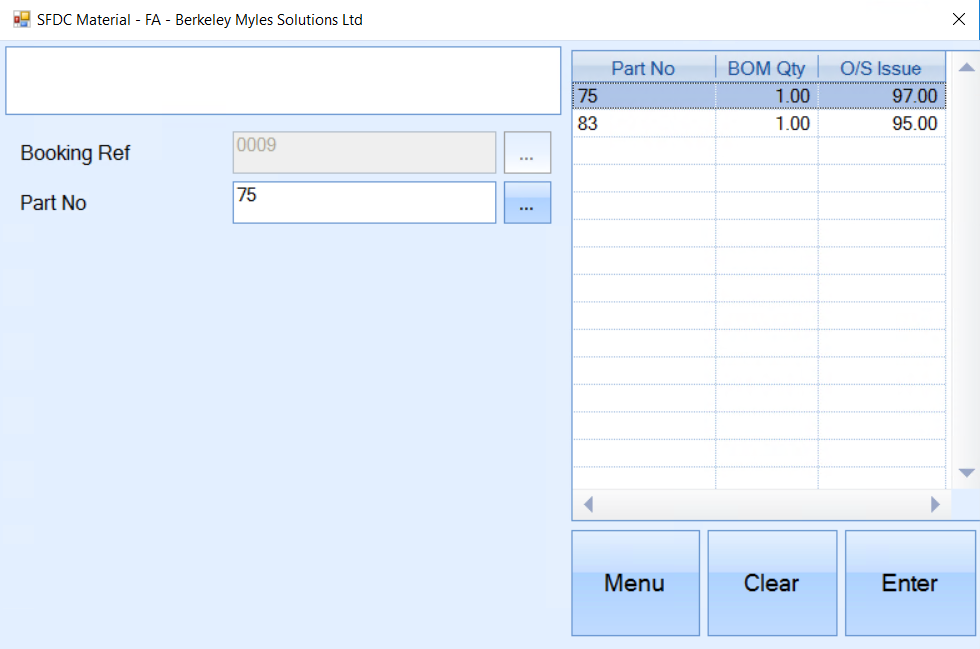
Once selected, pressing ENTER will proceed to the next prompt for the part number to be issued to the selected work order.
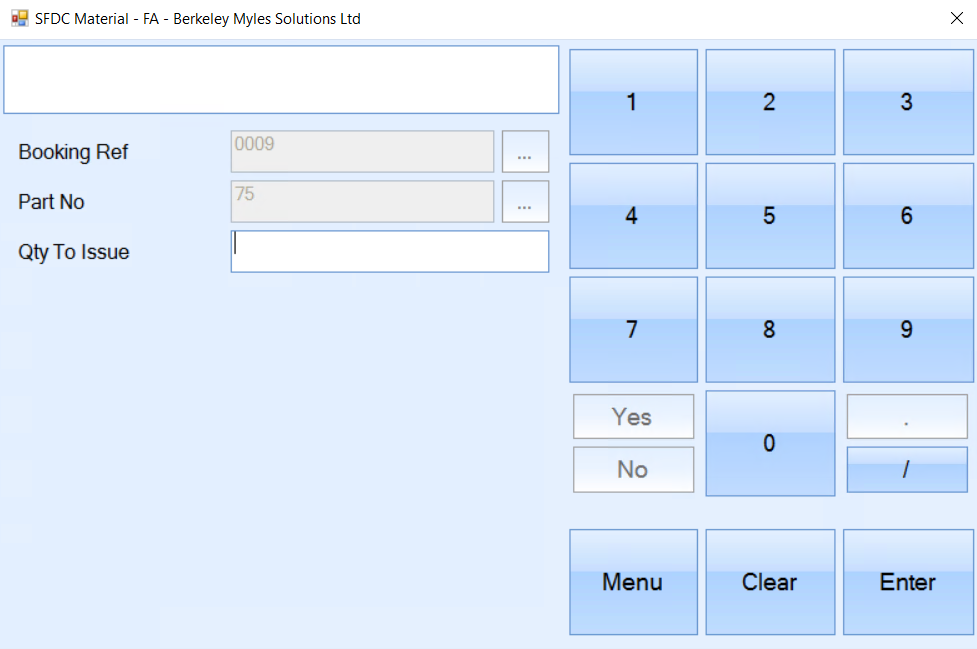
Once selected, again the user clicks ENTER to proceed to the next prompt for the quantity to be issued.
Once the user has entered the quantity, clicking ENTER will proceed to the next prompt.
The confirmed quantity will be displayed, alongside the GRN details.
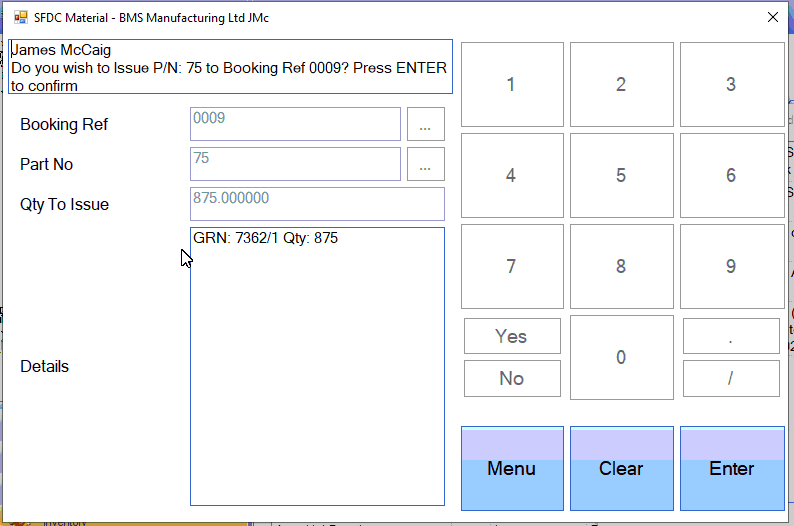
Clicking ENTER again will complete the issue of the part to the selected booking reference on a FIFO basis, returning the user to the main SFDC Material Activity screen once done.
Tool/Equipment Issue
NOTE: This option is only available if the additional Quality module has been purchased
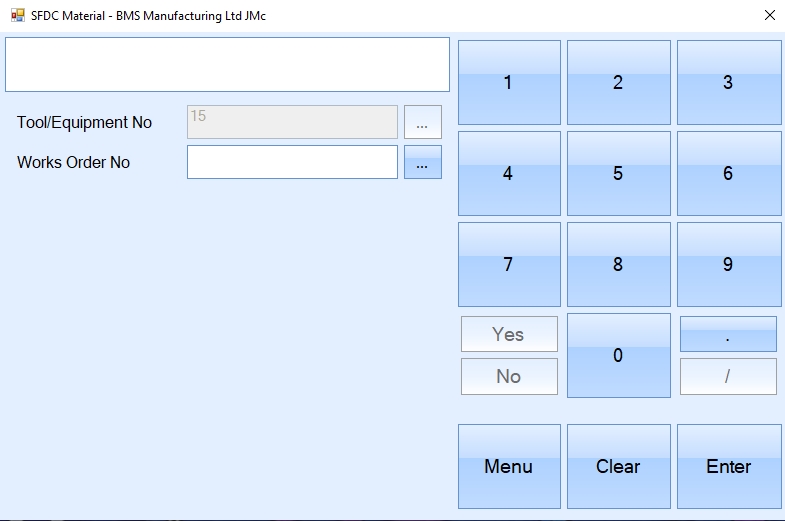
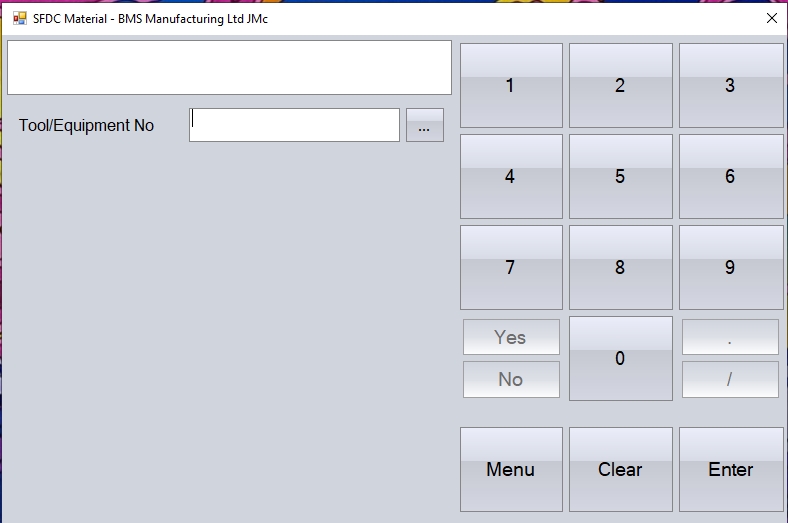
This option allows the user to issue planned tooling to work orders based on pre-defined tooling on the work order operations.
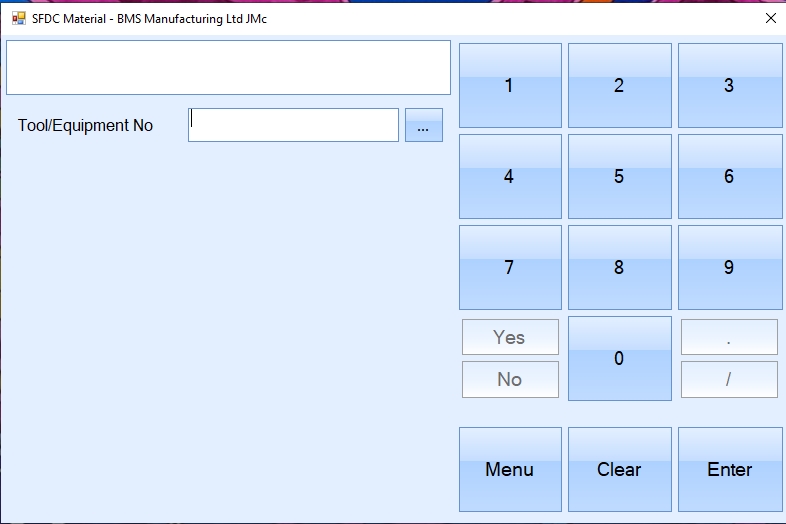
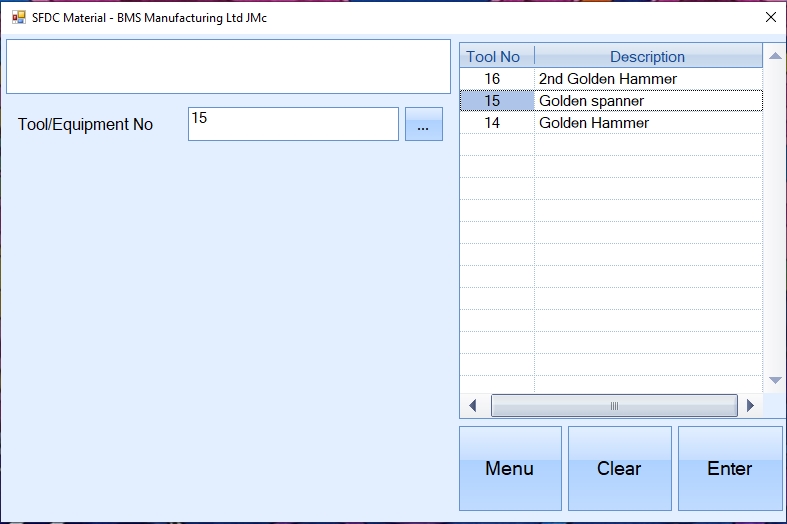
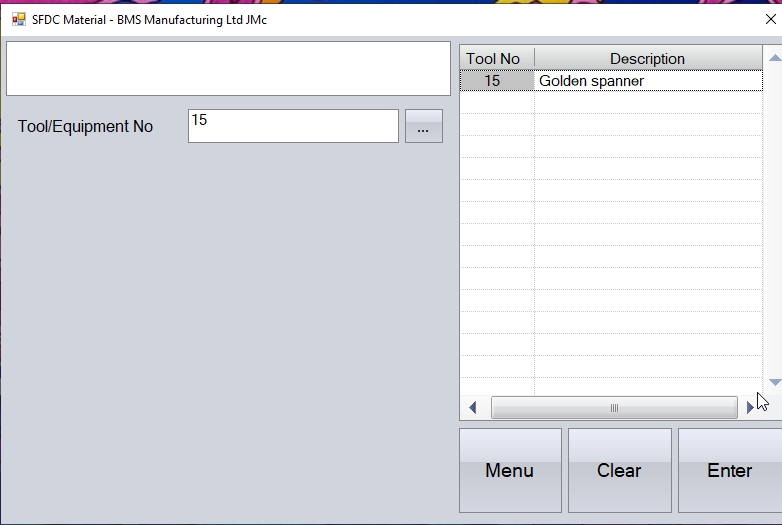
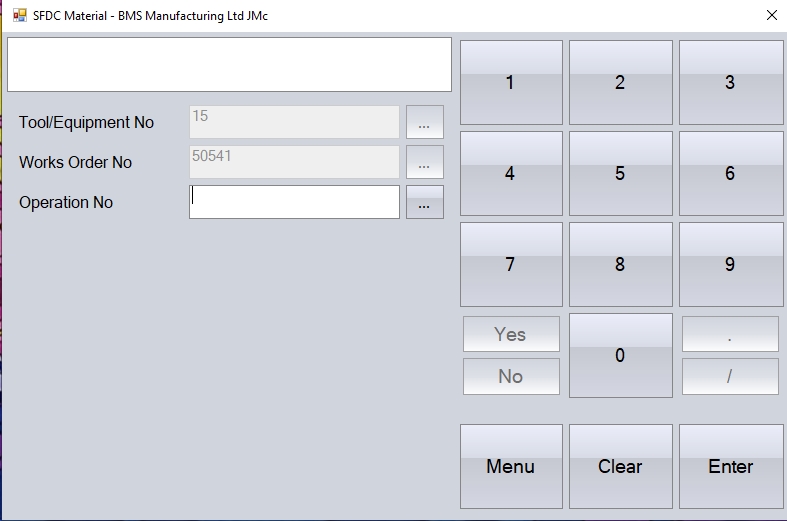
The first thing the user needs to specify is the tool ID to be issued. The user can enter the tool ID if known using the number options on screen or can select from the list using the search button.
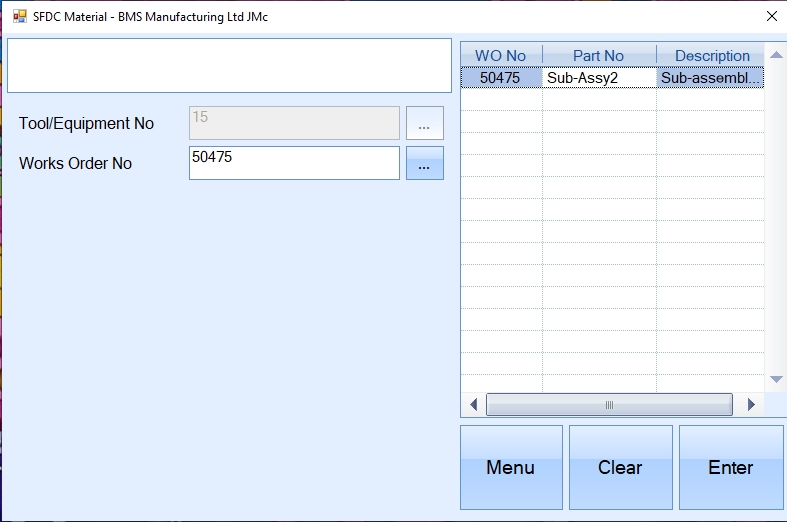
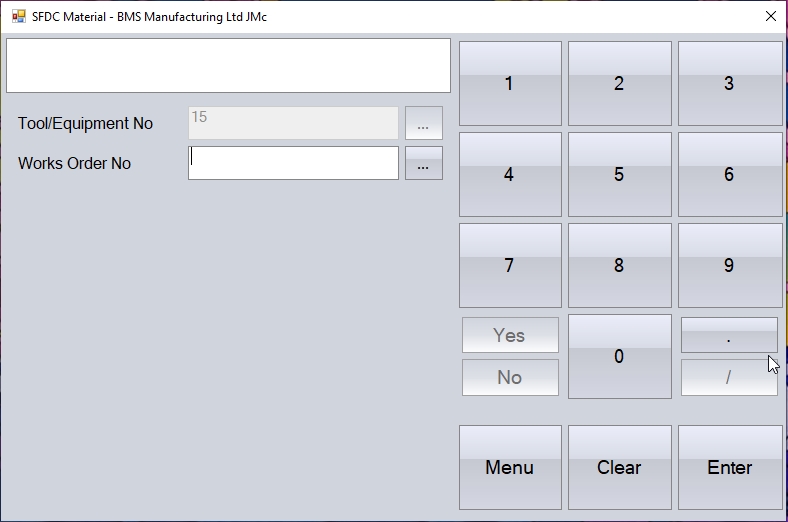
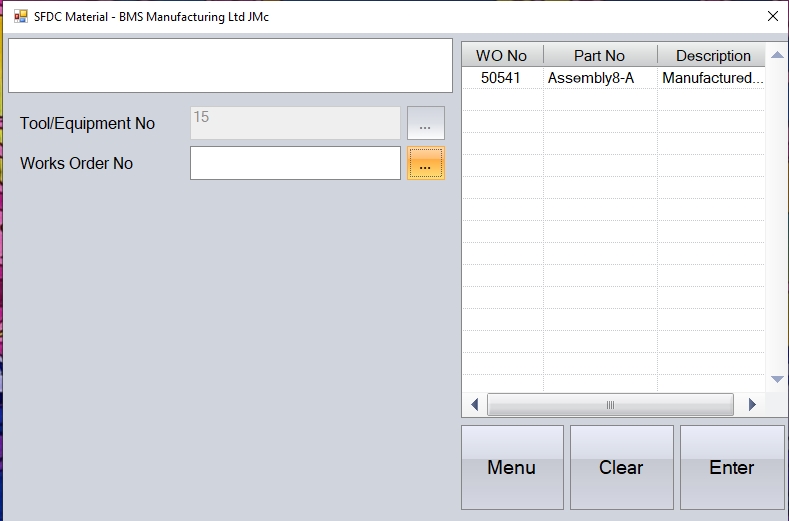
Once selected, the user is prompted for the work order the tool is to be issued to.
Again, this can be scanned, searched for or manually entered.
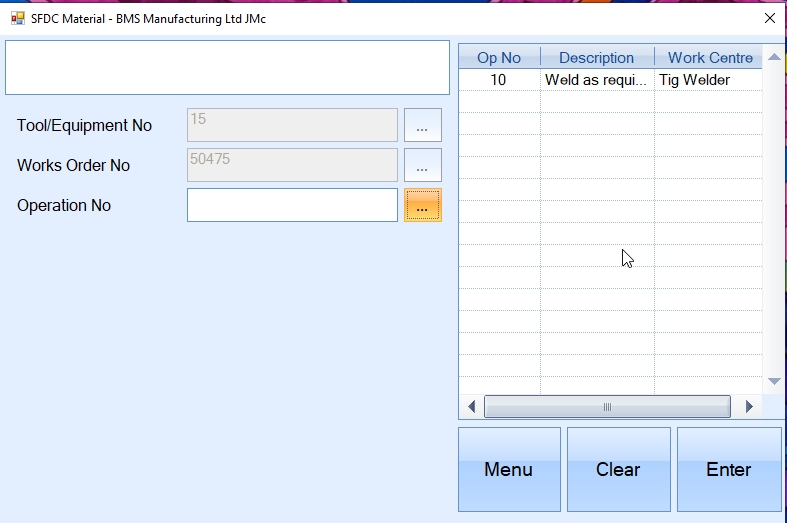
Lastly, the user is prompted for the work order operation number.
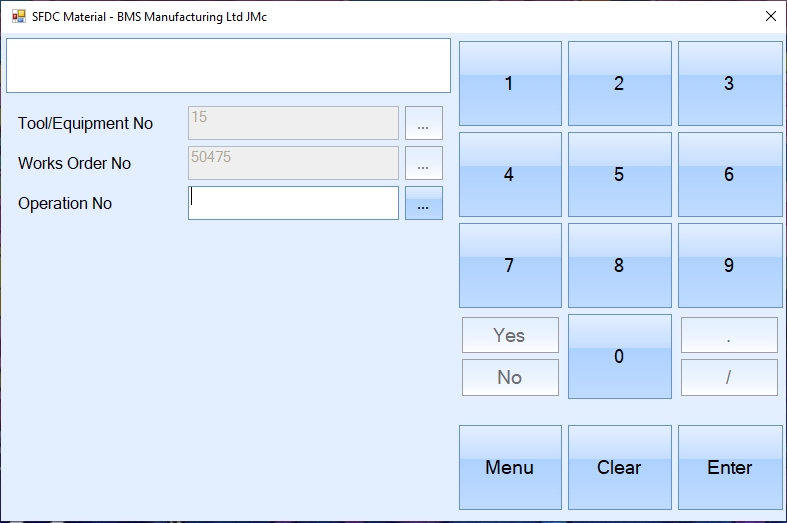
Again, this can be scanned, searched for or manually entered.
Once all the details have been entered, the user will be asked to confirm the tool issue.

Clicking ENTER again, will complete the issue.
Tool/Equipment Return
NOTE: This option is only available if the Quality module has been purchased
This option allows the user to return issued tooling to work orders.
The user will firstly be prompted for the tool ID they are returning. The user can manually enter the ID or can select from the list of issued tools.
Once selected, the user will then be prompted for the work order number.
Again, the user can scan, manually enter or select from the list of work orders.
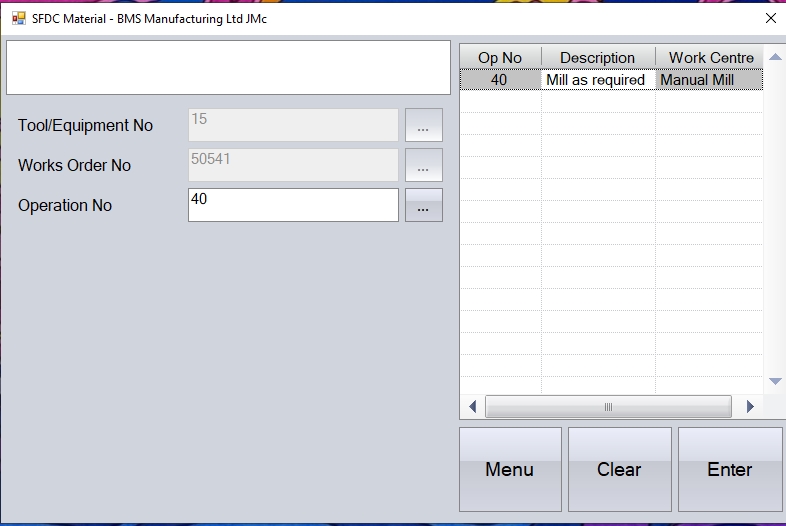
Once selected, the user is prompted for the work order operation number.
Again, the user can scan, manually enter or select from the list of operations.
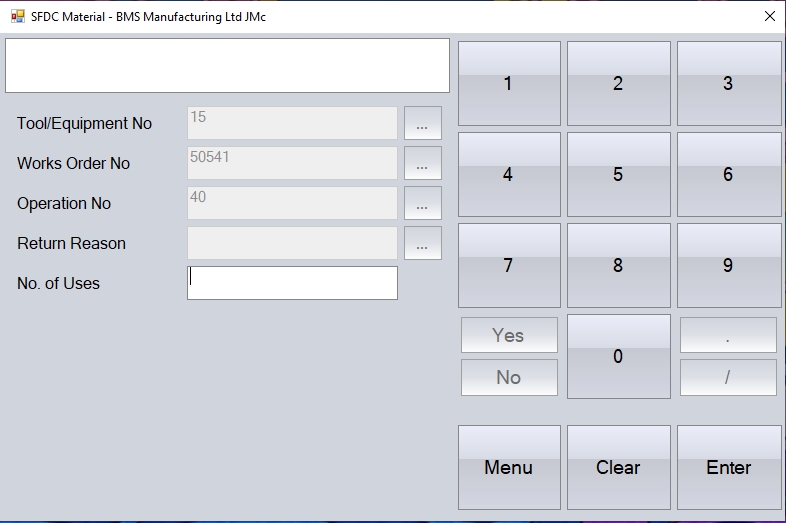
Once selected, the user will be prompted for a return reason.
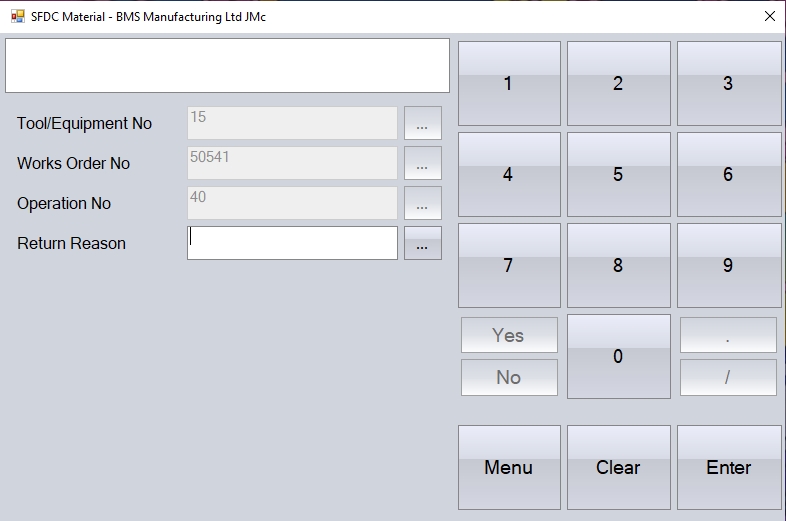
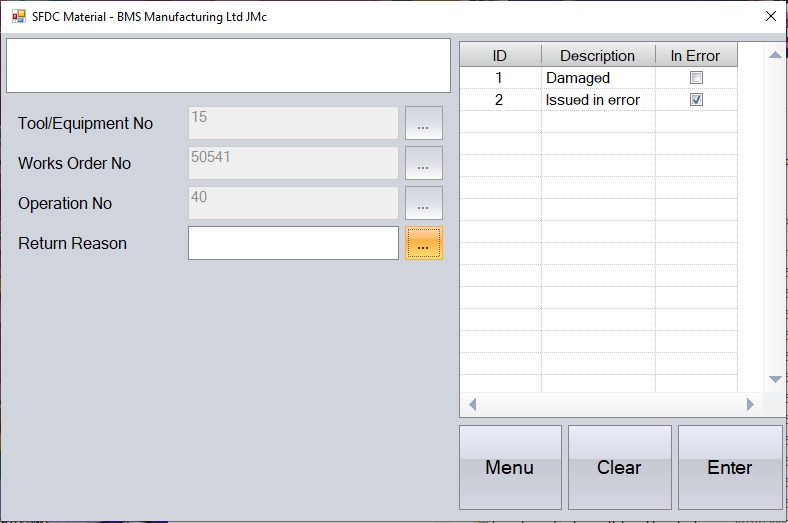
If the user is returning the tooling due to an issue (i.e. damaged, out of calibration, etc.), or if the tool was issued in error, the user can specify this by selecting from the list of valid reasons which have been set up previously in the List Maintenance section.
If the user is simply returning the tool because it is finished with, then the Return Reason field can be left blank.
Next, the user will be prompted for the number of uses. This is not mandatory, but this allows the user to record how many times the tool/equipment was used while issued to the work order operation. The user can enter the numerical value when prompted.
This information can be used when there is a need to track how many times the tool/equipment prior to being re-calibrated, and is recorded against he tool record itself.
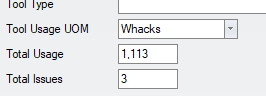
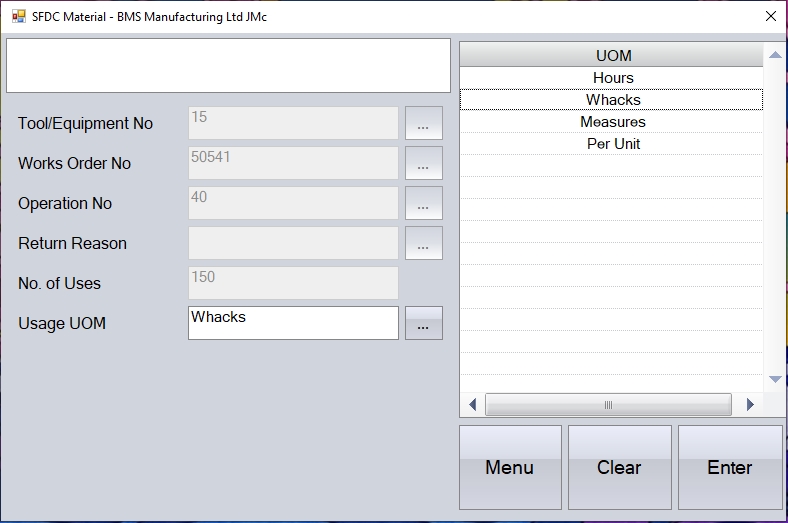
In addition to the number of uses, the user will be prompted for the UOM associated with the number of uses.
Once all the details have been entered, the user will be prompted to confirm the return of the tool.
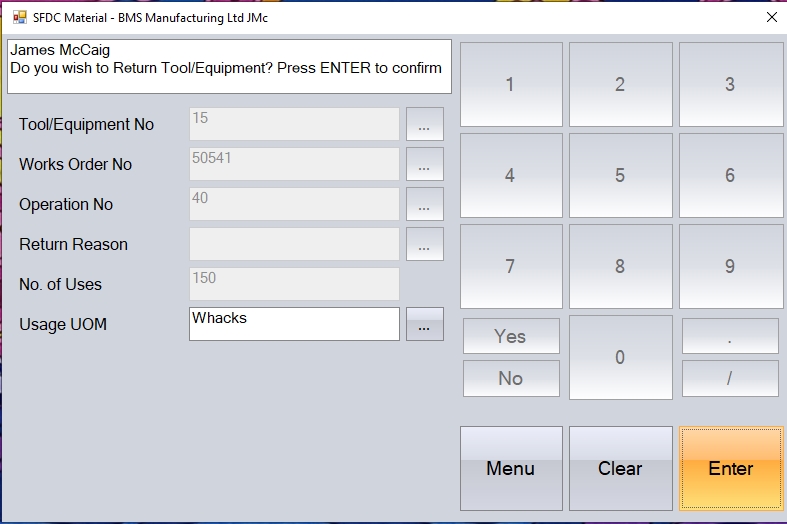
Clicking ENTER will complete the return of the tool, making it available for use elsewhere.
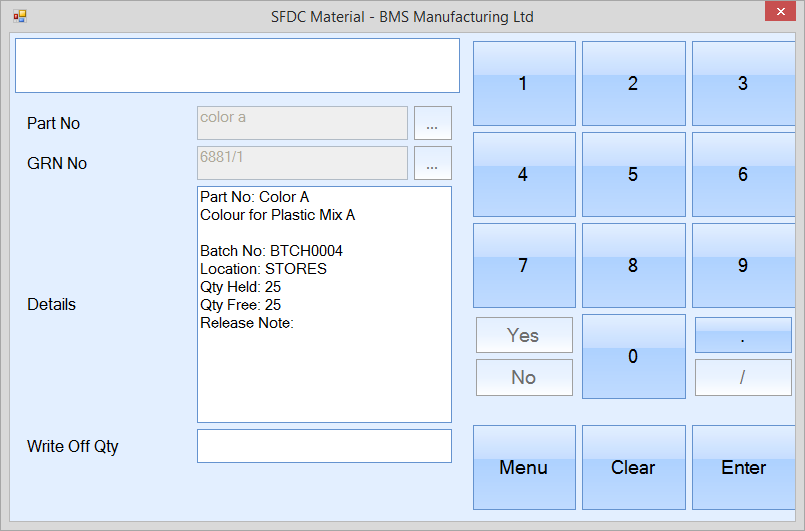
Write Off By Part No
This option allows the user write off existing stock by searching for a part number.
The user will be prompted to enter a part number before being prompted for a specific GRN number to identify the appropriate batch which is to be written off. Once all the information has been selected, the user is prompted for the write off quantity.
Upon entering a quantity and pressing ENTER, the system will reduce prompt for a write off reason. Pressing ENTER again will complete the write off transaction and return the user to the main SFDC Material activity screen.
Automated Batch Issue by WO
The user can automatically issue all outstanding material to a work order by using the Automated Batch Issue by WO. This will issue material on a First In First Out basis.
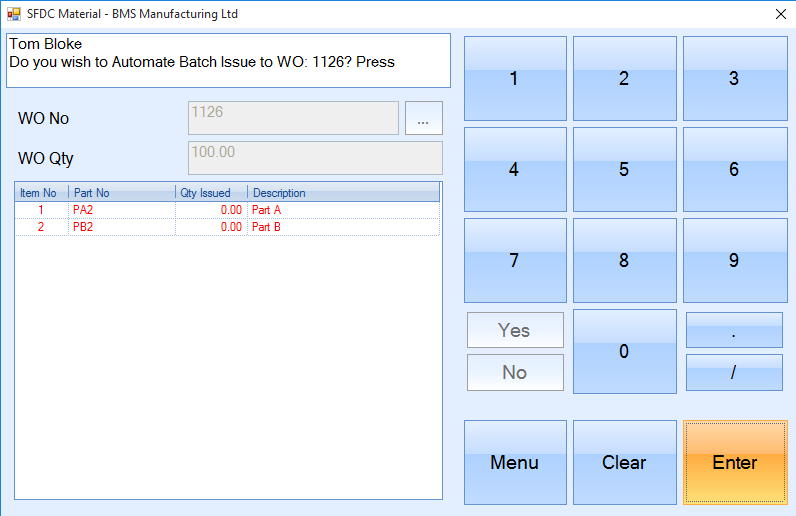
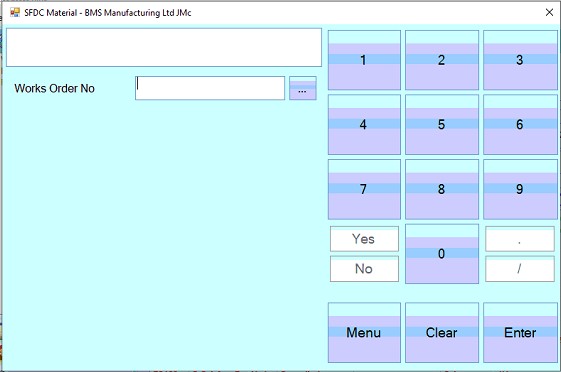
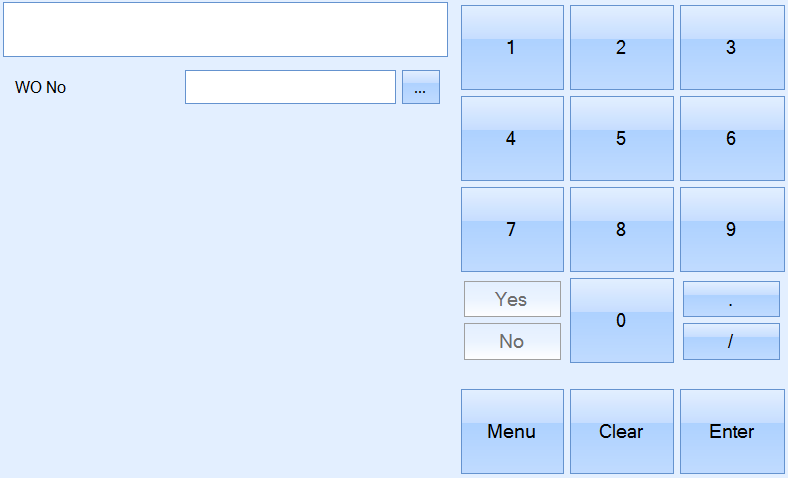
The user is presented with the following screen.
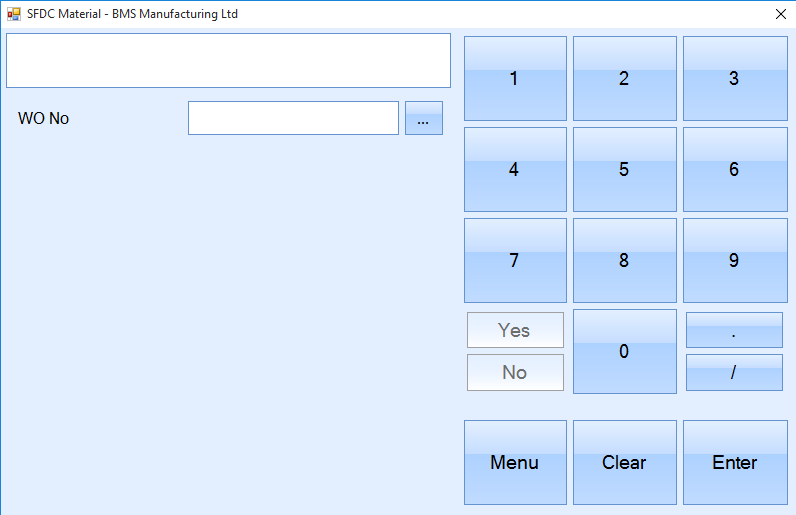
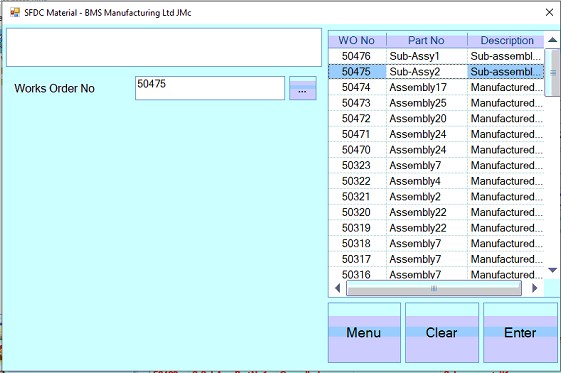
The user can select the appropriate work order from a list using the ![]() button or type the work order if known. Once selected, the user must select Enter.
button or type the work order if known. Once selected, the user must select Enter.
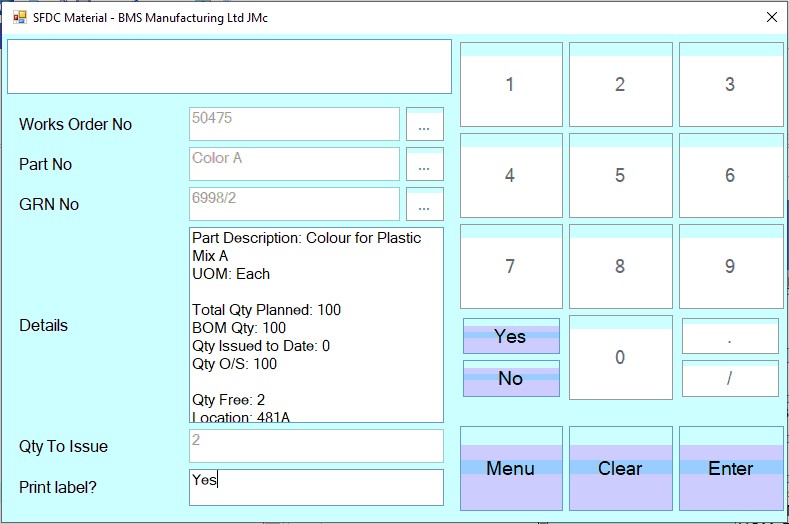
The materials to be issued to that work order will be displayed as well as the quantity already issued and the part description. The line will be displayed in red when the issued quantity is less than the BOM quantity. This will be displayed in black if the issued quantity is equal to or greater than the BOM quantity.
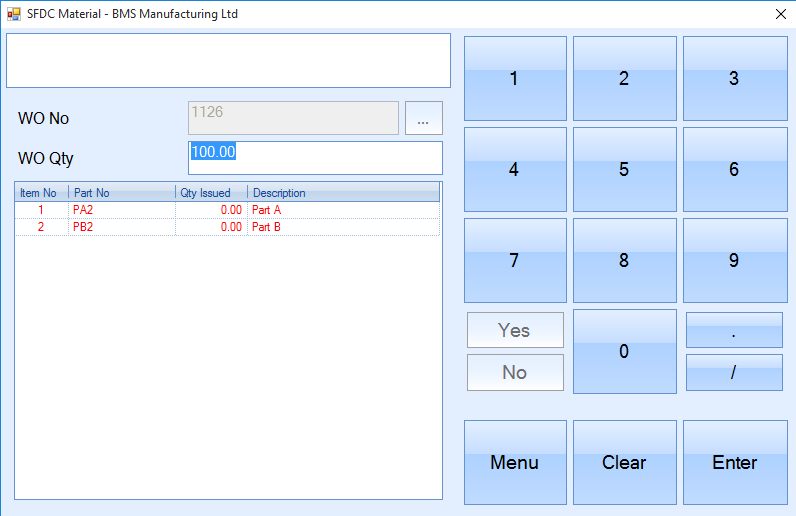
The WO Qty box allows the user to define the quantity of material that is being issued.
![]()
It will automatically display the work order quantity but can be edited if the user is not issuing the full quantity. For example, the user has a WO quantity of 100 but only wants to issue material to fulfill 50 units. This would be changed to 50, resulting in only half of the material being issued. If a quantity greater than the work order quantity is entered, the system will only issue the quantity of material to satisfy the work order and no more.
If the system is configured to generate an Issue To Production label, the user will be prompted to confirm these.
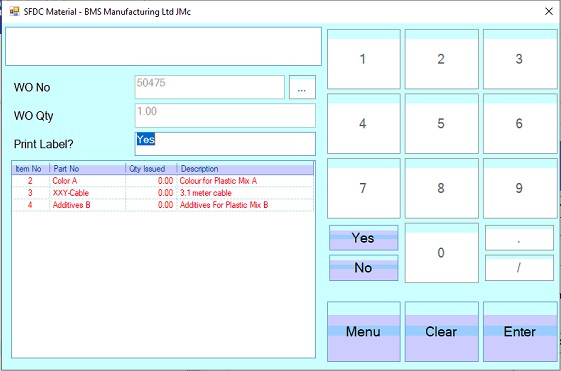
The value will default based on the system configuration, so the user can simply click ENTER to confirm or use the YES/NO options to change the value.
The system will then ask the user to confirm the issue, which can be done by pressing the ENTER button again.
The Qty Issued will update to represent the latest figures.
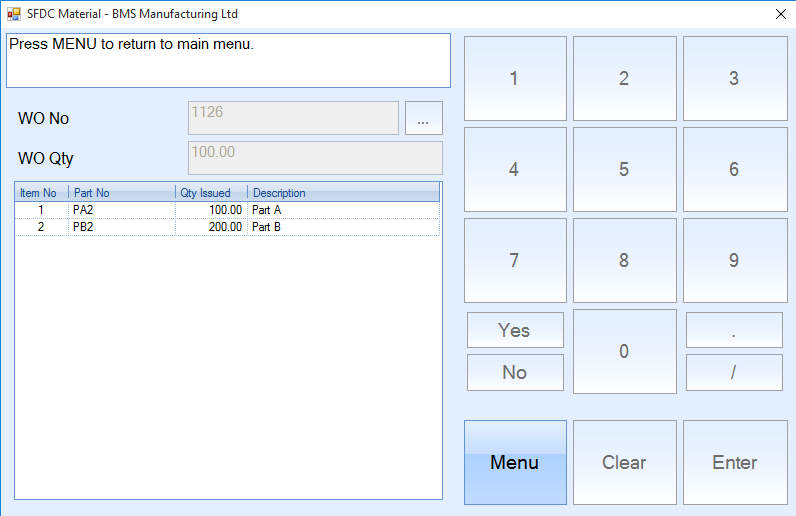
The user must select Menu to go back to the Material screen.
The Automated Batch Issue by WO will not allow any further issues to a WO if material has been fully issued to it. The user will be able to go through the whole process but it will not affect issues to that work order.
Batch Adjustment
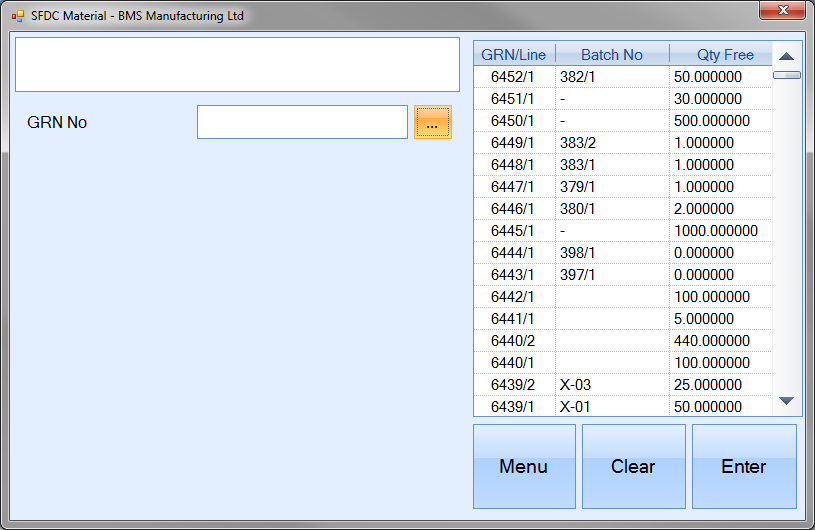
This option allows the user to do a batch adjustment of stock onto Progress. This allows the user to increase the amount of stock against a specific existing batch of inventory. Clicking this option presents the user with the following screen.
The user can use the ![]() option to view a list of existing GRNs to select from or, if known, enter the GRN number using the onscreen numbers.
option to view a list of existing GRNs to select from or, if known, enter the GRN number using the onscreen numbers.
Once the user enters the required GRN and presses the ENTER option, they are presented with the details of the selected batch.
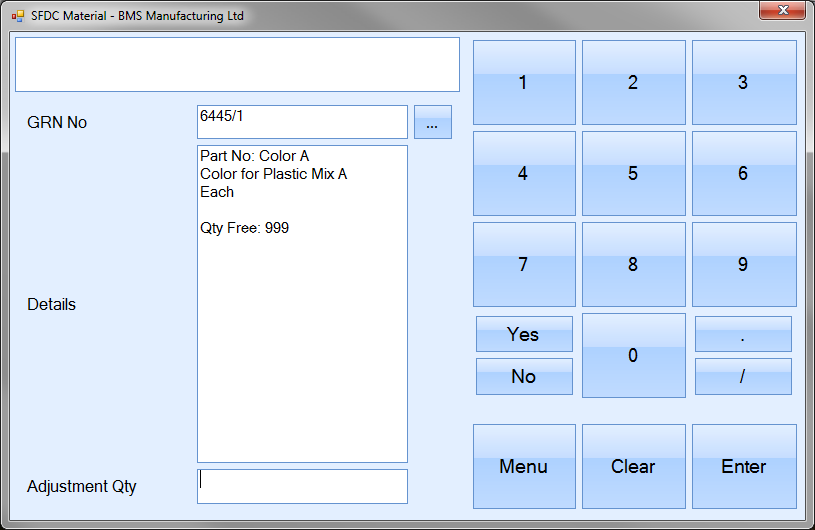
The user can select the quantity to be adjusted by again either typing in the quantity or entering via the onscreen numbers.
![]()
Once entered, the user can proceed with the adjustment by clicking the ENTER option. The system will ask the user to confirm the adjustment by clicking ENTER again. Upon doing so, the adjustment will be made and the user will be returned to the SFDC Material options screen. If further adjustments have to be done, the user can simply repeat the above process.
Issue By GRN No
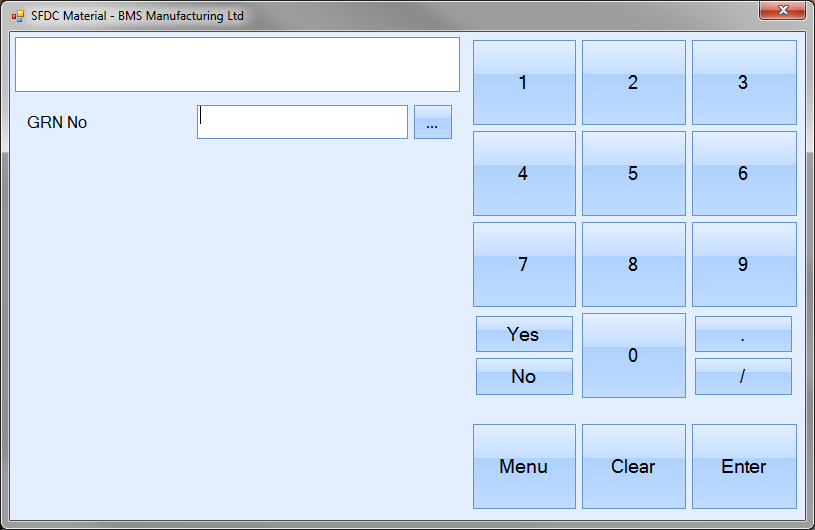
This option allows the user to issue material to a work order using the GRN number for the material. Selecting this option presents the user with the following screen.
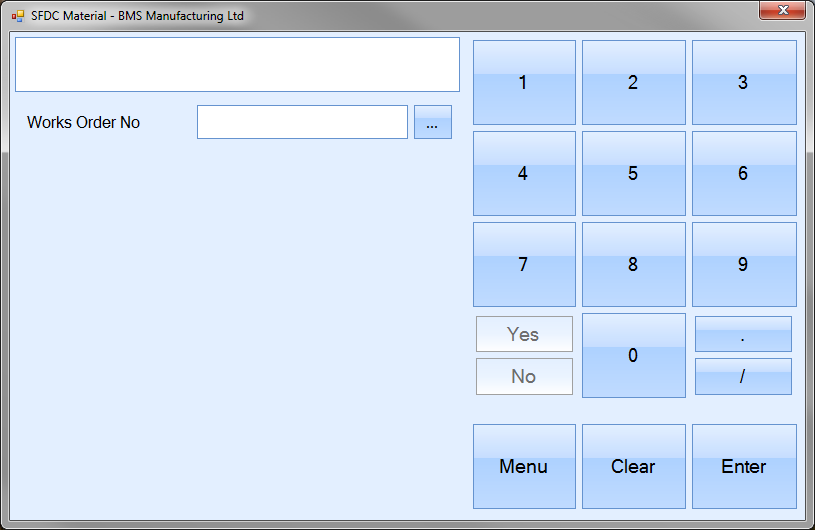
The user can click on the ![]() option to select the required work order from the list or can enter it using the onscreen numbers.
option to select the required work order from the list or can enter it using the onscreen numbers.
Once the user selected the work order required, the system prompts the user for the GRN number of the material to be issued.
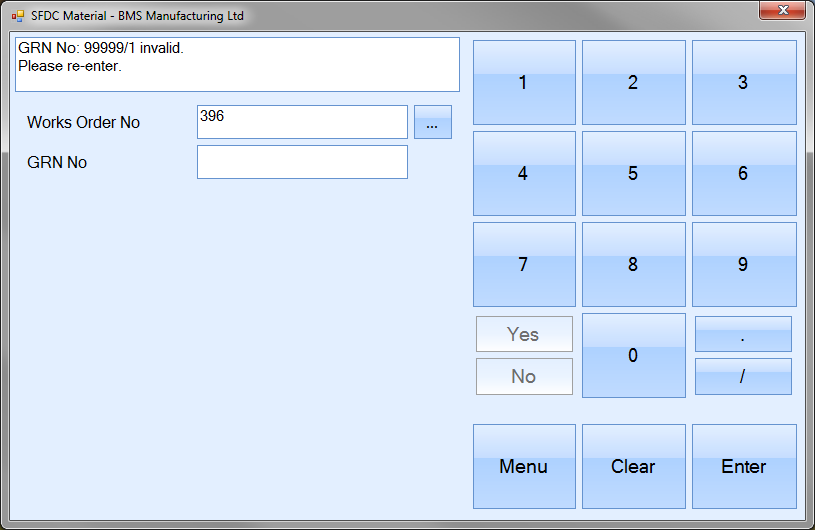
The user can enter the GRN required the onscreen numbers. If the GRN entered is invalid, the user is informed as shown above. Once a valid GRN number has been entered by the user, the details are displayed for the user to see as shown below.
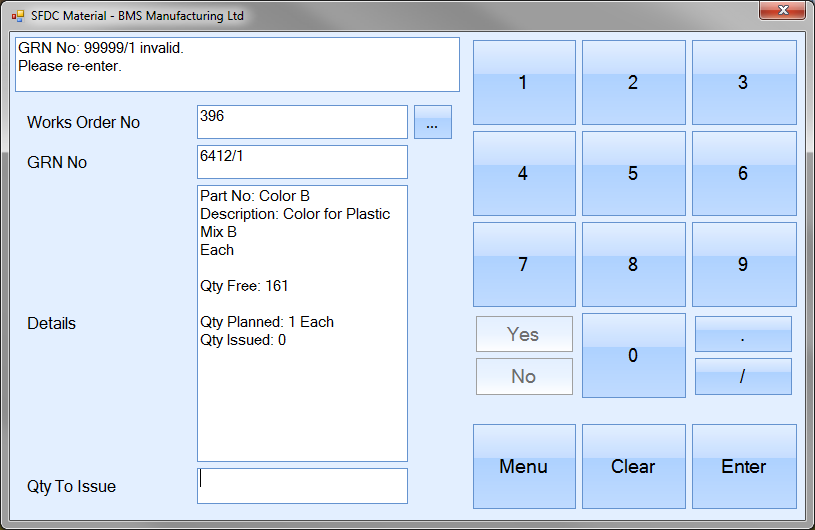
The user can then specify the issue quantity using the onscreen numbers. If the user enters an quantity greater than the current GRN quantity, the system will display an error accordingly.

If the system is configured to generate an Issue To Production label, the user will be prompted to confirm these.
The value will default based on the system configuration, so the user can simply click ENTER to confirm or use the YES/NO options to change the value.
Once all details have been entered, the system will prompt the user to confirm the issue.

Pressing ENTER again will issue the entered quantity to the work order and return the user to the SFDC Material options screen. If further material issues are to be done, the user can repeat the above steps.
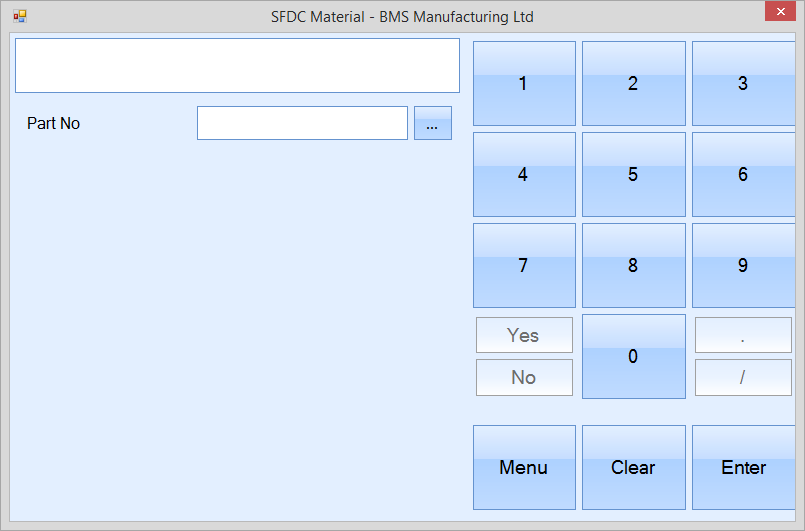
Issue By Part No
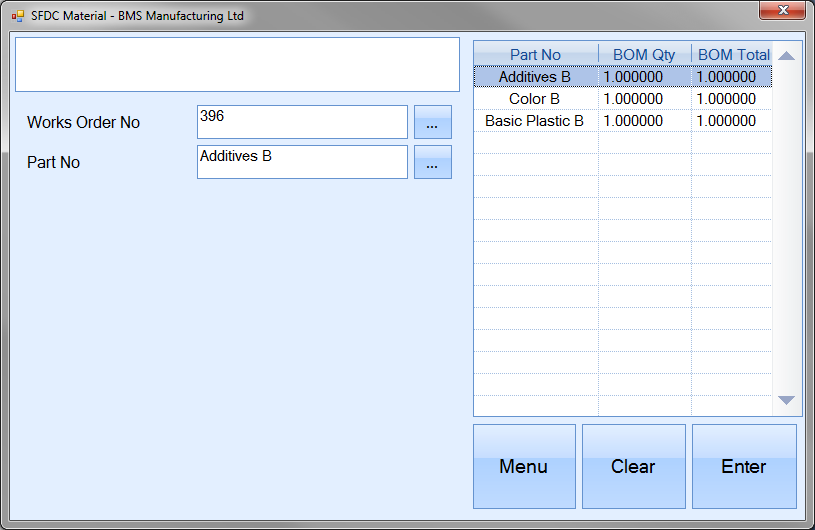
This option allows the user to issue material to a work order using the GRN number for the material. Selecting this option presents the user with the following screen.

The user can click on the ![]() option to select the required work order from the list or can enter it using the onscreen numbers and proceed by clicking the ENTER option.
option to select the required work order from the list or can enter it using the onscreen numbers and proceed by clicking the ENTER option.

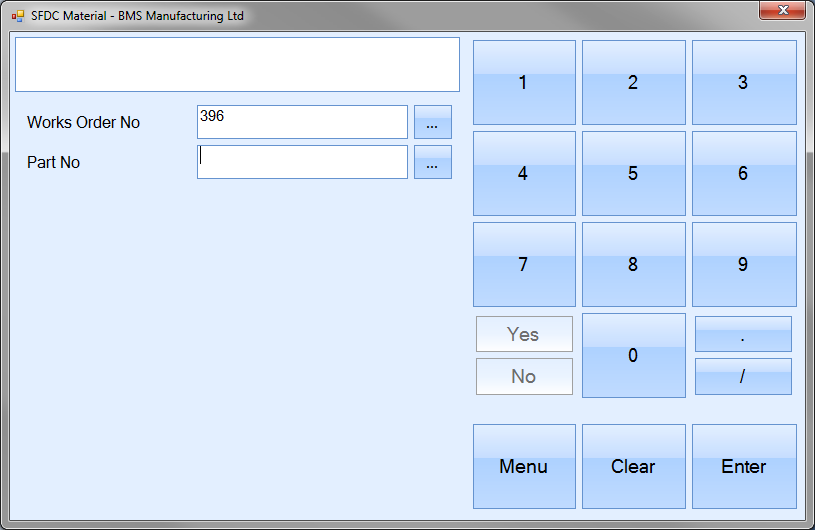
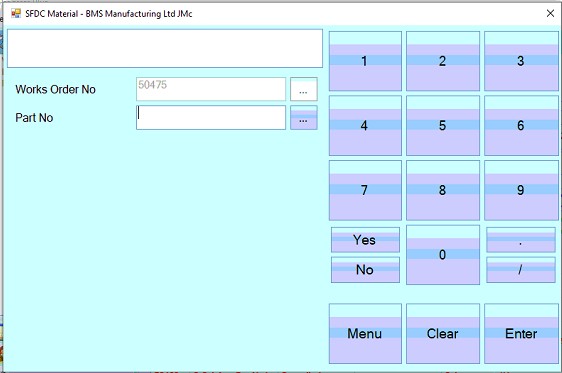
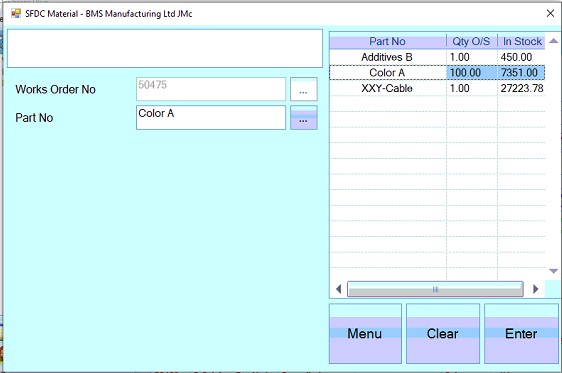
Once the user selected the work order required, the system prompts the user for the part number of the material to be issued.
The user can type in the part number in question or select the part number using the ![]() option, however selecting from the list limits the user to only the part numbers on the BOM of the selected work order as shown below.
option, however selecting from the list limits the user to only the part numbers on the BOM of the selected work order as shown below.
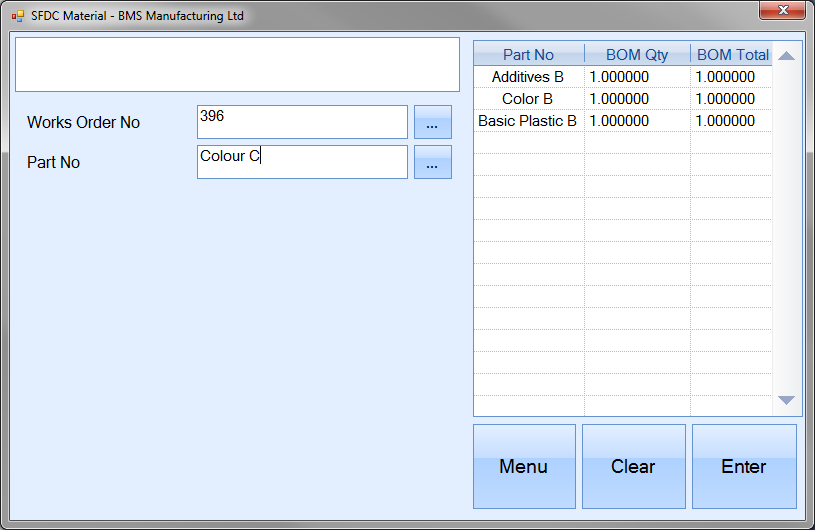
If the user wishes to issue a part to the work order that is not currently on the work order BOM, they must manually enter the part number required as shown below.
Once the required part number has been entered, the user can proceed by clicking the ENTER option. If an invalid part number has been entered, the system will inform the user.

The user will now be prompted for the required GRN number of the inventory to be issued. Again the user can select from the list by clicking on the ![]() option, or manually enter the required GRN.
option, or manually enter the required GRN.
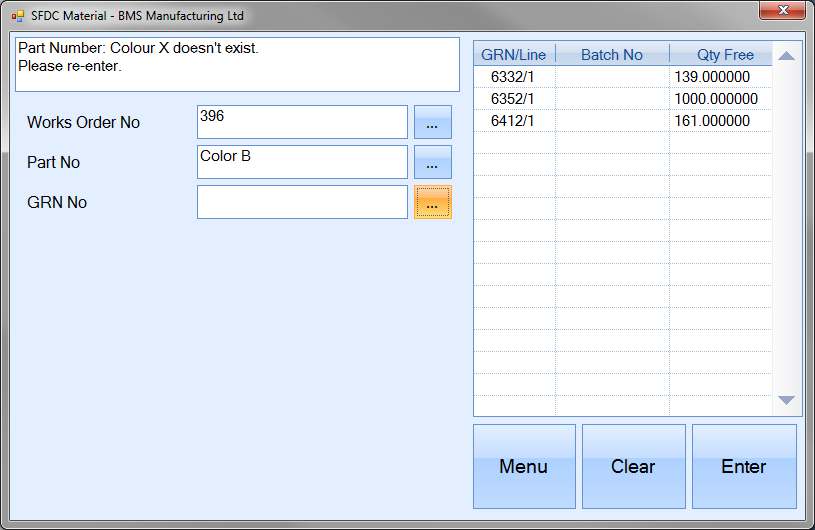
If the user enters an invalid GRN, again, the system will inform the user accordingly.

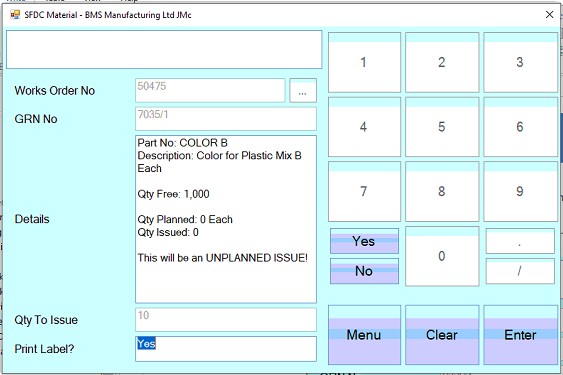
Once a valid GRN has been entered, the system will display the details associated with the GRN and prompt the user for an issue quantity.
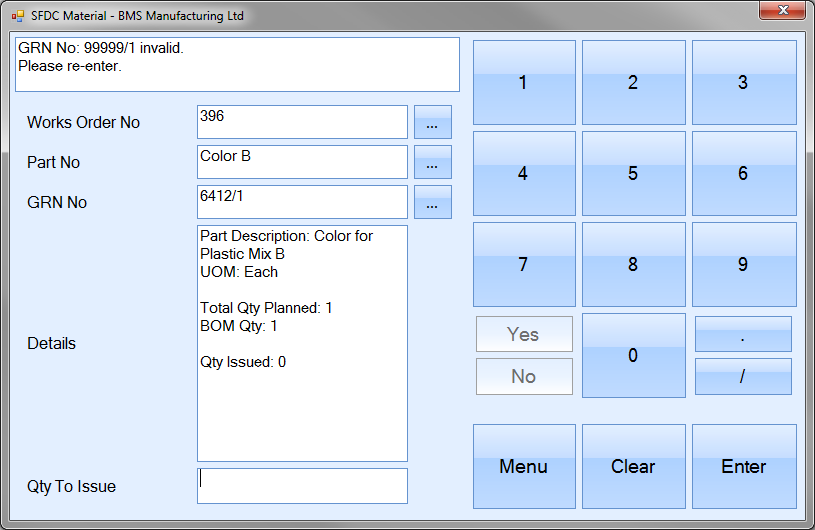
The user can then specify the issue quantity using the onscreen numbers. If the user enters a quantity which is more than the GRN’s current quantity, the system will display an error accordingly.

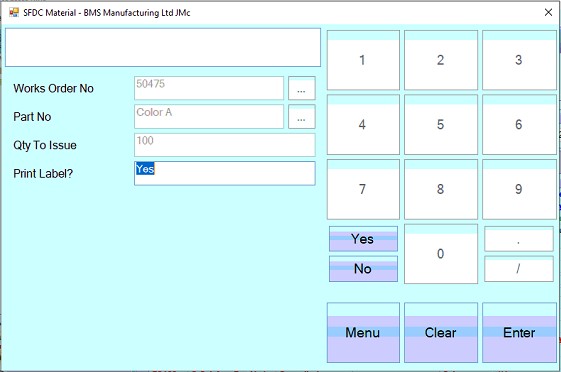
Once the user enters a valid quantity and presses the ENTER option, the system will prompt the user as to whether an issue label is to be generated.
If the system is configured to generate an Issue To Production label, then the user will be prompted to confirm by pressing ENTER or changing the value using the YES/NO options.
Once all the information has been entered, clicking the ENTER option will ask the user to confirm the issue.

Pressing ENTER again will issue the entered quantity to the work order and return the user to the SFDC Material options screen. If further material issues are to be done, the user can repeat the above steps.
Issue By Part No (FIFO)
This option allows the user to issue material to a work order based on "first in, first out" (FIFO) principle. This will issue the work order material based on oldest material first. The user is not given the option to select individual batches as the system will continue to issue each batch, oldest to newest, until the specified quantity has been issued.
The user will be prompted for the work order number first.
Once selected , pressing ENTER will proceed to the next prompt for the part number to be issued to the selected work order.
Once selected, again the user clicks ENTER to proceed to the next prompt for the quantity to be issued.

Once the user has entered the quantity, clicking ENTER will proceed to the next prompt. If the system is configured to generate Issue To Production labels, the user can confirm these are to be generated by clicking ENTER or by changing the value using the YES/NO options.
Once set, clicking ENTER will prompt the user to confirm the issue.
![]()
Clicking ENTER again will complete the issue of the part to the selected work order on a FIFO basis.
Production Return
This option allows the user to return inventory to stock which has been issued to work orders. This has the same result as doing a Production Return from the in the Inventory section of Progress. More information can be found in the Inventory > Issues section of this manual.
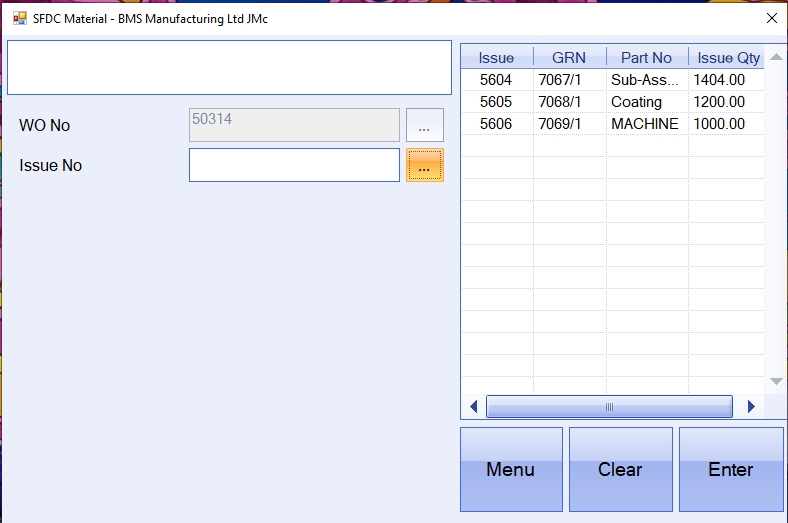
Selecting the PRODUCTION RETURN button will display the following screen.
The user must select (or scan) the work order that is having the issues returned.
![]()
The ![]() button can be used to browse a list of available work orders. NOTE: This process can only be done to "active" work orders. If the work order is at COMPLETED status, it will need to be re-opened. This can be done within the work order via the Menu > Status options.
button can be used to browse a list of available work orders. NOTE: This process can only be done to "active" work orders. If the work order is at COMPLETED status, it will need to be re-opened. This can be done within the work order via the Menu > Status options.
Once selected, the user must confirm by using the ENTER button. The user must then select the issue number that is to be returned.
![]()
Again, the ![]() button can be used to browse a list of available issue numbers to he selected work order. Information relating to the issue such as GRN, part number and original issue quantity are displayed.
button can be used to browse a list of available issue numbers to he selected work order. Information relating to the issue such as GRN, part number and original issue quantity are displayed.
Once selected, the user must confirm by using the ENTER button. Details about the selected issue will be displayed.
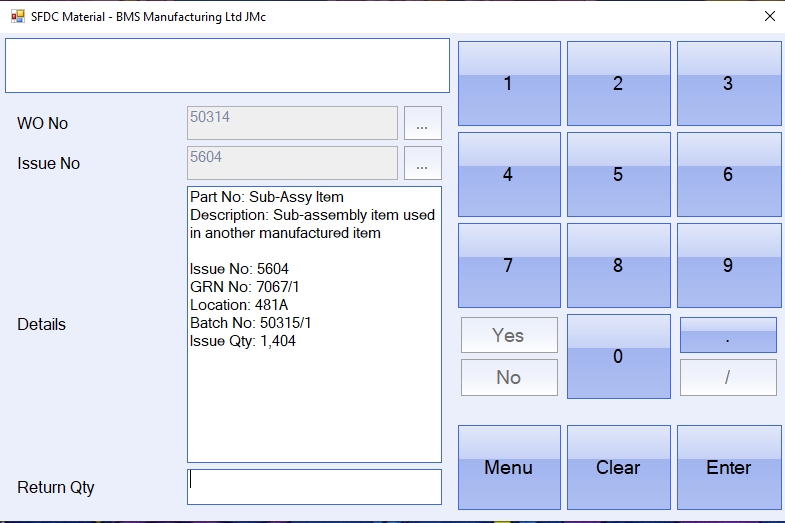
The user can must specify the return quantity by entering it into the following field.
![]()
The user must press ENTER to confirm this selection. The system will ask the user to confirm again by pressing the ENTER button.

Once done, the user will be returned to the main SFDC Material screen.
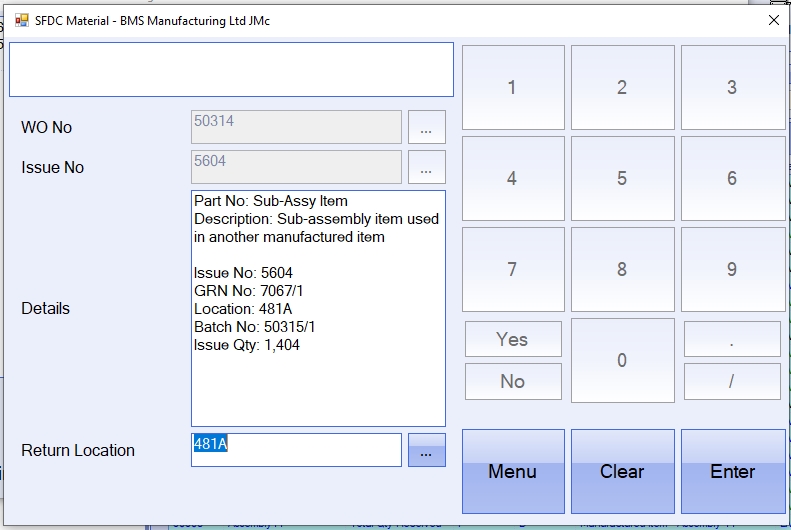
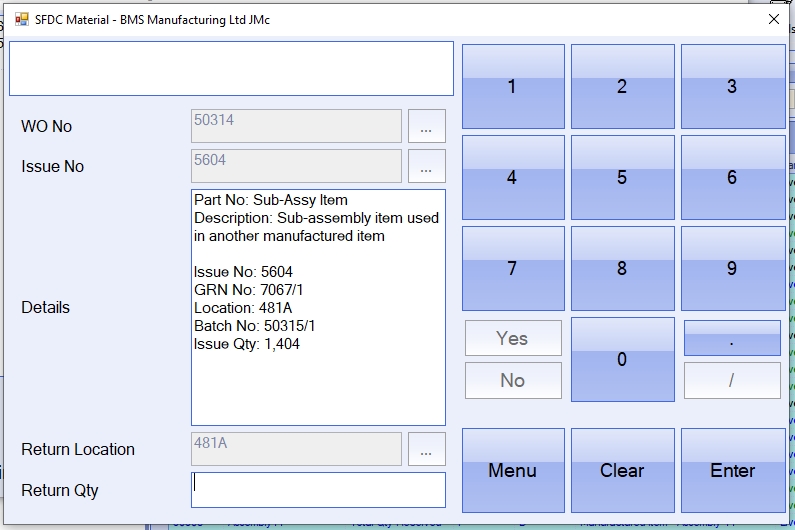
If the system is configured to allow the return to be send to a different stock location, then the user will be prompted to select a stock location before entering the quantity. The option to allow this can be found in the Admin section of Progress, under the Stock system options (Admin > Options > Stock).
![]()
Stock Lookup by GRN
This option allows the user to view the current inventory levels of a specified part number based on a selected GRN. Selecting this option presents the user with the following screen.
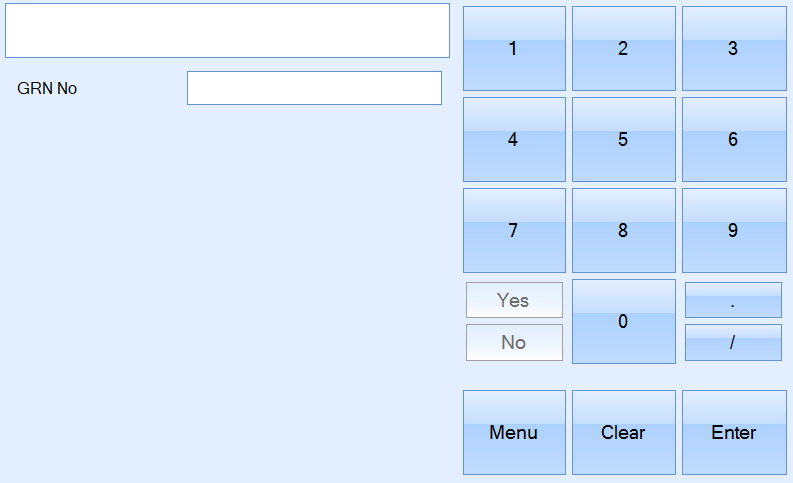
The user can select the GRN manually by either typing it in or using the onscreen numbers. The forward slash must be used to specify the full GRN number. E.G. the user must input 7090/1 instead of 7090. Once entered the user must select the Enter button to continue. If the user enters an invalid GRN number, the system notifies them of this by displaying the following error.

The system will display the GRN number with the relevant information.
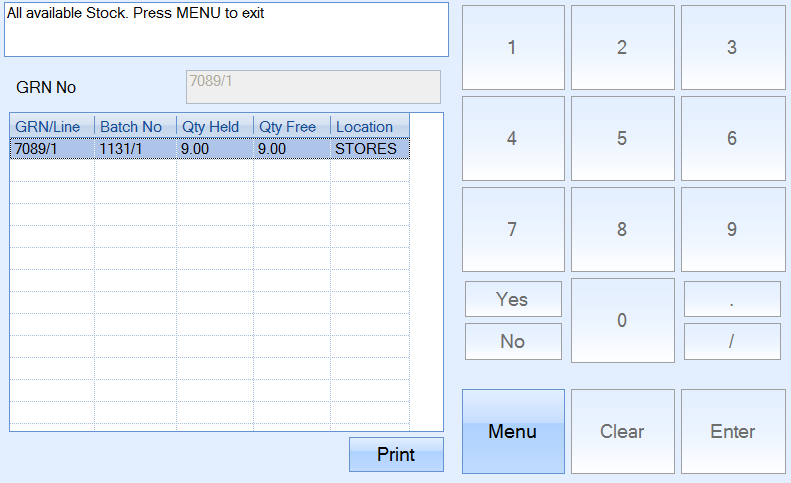
The user can generate a GRN label for the batch by selecting the PRINT button. Once the PRINT option is selected, the user is prompted for the number of labels to be printed. This must be entered and the ENTER button selected.
![]()
The user is then prompted for the individual label inventory quantity. This is automatically populated with the GRN unit qty but can be amended by the user.
![]()
The ENTER button is again pressed to confirm the selection. The user must select the PRINT button to print the GRN labels.
![]()
Once printed, the user will be returned to the main SFDC Material screen.
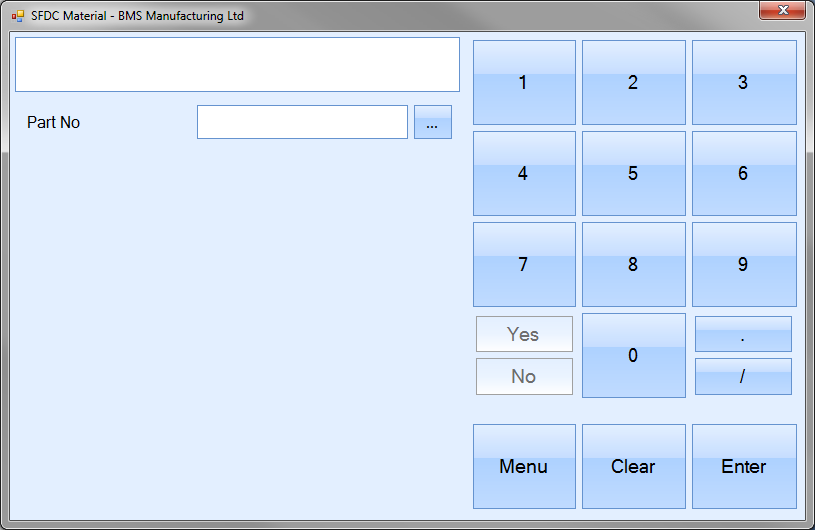
Stock Lookup By Part No
This option allows the user to view the current inventory levels of a specified part number. Selecting this option presents the user with the following screen.
The user can select the part number from a list by clicking on the ![]() option. This presents the user with a full inventory list to select from.
option. This presents the user with a full inventory list to select from.
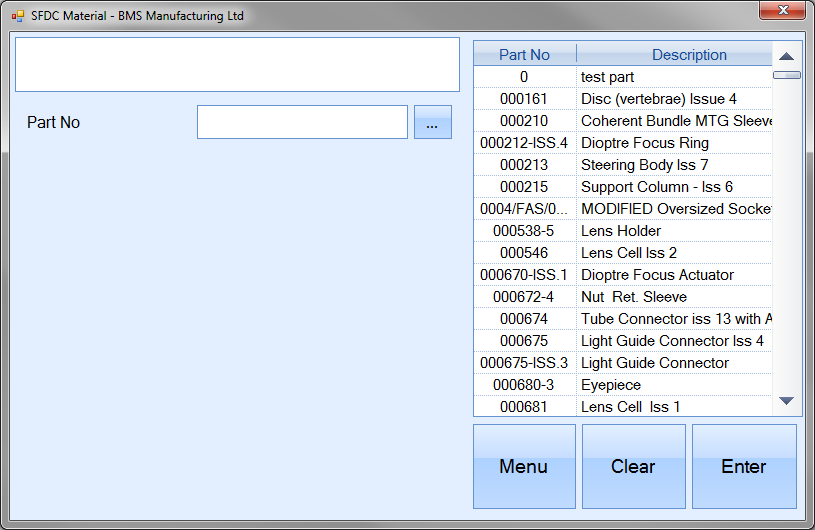
Alternatively, the user can filter the part list displayed by entering the start of the part number required. The list displayed will be filtered to match the entered text.
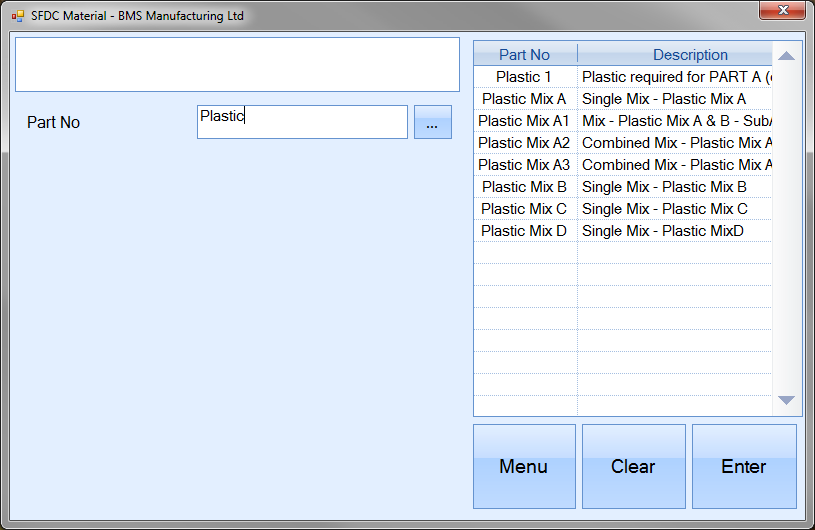
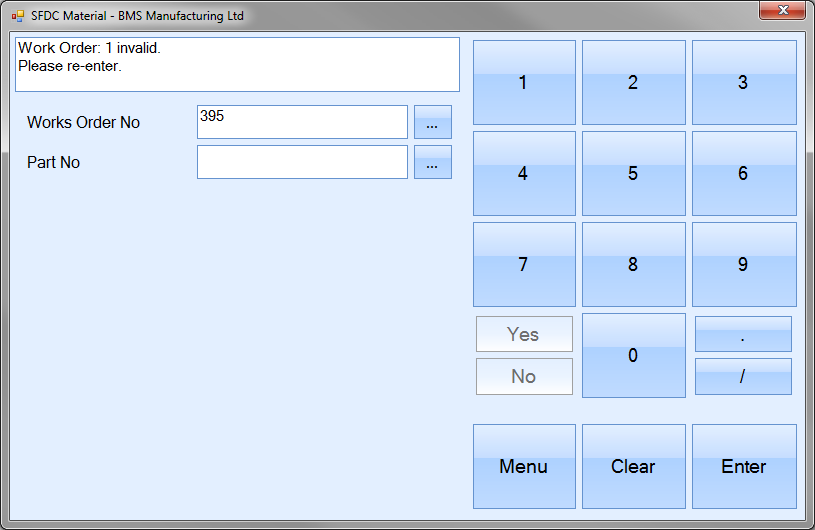
If the user enters a part number which does not exist, the system notifies them of this by displaying the following error.

Once a valid part number has been entered and the user presses ENTER, the system presents the user with a list of all available stock for the selected part.
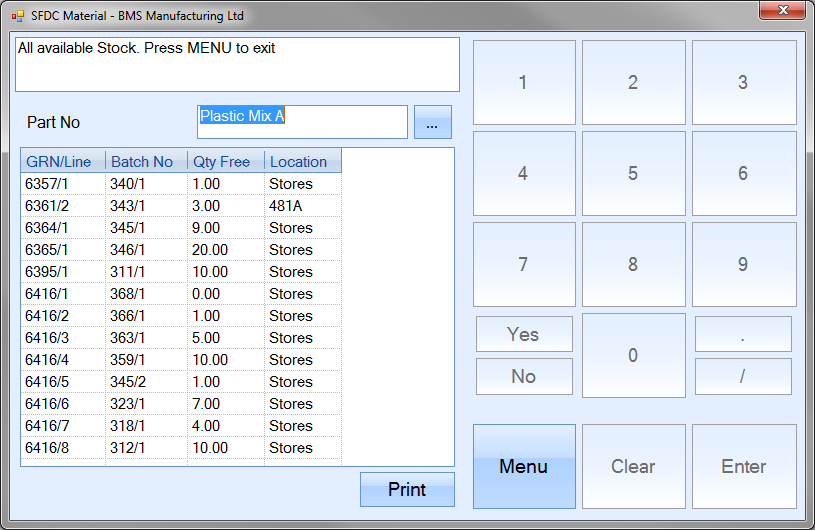
The PRINT option allows the user to print a GRN label for any of the batches listed. To do this, the user simply has to select the GRN required and click the PRINT option. Once the PRINT option is clicked, the user is prompted for the individual label inventory quantity and number of labels to be printed.
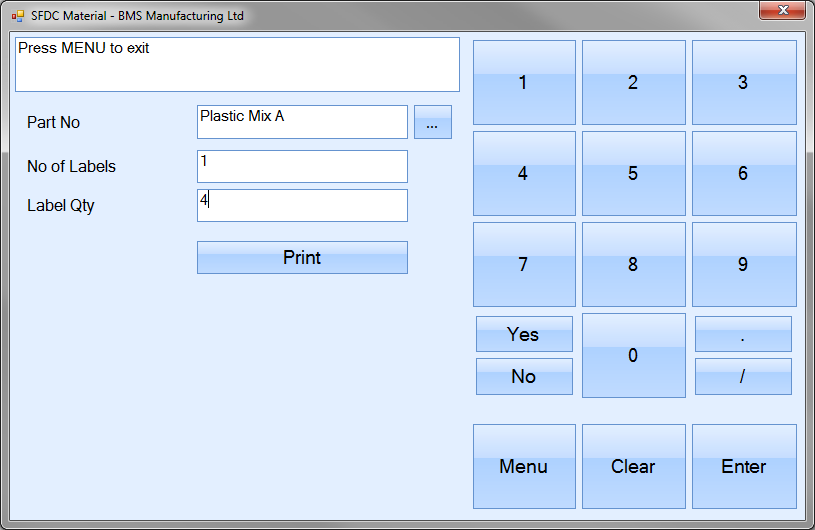
These values can be typed or entered via the onscreen numbers. Once entered, the user can generate the labels by clicking on the PRINT option. The user will be returned to the SFDC Material options screen once the labels are printed.
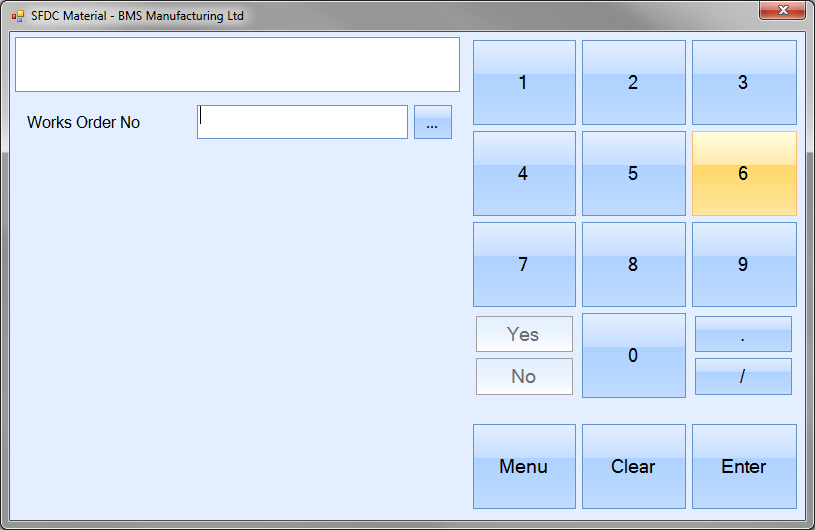
Stock Lookup By WO
This option allows the user to view the current inventory levels of a specified part number based on a selected work order. Selecting this option presents the user with the following screen.
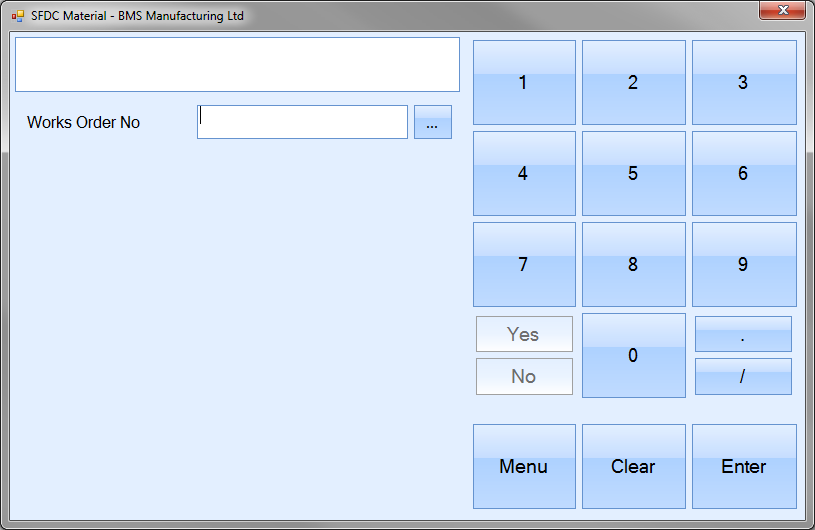
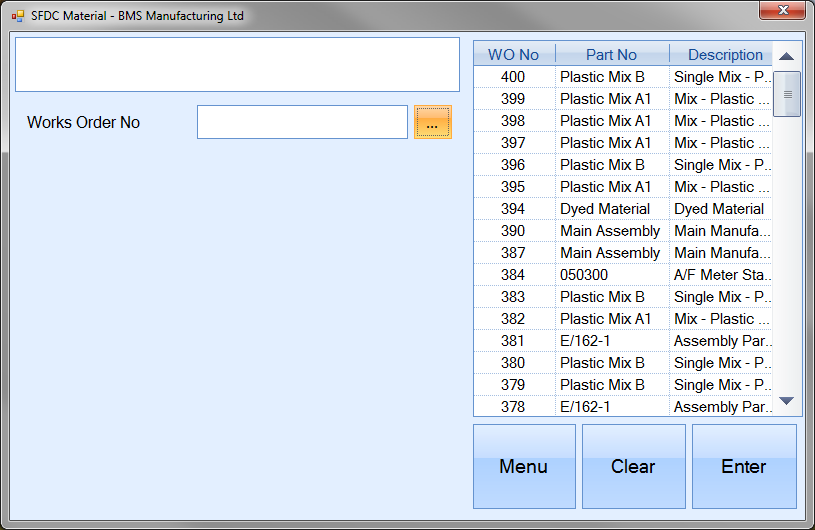
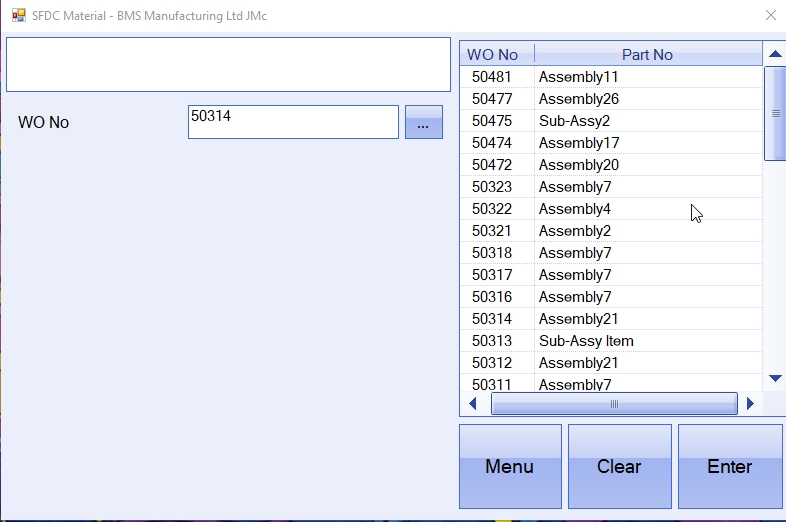
The user can select the work order number manually using the onscreen numbers or from a list by clicking on the ![]() option. This presents the user with a list of current work orders to select from.
option. This presents the user with a list of current work orders to select from.

If the user enters a work order number which is not valid, the system notifies them of this by displaying the following error.

Once a valid work order number has been entered and the user presses ENTER, the system prompts the user for a part number.
Again, the user can select the part number manually using the onscreen numbers or from a list by clicking on the ![]() option. This presents the user with a list of part numbers associated with the selected work order.
option. This presents the user with a list of part numbers associated with the selected work order.
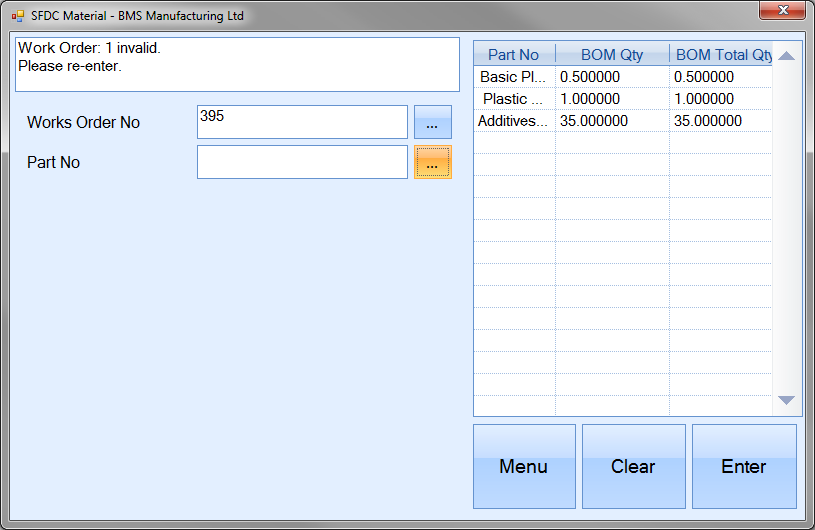
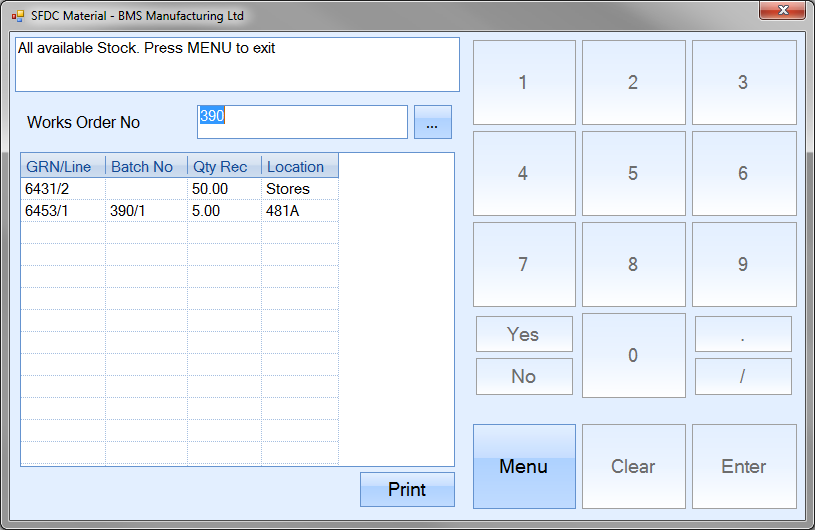
Once the user selects a part number and presses ENTER, the system will present a list of GRNs for the selected part currently in the system.
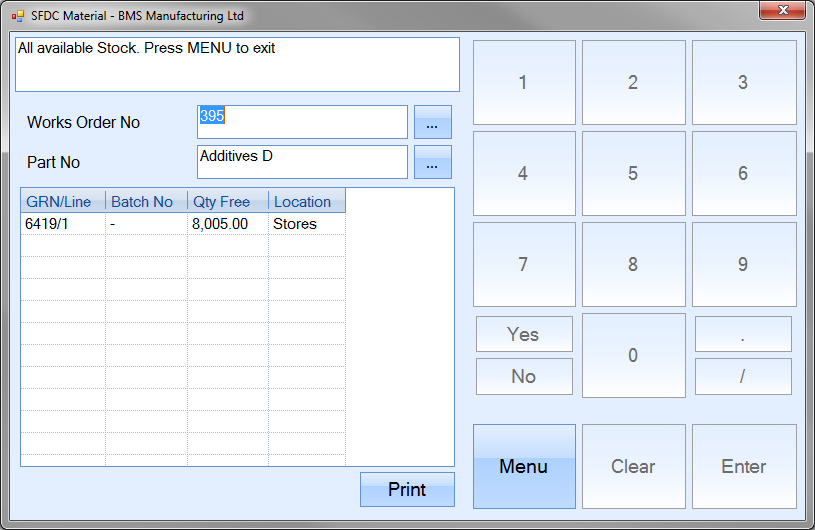
The PRINT option allows the user to generate a GRN label for one of the listed batches. To generate a label, the user must select the required GRN number and then click the PRINT option. Once the PRINT option is clicked, the user is prompted for the individual label inventory quantity and number of labels to be printed.
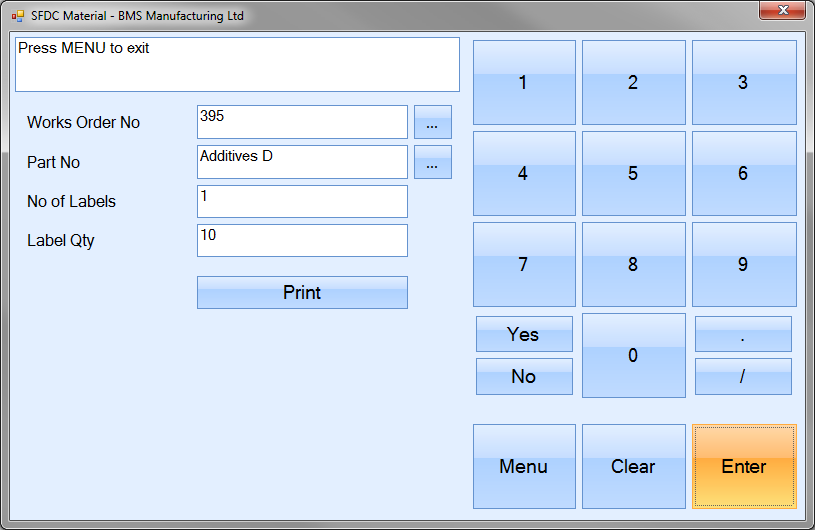
These values can be typed or entered via the onscreen numbers. Once entered, the user can generate the labels by clicking on the PRINT option. The user will be returned to the SFDC Material options screen once the labels are printed.
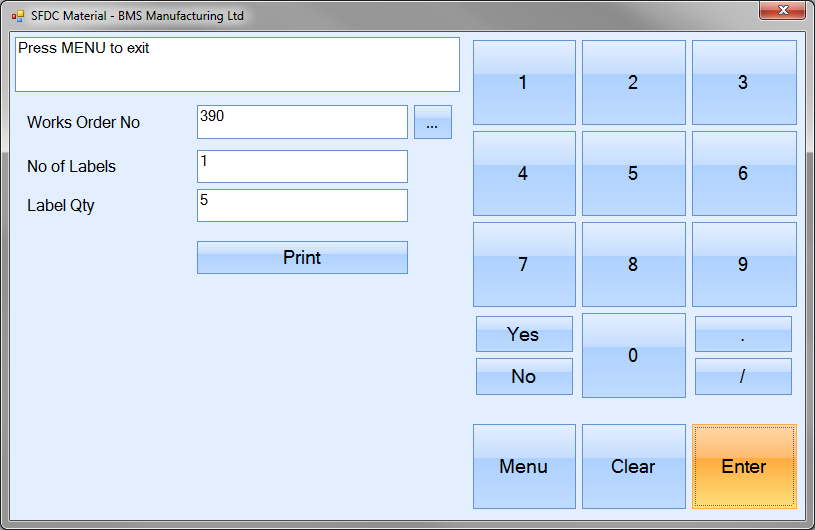
WO Label Print
This option allows the user to generate works order labels just like they can from within the WO section of Progress Plus. Selecting this option presents the user with the following screen.
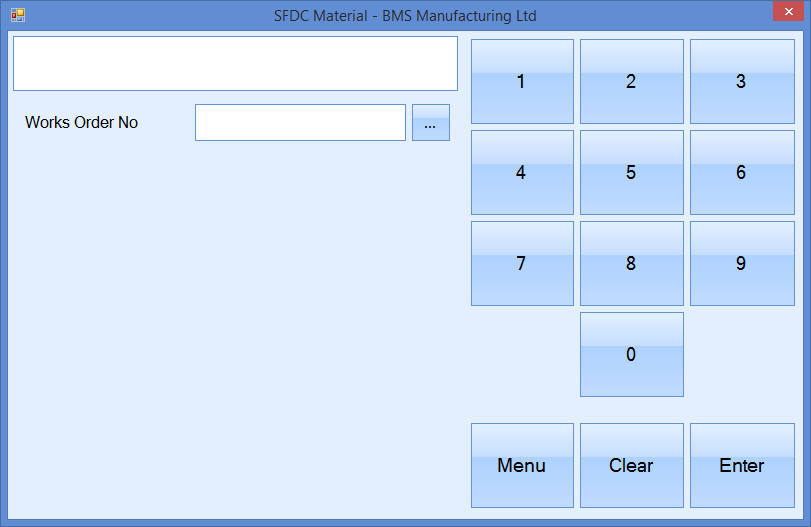
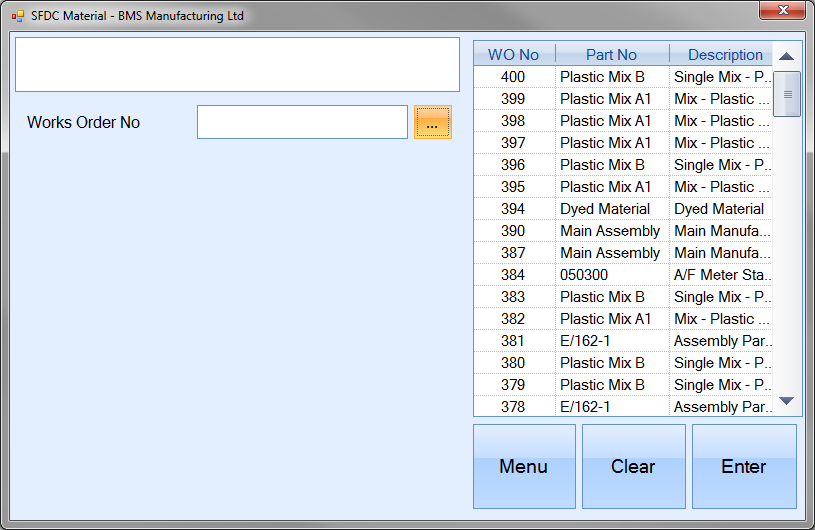
The user can select the work order number manually using the onscreen numbers or from a list by clicking on the ![]() option. This presents the user with a list of current work orders to select from.
option. This presents the user with a list of current work orders to select from.
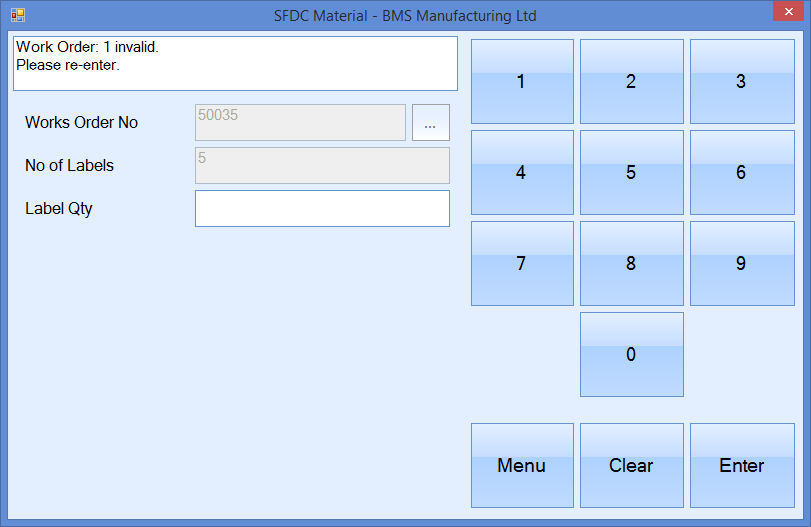
If the user enters a work order number which is not valid, the system notifies them of this by displaying the following error.

Once a valid work order number has been entered and the user presses ENTER, the system displays the selected work order information and prompts the user for the number of labels required.

Once the number of labels has been specified, the system will prompt the user for the quantity to be displayed on each label.
Once the quantity has been specified, the system will present a PRINT option to allow the user to print the labels as required.
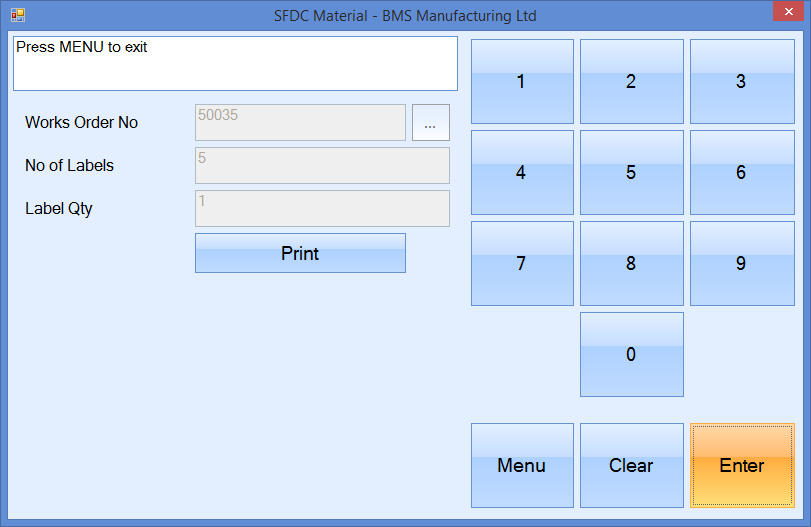
The user will be returned to the SFDC Material options screen once the labels are printed.
WO Print
This option allows the user to print WO documents just like they can from within the WO section of Progress Plus. Selecting this option presents the user with the following screen.
The user can select the work order number manually using the onscreen numbers or from a list by clicking on the ![]() option. This presents the user with a list of current work orders to select from.
option. This presents the user with a list of current work orders to select from.
If the user enters a work order number which is not valid, the system notifies them of this by displaying the following error.
Once a valid work order number has been entered and the user presses ENTER, the system displays various print options that are available.
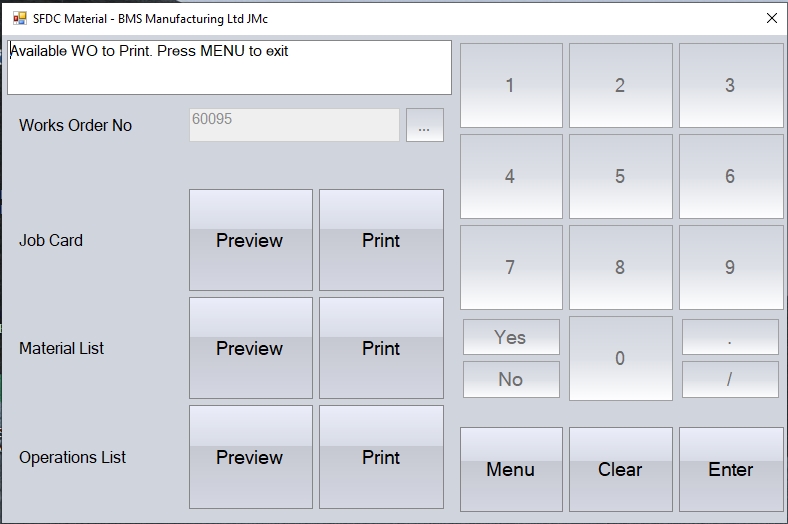
Each of the available print options will generate or preview the associated document. Clicking the MENU option will return the user to the main SFDC Material options screen.
WO Receipt
This option allows the user to receive a quantity of finished product into stock against a work order. Selecting this option presents the user with the following screen.
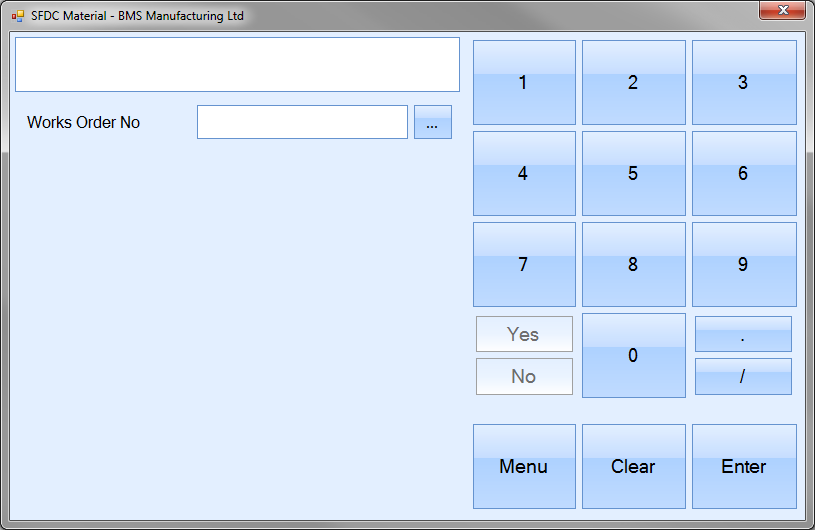
The user can select the work order number manually using the onscreen numbers or from a list by clicking on the ![]() option. This presents the user with a list of current work orders to select from.
option. This presents the user with a list of current work orders to select from.
If the user enters a work order number which is not valid, the system notifies them of this by displaying the following error.
Once a valid work order number has been entered and the user presses ENTER, the system displays the selected work order information and prompts the user for the receipt quantity.
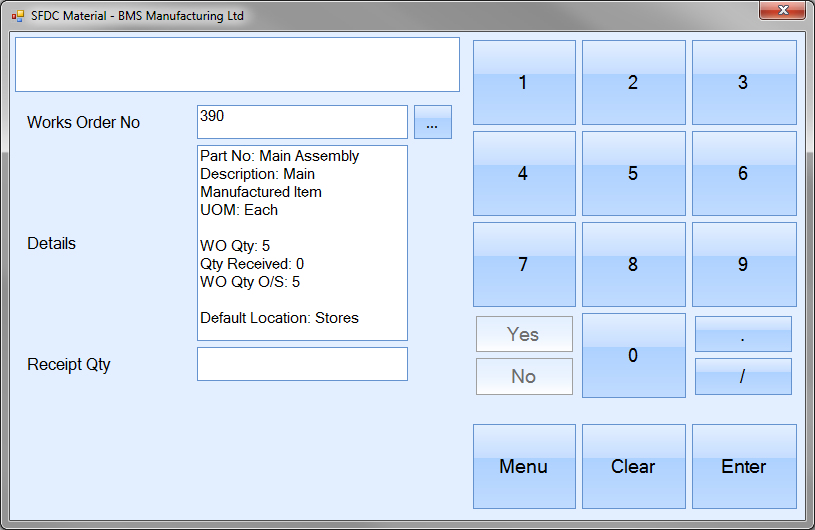
The user can now enter a receipt quantity to be booked into stock. Once a quantity has been entered and the user has clicked ENTER, they will be prompted for an inventory location to receive the finished product into. This will automatically display the default location set up against the part number but can be changed by clicking the ![]() option if required.
option if required.
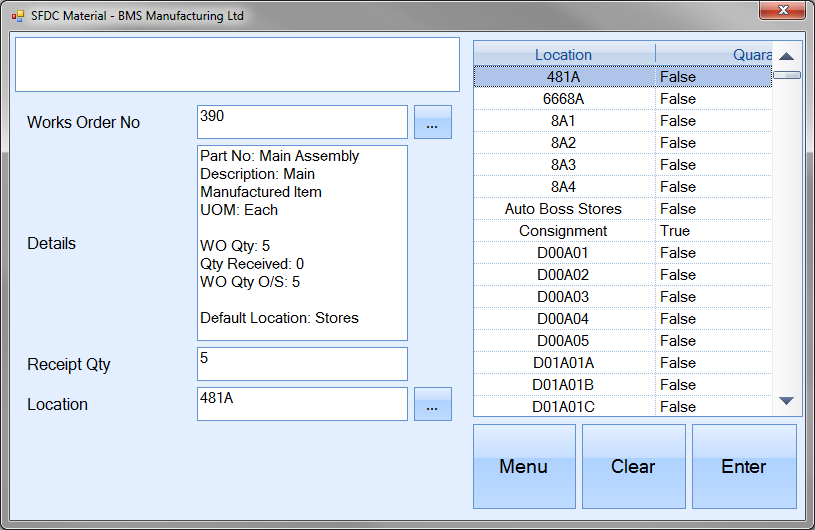
Once the location has been selected and the user has clicked ENTER, the user will be asked to confirm the receipt.

Once the user clicks ENTER to confirm the receipt, the user is returned to the SFDC Material options screen.
WO Receipt Reprint
This option allows the user to reprint the GRN label associated with a work order receipt. Clicking this option presents the user with the following screen.
The user can select the work order number manually using the onscreen numbers or from a list by clicking on the ![]() option. This presents the user with a list of current work orders to select from.
option. This presents the user with a list of current work orders to select from.

If the user enters a work order number which is not valid, the system notifies them of this by displaying the following error.

Once a valid work order number has been entered and the user presses ENTER, the system displays all the available batches associated with the selected work order.
The PRINT option allows the user to generate a GRN label for one of the listed batches. To generate a label, the user must select the required GRN number and then click the PRINT option. Once the PRINT option is clicked, the user is prompted for the individual label inventory quantity and number of labels to be printed.
These values can be typed or entered via the on screen numbers. Once entered, the user can generate the labels by clicking on the PRINT option. The user will be returned to the SFDC Material options screen once the labels are printed.