This screen allows the employee to choose from a number of tasks that they may wish to log time to. Users without the Time & Attendance module will not have the CLOCK button available. On accessing the SFDC system a screen similar to the following will be displayed.
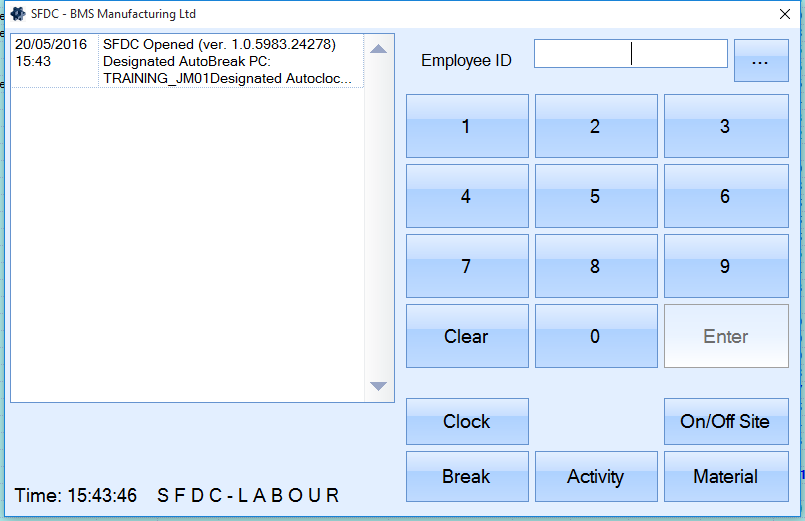
To access the options contained in the Activity screen the user must enter their employee ID. This can be scanned from an employee ID badge, selected from the list of employees, or manually entered if known.
After selecting the required employee the user must click on the ACTIVITY button.

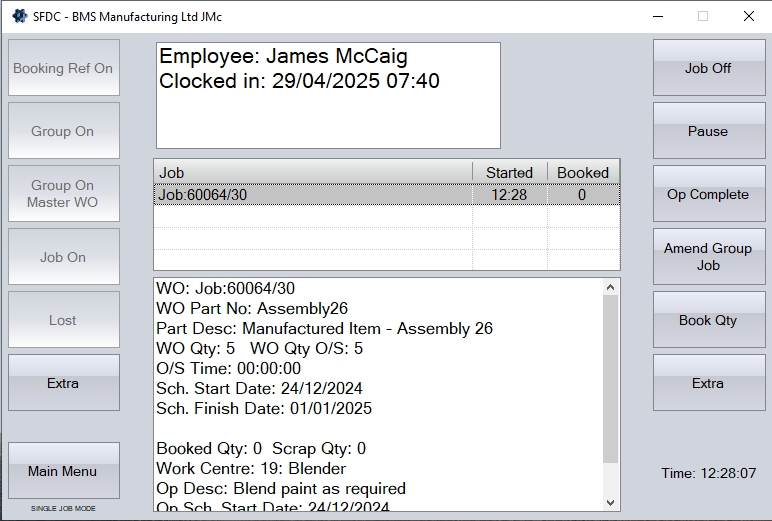
The main Activity screen will now be displayed permitting the user to choose from the various functions.
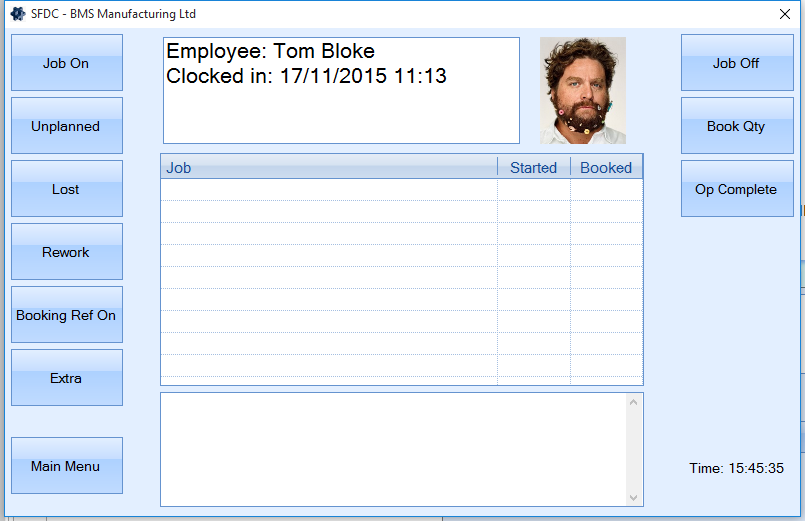
The user has a list of options available. Depending on how SFDC is configured, some options may be hidden, other will be available via the EXTRA/PREVIOUS buttons which will take the user to additional options available, or return them to the previous set of options respectively, with the MAIN MENU option returning the employee to the initial employee selection screen.
The following lists the options available via SFDC, and what they allow the employee to do.
Job On
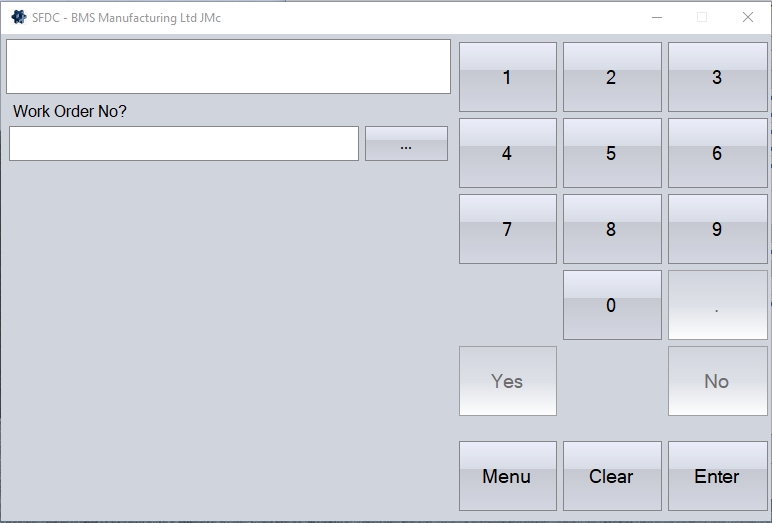
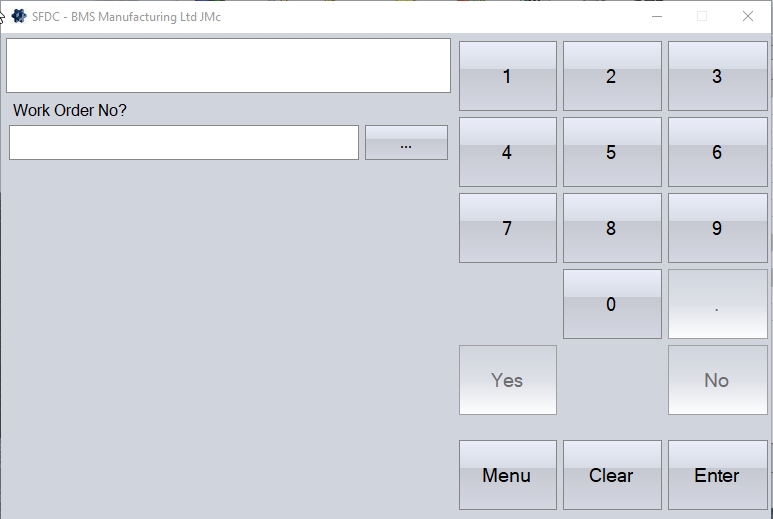
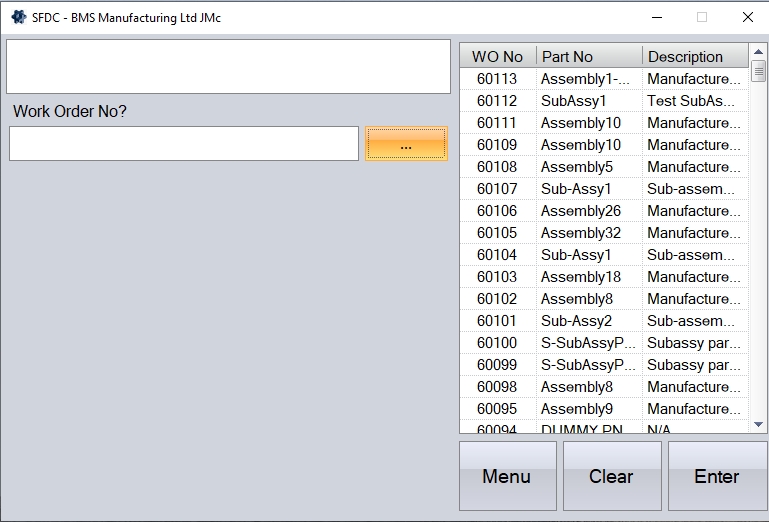
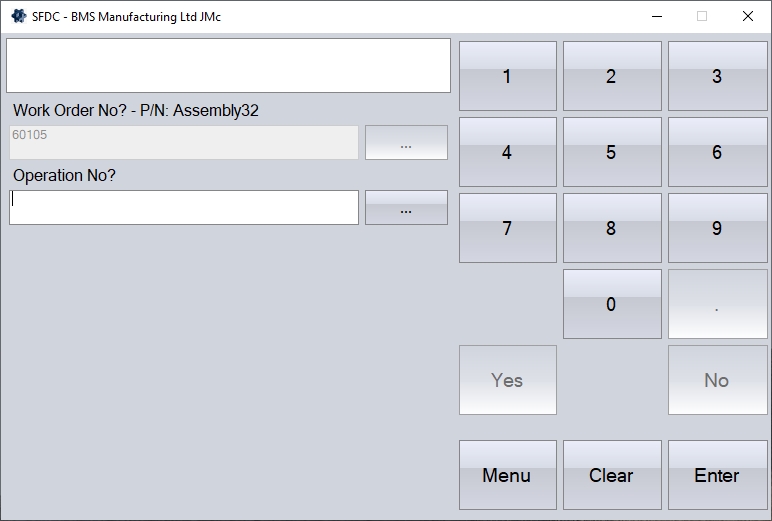
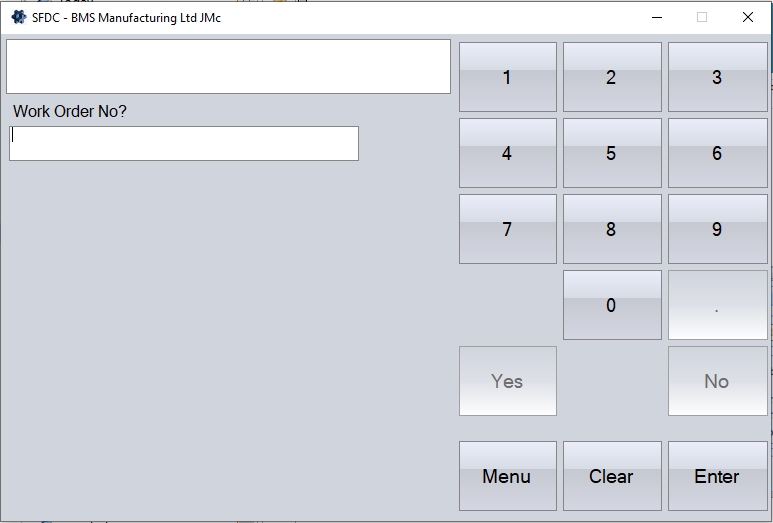
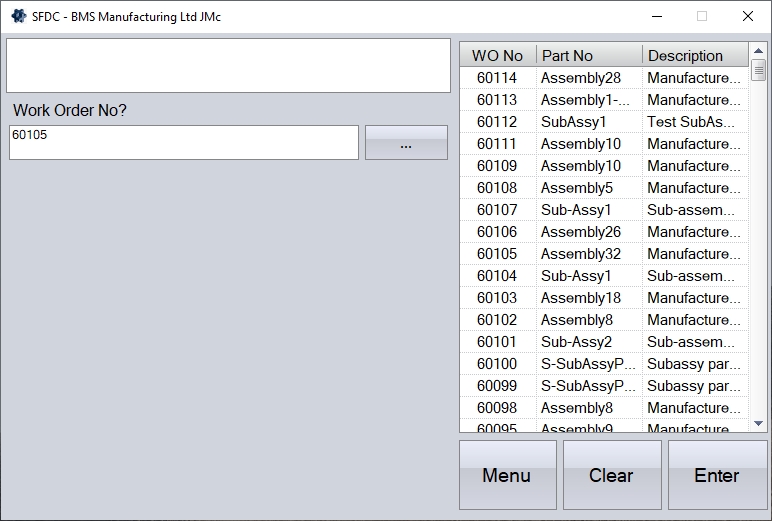
This option permits an employee to log time spent working on a job / works order. When this option is selected, the user will be prompted for the details of the WO they wish to record their time against.
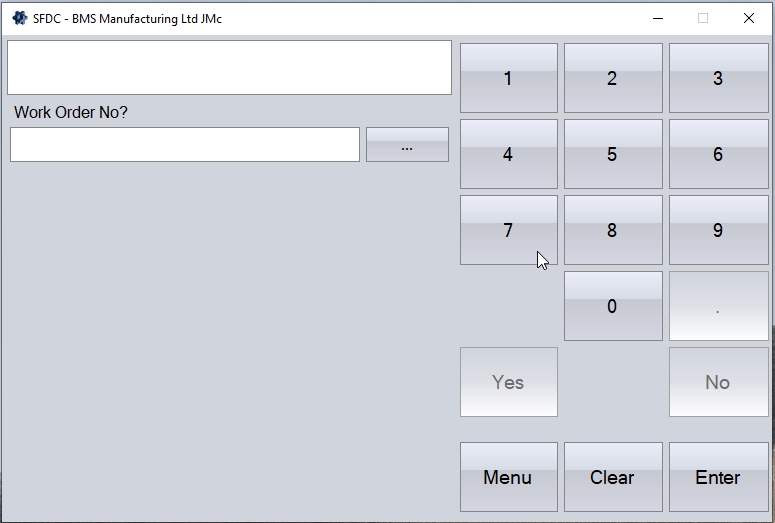
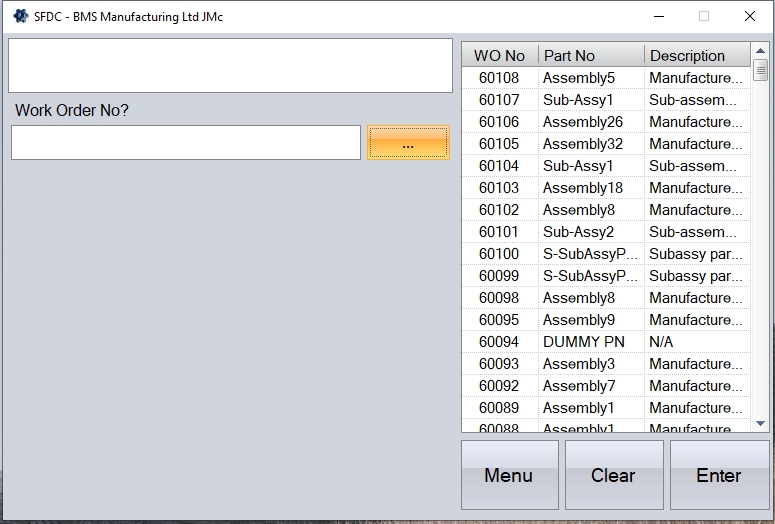
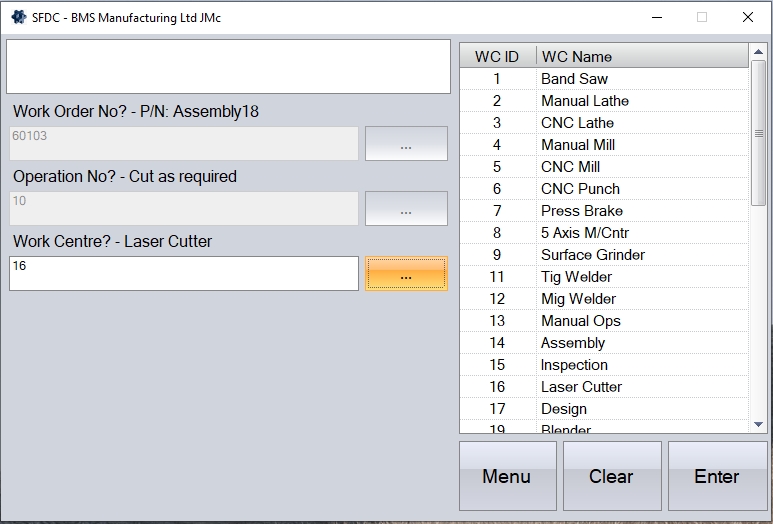
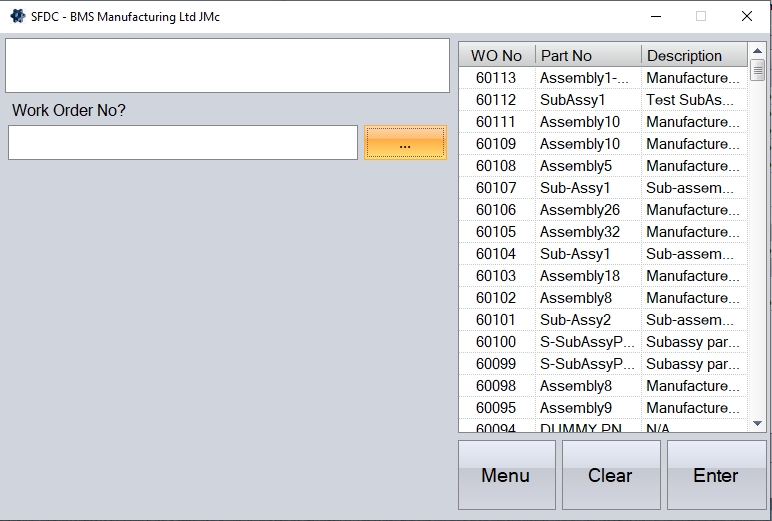
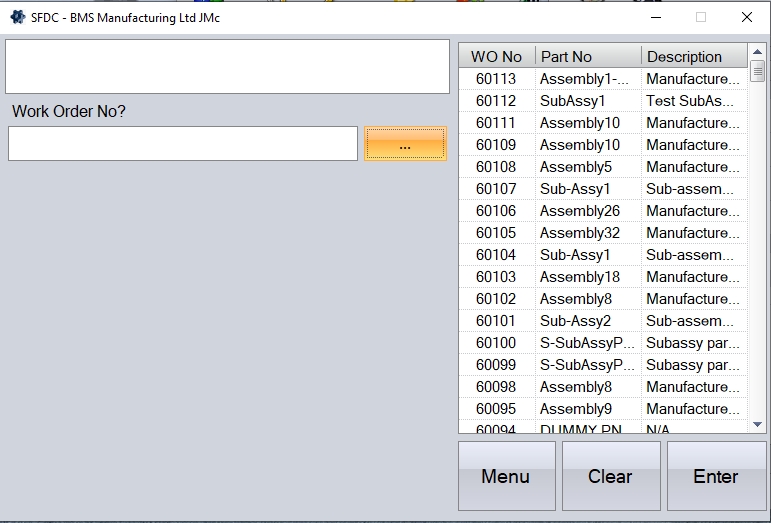
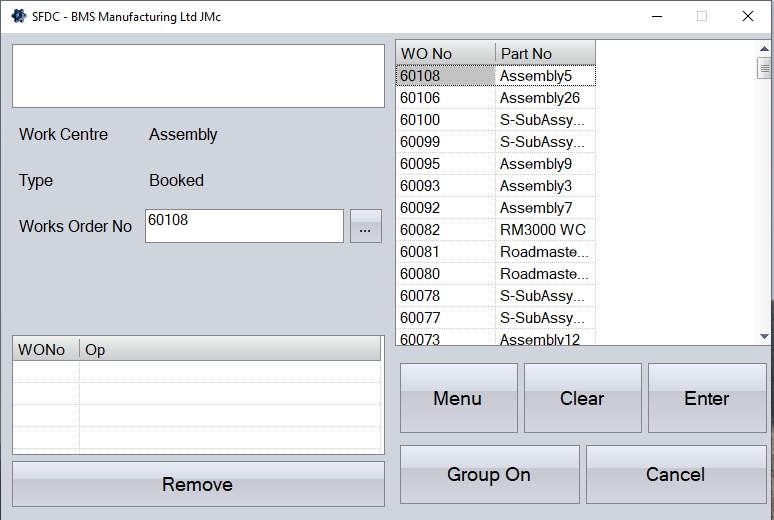
The user must now using the keypad / number pad enter the Works Order No. that they want to log onto and click onto the ENTER button. Alternatively, the employee can choose a work order from the look-up by scrolling up and down the list to find the required job before pressing the ENTER button. Users with scanners would scan in the required Works Order No barcode from the job card at this point before pressing the ENTER button.
Pressing the CLEAR button will remove any wrongly chosen works order.
If the selected WO has a warning note set up against it, this will be displayed at the bottom of the SFDC screen to inform the user.
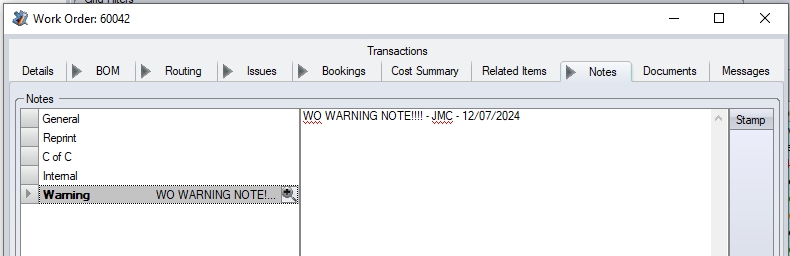
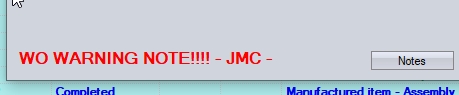
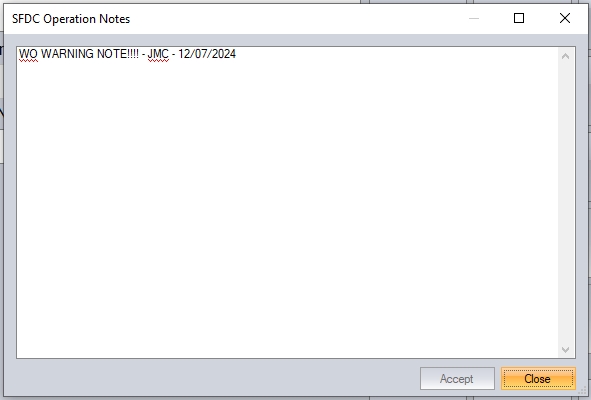
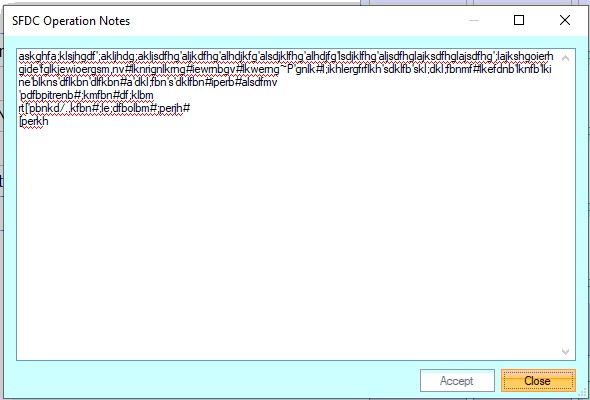
If the warning note is extensive, the user can click on the NOTES option at the bottom of the SFDC screen to see the complete note.
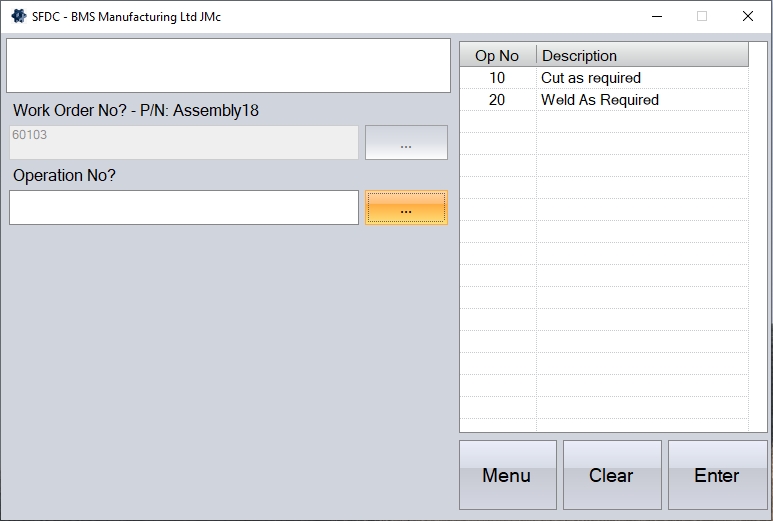
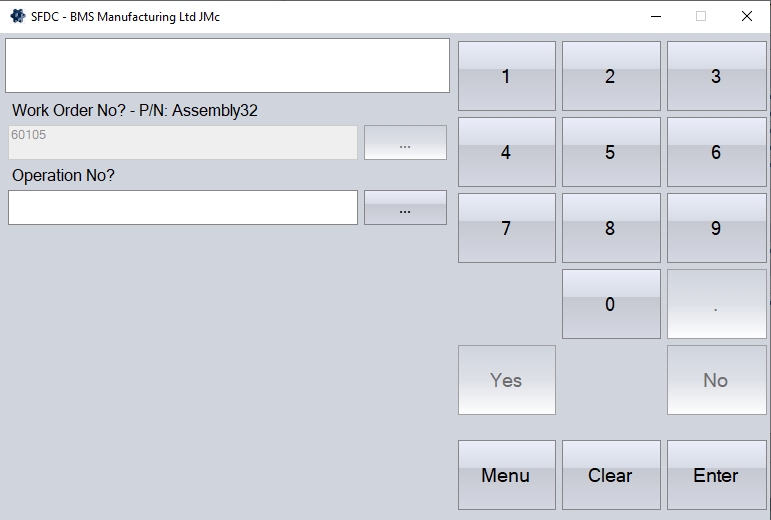
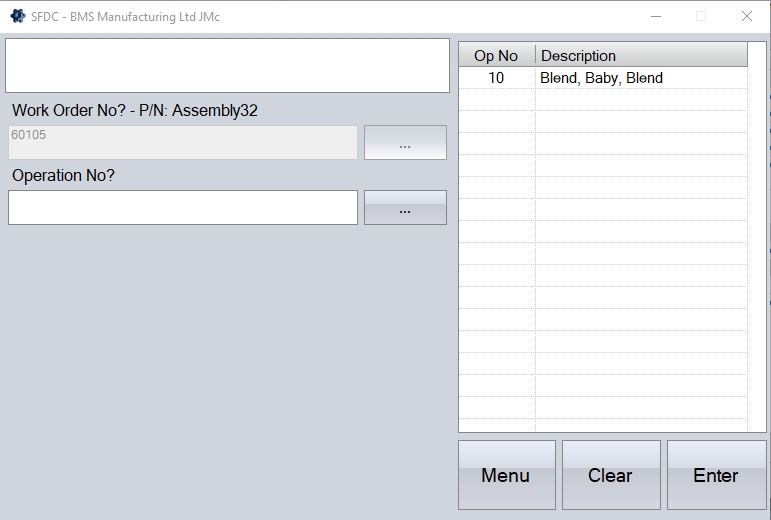
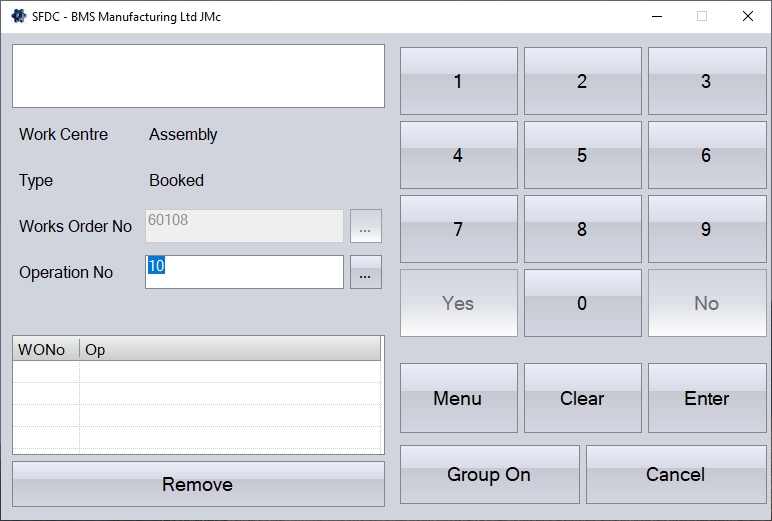
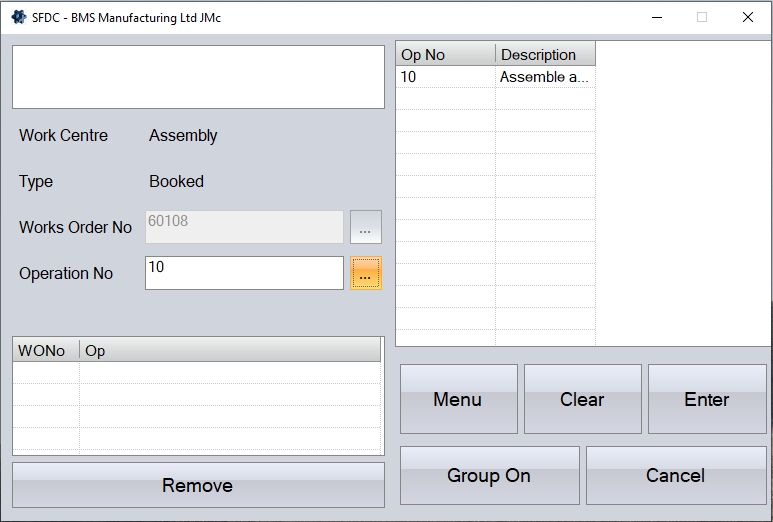
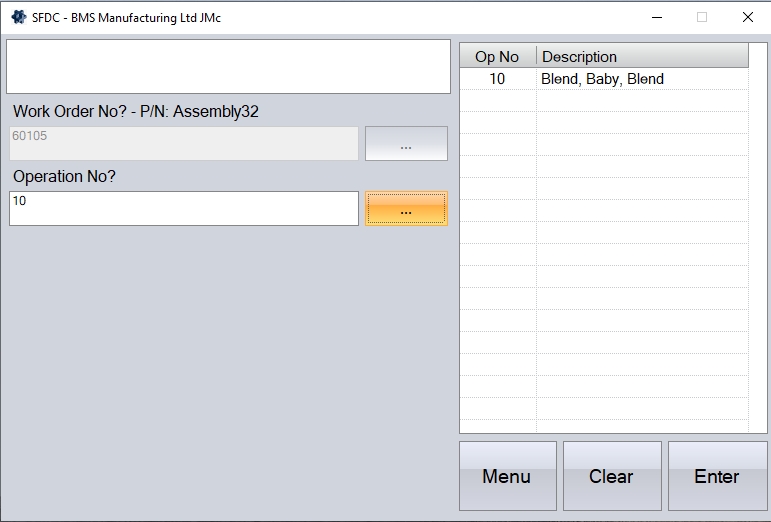
After selecting the required works order, the user must now enter the work order operation number they are jobbing onto. This can be done using the keypad / number pad to enter the operation number that they wish to log onto and then clicking the ENTER button. Alternatively, the employee can choose an operation number from the look-up by scrolling up and down the list to find the required operation before pressing the ENTER button. Users with scanners would scan in the required operation number barcode from the job card at this point before pressing the ENTER button.
Pressing the CLEAR button will remove any wrongly chosen operation numbers.
If the operation selected has a required skill set against it, then the system will check to ensure the current employee has the required skills against their employee record. If the employee does not have the required skills, SFDC will highlight this and stop the employee from jobbing onto the process.

If the selected operation has SFDC NOTES recorded against it, these will be displayed at the bottom of the screen. The user will also have a NOTES option which will allow them to open up the SFDC note to read in full.
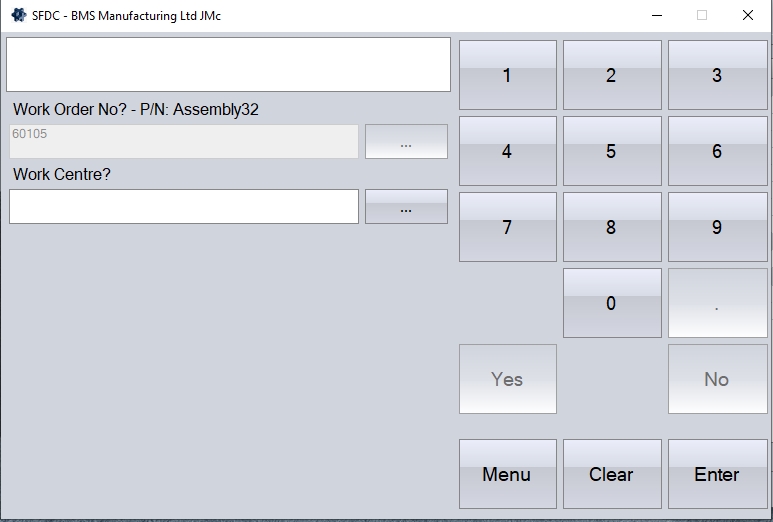
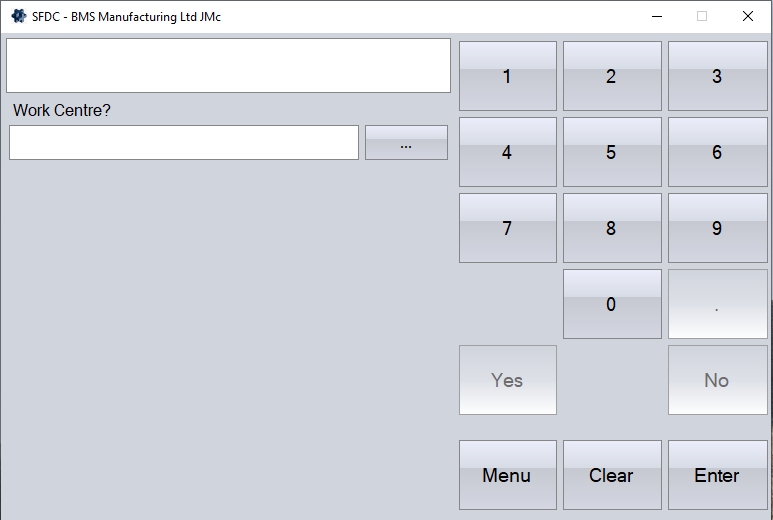
Depending on how SFDC is configured, the employee may now be prompted for the Work Centre they are working at. If the system is configured to default to the planned work centre set on the WO operation, the system will assume this is the work centre being jobbed onto and will not prompt the user to enter. If the system is configured to prompt the user for the work centre, then the prompt will be displayed, but will default to the planned work centre against the selected operation.
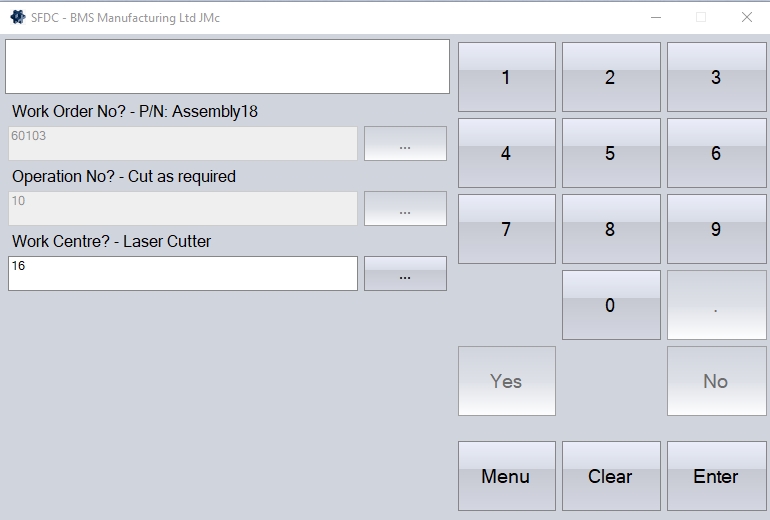
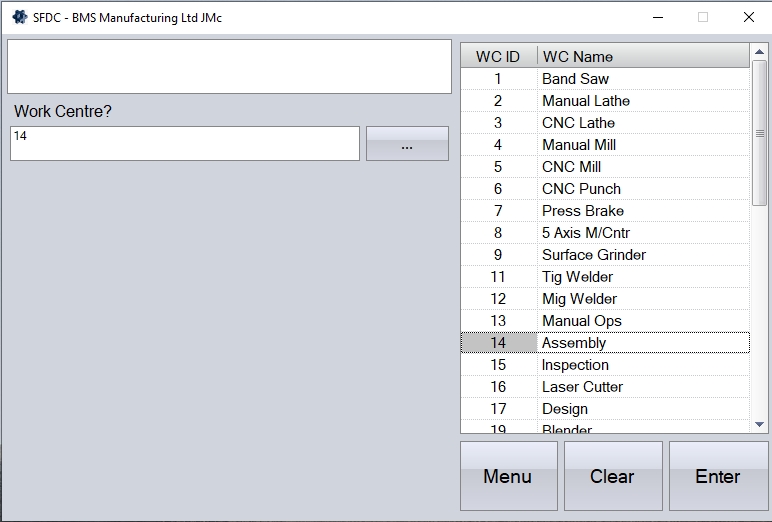
Alternatively the employee can choose a work centre from the look-up by scrolling up and down the list to find the required job before pressing the ENTER button. Users with scanners would scan in the required work centre barcode from the job card at this point before pressing the ENTER button.
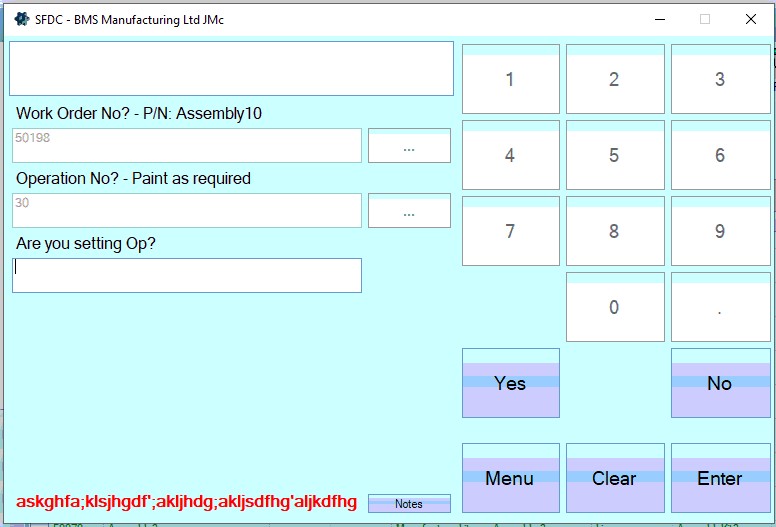
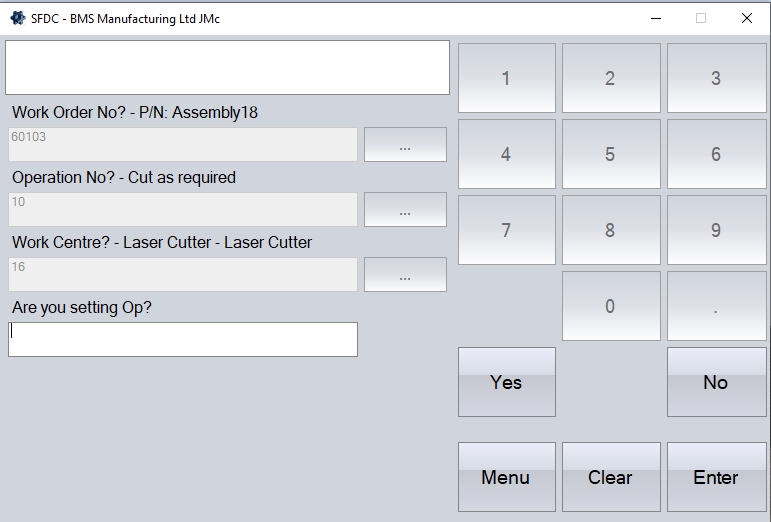
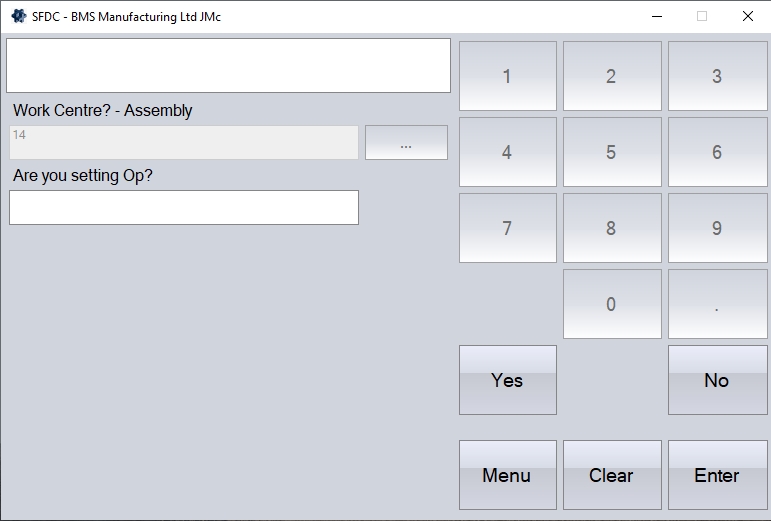
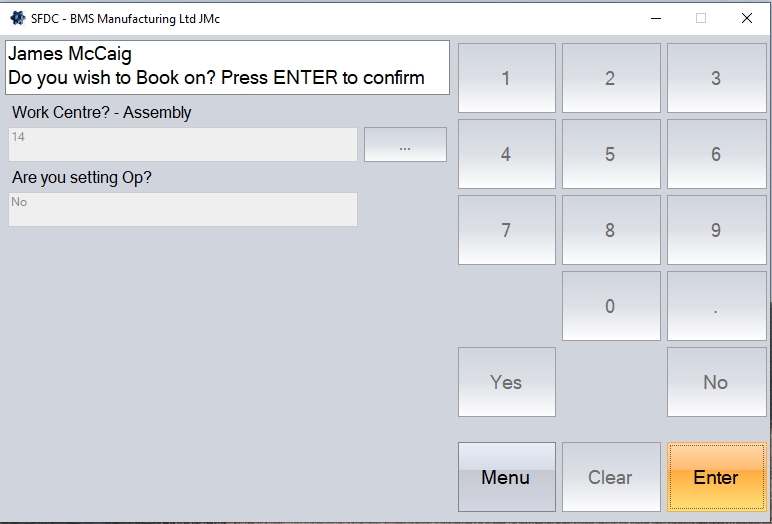
Depending on how SFDC is configured, the employee may now be prompted to say whether they are recording setup time, or run time. This is done with the by asking Are You Setting Op? If this option is enabled, the employee must now use the keypad / number pad to state whether they are recording set up time or not. The employee should select either the YES or NO button on the keypad and then pressing the ENTER button.
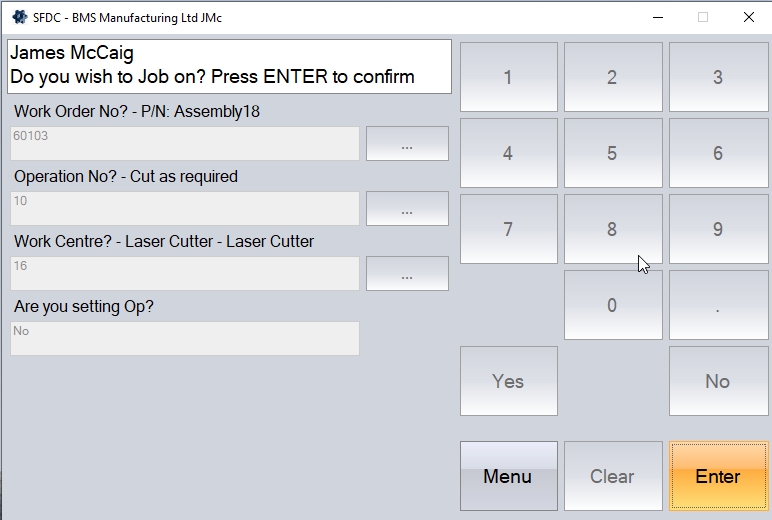
On pressing the ENTER key the user will be prompted to confirm the selection of the chosen works order / job.
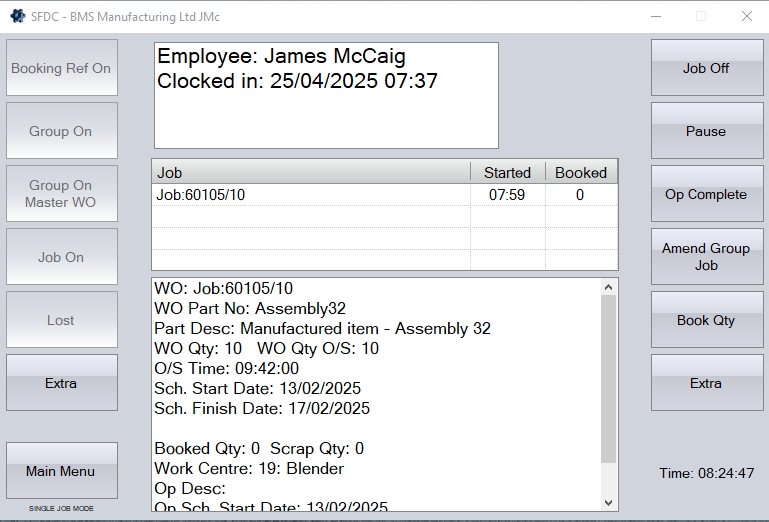
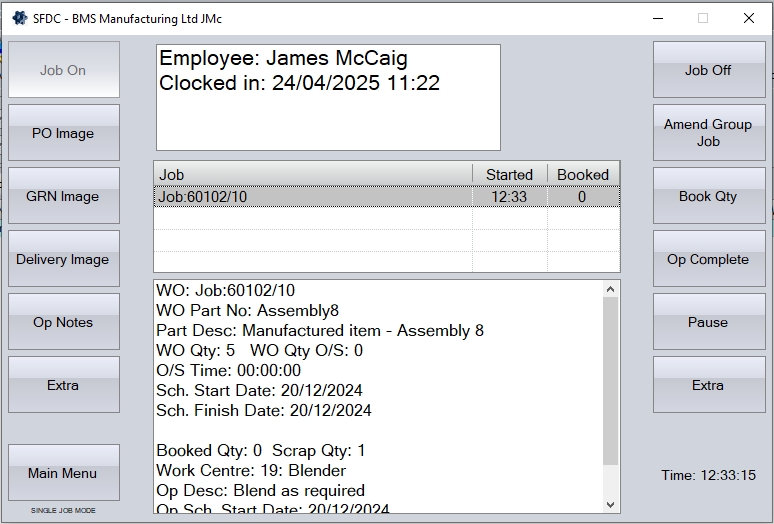
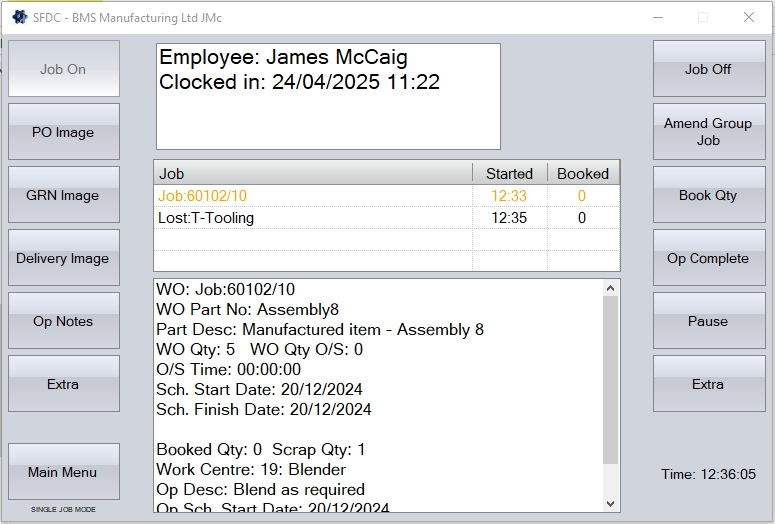
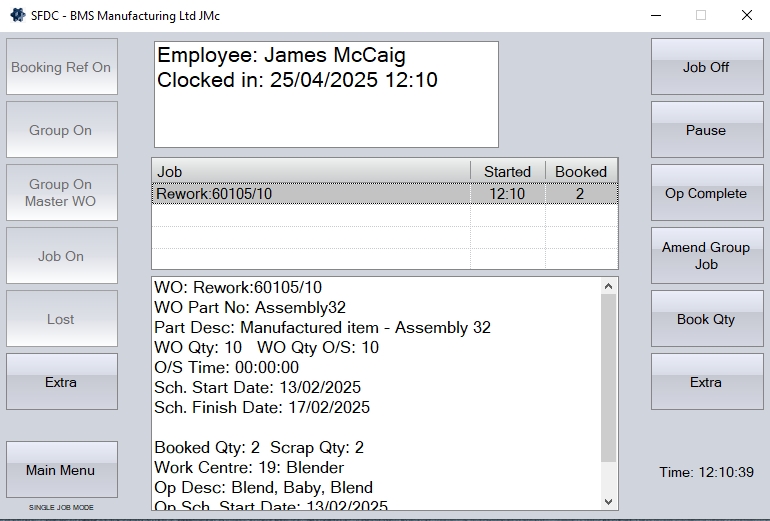
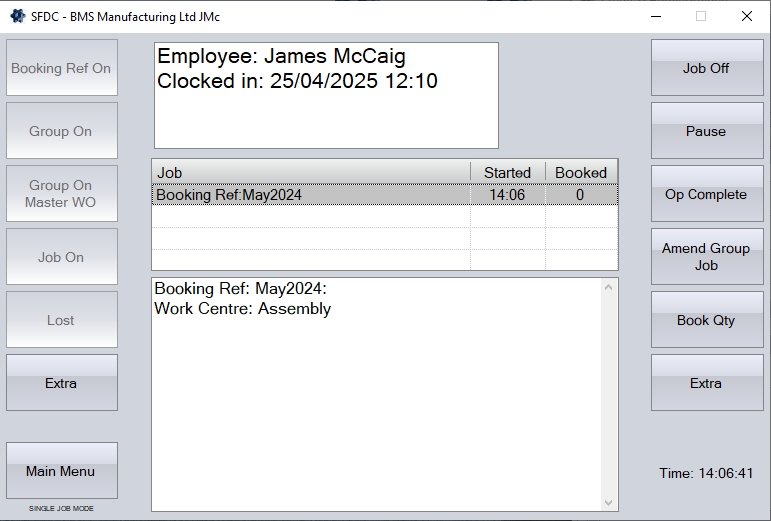
On confirming the works order details a screen similar to the following will appear displaying details of the selected job. The employee can, if desired, job onto more than one works order at a time by clicking back onto the JOB ON button again, and repeating the process above.
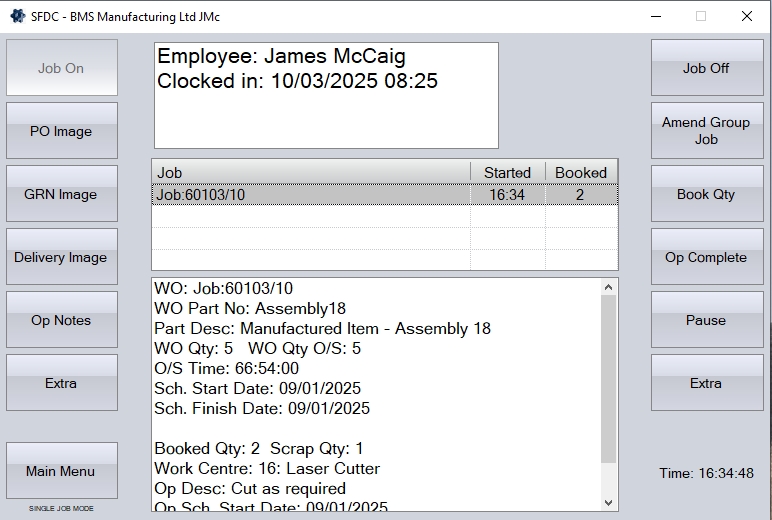
At this point, the system will start recording the employees time against the selected work order and operation. This will continue until the system is told otherwise.
Job Off
This option is used by the employee when they complete a period of work, or finish recording lost, unplanned or rework time.
To job off what the employee is currently doing, they should click the JOB OFF option. Like most of the SFDC options, the employee will then be presented with a list of questions to record the required information.
Firstly, the employee will be prompted to enter how many units the completed during their time. If the employee did not process any units during their time, they should enter 0. The employee should click ENTER to proceed.
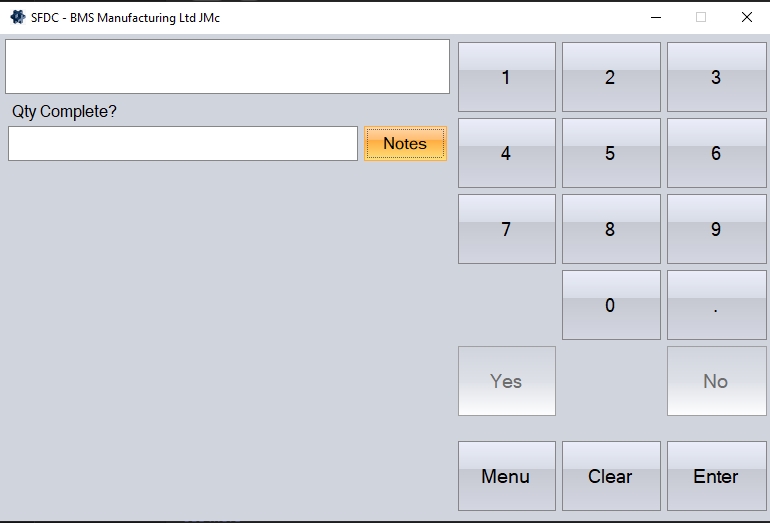
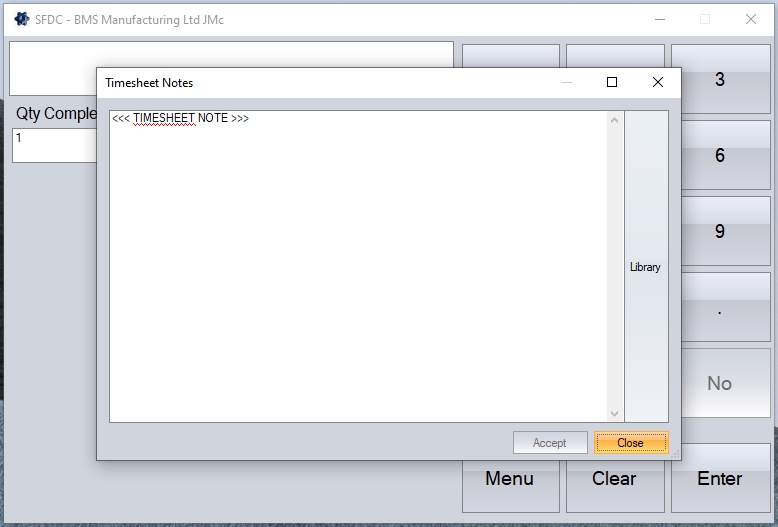
The NOTES option can be used to record specific notes against the employees's timesheet record if required too.
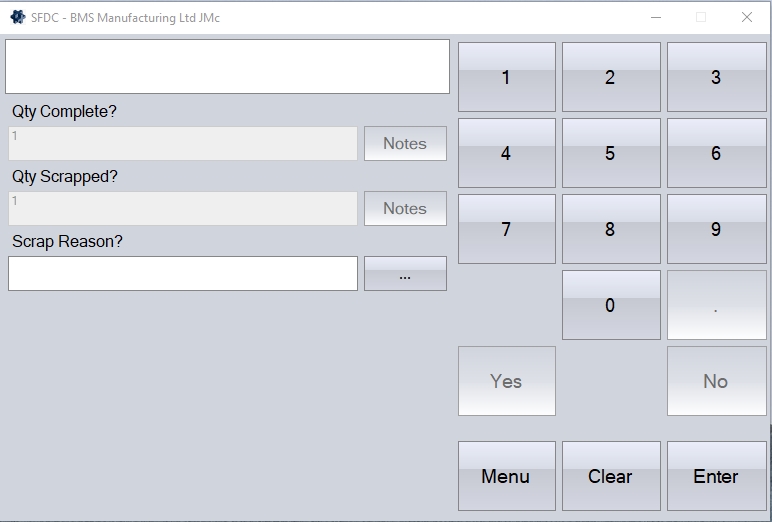
If the system has the additional Quality module switched on, the employee may be prompted for a scrap quantity, an associated scrap reason and also asked whether a non-conformance (NCR) needs to be raised. If the Quality module is not switched on, these questions will be skipped.
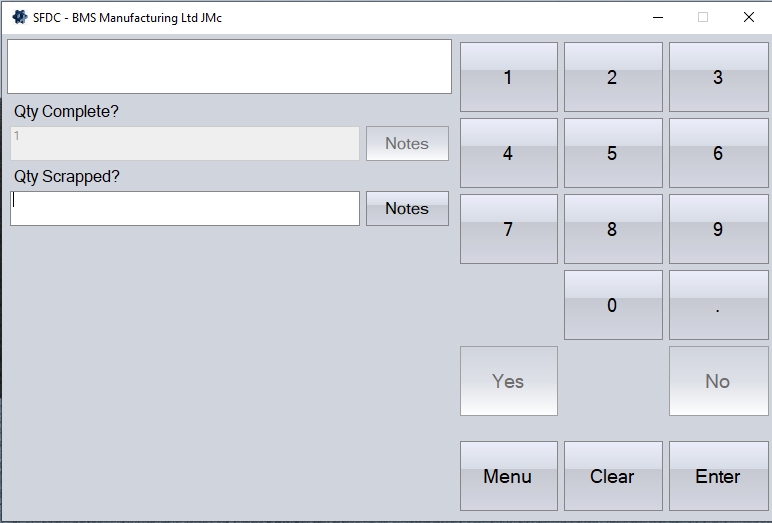
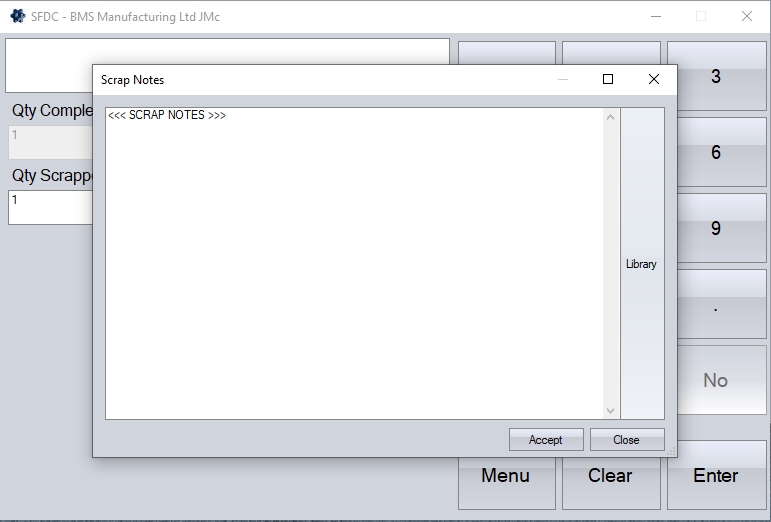
If the employee did not scrap any units during their time, they should enter 0. The employee should click ENTER to proceed. The NOTES option allows the user to record scrap notes if required.
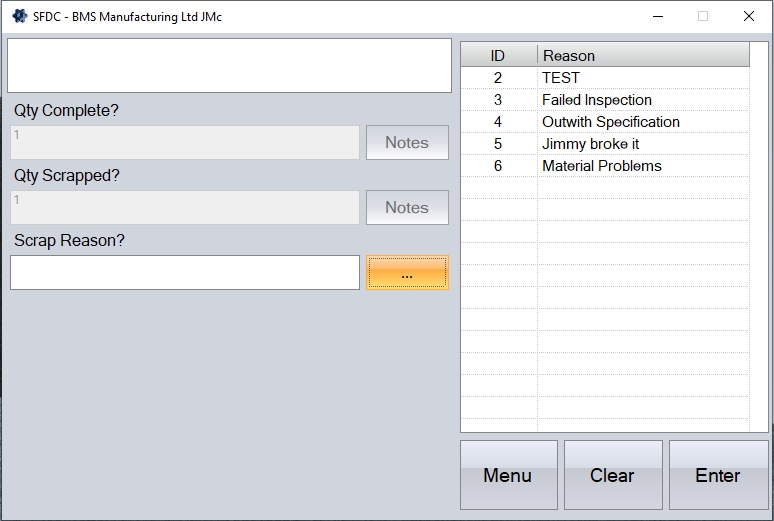
Once the employee has entered a scrap quantity, they will be prompted for a scrap reason.
The user can select a reason from the pre-defined list by clicking on the button available. Once selected, the user can click ENTER to proceed.
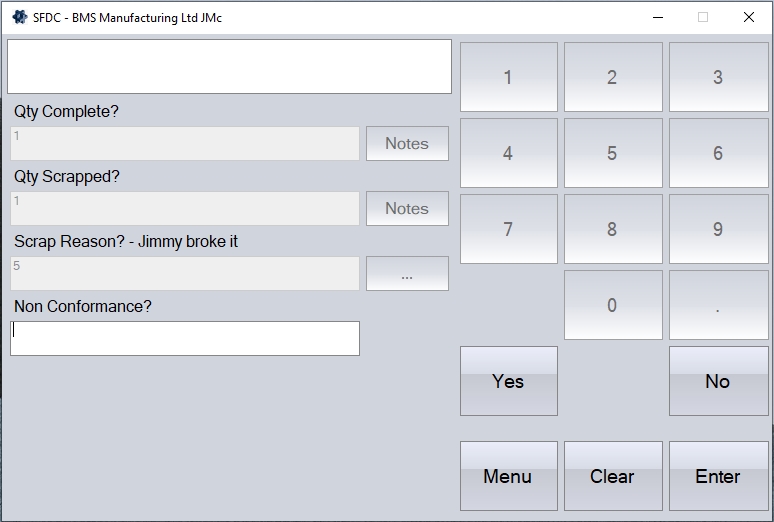
Next question prompts the user as to whether an NCR needs to be raised. The user can respond using the YES/NO options onscreen, and clicking ENTER to proceed. If the user responds NO, then no NCR record will be created in the main system. If they respond YES, then a work order-related NCR will be created in the background. This will then be available in the Quality > Non-Conformance section of the main system.
If the employee was recording setup time for the job, and the system is configured to ask, they may then be prompted to ask whether they want to move onto run time straight away. Again, the employee can respond using the YES/NO buttons onscreen, clicking ENTER to proceed. If the employee responds NO, then they will simply be jobbed off their current set up period. If they respond YES, the system will job them off their set up period, and start recording a new period of run time against the same work order and operation.
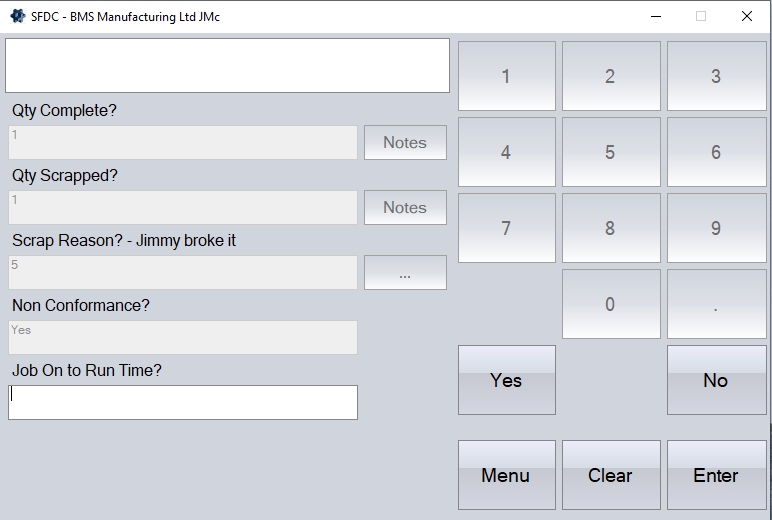
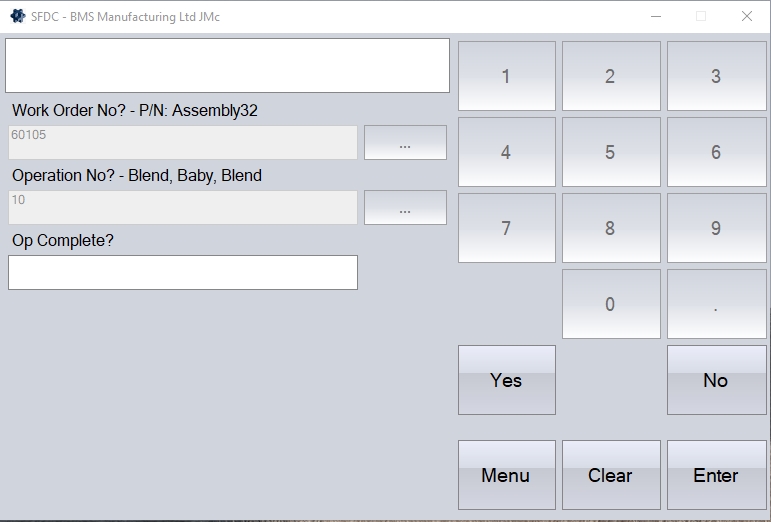
If the employee was previously recording run time, instead of being asked whether they wish to Job On to Run Time?, they will be asked if the operation is complete.
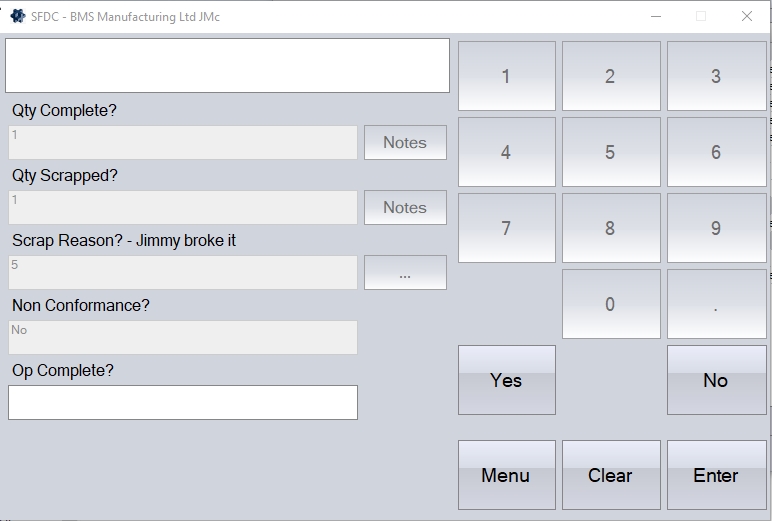
The user can again use the YES/NO options to confirm. If the employee has completed the operation in its entirely (i.e. all units processes, no further work to be done at this stage) then they can respond YES. This will proceed to mark the work order operation as complete and remove the operation from the list of outstanding operations in the system. If the employee responds is unsure, or if further work will be required, then the employee should click NO. This will simply job off the employee, and the work order operation will remain open for further time to be recorded.
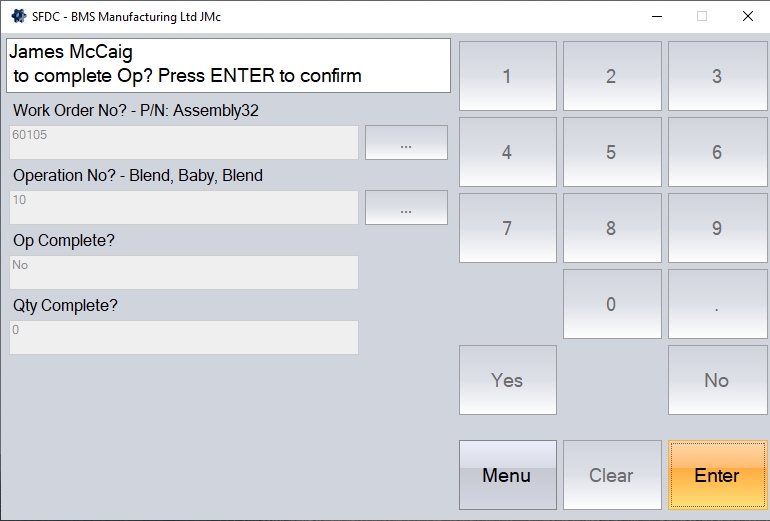
Once all the questions have been answered, the employee will be asked to click ENTER to confirm.
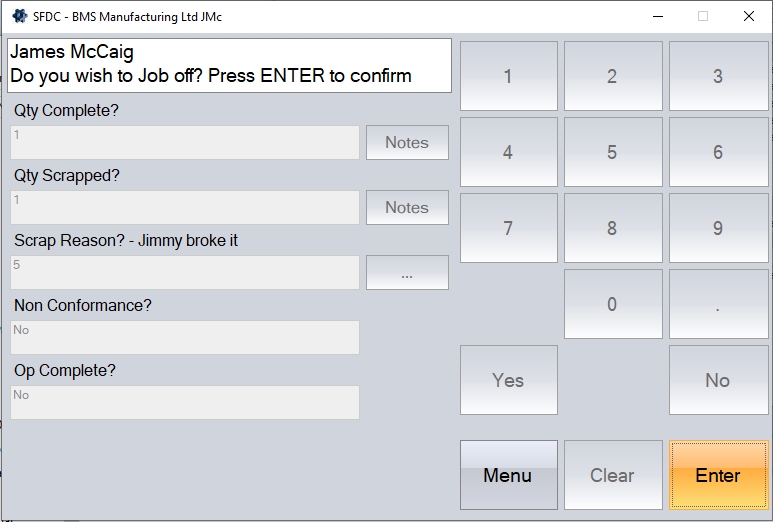
At this stage, the system will complete the timesheet details, including any scrap information, and update the associated work order and operation accordingly. If the employee asked for an NCR to be created, this will also be created in the system. The employee will also be returned to the main Activity screen.
Pause
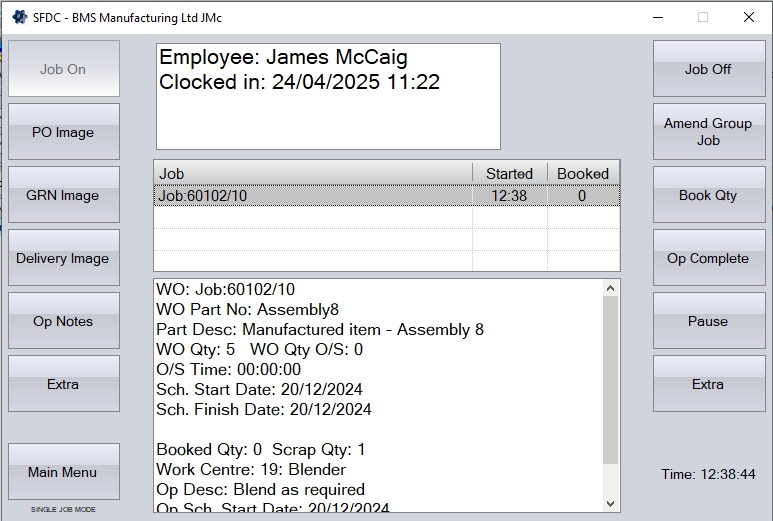
This option allows the employee to "pause" what they are working on, with the subsequent time recorded against a default lost time category. Returning to the job will "unpause" the employee, stop recording their absence time as lot time, and return them to the WO/op they were working on.
The PAUSE option is used when the employee above is currently working on a job. When the employee clicks this option, the system automatically starts a lost time timesheet for the employee against the default lost time category, and stops recording time against the work order operation they were working on.
No time will be recorded against the WO and operation the employee had been working on while "paused". Upon returning, the employee can click the PAUSE option again to indicate their return, stop the recording of lost time, and put them back onto the work order operation they were previously working on.
Lost On
This option allows the user to record time NOT associated with work orders. This is useful for tracking their activity when not working on jobs, and can be used to capture time spent in training, carrying out general maintenance, or housekeeping, etc. The lost time categories available can be set up in the Maintenance > List Maintenance > Lost Time Categories section.
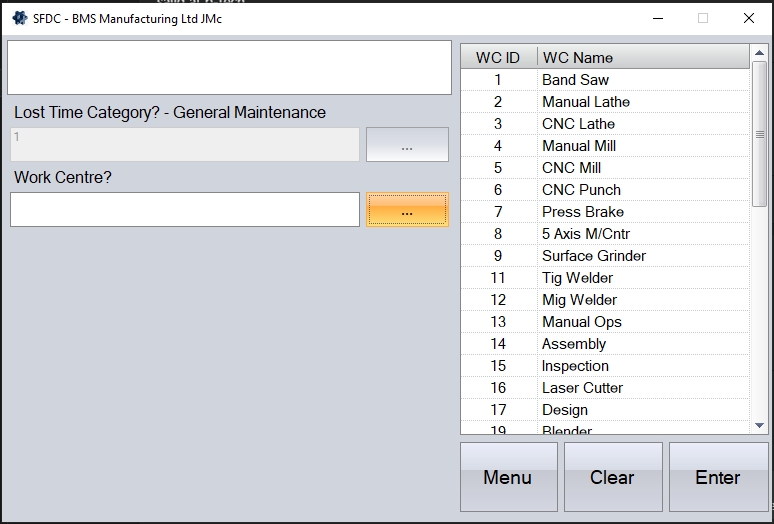
On clicking the LOST button, the system will prompt the employee for the lost time category to be recorded against.
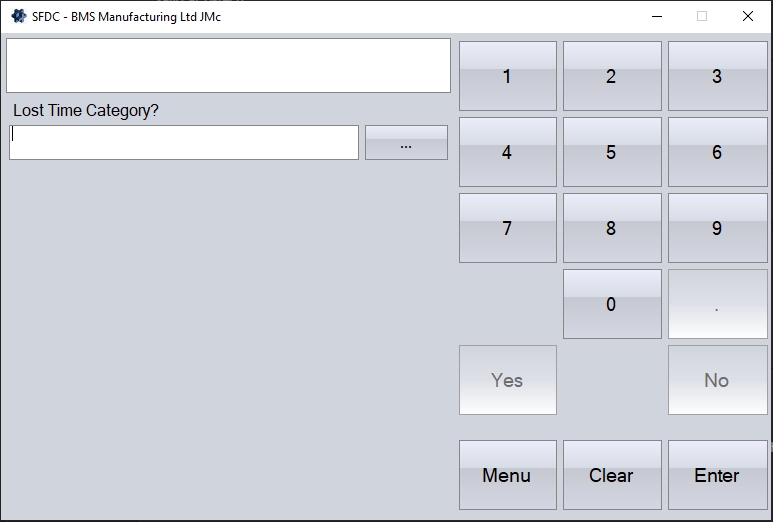
The employee can select from the pre-defined list by clicking on the search option. The user can select the relevant option and click ENTER to proceed.

Next, the employee will be prompted for the work centre they are working at. This is prompted to establish where the employee should be working, and to get the hourly cost rate which is used to put a cost on the lost time period.
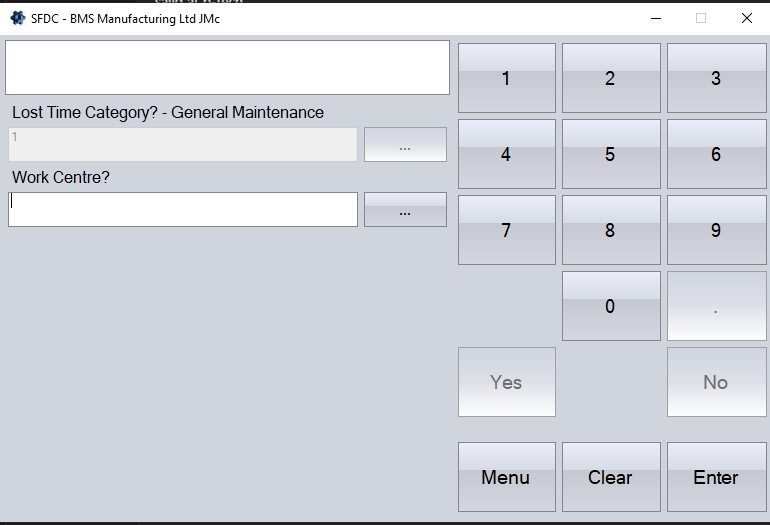
Again, the employee can enter the work centre ID if known, or select from the list via the search option, clicking ENTER to proceed.
Next, the employee will be prompted to ask if they wish to add notes to the timesheet. The employee can respond using the YES/NO options onscreen.
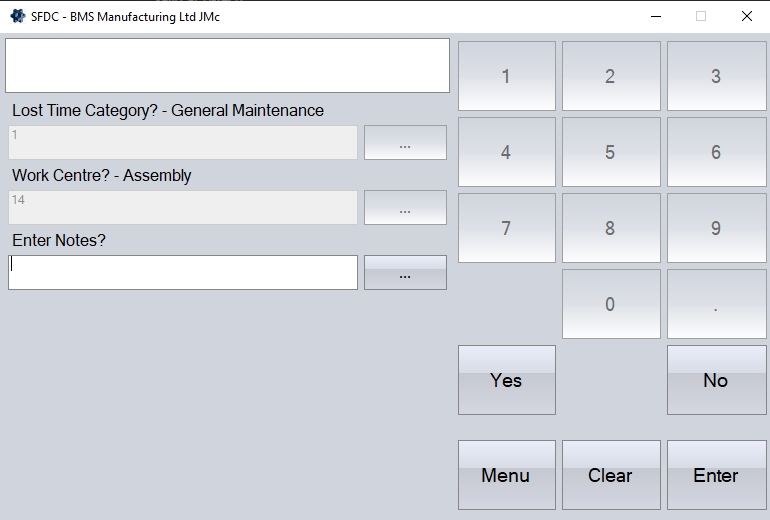
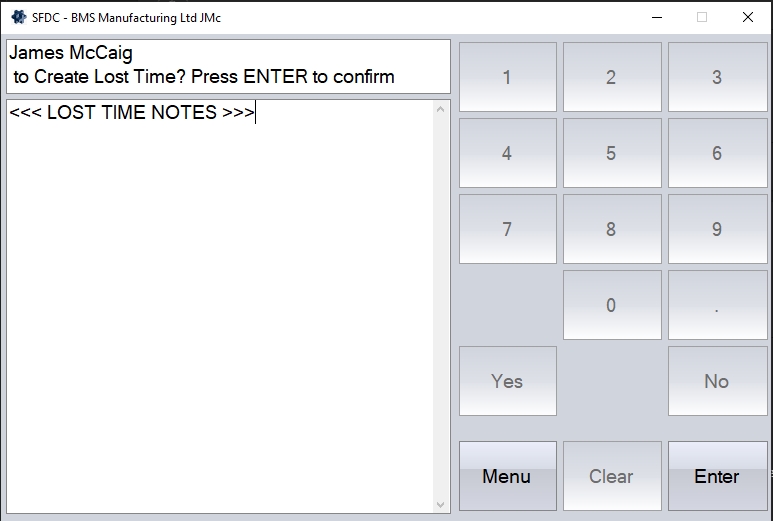
Responding YES will provide the employee with a box to enter any notes they wish to add. The employee can enter the text, and then click ENTER to complete the process.
Responding NO will simply prompt the user to click ENTER to proceed.

Once the employee completes the questions, they will be returned to the main Activity screen and the system will start recording their time as lost time against the selected category.
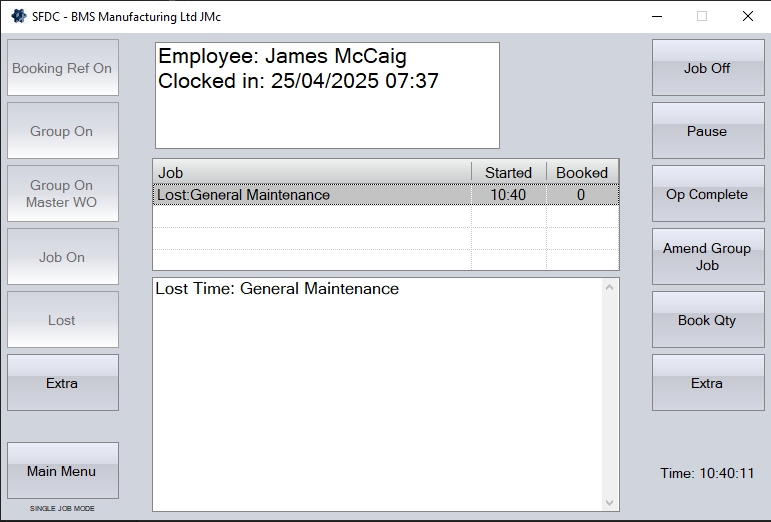
Once the user has completed this period of time, they can use the JOB OFF button to finish the lost time period.
Rework
This option allows the user to record their time as "rework". This option is used when additional time is required on a work order operation specifically when redoing/reworking units that have already been done. This will record the time as a "rework" timesheet against the selected work order and operation, and can be used to analyse rework generally too.
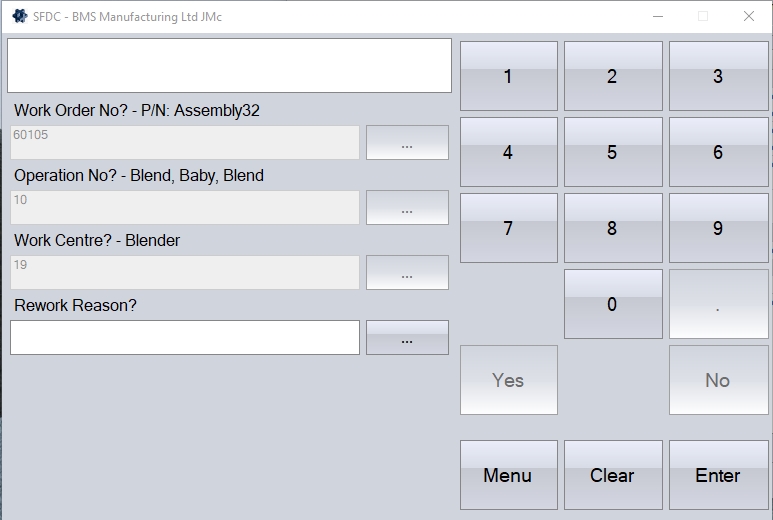
On clicking onto the REWORK button, the user will asked to enter information relating to the required works order, operation number and work centre.
The user can enter the work order number manually, from the search list option and clicking ENTER to proceed, or by scanning the barcode on their job card document.
Next, the employee will be prompted to enter the operation number of the selected work order.
Again, this can be entered manually, selected via the search list option and clicking ENTER, or scanned from the job card document.
Next, the employee is prompted for the work centre that they are going to be working at. If the system is configured to default to the planned work centre, the selected operation's work centre ID will auto-populate, however, the employee can select any other work centre as required by entering/selecting the work centre ID to be used for the rework process. Once selected, the employee can click ENTER to proceed.

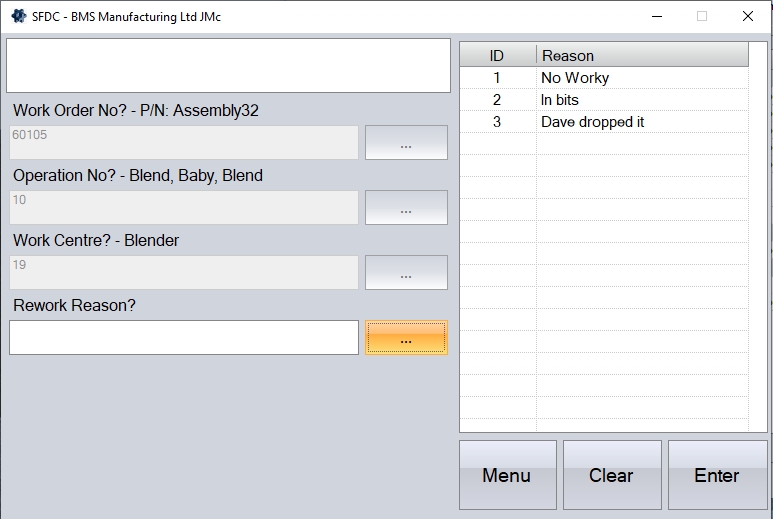
Next, the employee will be prompted to enter a rework reason. This is simply a category for the rework, and can be used for further analysis of rework more generally.
Again, the user can use the search option to select the reason from the pre-defined list. The list of reasons available can be set up in the Maintenance > List Maintenance > Work Order Rework Reasons section. Clicking ENTER will proceed.
Finally, the employee will be asked if they wish to record notes, using the YES/NO buttons to respond. These notes will be recorded against the rework timesheet created by this process.
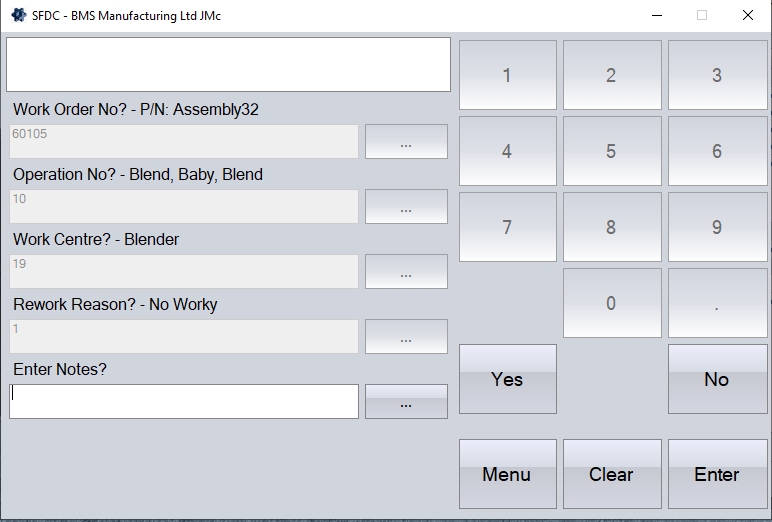
If the employee responds YES, they will be prompted to enter the notes before clicking ENTER to complete the process.
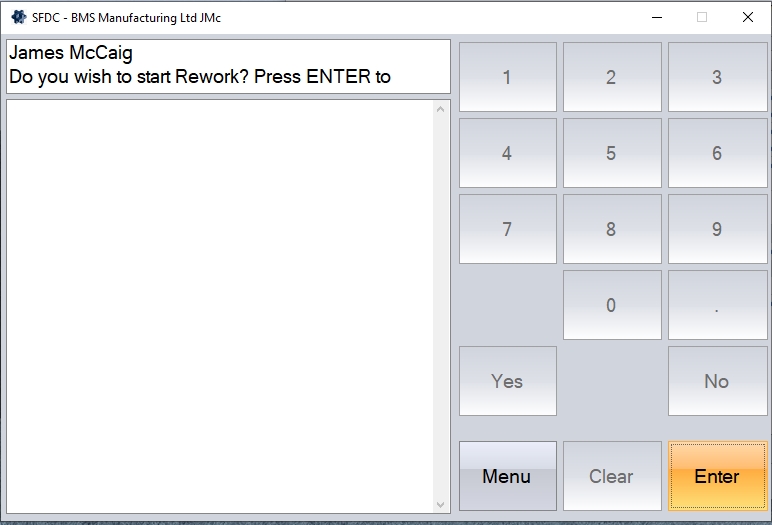
If the employee responds NO, they will be prompted to click ENTER to complete the process.

Once the process is complete, the employee will be returned to the main Activity screen, and will show that they are recording rework time against the selected work order and operation.
Once the employee has completed the rework, they can use the JOB OFF option to complete the rework period.
Unplanned
This option allows the employee to record unplanned time against a WO. This could be due to unforeseen circumstances, or could be because additional work which was not identified initially is now required. Using the UNPLANNED option will add an additional operation to the work order, numbering them from a start of 900, 910, etc. depending on how many unplanned bookings are made by employees. Like the other SFDC options, the employee will be prompted for the information required before the system starts recording the unplanned time against the selected work order.
Clicking the UNPLANNED option will prompt the employee for the work order number.
As with other SFDC options, the user can manually enter this, or select from the search option, clicking ENTER to proceed. Scanning the work order number barcode on the Job Card document can also be done.
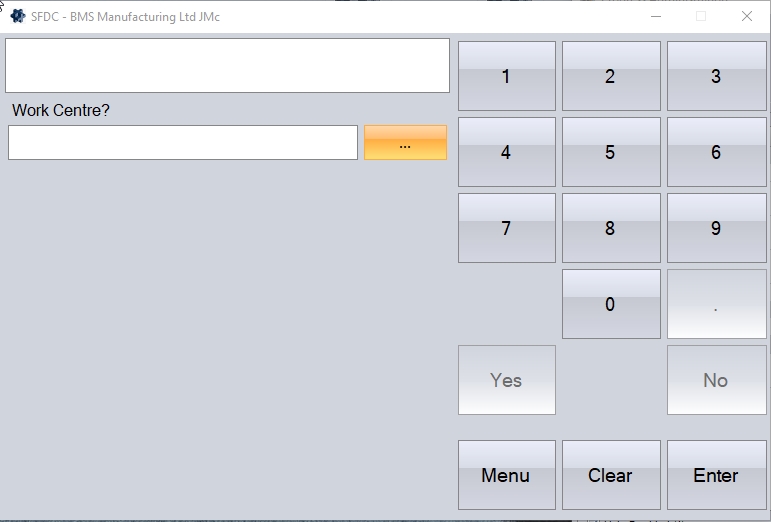
Next, the employee will be prompted to select the work centre the work is being done at.
Again, the employee can manually enter this, or use the search option to select from the list, pressing ENTER once selected.

Finally, the employee will be asked to confirm whether they are recording set up time or run time.
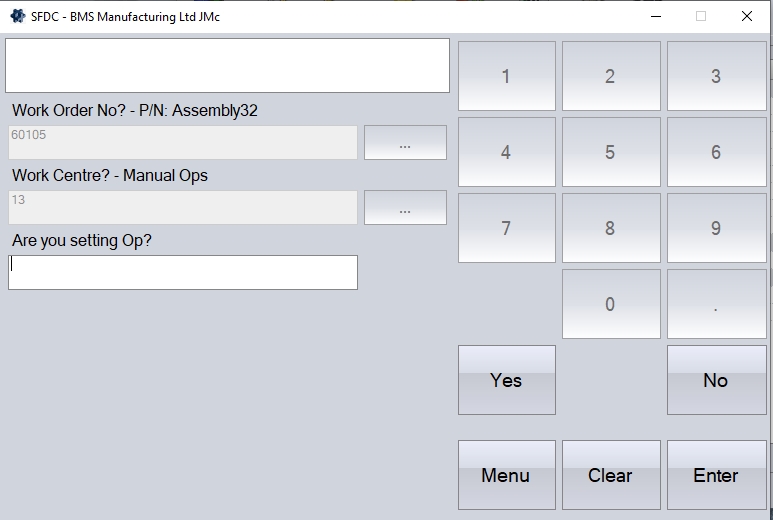
The employee can respond using the YES/NO buttons. Clicking the YES option will record unplanned set up time against the work order and new operation. Clicking NO will start recording run time against the work order and new operation.
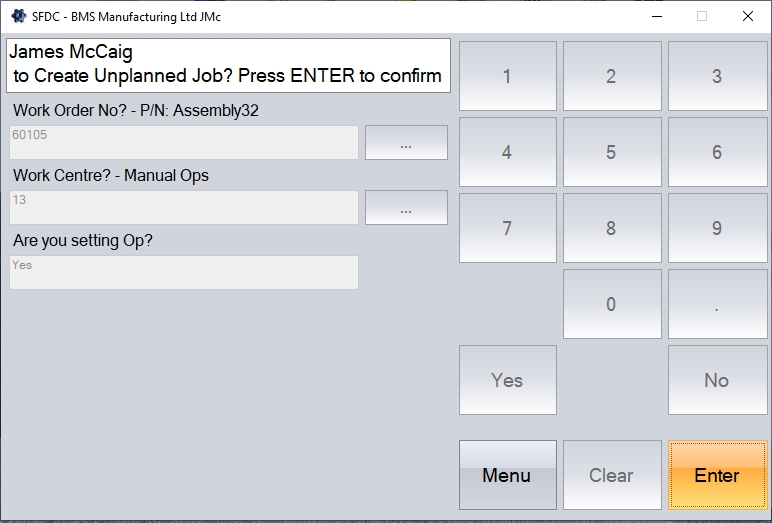
Once all the details have been entered, the employee will be prompted to click ENTER to proceed. Doing so will return the employee to the main Activity screen and show them recording unplanned time against the selected work order.
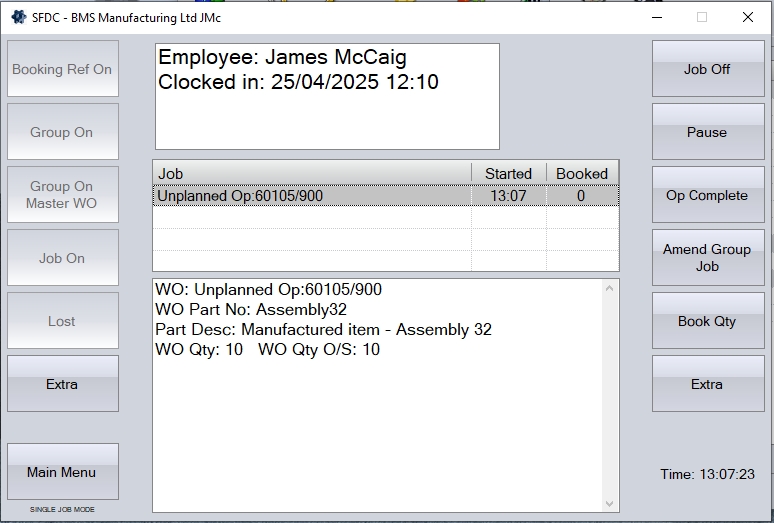
Once the employee has completed the unplanned work, they can use the JOB OFF option to complete their period of work.
Booking Ref On
This option allows employees to job onto a specific booking reference, where the booking reference represents a collection of individual WOs. The booking reference itself needs to exist in advance of this option being used, and would be created via the Work Orders > Booking Ref section in the main system. For more information on booking references and how they are created, please see the Booking Reference section of the manual.
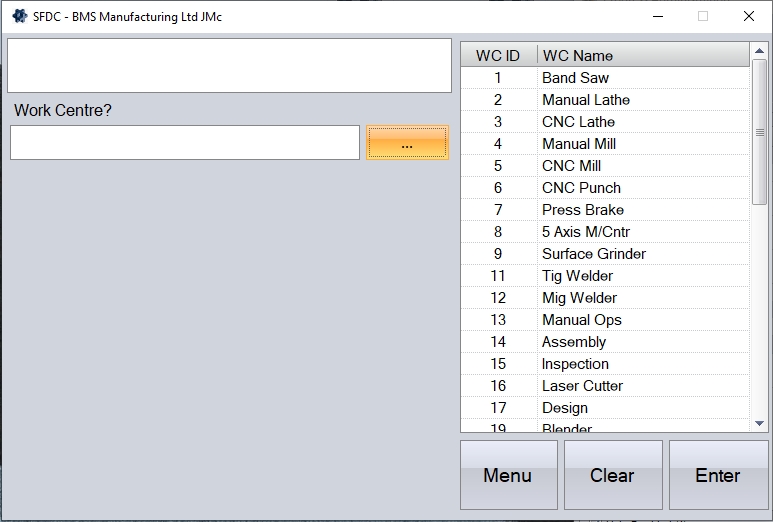
When the user selects this option, they are first prompted for the work centre they are working at.
They can manually enter the work centre, or select the work centre via the search option. Once selected, the employee clicks ENTER to proceed.
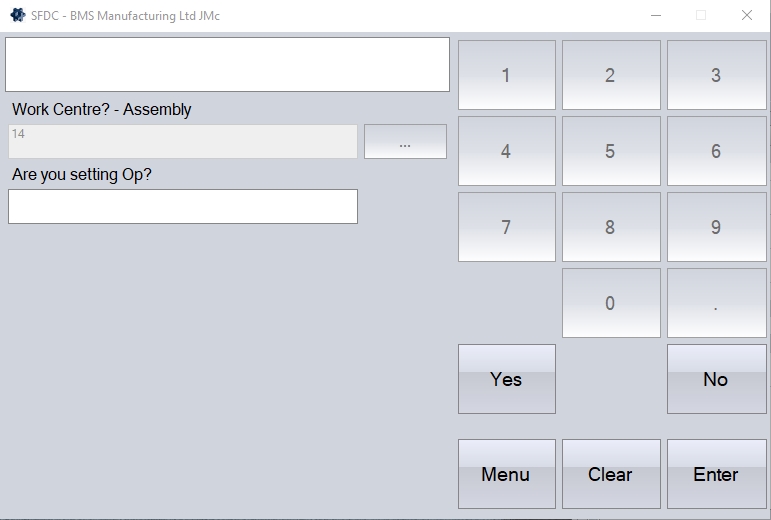
Next, the employee will be asked whether they are recording set up time, or run time. The employee can use the YES/NO options onscreen to respond. Responding YES will record the employee's time as setup time, while selecting NO will record their time as run time. Clicking ENTER will proceed.
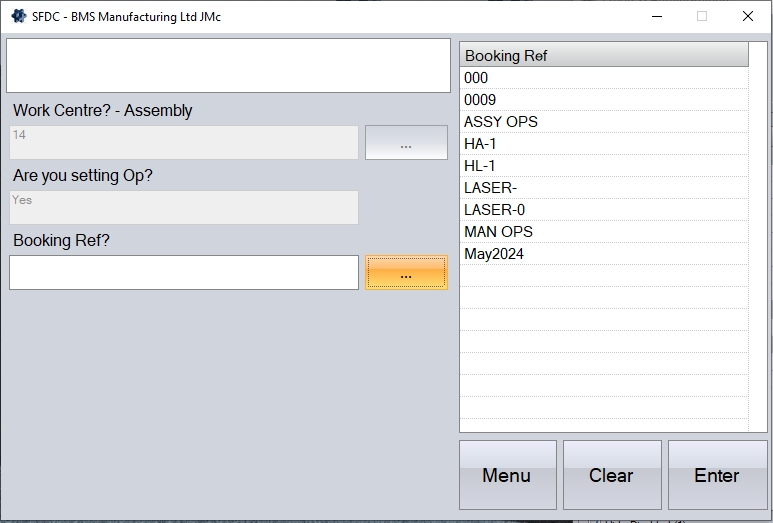
Next, the employee must select the booking ref that they are jobbing onto.
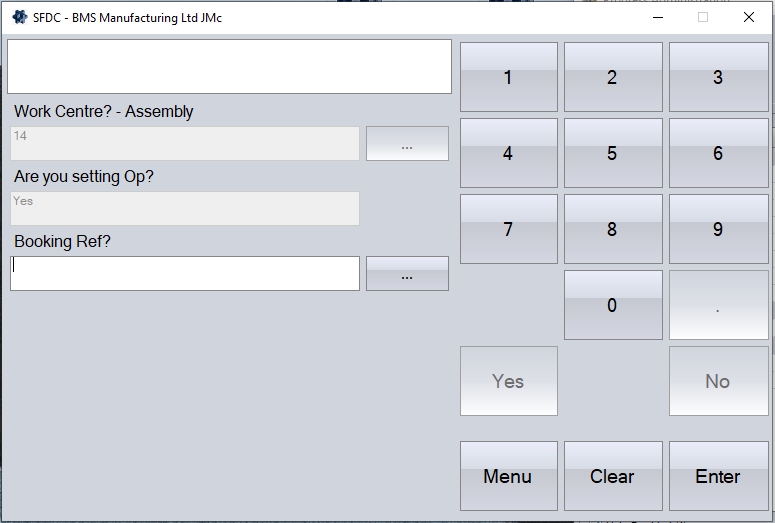
Again, this can be manually entered, selected from the list via the search option, or scanned from the booking ref document which may have been provided. Employee can click the ENTER button to proceed.
Once all the details have been entered, the employee will be prompted to click ENTER to proceed. This will return the employee to the main Activity screen, and job them onto the selected booking ref.
When the employee jobs off, they will be asked if the are asked if all the work at the work centre is complete and also whether all the work against the booking reference is complete too. Once confirmed, the system pro-ratas the recorded time across all instances of the selected work centre and across all work orderss under the booking reference based on the individual instances planned time; work orders with more planned time for the selected work centre will have a larger proportion of the recorded time. Any work orders in the booking reference that have no instances of the selected work centre will have no time allocated to it.
Group On/Group On Master WO
These allows the employee to job on to multiple work orders at the same time on the same work centre. This can be a selection of individual work orders, or a selection of master work orders and their child work orders. The time spent on the jobs will be split on a pro-rata basis across the all the work orders. This functions in a similar way to the Booking Ref function where a user can create pre-defined groups of work orders, and an employee can job onto the single booking reference, however the GROUP ON/GROUP ON MASTER WO allows the employee to create the list of work orders, or master work orders, "on the fly" (i.e. the list of work orders doesn't need to be created in advance), allowing the employee to select the work orders they have in front of them.
After selecting the GROUP ON button, the employee must first specify the work centre they are working at.
The employee can select the work centre via the search button to the right of the text box. Alternatively the work centre number can be entered manually if known. Once the work centre is selected, the user must press ENTER to proceed.
The employee will then be asked to confirm whether they are recording set up time or run time. The employee can respond using the YES/NO options onscreen.
The employee will then be asked to click ENTER to proceed.
Next, the employee will be prompted to enter the work orders they are jobbing onto. The employee can select the work orders via the search button to choose from a list of work orders available with the selected work centre in their operation list. Alternatively, the employee can manually enter the work orders, or scan the barcode on the job card document.
Once the employee has selected the work order number, they will then be prompted to select the operation number.
Again, the employee can scan the operation number barcode from the job card, select via the search option, or manually enter it if know, pressing ENTER to confirm.
This will add it to the WO No list on the left of the screen.
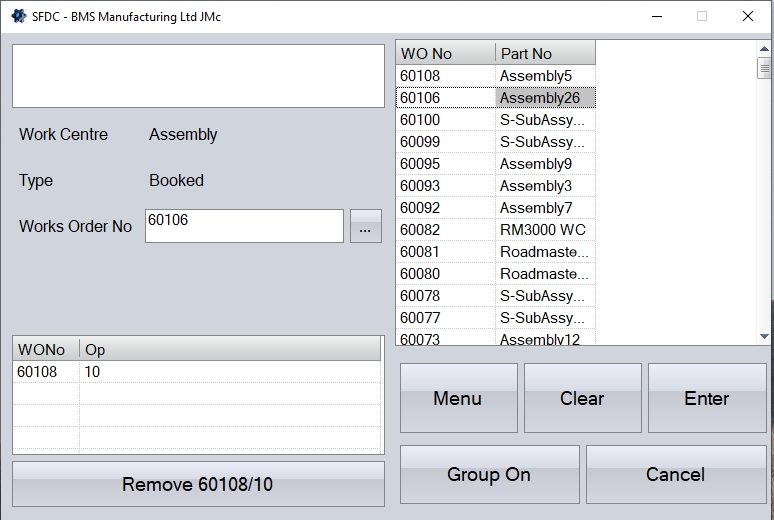
This process can be repeated until the WO No list has been populated with all the work orders that the user is jobbing on to. If a work order is entered in error, the employee can select the work order in the list, and click the REMOVE option to remove it.
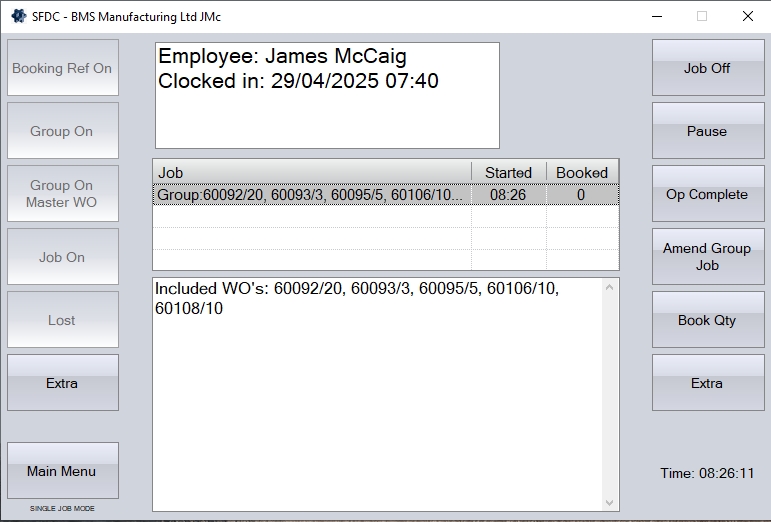
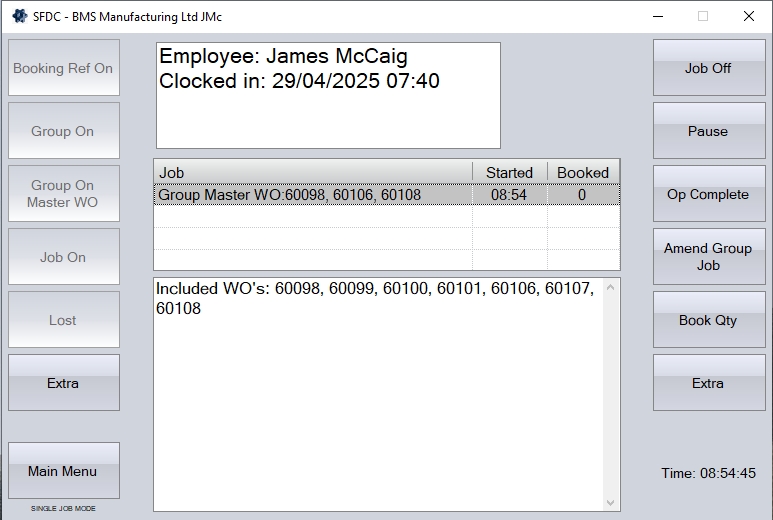
Once all the work orders and operations have been selected, the employee can job onto them all by clicking the GROUP ON button. SFDC will then return to the Activity screen for the employee and will show the jobs that the employee is jobbed on to. When the employee is jobbed onto a group it will show each work order that is part of that group.
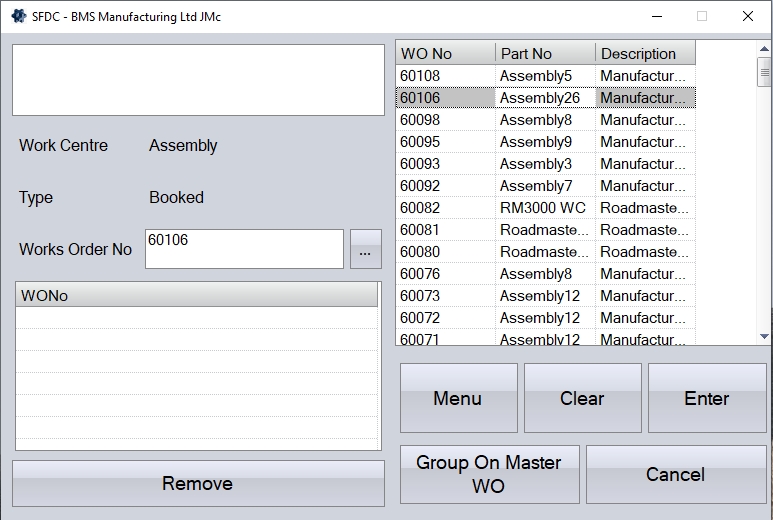
The GROUP ON MASTER WO option works in a similar way but is based on the employee selecting a master work order(s) and the work centre they are currently working at. As per the GROUP ON option above, the employee will be prompted to select their work centre, and whether they are recording set up or run time. Once this has been confirmed, they will be prompted to select the master work orders they are jobbing onto.
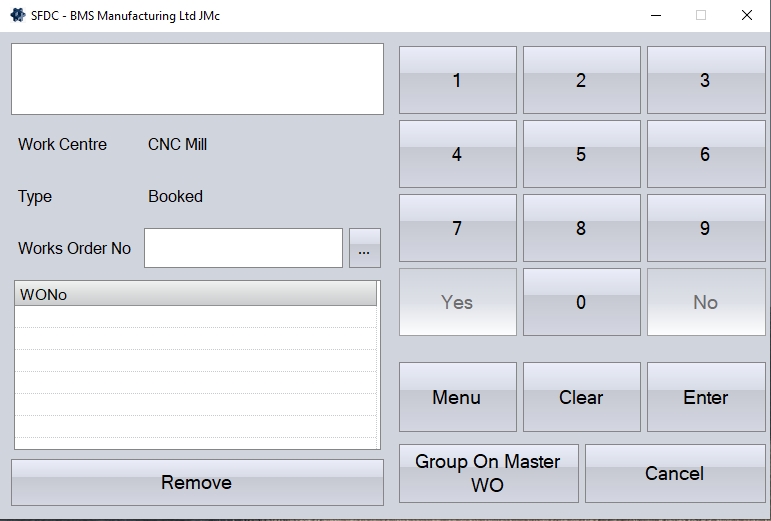
Again, the user can select the master work order via the search option, by scanning a barcode on the job card document or by manually entering it.
Once selected, the employee can click ENTER to add it to the list of master work orders being jobbed onto. The employee can repeat this process until all master work orders have been added to the list.

Once done, the employee can click the GROUP ON MASTER WO option to job onto all the selected master work orders. This will return the employee to the Activity screen and show all the associated work orders being worked on.
Once the employee is finished working on the jobs, they will use the JOB OFF option to job off all the selected work orders. When the employee jobs off, the recorded time will then be pro-rata'd across all the work orders selected.
Amend Group Job
This option allows the employee to amend an existing GROUP ON/GROUP ON MASTER WO collection of work orders. Clicking this option returns the employee to the GROUP ON or GROUP ON MASTER WO screen where they previously selected the work orders and/or operations to be grouped onto.
While the employee is working on a group of WOs and operations, clicking the AMEND GROUP JOB option returns them to the screen where they chose the WOs and operations to be included.
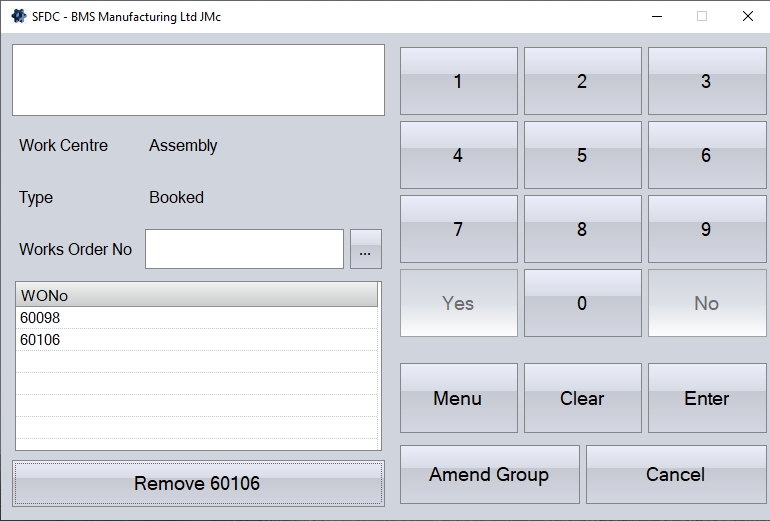
The employee can now add or amend WOs and operations as necessary. Clicking the AMEND GROUP will save any changes and return the employee to the main Activity screen and continue recording the employee's time.
NOTE: Work orders/master work orders removed from a GROUP ON/GROUP ON MASTER WO collection will NOT have any time recorded against it, regardless of how long the employee has recorded. The recorded time will only be pro-rata'd at the point the employee jobs off the collection and will be based on the work orders and operations at the point of jobbing off.
Time Sheet Entry
This option allows an employee to manually enter a time sheet for a job or manually record some lost time. This can be used if the employee forgets to log on to a works order and wishes to record the time after he or she has finished. This functions in a very similar way to the timesheets that can be accessed through the Labour section of the main system. More information on time sheets is available in the Labour > Timesheet section of this manual.
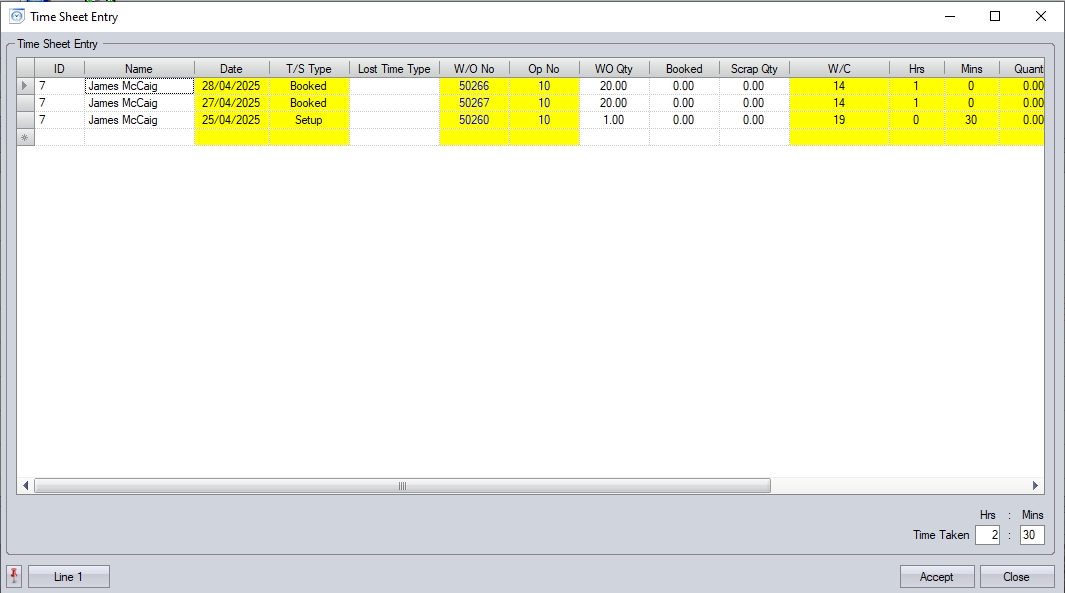
When the employee clicks this option, they will be presented with a Timesheet Browse screen, which will show any of the employee's timesheets for the current date by default.
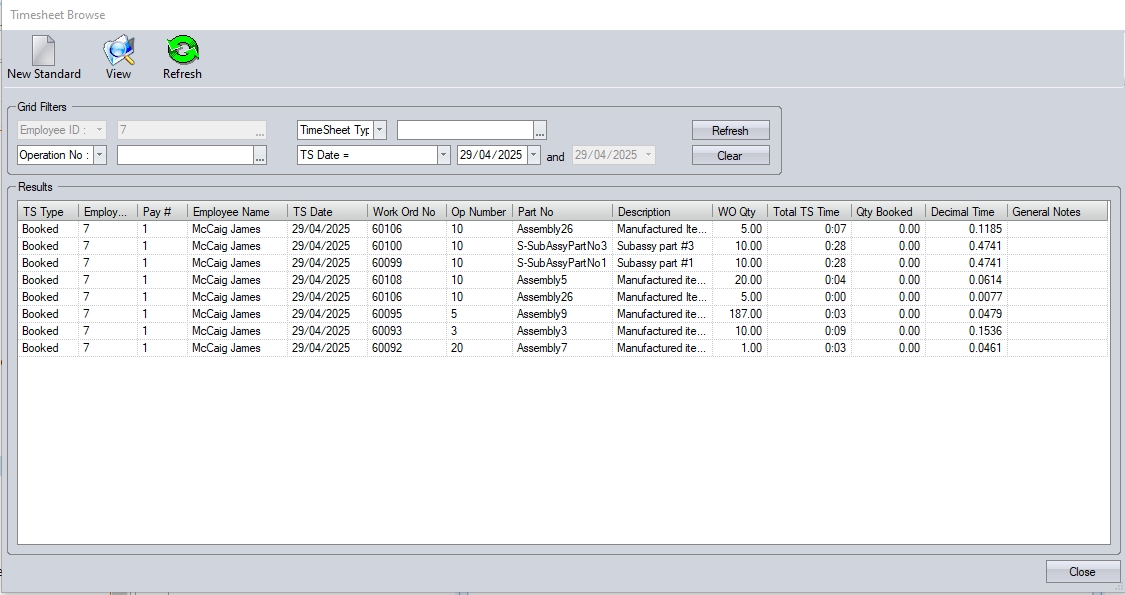
The employee can use the various filters available to see other timesheets recorded by themselves, clicking REFRESH to apply the selected filters, and update the grid with the timesheets that meet the criteria set by the employee.

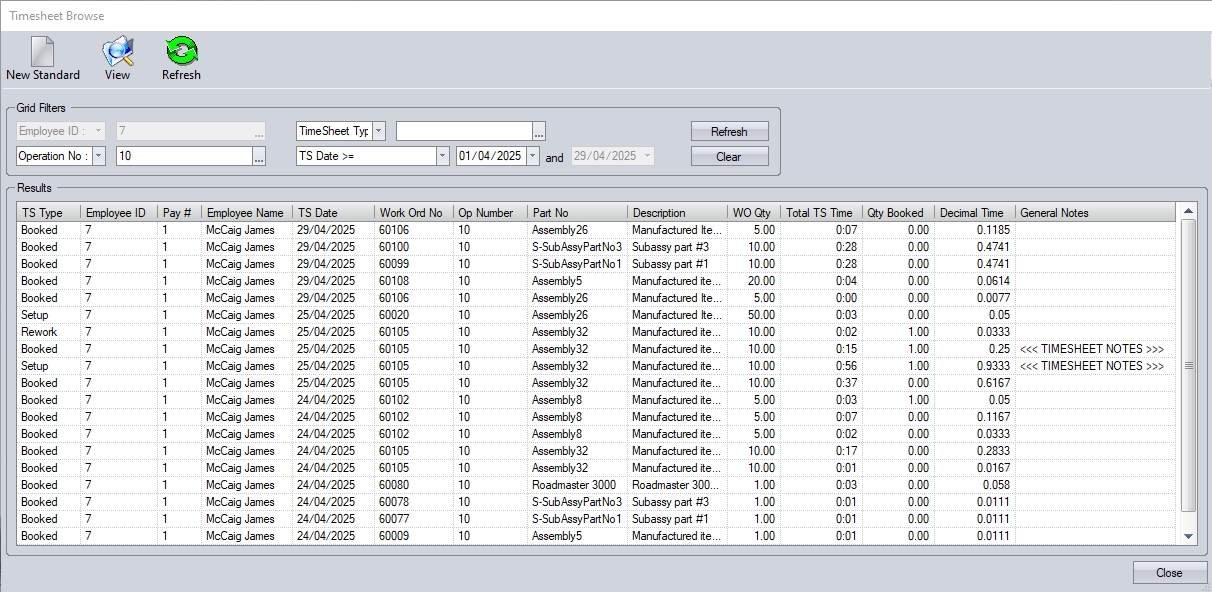
(Example filters applied for timesheet date and operation number)
The employee can edit any listed timesheet by double-clicking on it. This will open the timesheet up, allowing the employee to make the necessary changes.
Once any changes have been made, the employee can click ACCEPT to save the timesheet.
The NEW STANDARD option allows the employee to record additional timesheets for themselves too. Clicking this option present the employee with the following screen where they can enter the relevant details.
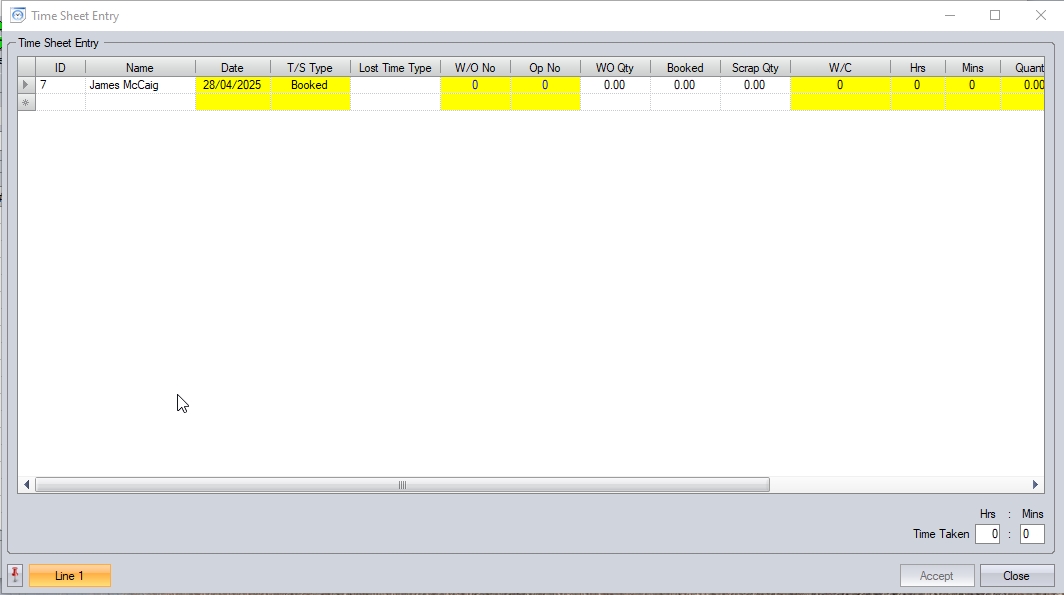
The employee can record multiple timesheets from here, simply taking a new row for each timesheet required.
Once the employee has finished entering the details, they can click ACCEPT to save the timesheets. Once done, clicking CLOSE will return the employee to the Timesheet Browse screen. Once the employee is finished viewing or creating timesheets, clicking CLOSE will return the employee to the Activity screen for themselves.
Op Complete
This option allows the employee mark a work order operation as complete without needing to job on/off to do so. Like the other SFDC options, the employee will be prompted for the information required before updating the specified work order operation as complete.
Clicking this option will prompt the employee to enter the work order in question.

The user can manually enter, select from the list via the search option, or scan the work order barcode on the Job Card document. Once selected, clicking ENTER will proceed.
Next, the employee will be prompted to select the operation number to be completed.
Again, the employee can manually enter, select from the search list or scan the operation number from a Job Card document. Clicking ENTER will proceed.
Once the employee has selected the operation number, they will be asked whether the operation is complete. The employee can use the onscreen YES/NO options to respond.
Once confirmed, the employee will also be prompted for a quantity complete. This allows the employee to record any additional units that have been processed against the selected operation. If the employee simply wants to mark the operation as complete, they can enter zero for this, clicking ENTER to proceed.
Clicking ENTER to complete the process will proceed to update the selected operation to COMPLETE status, and also record any additional quantity entered by the employee before returning the employee to their Activity screen.
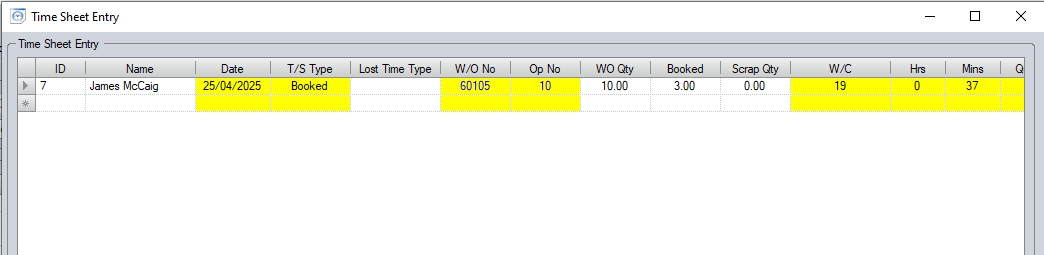
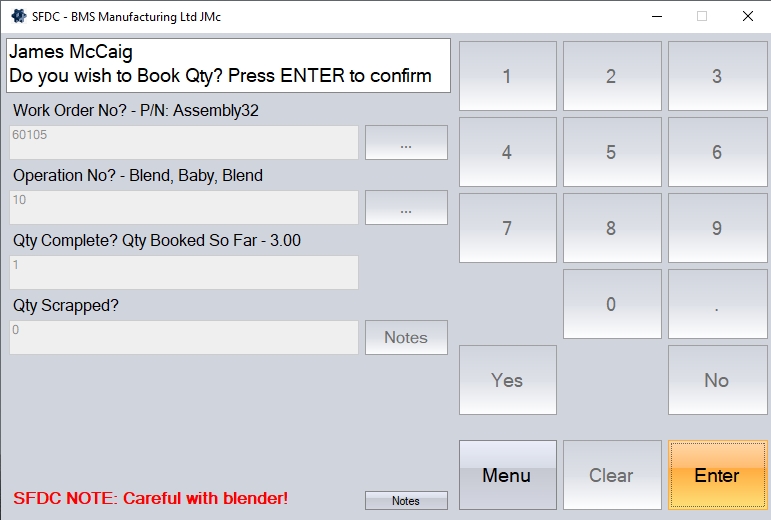
Book Qty
This option allows the employee to record a booked quantity against a WO operation without needing to job on/off. Selecting this option prompts the employee for a WO number, operation number and the quantity they wish to book against the operation. They can also record a scrap quantity too using this option if the additional Quality module has been activated. The employee will also be shown the quantity booked to the operation so far on screen for reference when prompted for the QTY COMPLETE.
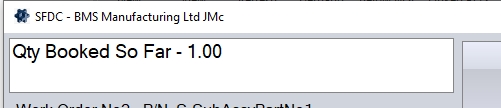
(Highlighting the quantity booked so far against the selected operation)
Once all the details have been entered, clicking ENTER creates a time sheet with zero time, but with the recorded booked quantity against the selected work order operation, before returning the employee to their Activity screen.
First Off Inspected
This option allows the employee to update the first off inspection status of a selected work order operation to indicate how the first off inspection process went. The employee will be prompted to enter the work order number and operation, who carried out the inspection, and the results of the inspection, pass or fail, along with notes if required. If the inspection was a fail, then the employee will be able to enter a fail reason too.
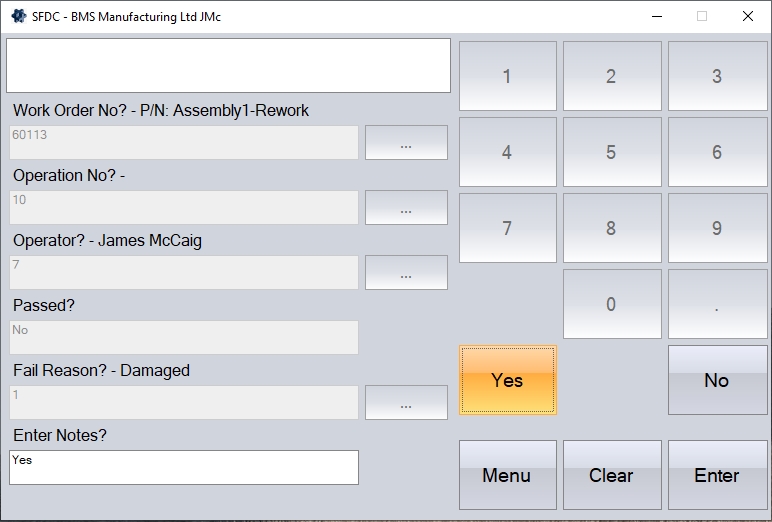
(Example of a a failed inspection being recorded)
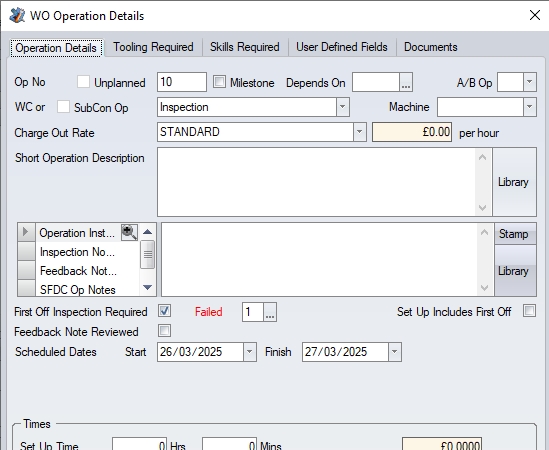
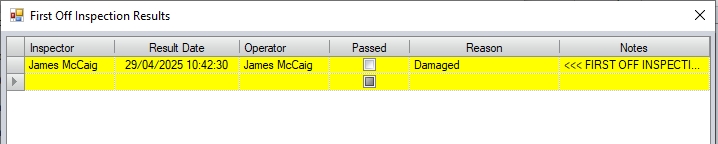
(Routing operation showing failed first off status, and the inspection result details captured)
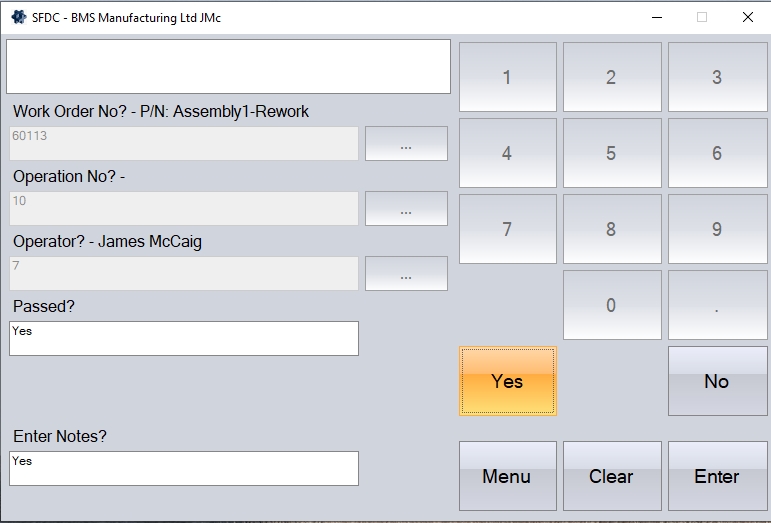
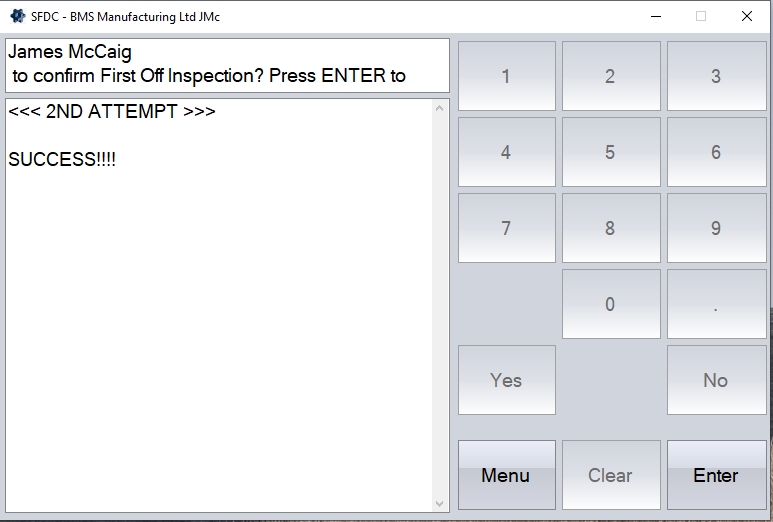
(Example of a a successful inspection being recorded)

(Routing operation showing successful first off status, and the inspection result details captured)
Once the employee has recorded the first off inspection results, they will be returned to their Activity screen.
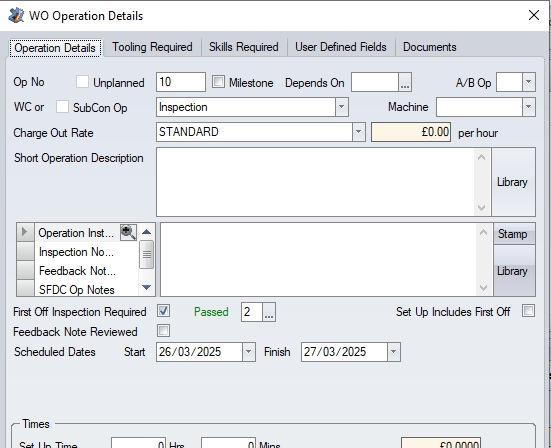
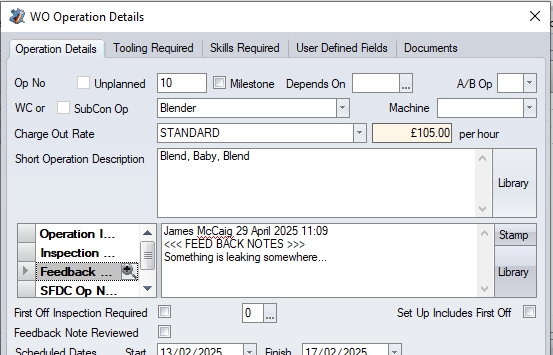
Op Notes/Instruction Notes/Feedback Notes/Inspection Notes
These options allow an employee to view and/or manually enter/amend works order notes relating to a particular operation. Each option will prompt the employee for the work order and operation number they wish to view/edit before displaying it as required. The employee can then make changes if required, or simply view the instructions/text recorded.
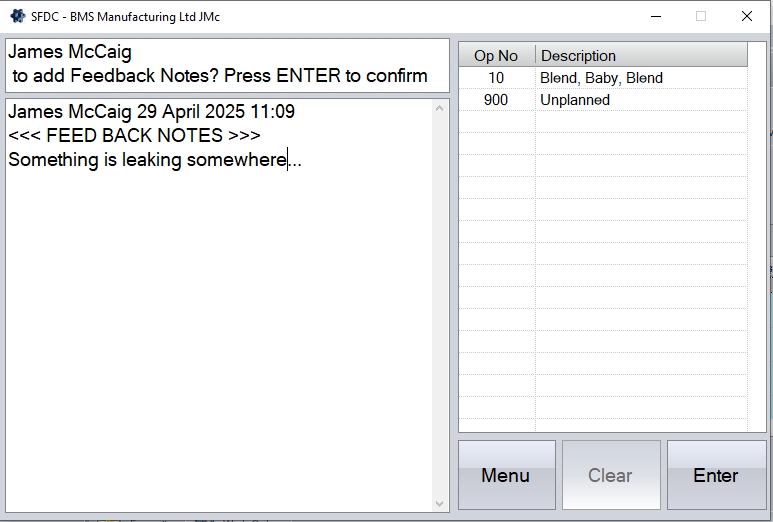
(Example of Feedback Notes)
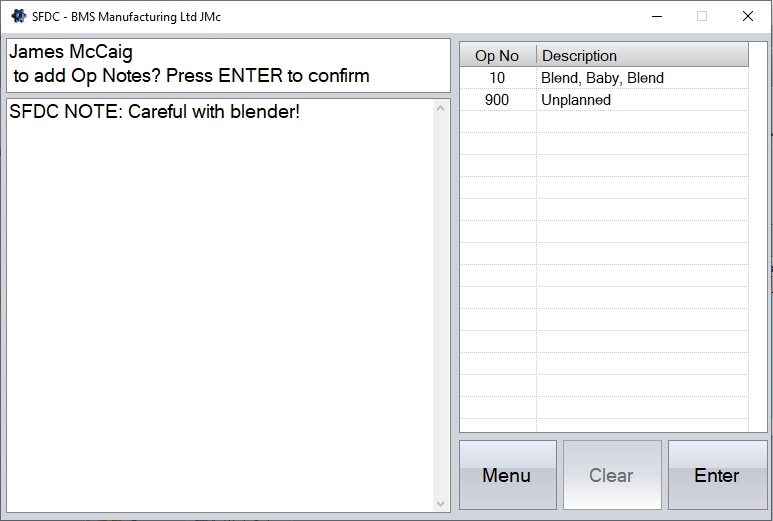
(Example of Op Notes)

(Example of Op Instruction Notes)
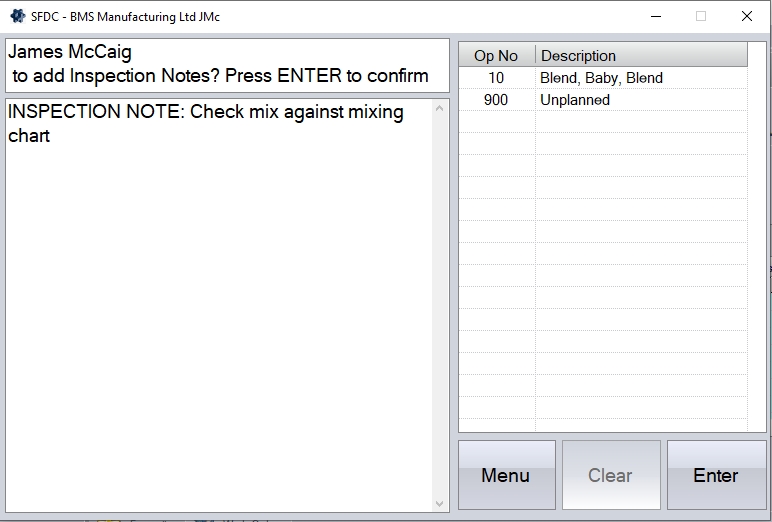
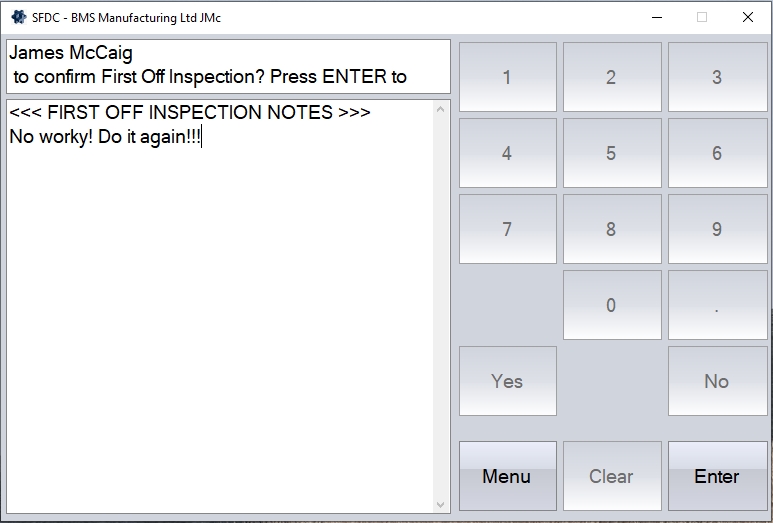
(Example of Inspection Notes)
If the employee adds additional notes to any of these categories, the selected work order operation will be updated accordingly upon the employee clicking ENTER.
(WO routing op - Feedback Notes)
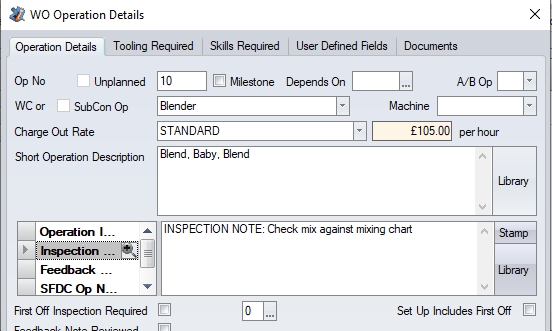
(WO routing op - Inspection Notes)
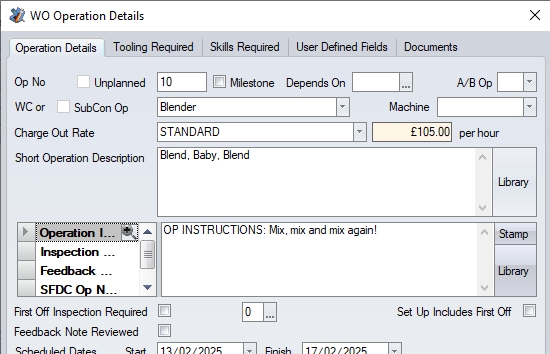
(WO routing op - Operation Instruction Notes)
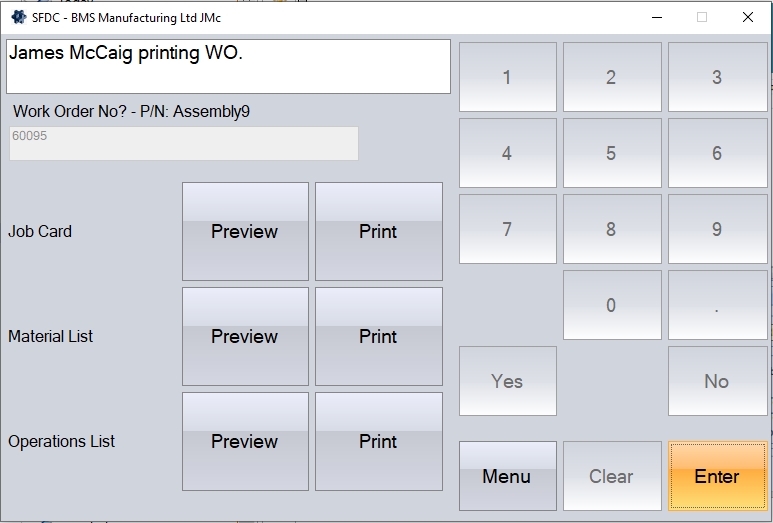
WO Print
This option allows the user to generate any of the associated WO documents; WO Job Card, Material List or Operations List. Clicking this option will prompt the user for the WO number in question before displaying the options to preview and print the documents.
Associated Documents/Associated Documents (Booking Ref)
These options allow the employee to view or print documents which have been added to the system in relation to the inventory part, a selected booking reference or any of the associated work order documents. The Associated Documents option is specifically for a single work order while the aptly names Associated Documents (Booking Ref) does the same based on a selected booking reference.
When the employee selects either of these options, they are prompted to enter the work order or booking reference they are referencing. The user will simply ask them to confirm by pressing ENTER before displaying all the associated documents (as shown below).
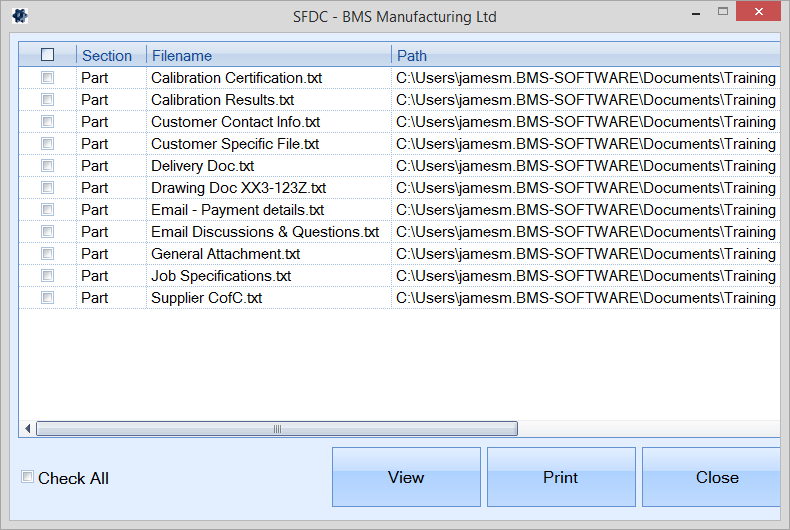
(WO associated documents)
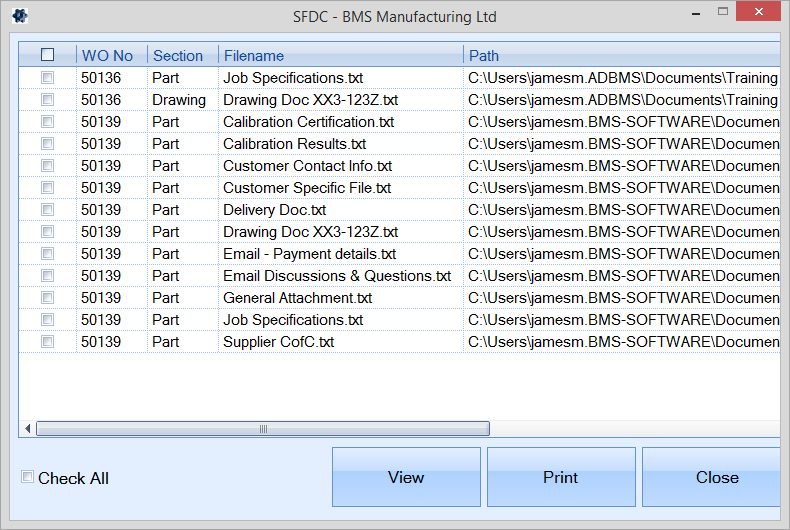
(Booking Ref associated documents)
From here, the employee can select individual or multiple documents for viewing or printing. Selecting either the VIEW or PRINT option will do exactly that for the selected documents.
NOTE: Only documents that have not been marked as HIDE ON SFDC will be displayed. For more information on this, please refer to the parts Documents or WO Documents section of the manual on how to hide specific documents.
Work To List
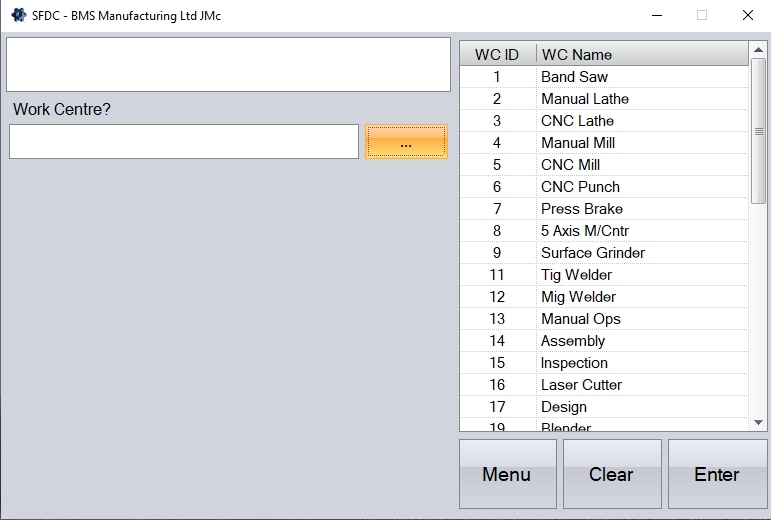
The WORK TO LIST option allows the employee to view a list of outstanding operations on a particular work centre/machine. The system will them present the employee with a list of operations for their specified work centre, in the sequence they should be done as set in the system settings.
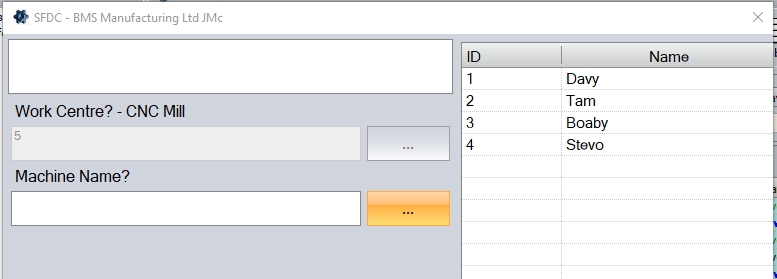
The user must firstly select the work centre. The work centre number can be typed in if known or can be selected from a list via the search button. The selection must then be confirmed by using the ENTER button.
If the option to prompt for work centre machine name is switched on, the employee will also be prompted to select the machine name too.
The outstanding jobs for that work centre (and machine, if selected) will now be displayed with corresponding information, such as the Scheduled Op Start date and Scheduled Op Finish date.
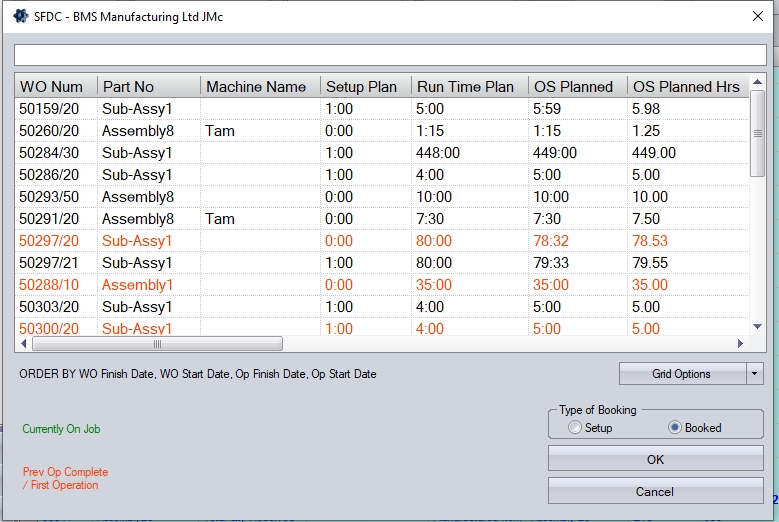
The user can job onto a work order operation from this screen by highlighting the appropriate work order/operation in the grid and selecting the timesheet type (SETUP or BOOKED).
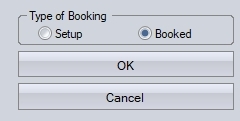
Selecting SETUP will create a SETUP timesheet for the highlighted work order and operation. Selecting BOOKED will create a BOOKED timesheet for the highlighted work order and operation. Once the employe has selected the required job, clicking OK will return them to their Activity screen, job them on, and start recording their time
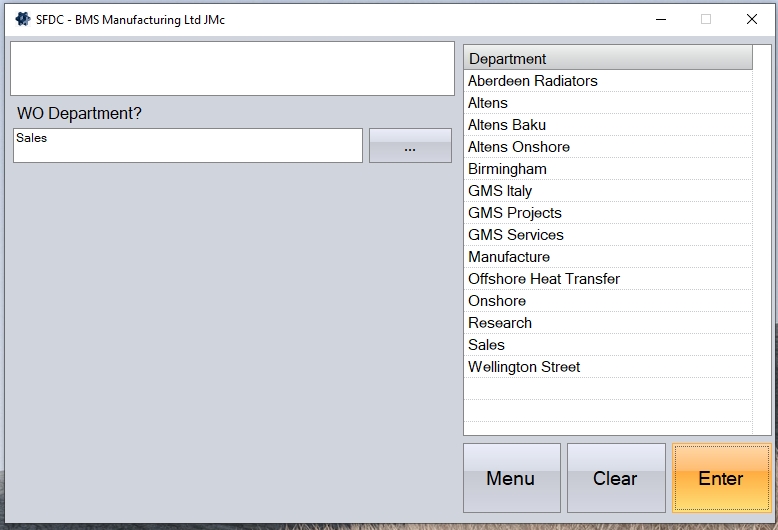
Work To List By Department
This option allows the user to see a list of outstanding operations based on a selected department.
The user must firstly select the WO department. The department can be typed in if known, or can be selected from a list by using the search button. The selection must then be confirmed by using the ENTER button.
The user will then be prompted to select the work centre. Again, this can be scanned from the job card, manually entered, or selected from the list via the search option.
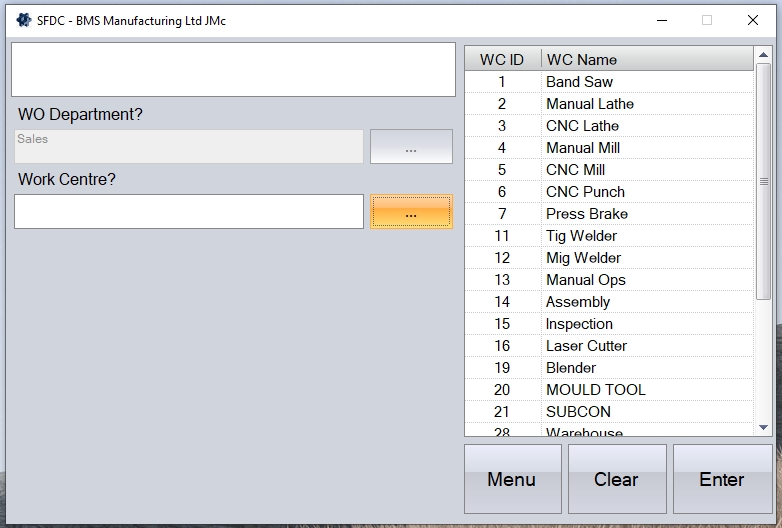
Once selected, the user will be asked to confirm the selections by pressing the ENTER option.
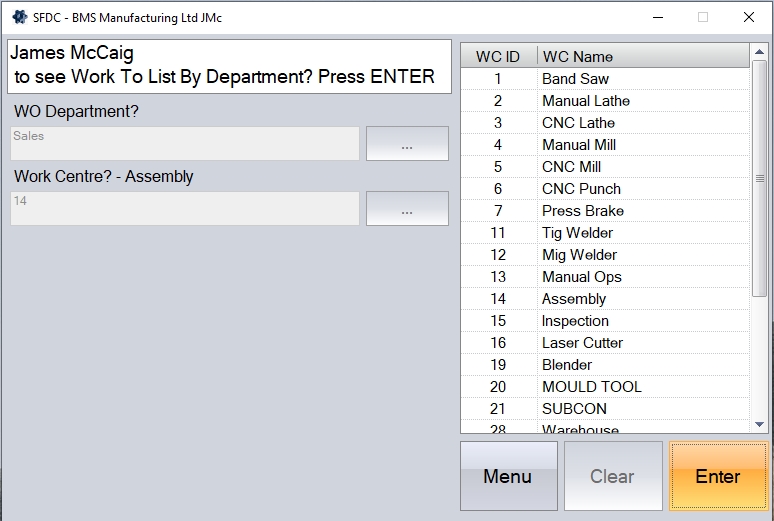
Once confirmed, the user will be presented with the Work To List screen for the selected department and work centre.
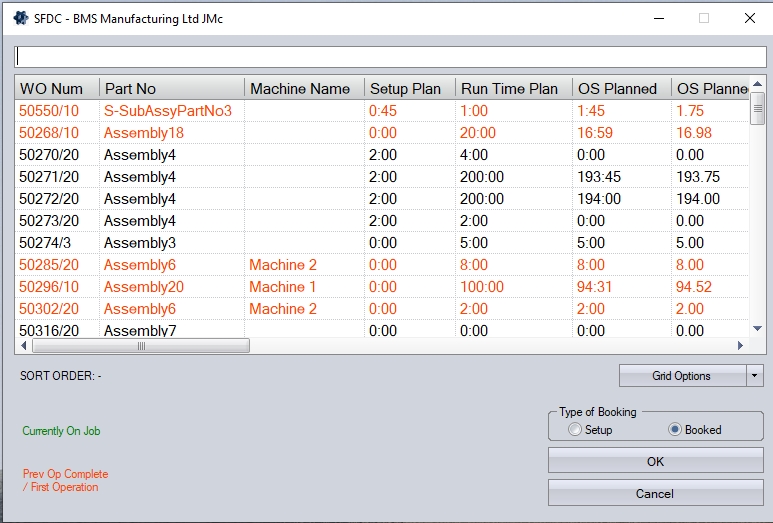
As per the WORK TO LIST option, the employee can job onto the listed work order and operation from this screen. Selecting SETUP will create a SETUP timesheet for the highlighted work order and operation. Selecting BOOKED will create a BOOKED timesheet for the highlighted work order and operation. Once the employe has selected the required job, clicking OK will return them to their Activity screen, job them on, and start recording their time.

WO Status
The WO Status allows the employee to view the status of a selected work order. The employee will be prompted to enter the work order, which they can do by scanning the job card, selecting from the list via the search button, or manually enter if known.
Once selected, clicking ENTER will present the employee with the details of the selected work order, defaulting to the Booking tab.
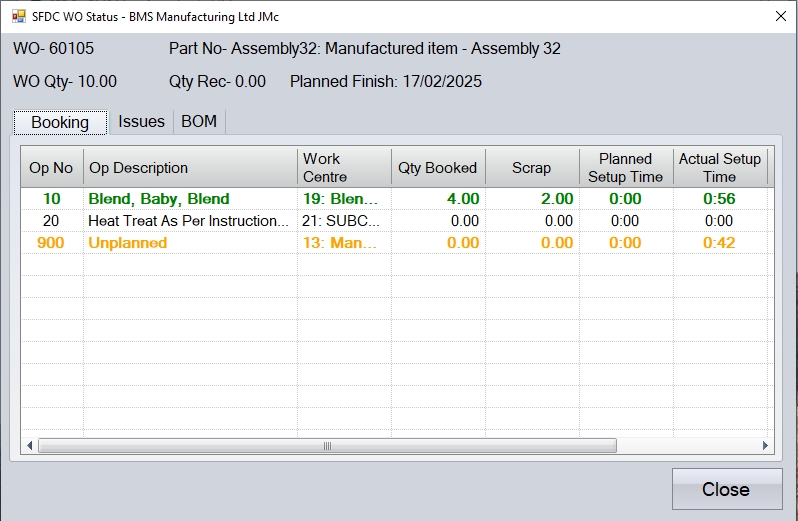
The labour bookings against that work order and its operations are displayed. These include any existing work being carried on the WO (i.e. includes "live" time too).
The lines are colour coded with the following:
Blue: Operation is complete
Yellow: Actual Total Time > Planned Time
Green: Actual Total Time < Planned Time
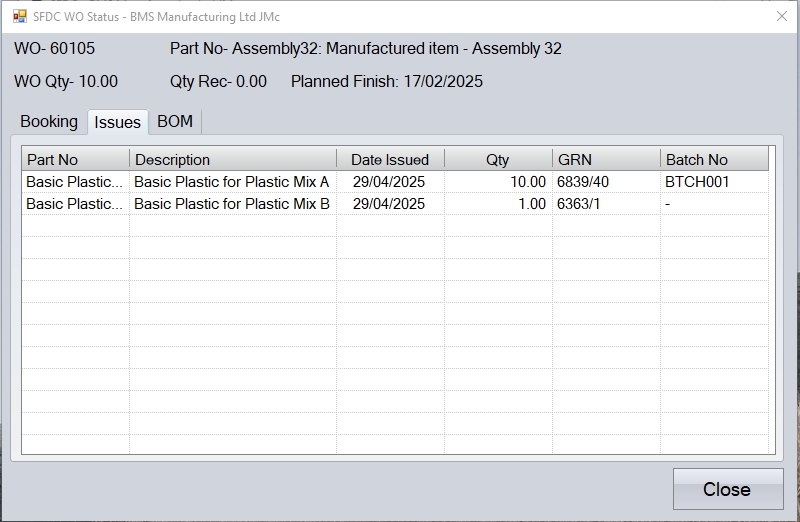
The material issues to that work order can be viewed by selecting the Issues tab at the top.
The employee can also view the WO BOM information via the BOM tab. This will display the following screen.

The information in the Booking, BOM and Issues tabs is for reference only, and cannot be amended from this screen. Clicking the CLOSE option will return the employee back to the main activity screen on SFDC.
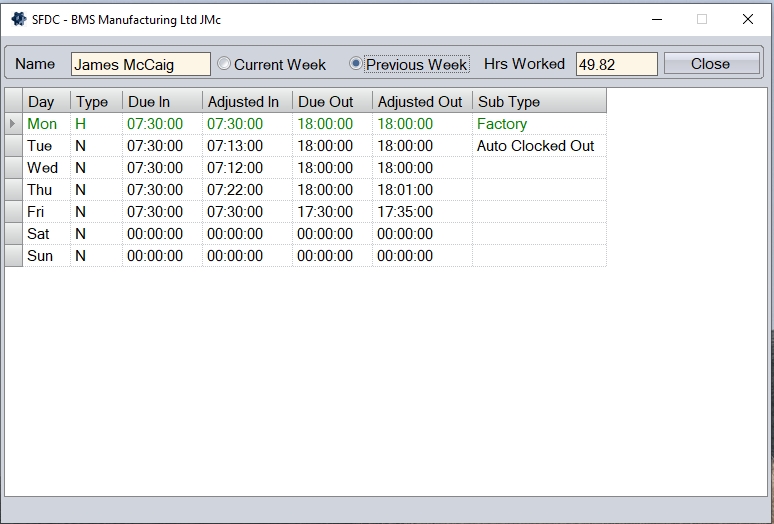
Hours Worked
This option allows the employee to see their T&A clocking details for the current and previous weeks. This screen is only for reference and cannot be used to amend any of the details; this would need to be done in the main system.
NOTE: This option is only available if the system is configured to have the T&A module, which manages employee clock in/out details.
Clicking this option presents the user with details of the T&A clockings for the current week.
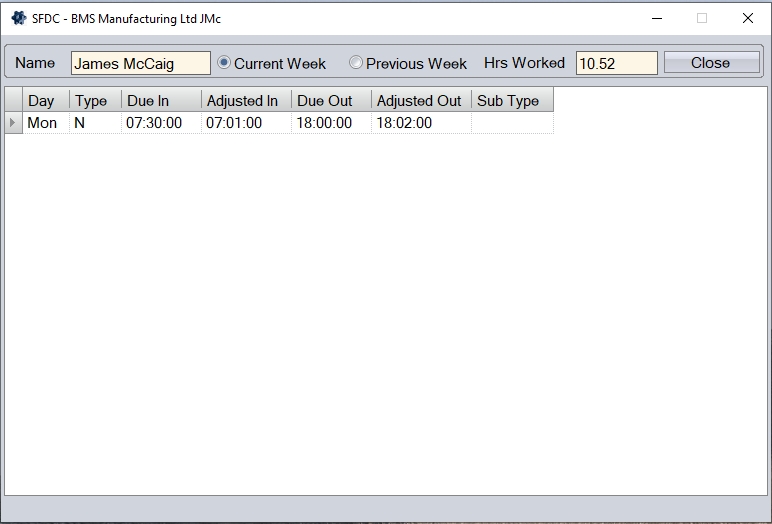
The employee also has an option at the top of the screen which allows them to see the previous weeks T&A records.
Once done, the employee can click the CLOSE option to return to their Activity screen.
Holiday Request
This option allows the employee to request a holiday via the SFDC client. This will place a request for a holiday against the employee, which can then be actioned by someone who can approve the request.
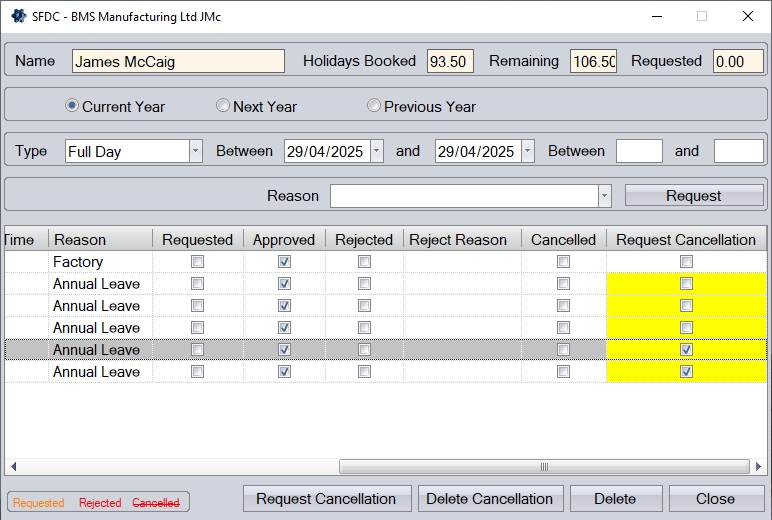
Clicking this option will present the employee with the following screen, which highlights summary holiday details for the current year.
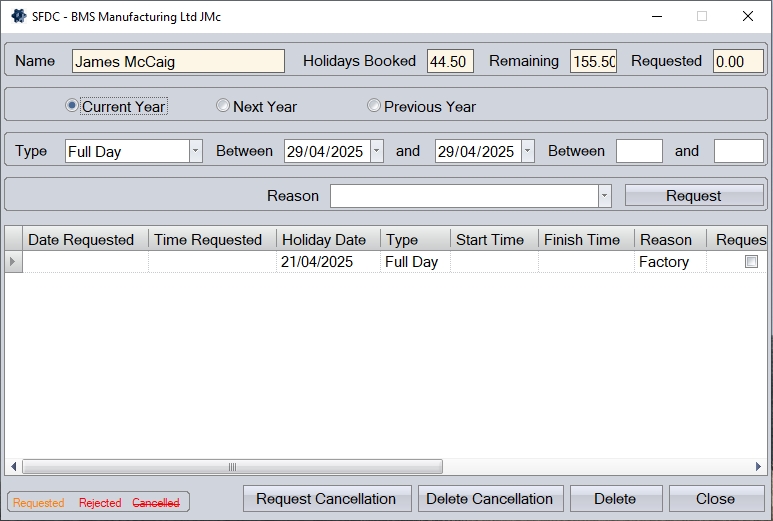
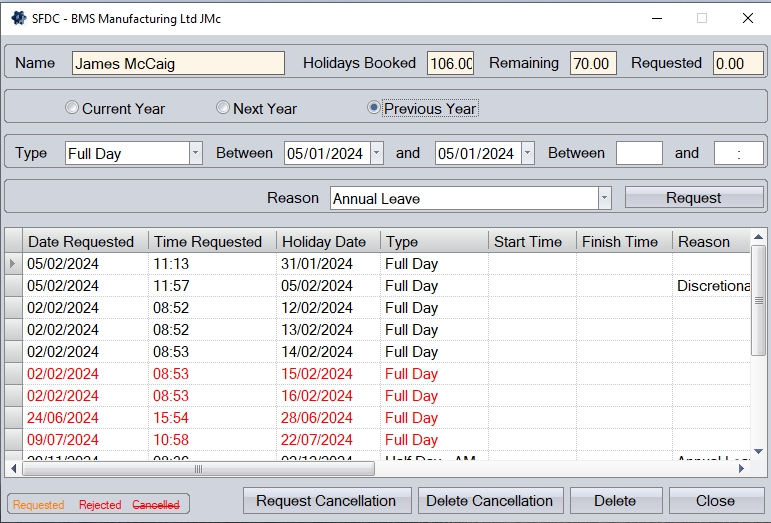
The employee can view the previous and following year details if they need to, clicking the relevant option as required.
![]()
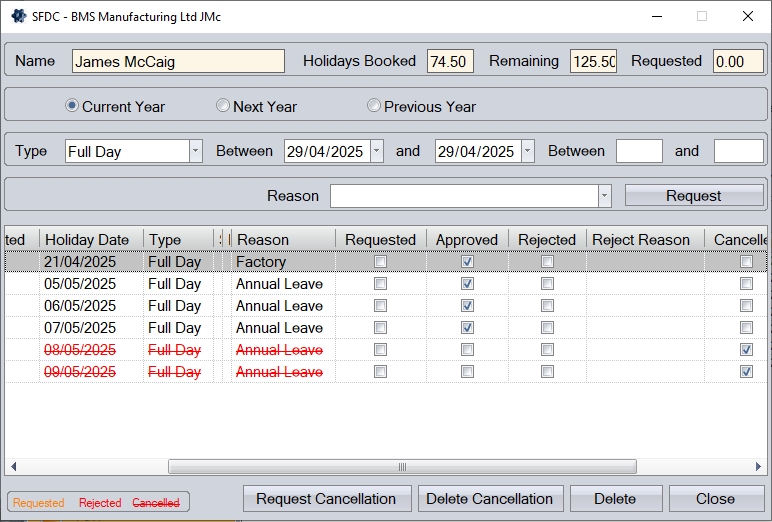
The screen will update based on the employee's selection, showing summary and detail information on the selected year's holidays.
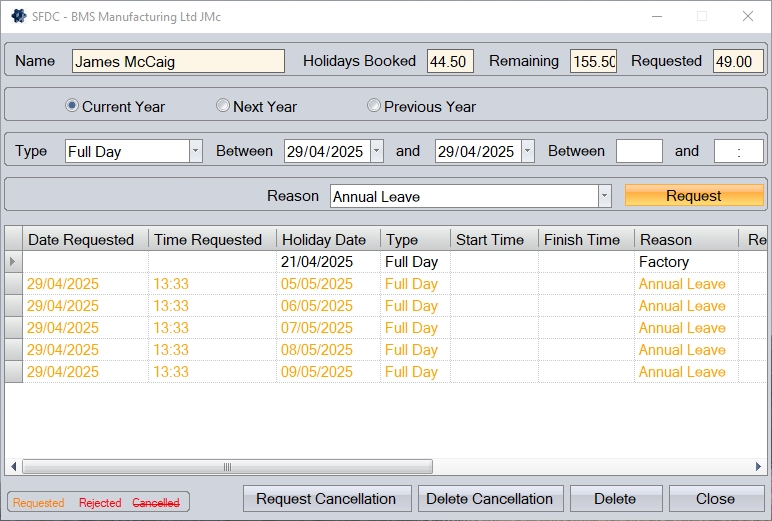
The employee can request a holiday using the options available. The employee can select the type of holiday (i.e. full, day, half day, custom hours, etc.) using the drop-down list available, as well as setting the date required. A holiday request reason can also be specified if required. Once the details have been entered, the employee can click REQUEST to request the holiday.

Once requested, the holidays will be displayed in the grid below, showing in orange while awaiting a response from whoever approves the holidays.
If the employee needs to cancel an approved holiday(s), they can do so using this screen too. To cancel an approved holiday, the employee must select the holiday to be cancelled using the REQUEST CANCELLATION option, and then click the REQUEST CANCELLATION button.
The cancellation request will then be highlighted to whoever manages the employee's holiday. Once the holiday cancellation has been approved, the employee's screen will be updated to reflect the response.
GRN Image/PO Image/Image Capture/Delivery Image
These options allow the employee to capture images against the selected items. Selecting any of these options will prompt the employee to select the item they wish to capture the image against (i.e. PO, delivery, GRN, etc.) before capturing the image via the employee's device.
The PO IMAGE option will prompt the employee for the purchase order they wish to capture the image against. Again, the employee can select the purchase order from the list via the search option, or manually enter it if known. Clicking ENTER when done will then take the user to the image capture screen.
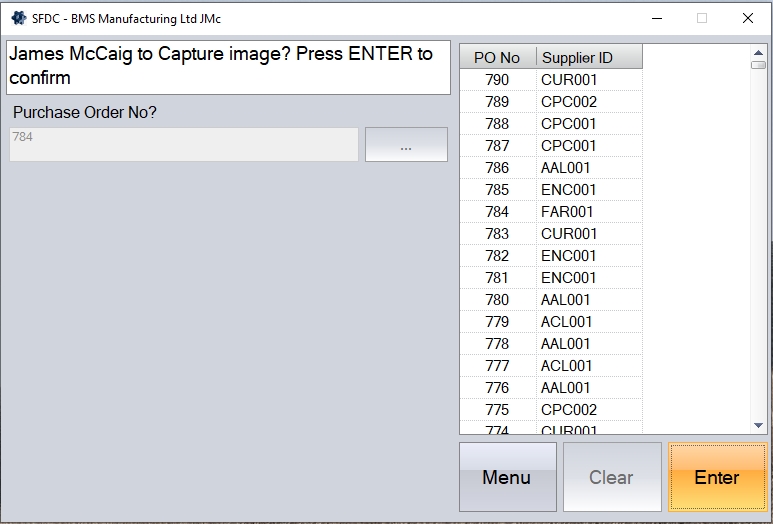
(Example of PO Capture)
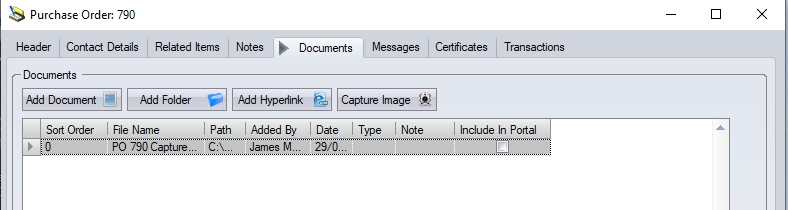
Once the image has been taken, it will be stored against the purchase order selected in the Documents tab of the order.
The IMAGE CAPTURE button will prompt the employee for the work order and operation number they wish to capture the image against.
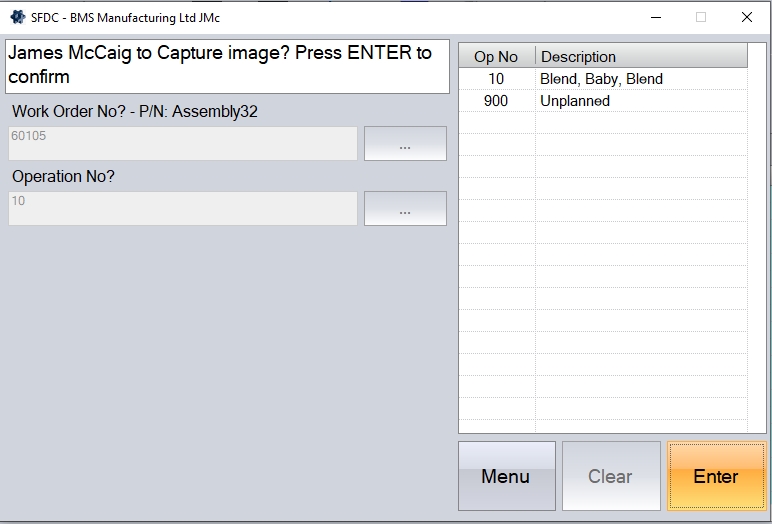
(Example of Image Capture)
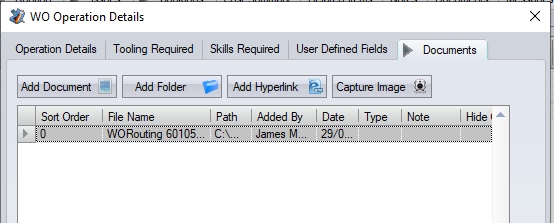
Once the image has been taken, it will be stored against the work order operation selected in the Documents tab of the operation.
The GRN IMAGE option allows the employee to capture an image against a specific GRN record. The employee will be prompted for the GRN that they wish to capture the image against.
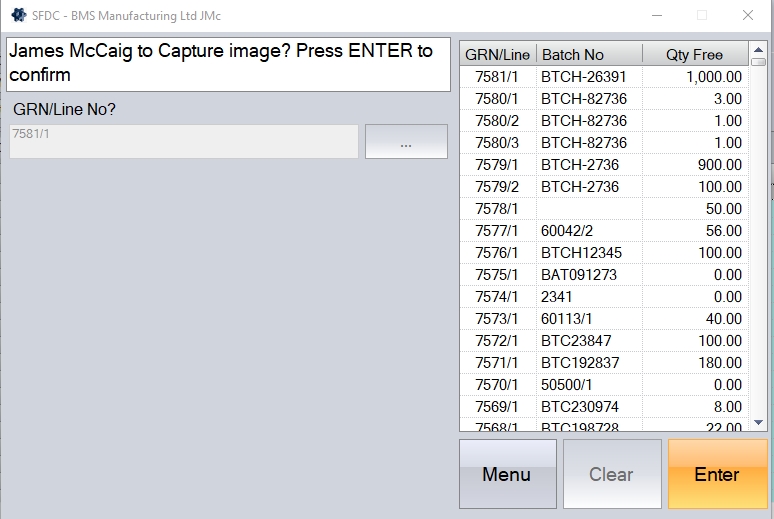
(Example of GRN Image)
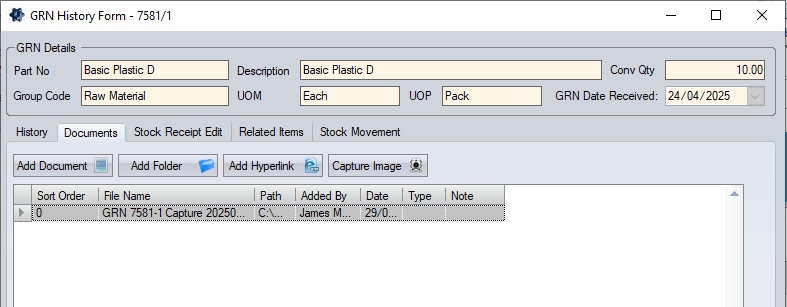
Once the image has been taken, it will be stored against the specified GRN in the Documents tab of the GRN record.
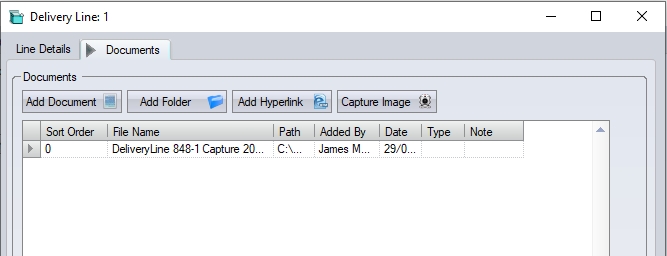
The DELIVERY IMAGE button will prompt the employee for the delivery number and delivery line number that the image is to be captured against.
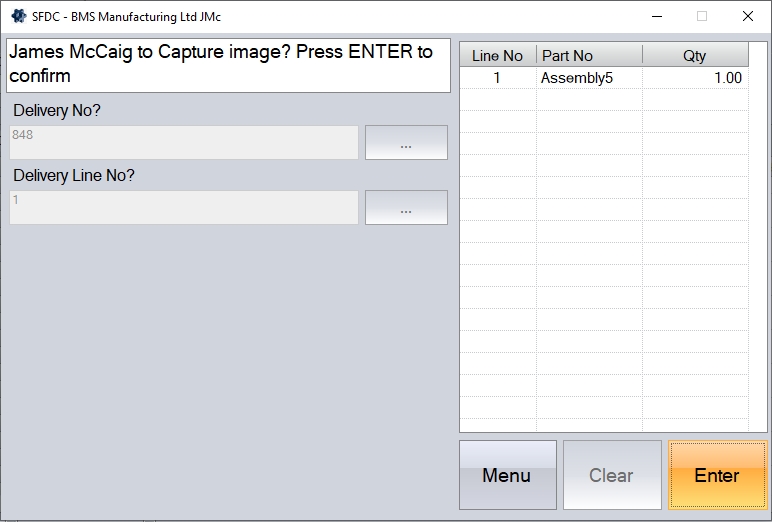
(Example of Delivery Image)
Once the image has been taken, it will be stored against the specified delivery line in the Documents tab.