GRNs
This option allows the user to search for specific GRNs (Goods Received Numbers) within Progress. Each receipt of inventory, whether from a supplier via a purchase order or from the receipt of manufactured items via a work order for example, is allocated a unique GRN number. Clicking on this option will present the user with the following screen.
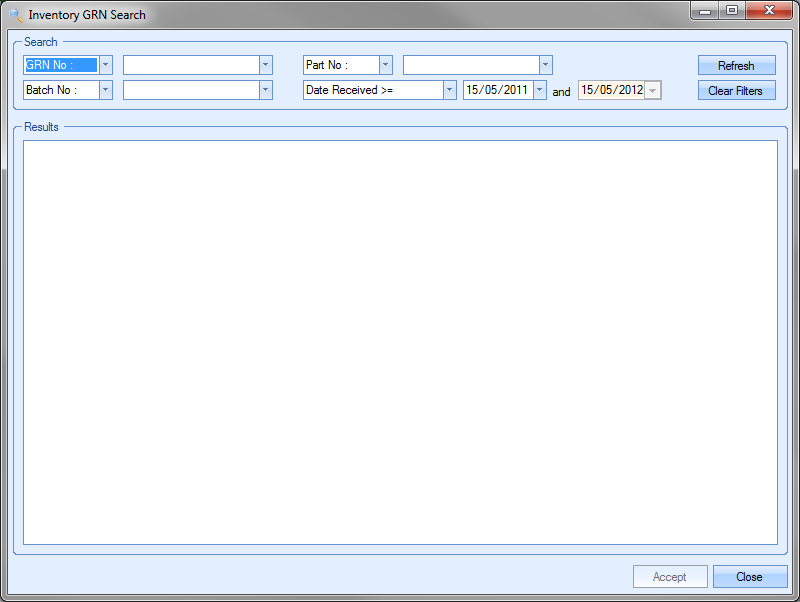
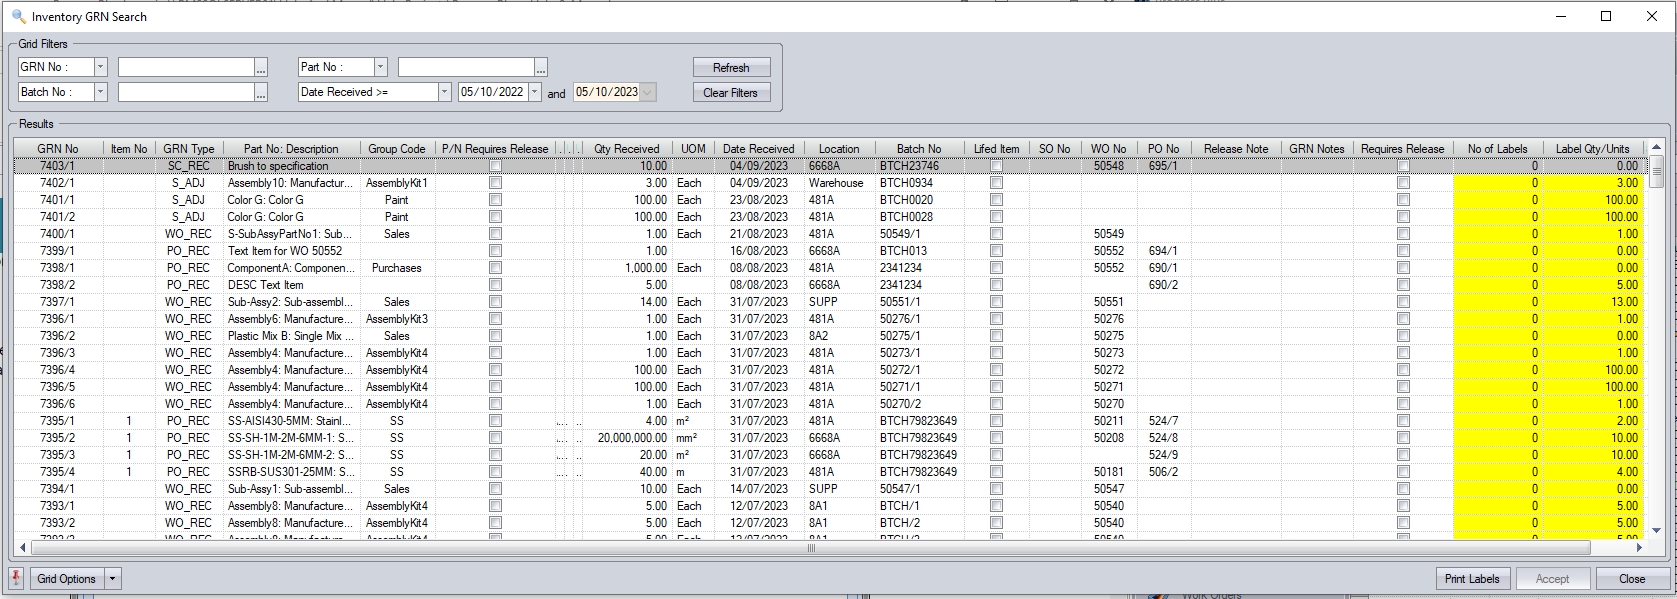
The user can use the search options at the top of the screen to locate the GRN record they are looking for.

Once any filters have been applied, the user can click on the REFRESH option to list all the GRNs that meet the search criteria entered by the user.
GRNs - Offcuts
If the system is configured to use the Offcuts functionality, then the system will display all the relevant information relating to each piece of material. Since pieces of material can be of different sizes and areas, and all belong to same GRN number, the user may see multiple listings for a specific GRN number.
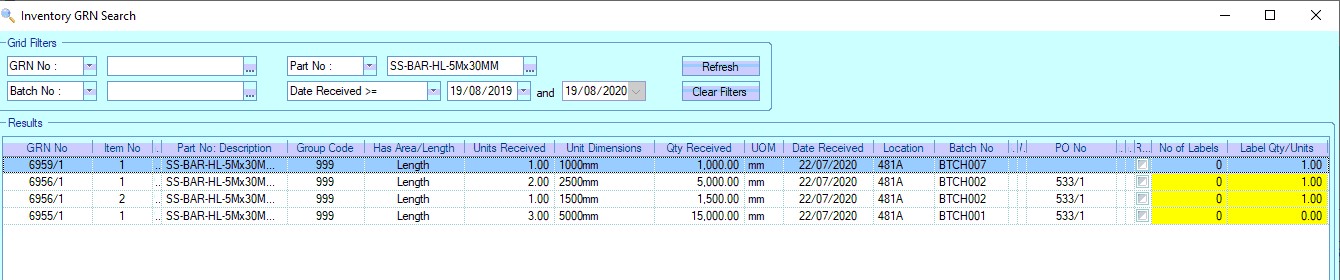
(GRN 6956/1 as two pieces of material)
Drilling into the GRN number of either will present the same GRN information, as all materials were from the same original batch.
Once the user has identified the GRN they are searching for, they can view the details of that GRN by drilling into the GRN No. The user can access the GRN details by clicking the ![]() box that appears beside the GRN No. This presents the GRN History screen for the GRN selected.
box that appears beside the GRN No. This presents the GRN History screen for the GRN selected.
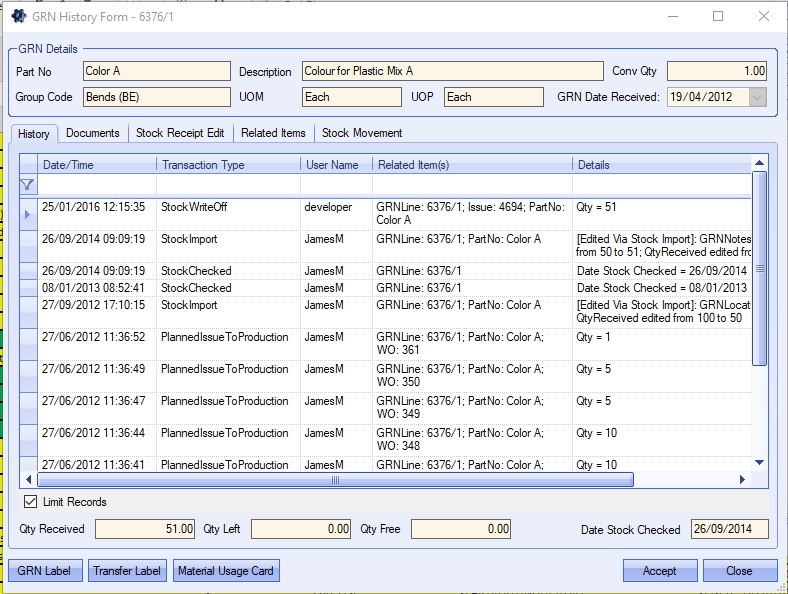
The top part of the screen shows the part details along with the date of the GRN receipt.

GRN History
This section of the GRN record shows a complete list of transactions made in Progress by the users which relate to this GRN.
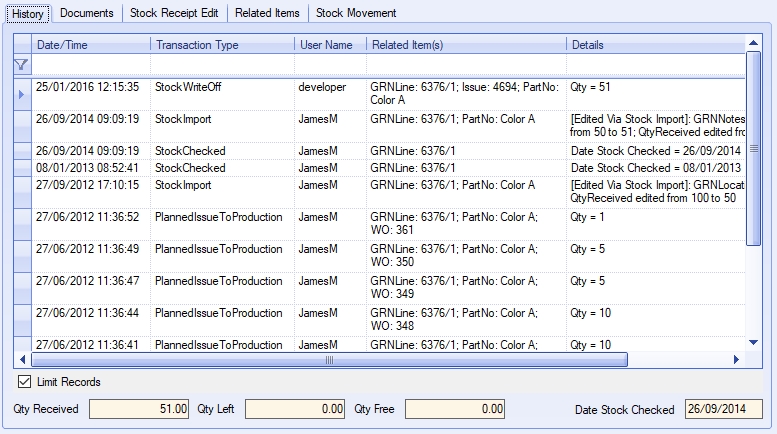
The user can see what transactions have occurred as well as details of those transactions. This is often very useful when trying to find out why something has changed unexpectedly or if the user needs to find out what was happened since the receipt was made.
Date/Time: The date and time that the transaction occurred.
| Transaction Type: | This field names the type of transaction recorded. This references both the area of Progress and the action, i.e. POReceipt – goods received via a purchase order, PlannedIssueToWorksOrder – quantity of GRN issued to a work order, etc. |
| User Name: | User who made the transaction. |
| Related Item(s): | Reference information on the exact data that was amended, i.e. GRN number, part number, PO no, etc |
| Details: | Brief summary of transaction, i.e. quantity, GRN unit cost, etc |
GRN Documents
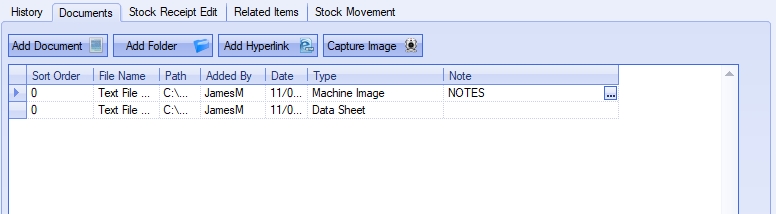
This section allows the user to attach documents, folders, hyperlinks and even captured images to the GRN record. These might be certificates of conformity or delivery notes from the supplier.
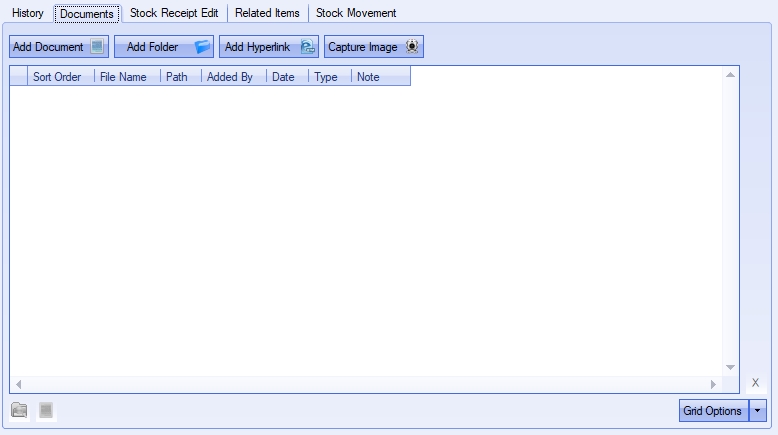
To record document, the user simply clicks on the ADD DOCUMENT option to select the file required.
![]()
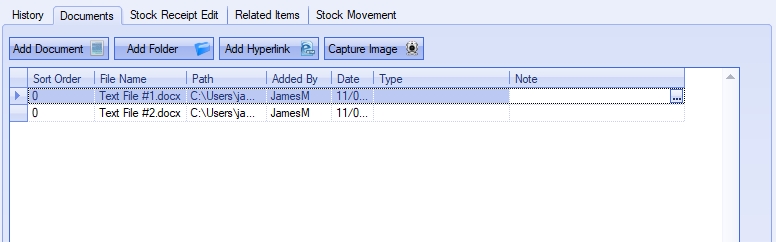
This will open a standard Windows explorer window to allow the user to search for the file to be attached.

Once the user has selected the file required, Progress will return the user to the documents screen and list the selected file.
NOTE: To allow access for other users to the files added to the supplier record, the user must ensure that these files are held in a folder accessible by all users. Typically, a shared network folder would be created for this purpose.
Once the file(s) have been added, the user can specify a file type or comment associated with the document. The Type can be chosen from the drop-down list.
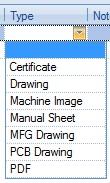
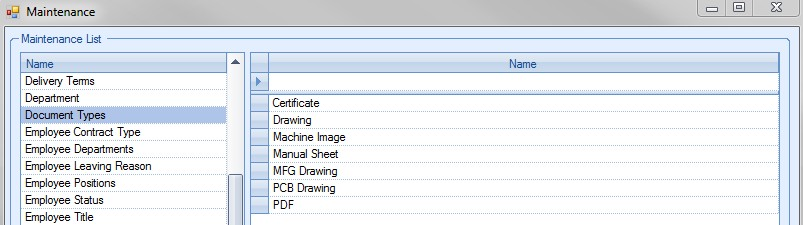
This drop-down list can be populated from the List Maintenance section of Progress in the Document Types list as shown in the screen below.
For more information on maintaining lists and the List Maintenance section of Progress, please refer to the List Maintenance section of this manual.
Notes for the documents can also be added directly to the Note field as shown below.
Once all documents and details have been added, the user can save the changes by clicking on the ACCEPT option.
Stock Receipt Edit
This section of the GRN shows all the details captured at the point of receipt.
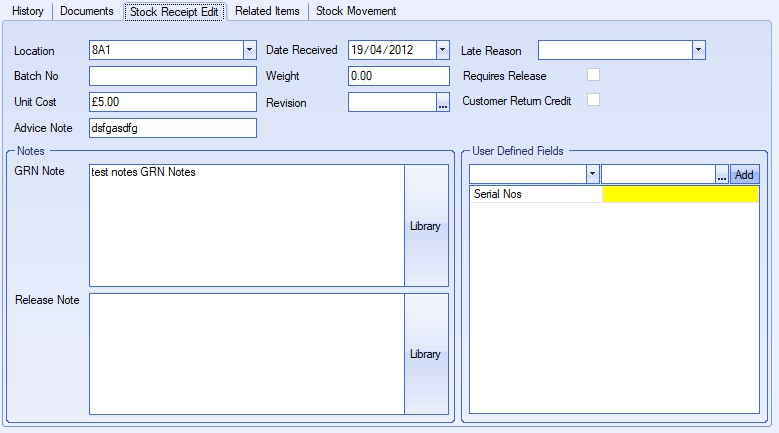
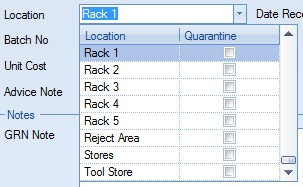
| Location | This is the stock location that the GRN was received into. The user can mend this if required by selecting the required location from the drop-down list. |
| Batch No | This is batch number recorded by the user when the inventory was received. Inventory created from a work order will have a batch number based on the work order number and the receipt number against that work order. |
| Unit Cost | This is the unit cost per UoM (unit of measure). For purchased items with a UoP (unit of purchase) conversion quantity more than 1, the UoM unit price will be calculated based on the unit price on the PO for the UoP, divided by the conversion quantity. |
Example:
| PO: | 1 box of 1000 screws @ £10.00 per box |
| Part: | UoM = Each |
| UoP = Box |
| Conv. Qty = 1000 |
The GRN unit cost would be recorded as £10.00/1000 resulting in a GRN unit cost of £0.01.
For manufactured items, this is the cost of each manufactured item based on the cost of material and labour issued and recorded against the work order and the quantity being received.
Example:
| WO: | Total WO quantity = 15 |
Labour cost recorded = £70
Cost of material issued = £30
WO receipt of 5 units will create a GRN with a unit cost of (70+30)/5 = £20
WO receipt of remaining 10 units will create a GRN with a unit cost of (70+30)/10 = £10
Once the WO status is marked as complete, Progress will recalculate the cost of all GRNs created from the work order to calculate a GRN cost for the full quantity received. In this example, the final GRN unit cost would be set to £6.67
| Advice Note | This is the advice not number or reference recorded by the user when the inventory was received. |
| Date Received | This is the date the inventory was received. This defaults to the date the GRN was created but can be changed to reflect receipts made after the material was physically received by selecting the required date from the drop-down calendar. If the date selected is a day in the future, then the following warning will appear. |
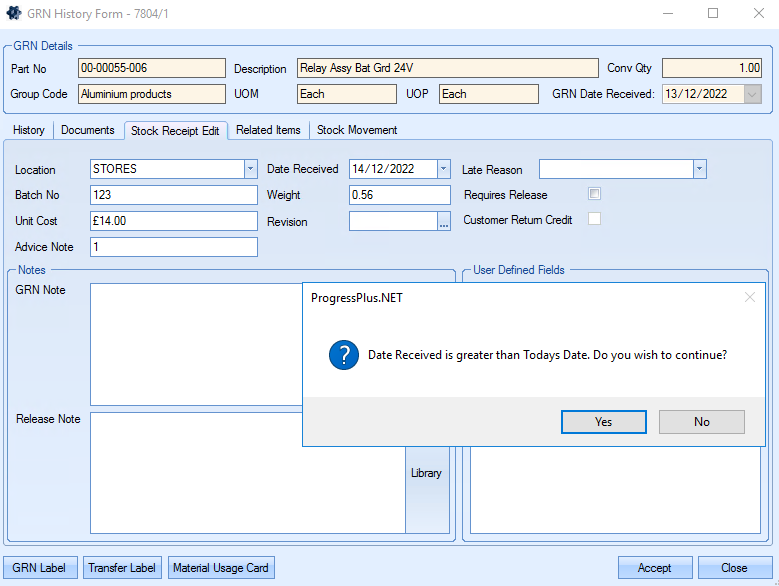
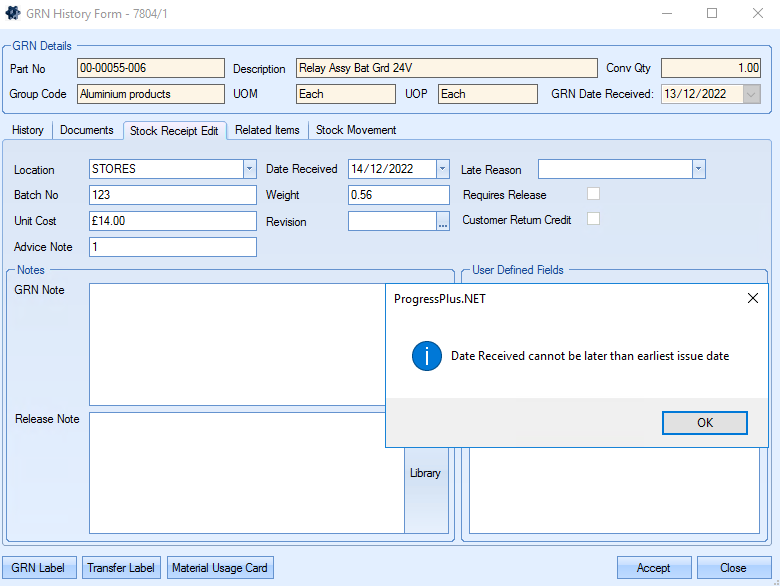
| If the user was to select “Yes”, but the date entered is a date later than the first issue of the GRN, then the following warning would also appear. This prevents the user from changing the Date Received to a date after the stock was first used. |
| Weight | This is the weight recorded against the receipt by the user. |
| Revision | For purchased parts, this is the current revision of the part being received. For manufactured items, this is the revision of the work order when received. |
| GRN Note | This field shows any GRN notes that have been recorded when the receipt was made. |
| Release Note | This field shows any release notes that have been recorded when the receipt was made. |
If any user defined fields have been created for use against the GRN record, these will be displayed in the User Defined Field section at the bottom of this screen.
Related Items
This section shows all related items within Progress associated with the GRN. These include receipts, issues, allocations, deliveries and, if the Quality module is activated, non-conformances and technical queries associated with the GRN.
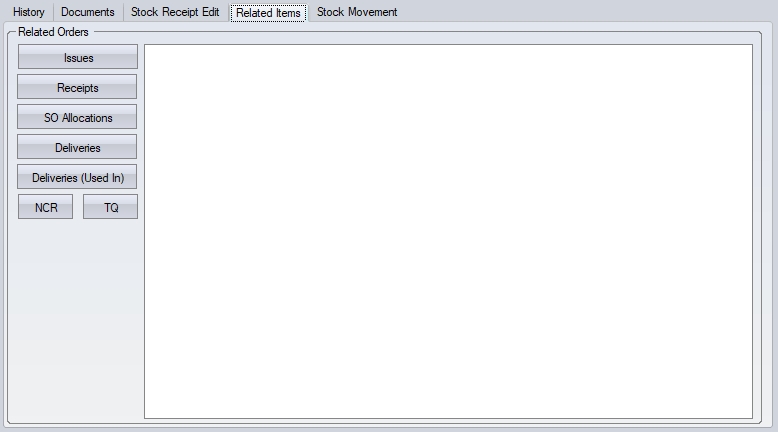
Clicking on each option will display the associated related items. Some examples are shown below.
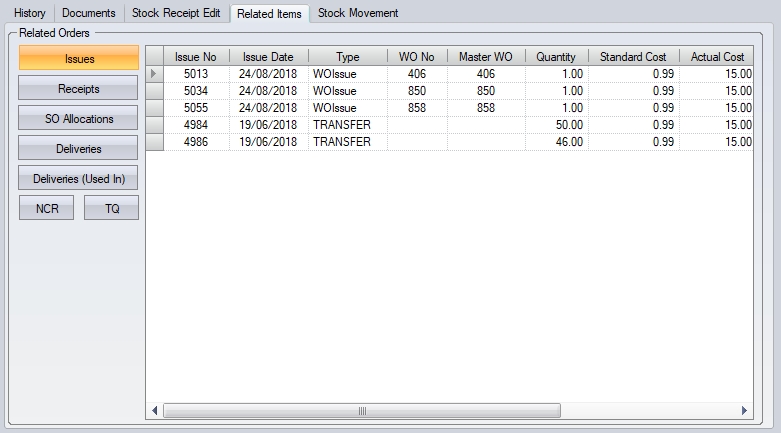
(Example showing issue details for a GRN)
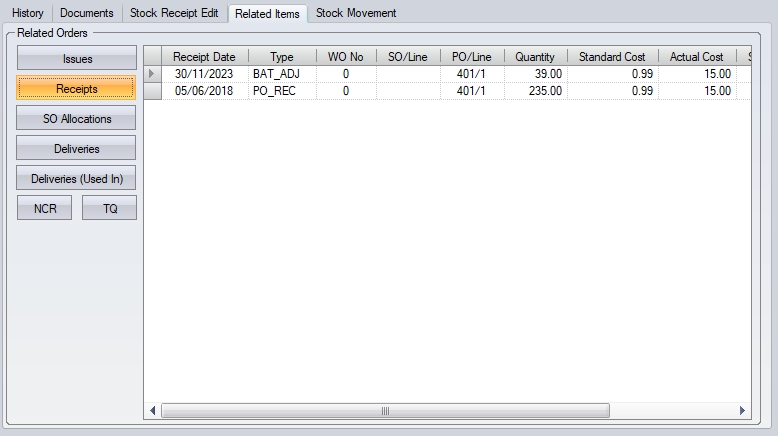
(Example showing receipt details for a GRN)
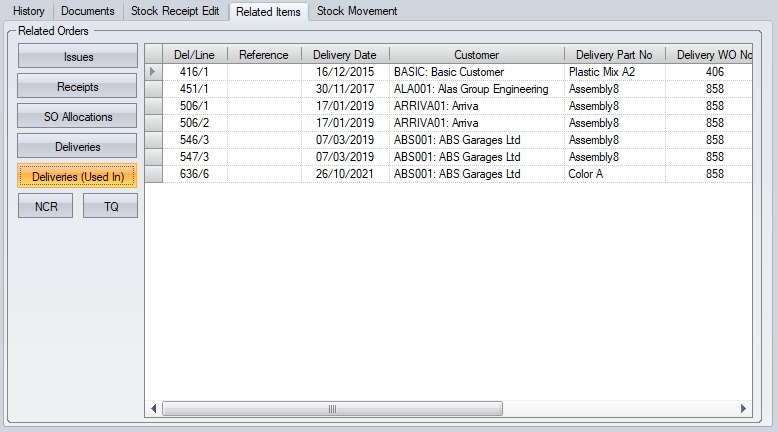
(Example showing delivery details for deliveries that contained the selected GRN)
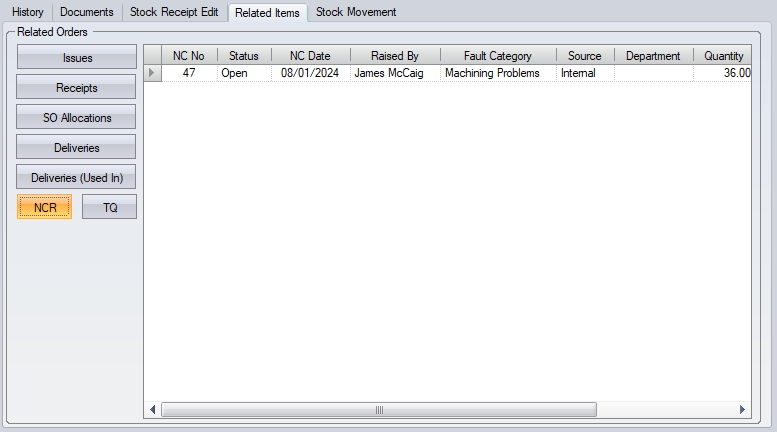
(Example showing non-conformance details for a GRN)
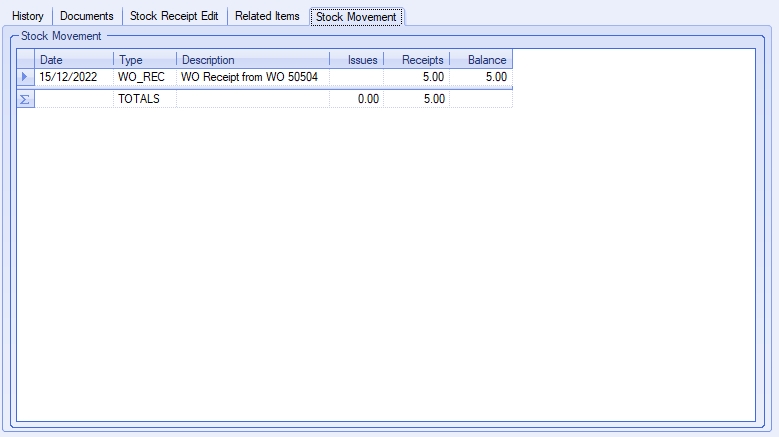
Stock Movement
This section shows a summary IN/OUT time line for the GRN, showing all instances of receipts and issues with a running balance figure shown.
GRN Printing Options
The user can also generate GRN, Transfer and Material Usage labels from this screen using the various print options at the bottom.
![]()
Clicking the GRN LABEL option presents the user with a prompt for the number of labels and the quantity to be printed on each label.
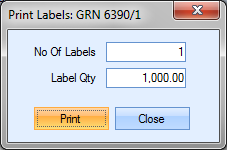
Clicking the PRINT option will send the GRN label to the designated printer (if one is set up) or to the user’s default printer.
Clicking either of the other options will automatically generate the transfer label or usage card as requested.
Printing GRN Offcut Labels
If the system is configured to use the Offcuts functionality, clicking the GRN LABEL option will present the user with a list of all individual pieces of material for that batch, allowing the user to choose which they want a label for (if not all).

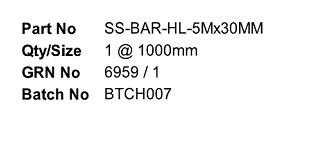
Clicking the PRINT option will generate the Offcut GRN label for the selected pieces of material. This shows slightly different information to the standard GRN label as it will include length and area details as well as the quantity as a number of "units". An example is shown below.
The user also has options to print out both a Material Usage Card and a Transfer Label for the GRN from this screen using the option provided.
![]()
The option will prompt the user to select a printer to use before printing out the selected document.
GRN Issues
While the GRN SEARCH option allows the user to view the specific receipt information for an item, the user can also view a list of issue transactions and their details using the ISSUE SEARCH option.
This presents a screen similar to the GRN SEARCH option, and allows the user to search for relevant issue information. The user has the usual grid filters available to help find what they are looking for.
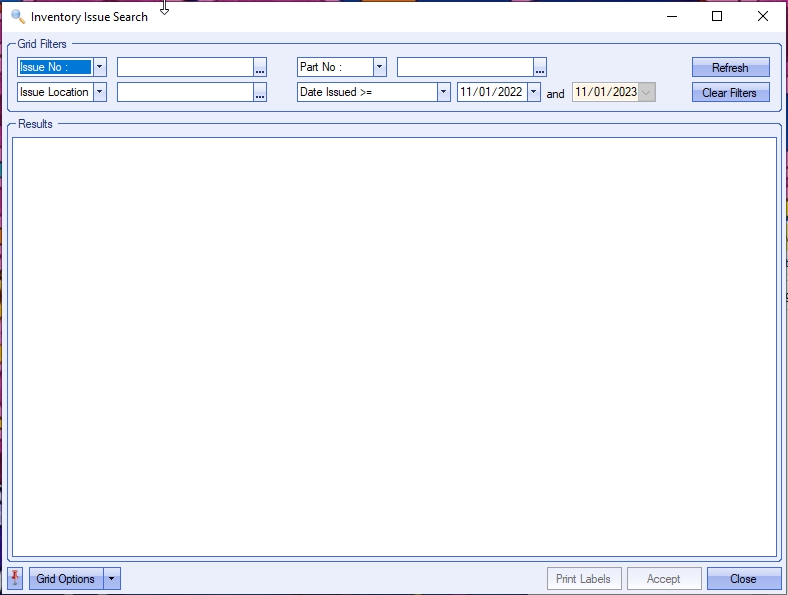
Once the relevant filters have been applied and the user has clicked the REFRESH option, the system will display a list of issue transactions that meet the criteria chosen.
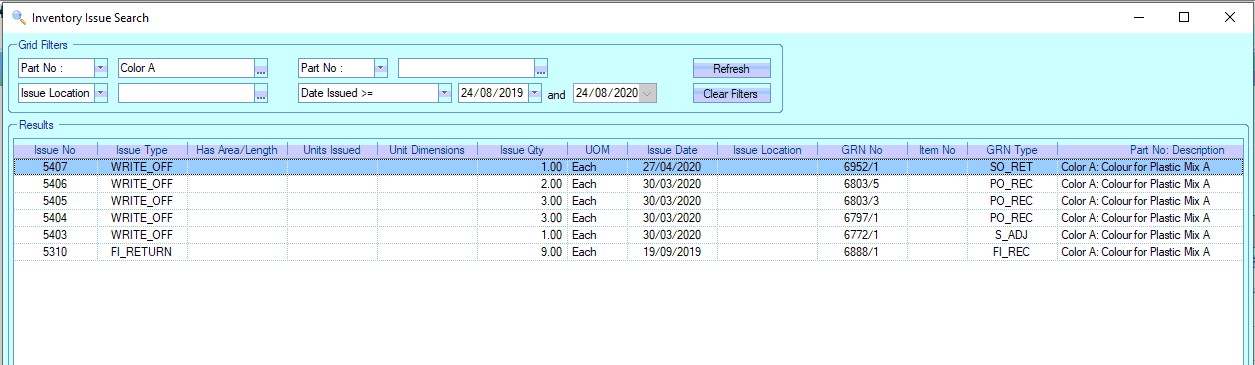
This screen lists each individual issue along with the issue type, date as well as other order related information. The user can see details of specific issues by drilling into the ISSUE NO field. This will present the user with the following form with all the details of the issue.
Issue Details
This screen is the equivalent of the GRN Stock Receipt Edit tab, but for the issue transaction selected. This shows all the associated part and quantity details of the issue transaction, as well as any notes or user defined field information that's been recorded.
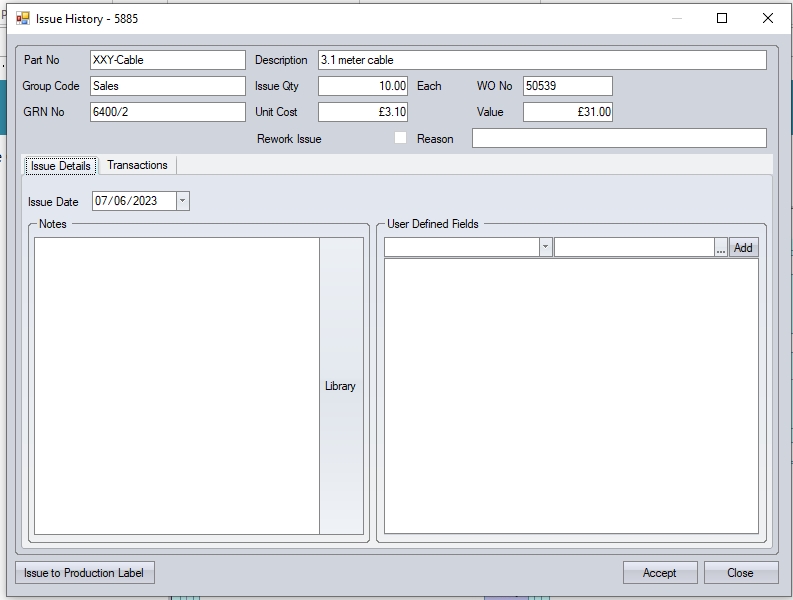
This Issue Details screen shows all the part information as well as the associated cost of the issue. Notes can be added for reference, however, some transactions will record information based on the issue type, for example, a supplier return or a write off will capture the return reason and write off reason respectively.
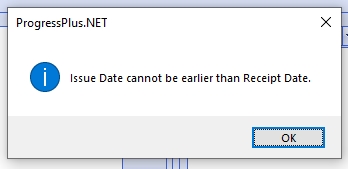
The date of the issue is also displayed here. This can be amended by the user (if required) but cannot be changed to a date that is earlier than the receipt date of the GRN being issued. Any attempt to do this will result in the following warning being displayed.
The user should save any changes by clicking the ACCEPT option.
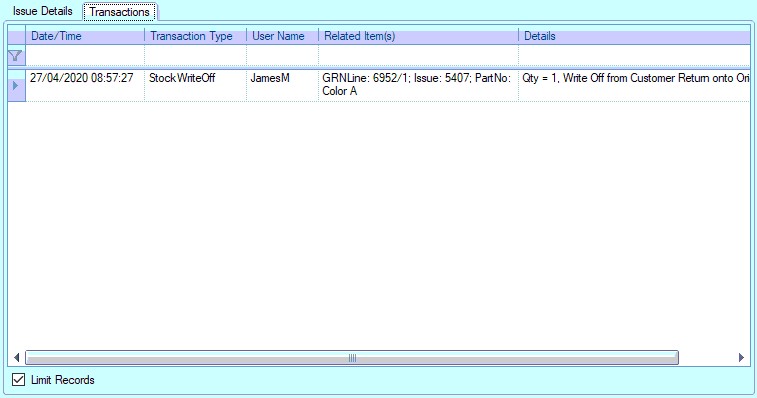
Issue Transactions
The user can view further date-stamped details looking at the Transactions tab which will provide a time line of activity for this batch.
Generating WO Issue Labels
The user can generate WO issue labels from within an selected issue using the ISSUE TO PRODUCTION LABEL print option. This option is only available within a WOISSUE-type issue record.
![]()
Multiple Issue To Production labels can also be printed directly from the Issue Search screen using the PRINT LABELS option. This allows the user to generate Issue To Production labels across multiple issue transactions if required. To generate or reprint labels, the user can tick the PRINT option against the required work order issues and then click the PRINT LABELS option to print the labels.
Enter topic text here.