Progress has a large number of pre-set fields available for all the various sections of the system, however not everyone will have enough pre-set fields available or have fields specifically for their own requirements. As a result of this, the User Defined Fields (UDFs) section of Progress allows the user to create their own fields for use in the system. These can be tailored to a variety of types and can be used across multiple section of the system resulting in auto-population of the same fields between sections, therefore removing the need to duplicate data entry. These fields can also be used in layouts within the system. The screen below shows the window presented to the user when selected.
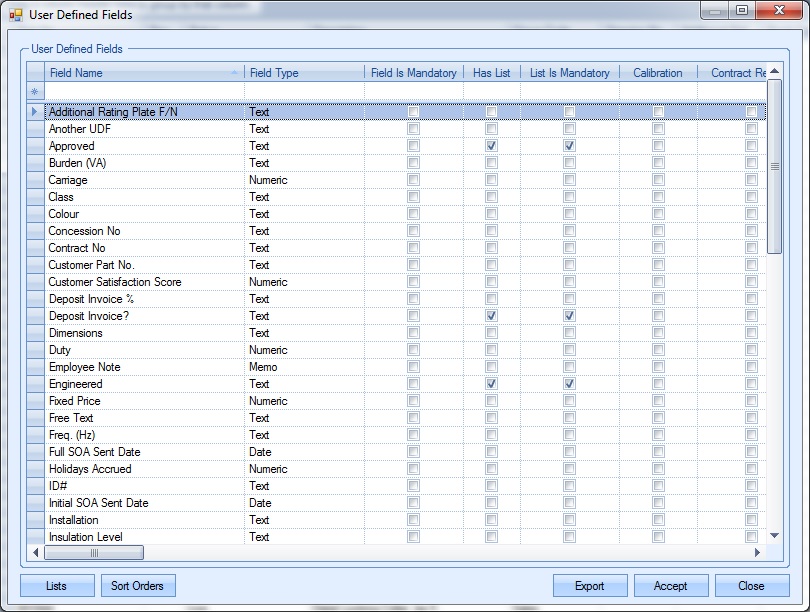
The grid displays all existing UDFs, their type, configuration and where they are presented for use in the system.
Adding New UDFs
The user can add new UDFs to the system using the blank row across the top of the grid. The fields available are as follows:
Field Name
This is the name of the UDF as it will be displayed on whatever sections it’s linked to.
Field Type
This is the type of field and indicates the type of data it will hold. This can be numeric, currency, text, etc. and can be selected from the list available.
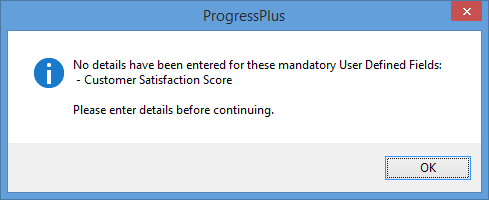
Field Is Mandatory
This option indicates whether the UDF must be completed where present. If not completed, the system will inform the user. An example is shown below.
NOTE: If the UDF is marked as mandatory, the ALWAYS SHOWN option is automatically ticked to ensure the UDF is visible.
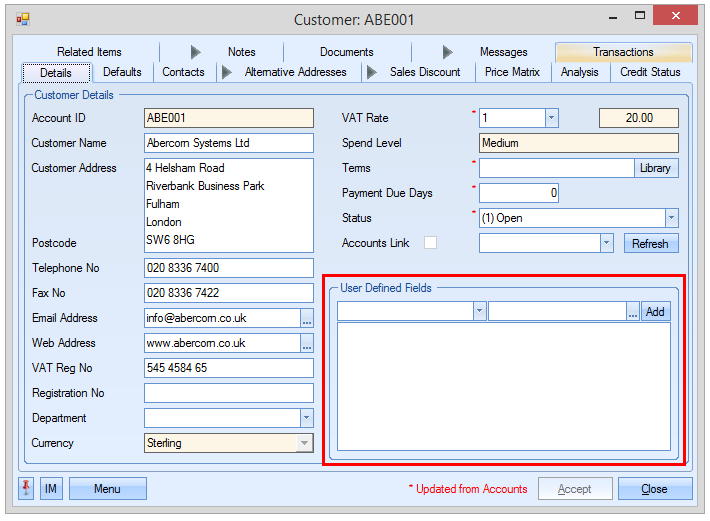
Always Shown
This option allows the user to determine whether the UDF is permanently shown in the UDF section of the associated record. If this option is not ticked, then the UDF will not be automatically listed against the associated record, however, the user can still select and populate the UDF is required.
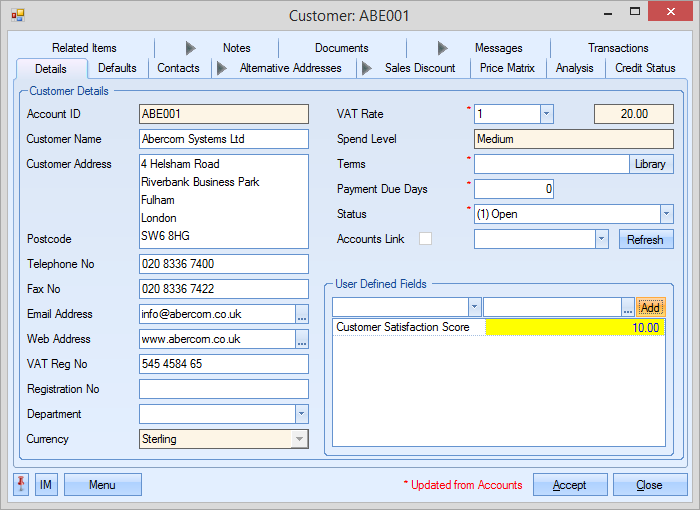
Example - Option is unticked
Using the following example UDF, Customer Satisfaction Score, with the option unticked, the UDF is not automatically listed against the customer record as shown below.
The user can still fill in the UDF if required by selecting the UDF name from the drop-down list and then adding the value.
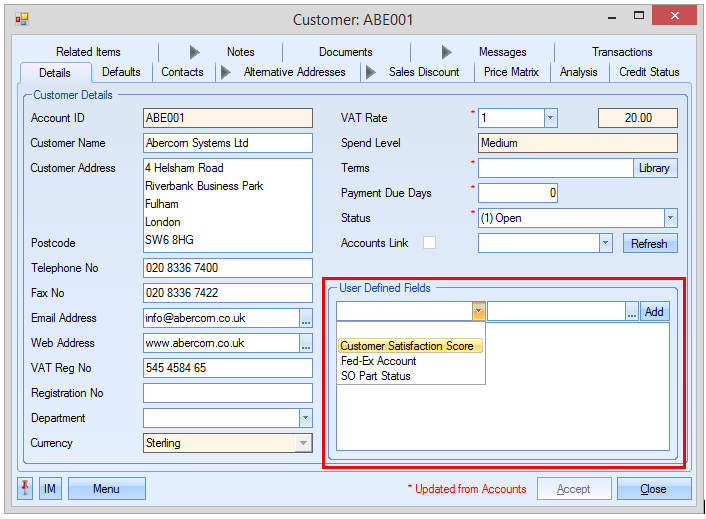
Once selected, the user can add a value. Clicking the Add option will display the UDF along with the value.
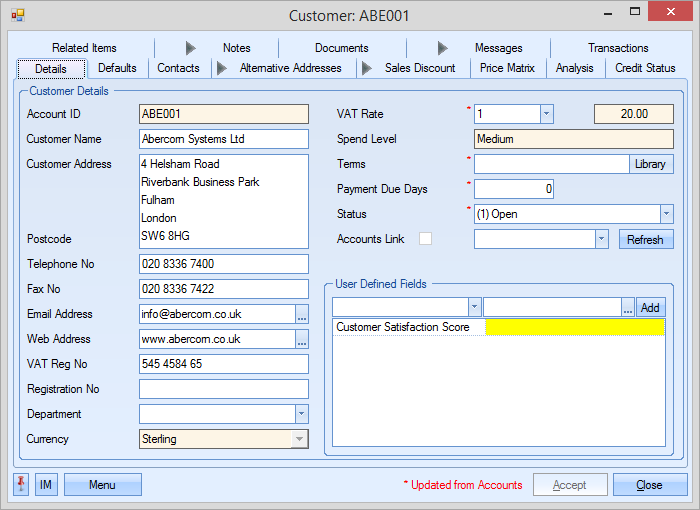
Example - Option is ticked
Using the same UDF example, with the option ticked, the UDF is automatically shown for the user to complete.
Has List
This option indicates that the UDF has a specific list of values that can be used to populate the field and works in conjunction with the LISTS option at the bottom of the screen.
List Is Mandatory
This option indicates that any values recorded in the UDF must be from the pre-defined list and that bespoke entries are not allowed. Often used when a standard list of values must be recorded for analysis. This works in conjunction with the HAS LIST and LISTS options.
The remainder of the tick boxes listed on the grid indicate where the UDF will be displayed for use. The user simply ticks the sections they want the UDF to appear. Once all the information has been entered, the user can click the ACCEPT option to save the new details.
Amending Existing UDFs
The user can amend existing UDFs by simply editing the main grid. The tick boxes can be ticked/unticked as required and the name, type and list options amended as required. Once all changes have been made, again, the user must click the ACCEPT option to save the changes.
Unfortunately, UDFs cannot be deleted from the system. To stop using a UDF, the user must simply untick all the sections of the system against the UDF so that it no longer shows.
Creating Lists for UDFs
Where a UDF has been set up to use a list, the user can create a pre-defined set of values using the LISTS option at the bottom of the window. Clicking on this option presents the user with the following window.
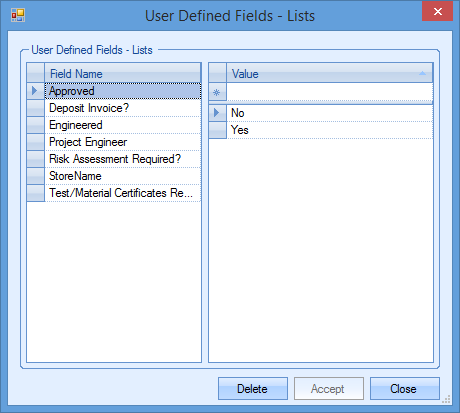
This window displays all the UDFs that’s have been set up as having a list on the left with the associated list displayed on the right. To add or amend a list, the user must select the UDF required first then amend/add entries to the list on the right hand side. Entries can be deleted from the list using the DELETE option at the bottom while new values can be added via the blank row at the top of the right hand list. Once changes have been made, the user can save the changes by clicking the ACCEPT option.
Sort Orders of Lists
Areas of Progress which have multiple UDFs can have their UDFs sorted in a particular sequence if desired using the SORT ORDERS option. Clicking this presents the user with the following window.

The left hand side of the windows shows all the section of Progress where UDFs can be used, while the right hand side of the screen shows all the current UDFs in use for the selected section. Once a particular section is selected, the right hand side shows the UDFs associated with that section along with the sort order set. The user can amend the sort order as required to ensure the UDFs are listed correctly. The SORT ORDER field is simply a numeric number. It’s by this number that the UDFs will be sorted within that section.
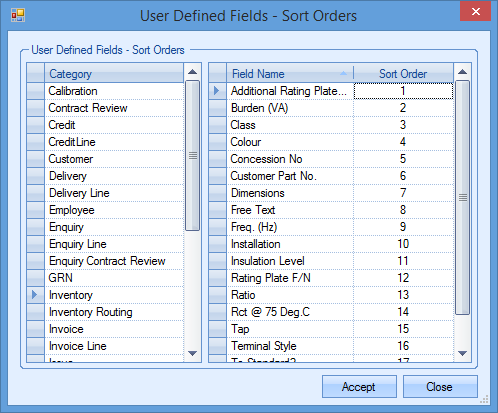
Any changes made to the sort orders can be saved by clicking the ACCEPT option.
Export
The user has the ability to export out the UDFs to Excel if required. To do this, the user simply clicks the EXPORT option at the bottom of the main UDF screen.
![]()
The user will be prompted to provide a name for the file created before the spreadsheet is opened for view.
