Progress allows projects to be created for use when large jobs may span multiple sales orders. By using a project, multiple sales orders can be grouped together and reported on. The Projects option in the Maintenance menu will present the user with the following screen.
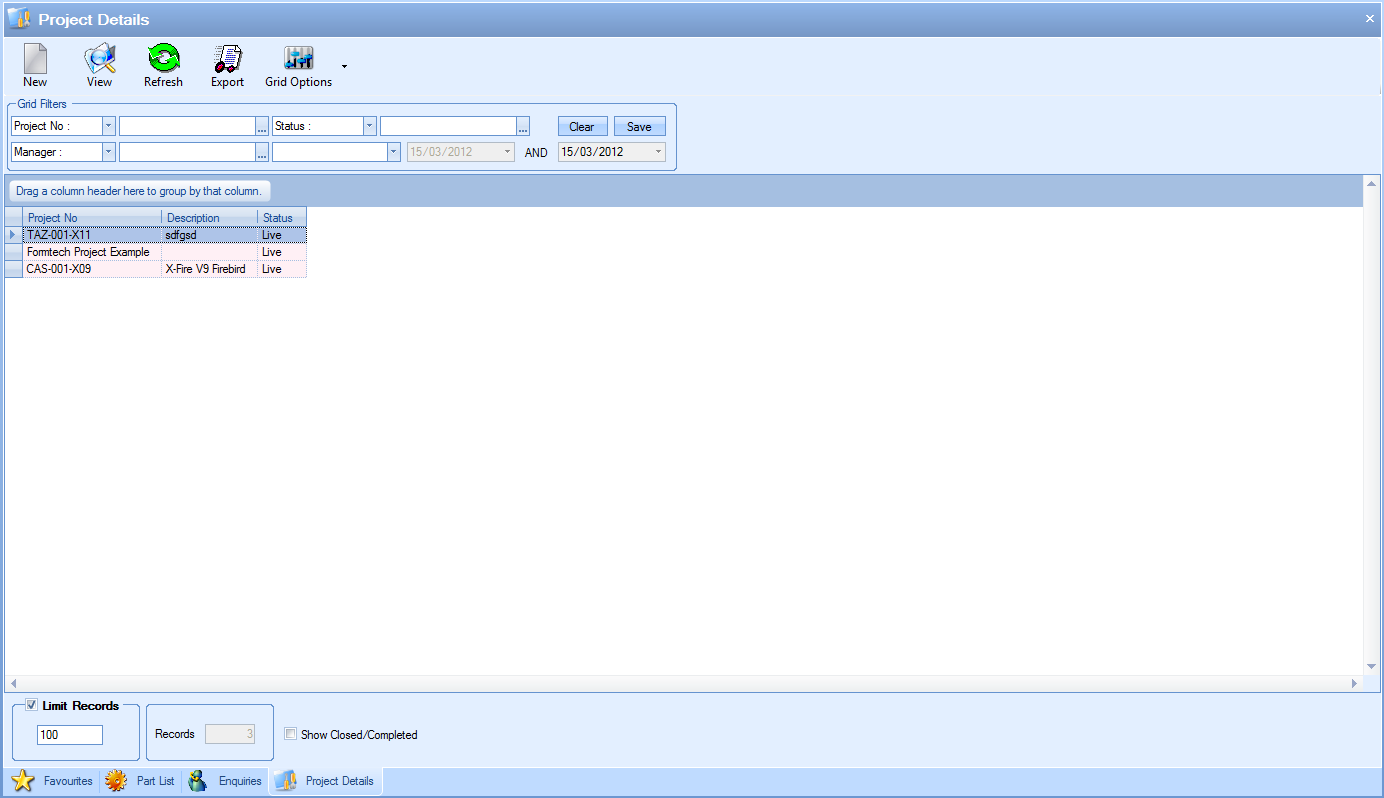
All existing projects are displayed in the main grid with the option to filter by a variety of means at the top using the grid filters (like most of the other Progress screens). The options at the top allow the user to create new projects, view/amend existing projects as well as export the list of projects out to Excel for further use out with Progress.
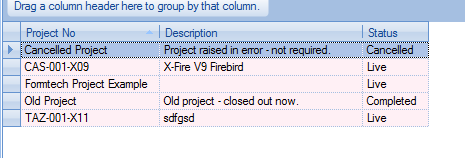
The main grid only shows active or “live” projects by default but the user can view inactive or “closed” projects by ticking the SHOW CLOSED/COMPLETED option at the bottom of the screen.
![]()
Ticking this and refreshing the screen will update the main grid to show any inactive projects.
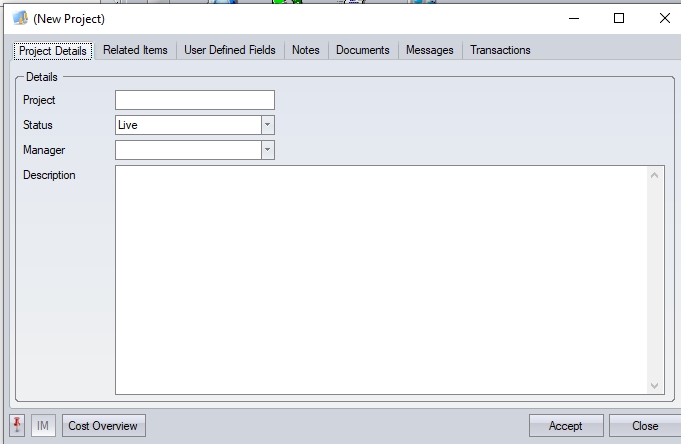
Adding New Projects
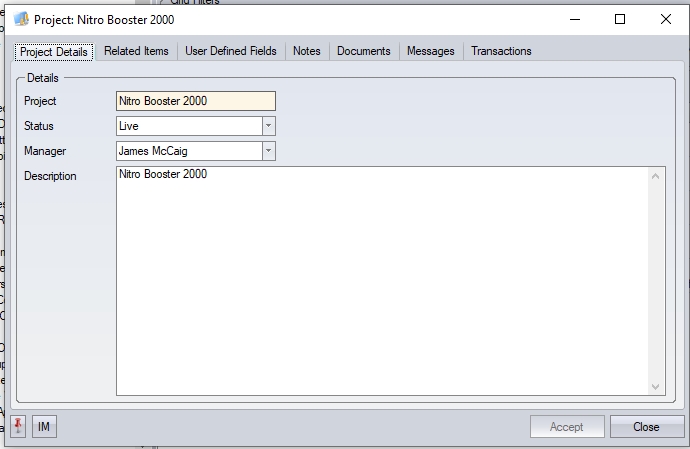
To add new projects to the system, the user must click the NEW option at the top of the screen. This presents a new project window which the user can complete.
The user can assign a name, assign a status and a manager for the project before providing further details in the description field.
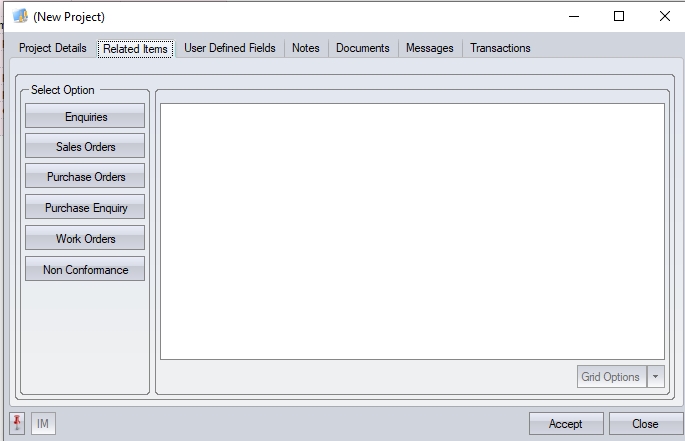
The Related Items tab will show any linked records in the system. This will be where the project has been assigned to sales orders, work orders, etc.
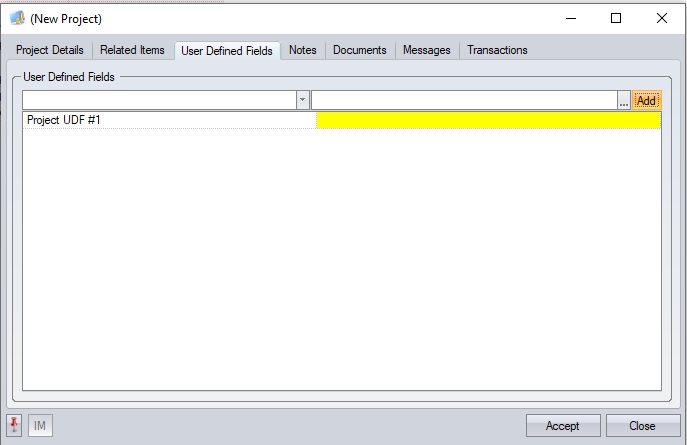
The User Defined Fields tab will show any user defined fields that have been set up against projects. For more information on user-defined fields, please refer to the Maintenance section of the manual.
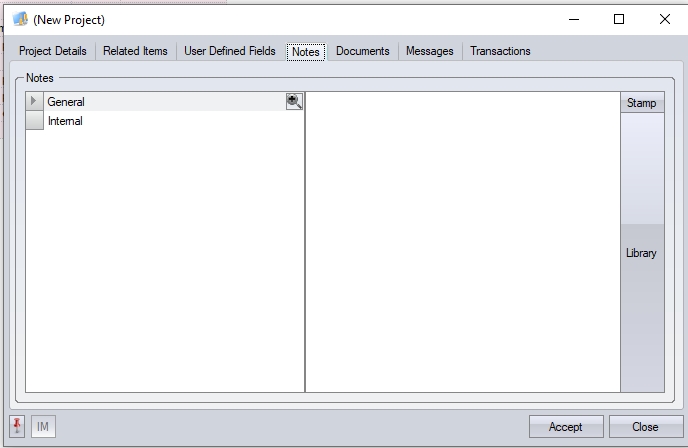
Further notes can be added via the Notes tab, including notes from the Notes Library.
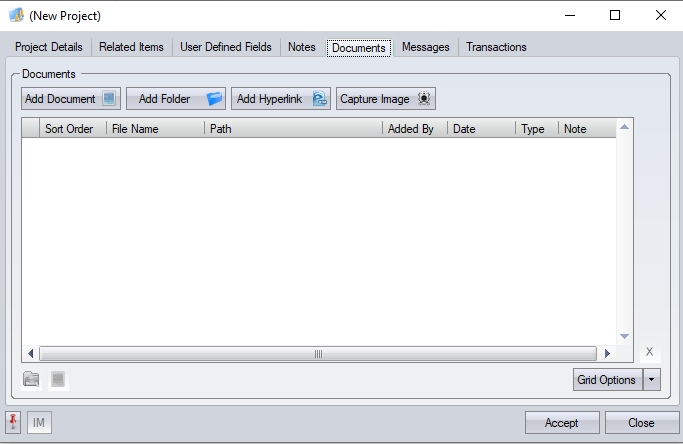
If there are any associated documents for the project, these can be linked to the project via the Documents tab, just like the rest of the system.
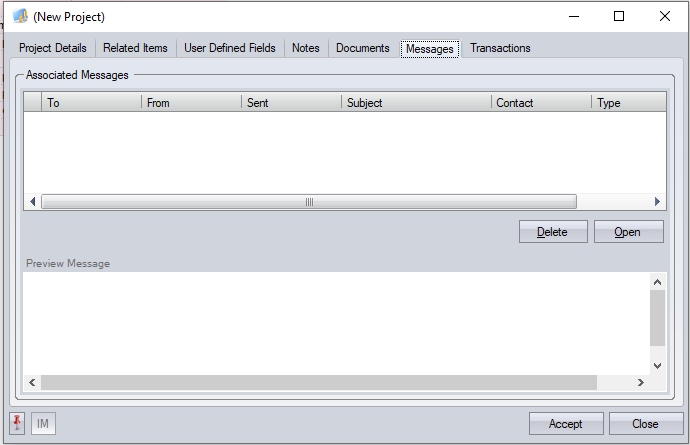
If any internal messages have been sent within Progress using the IM section, these can be viewed here in the Messages tab.
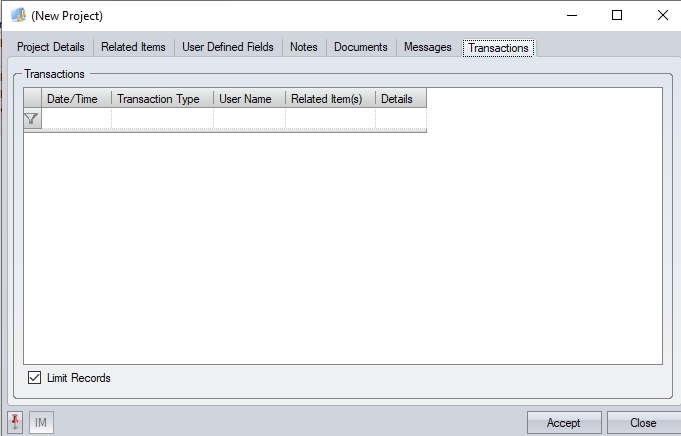
The TRANSACTION tab shows a history of all the transactions that have occurred with the project in question. Initially this will be blank but will start to show transactions over time.
Once all the details have been entered the user can click ACCEPT to save the project in the system.
Viewing/Amending Existing Projects
The user can view or amend the details of an existing project using the VIEW option at the top of the project screen or double-click the project in the main grid. This will display the details of the project selected.
The user can amend any of the details or view any information associated with the project using the various tabs available as described above. Any changes made can be can be saved by clicking the ACCEPT option.
Completing/Cancelling Projects
If projects have come to completion or have been cancelled, the project itself can be closed out by updating the status of the project. To do this, the user simply opens the project itself and changes the STATUS field to either COMPLETE or CANCELLED, depending on the scenario.

Once changed, the user can save the changes by clicking the ACCEPT option and closing the project. The project will now drop off the project list but can be viewed by ticking the SHOW CLOSED/COMPLETED option at the bottom of the screen.
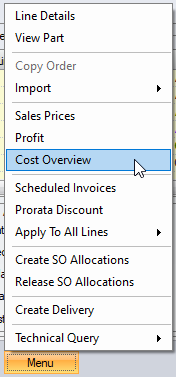
Cost Overview (Project)
This option presents the user with a cost overview screen for the selected project. This screen lists all the associated cost details for the project, both summarised and with detail.
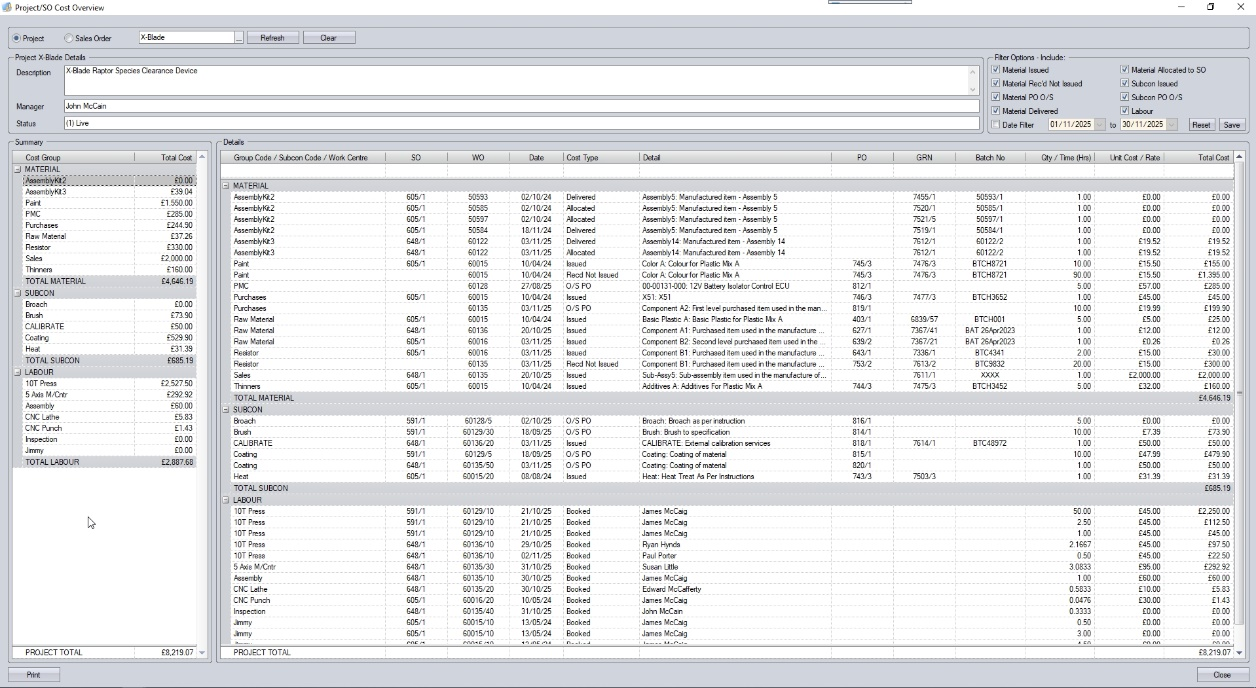
The Cost Overview screen can also be viewed based on a sales order, with the option at the top of the screen for the user to switch between.
![]()
This screen is also accessible from within a sales order, via the Menu > Cost Overview, where the user will be presented with a cost overview of the selected sales order.
For more information on sales orders, please refer to the Customer > Sales Orders section of the manual.
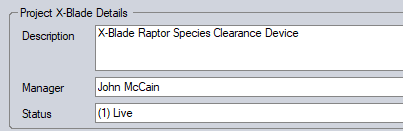
Upon opening the Cost Overview screen, the screen will display all the details of the selected project at the top.
The lower part of the Cost Overview screen shows summary and detailed breakdowns of all the associated costs based on the selected filters above. Since projects can span multiple sales orders, the lower part of the screen will show a summary breakdown by group code (Material), subcontract code (Subcon) and work centre (Labour) which summarises the material, subcontract and labour costs across all sales orders associated with the project, while on the right you have the details associated with each summary category, with all the associated orders, parts, quantities, cost values, etc., with both sections having summary totals for each element and overall too.
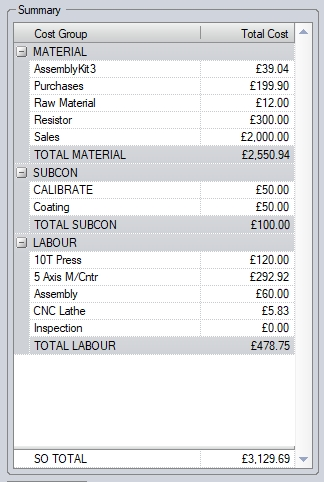
(Summary costs)
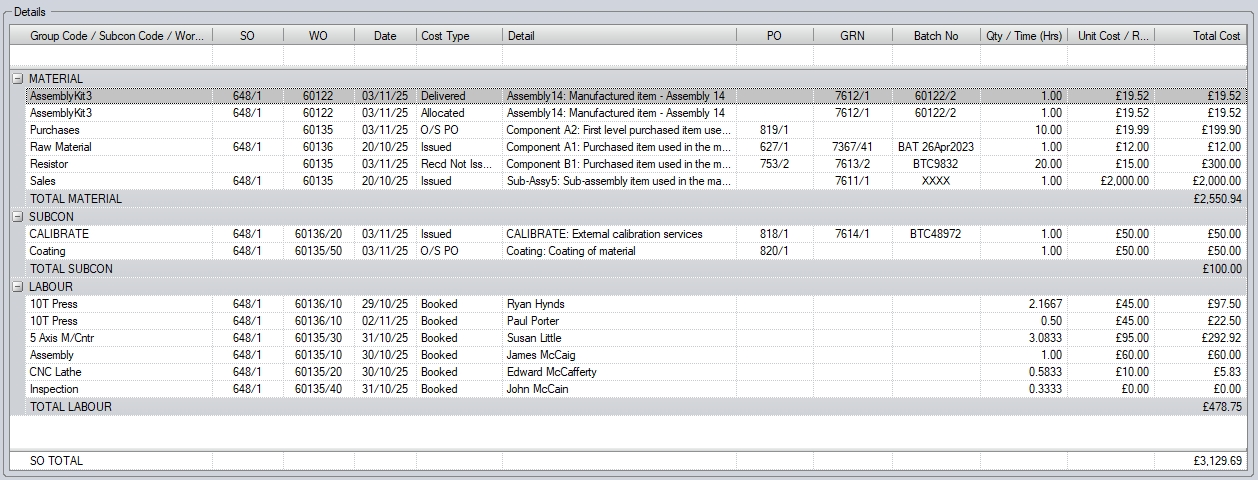
(Detailed costs)
Like many of the grids in Progress Plus, the user can drill into the information in many of the columns to quickly access parts, orders, etc. by clicking into the field as shown below.
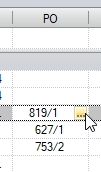
Doing so will open the selected order, GRN, part, etc. for the user to see further details.
To the right of the project details, at the top, the user has a selection of options available regarding what’s shown on the Cost Overview screen.
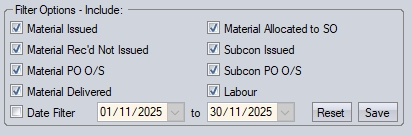
These options allow the user to select which elements are displayed on the screen, allowing them to focus on specific elements associated with the sales order or project.
•MATERIAL ISSUED shows all material issued to associated work orders linked to the order/project
•MATERIAL REC’D NOT ISSUED shows all material purchased for the order/project which has been booked into stock, but not yet issued to the associated work order
•MATERIAL PO O/S shows all purchase orders raised for the sales order/project which have yet to arrive from the supplier(s)
•MATERIAL DELIVERED shows cost value of all delivered items to the customer(s)
•MATERIAL ALLOCATED TO SO shows all finished goods stock allocated to the order/project
•SUBCON ISSUED shows all subcontract costs issued to work orders associated with the order/project
•SUBCON PO O/S shows the details of subcontract POs raised for work orders linked to the order/project, which have yet to be received back from the supplier(s)
•LABOUR shows all associated labour costs recorded against work orders linked to the order/project
•DATE FILTER allows the user to filter any of the selected option above by date range
The user can select any combination of these options, depending on what they wish to see, with the selected item details displayed in the grids below.
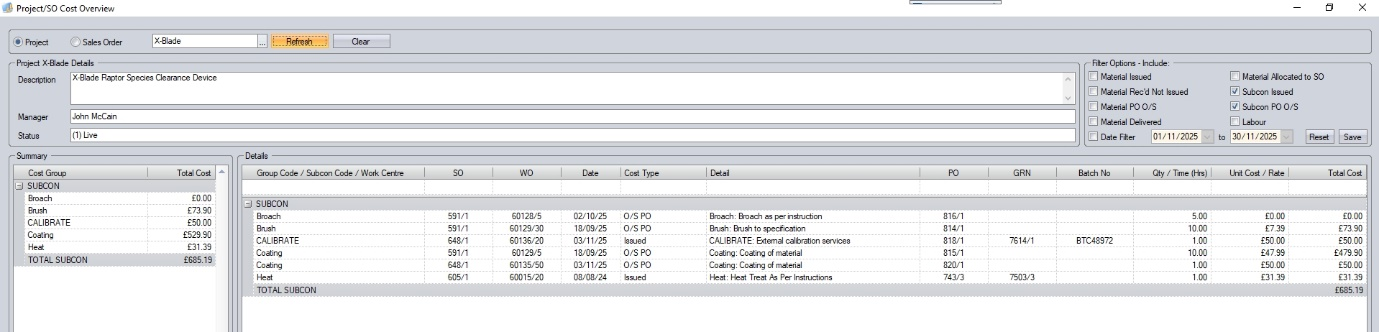
(Subcon details only example)
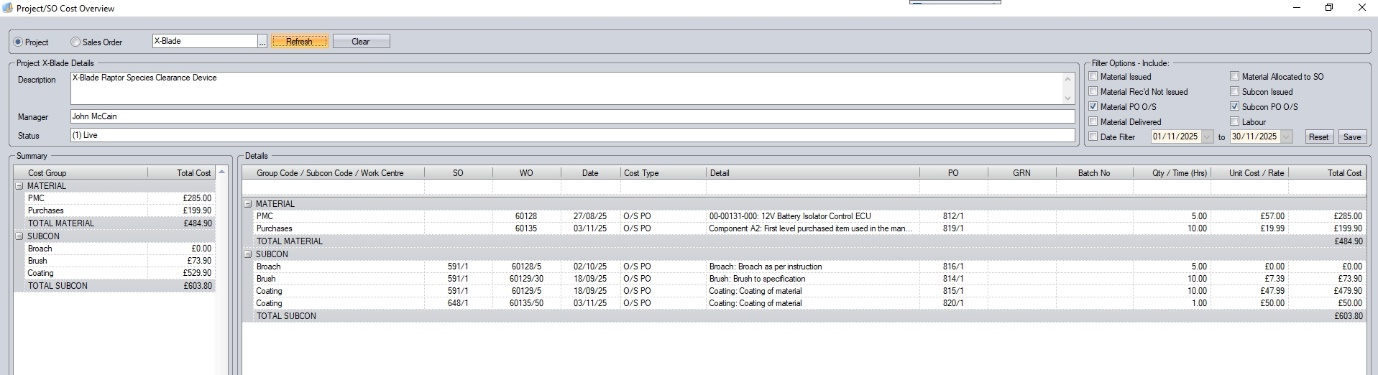
(Outstanding POs only example)
The user can also generate summary and detailed reports for the selected information using the PRINT option at the bottom.
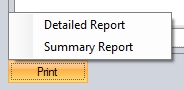
Selecting either of the print options will generate a report based on the filter options selected by the user on the screen.
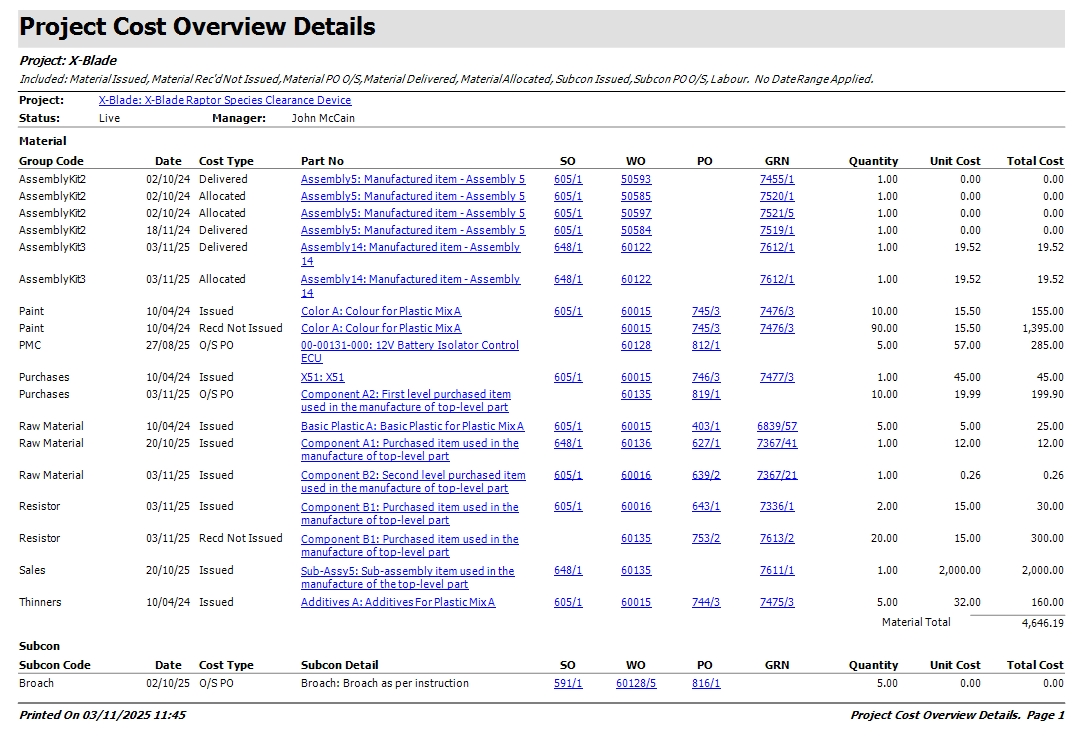
(Detailed report)
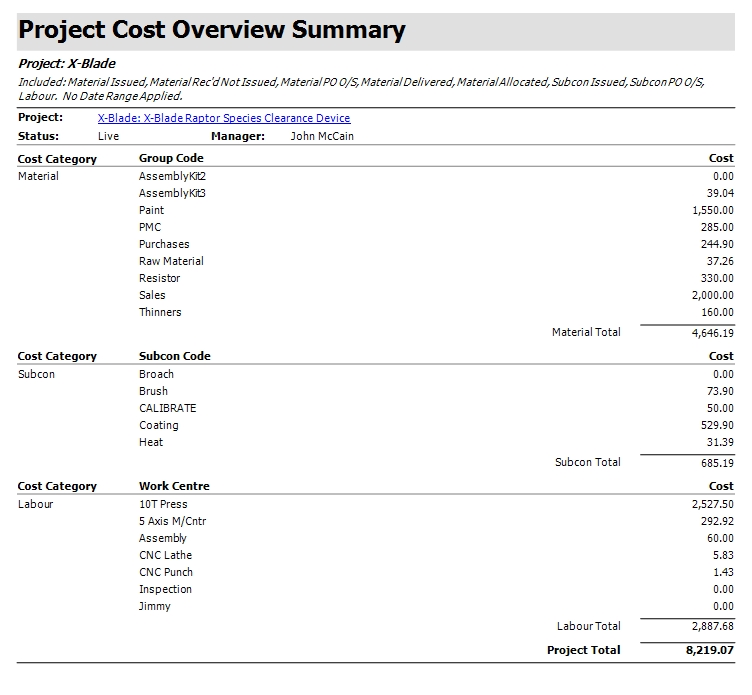
(Summary report)
Exporting Projects
The list of projects in the system can be exported out to Excel for further use by clicking on the EXPORT option at the top of the projects section. The user will be prompted to give the export file a name before the spreadsheet is created and opened for the user to see as shown below.