This section of Progress allows the user to create and maintain the subcontract codes used within the system for all external operations that have to be done as part of the manufacturing process. Clicking this option will present the user with the following screen.
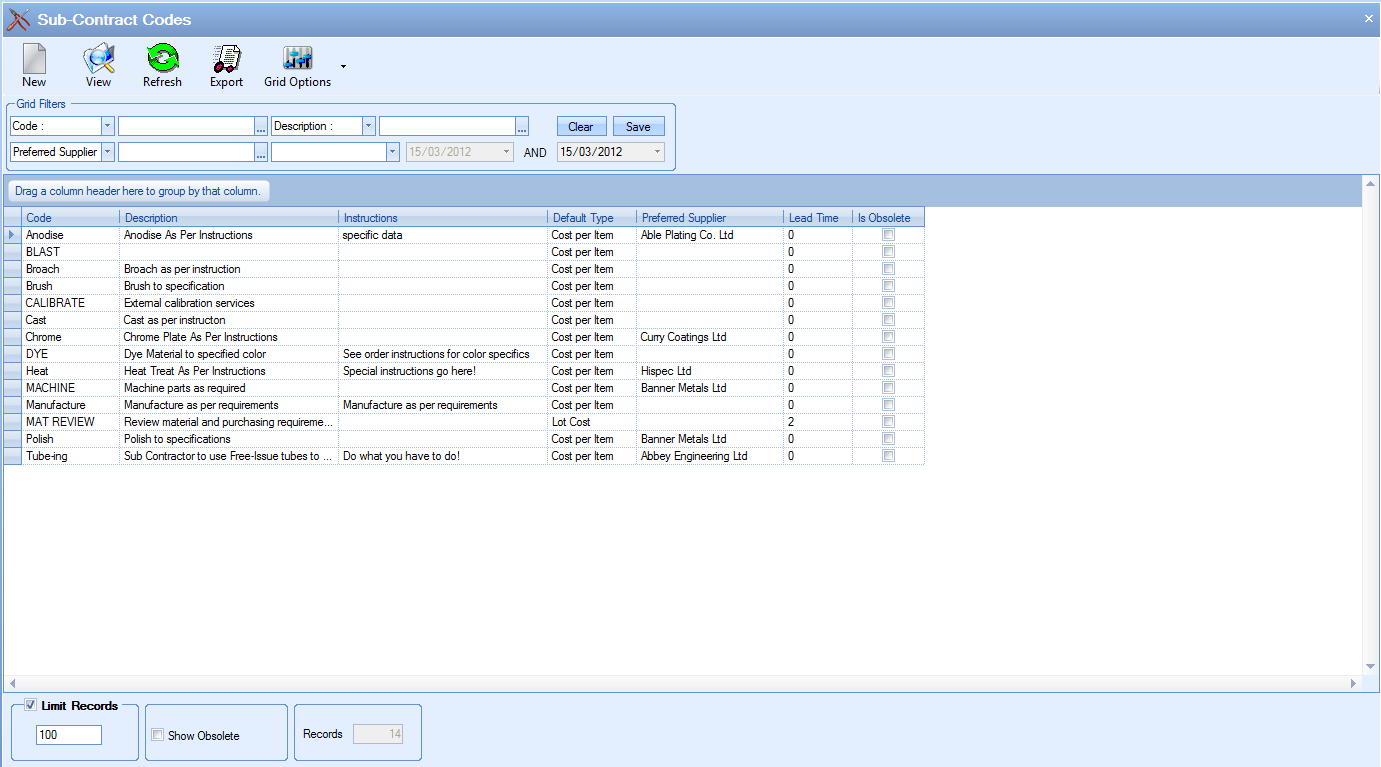
All existing sub-contract codes are displayed in the main grid with the option to filter by a variety of means at the top using the grid filters (like most of the other Progress screens).

The options at the top allow the user to create new sub-contract codes, view/amend existing codes as well as export the list of sub-contract codes out to Excel for further use out with Progress.
The main grid will display all existing sub-contract codes in the system. Old codes which have been marked as obsolete are not shown by default but can be included in the grid by clicking the SHOW OBSOLETE option at the bottom of the screen and clicking REFRESH at the top.
![]()
Adding New Sub-Contract Codes
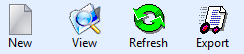
The user can add new sub-contract codes to the system by clicking the NEW option at the top of the screen. This will display the new sub-contract window as shown below.
The following is a list of fields that are available for completion.
Sub-Contract Code
This is the short code that represents the sub-contract operation. Typical examples would be PLATING, ANODISING, PAINTING, HEAT, etc.
Status
This is the sub-contract code status. This determines whether the sub-contract code is active or obsolete.
Nominal Code
This is the default nominal code for this sub-contract code. This will default onto any purchase orders raised for this sub-contract operation.
Description
This field allows the user to record a description for this sub-contract operation. Typically this will be a generic description that can be applied to all instances of this subcontract operation (for example, “plate as per specification”, etc.). This description will pull through to the SHORT OPERATION DESCRIPTION field when added to a part or a work order and also to the purchase order LINE DESCRIPTION when a purchase order is created.
Instructions
These are the specific instructions for the sub-contract operation. These instructions can change from work order to work order so this will often be left blank against the sub-contract code itself as it can be added later on against specific parts and/or jobs. However, if this is populated against the sub-contract code, this will pull through to the part routing Operations Instructions field or, if added direct to a work order, to the Operations Instructions field of the WO routing operation. When purchase orders are created for the sub-contract requirements of a work order, this information will pull through to the purchase order line EXTERNAL NOTES field. This field can also be populated from the Notes Library if required.
Inspection Notes
These are the specific inspection instructions for the sub-contract code. These instructions can change from work order to work order so this will often be left blank against the sub-contract code itself as it can be added later on against specific parts and/or jobs. However, if this is populated against the sub-contract code, this will pull through to the part routing INSPECTION NOTES field or, if added direct to a work order, to the INSPECTION NOTES of the WO routing. When purchase orders are created for the sub-contract requirements of a work order, this information will pull through to the purchase order line INTERNAL NOTES field. This field can also be populated from the Notes Library if required.
Preferred Supplier
This allows the user to specify a default supplier for raising the purchase orders against for this sub-contract code. This will default to the Items To Be Sub-Contracted screen, however this can be changes at the purchase order stage if required.
Lead Time
This allows the user to record a default lead time as a number of days against the sub-contract code. This is the time it takes for the operation to be done by the supplier.
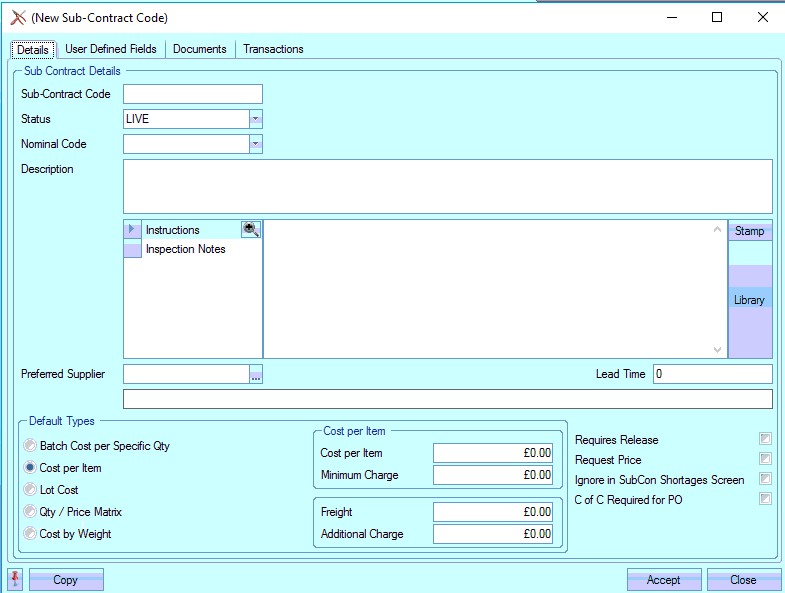
Default Types (Costings)
This section allows the user to determine how the sub-contract operation is cost. These options allow the user to set default setings against each subcontract code. The user has 5 options available to choose from. The costing method of a part's routing operation will default to the selection made against the sub-contract code, but can be changed if necessary by the user. All options have default freight and additional charge option too, allowing any known costs to be set.
The options available are as follows:
Cost Per Item
This option allows the user to enter a cost per item for the sub-contract cost and can be used in conjunction with a specified minimum order quantity. The following example has a Cost Per Item of £1.25 with a minimum charge of £75.
The system would cost any quantity up to 60 (£75/£1.25 = 60) as costing the minimum charge of £75 i.e. to plate 1 item = £75, 15 = £75, 42 = £75 etc. as these quantities do not fulfill the minimum charge. Any quantity greater than 60 would be cost at Minimum Charge + Cost per Item e.g. a quantity of 80 would be cost at £100 (£75 + 20 x £1.25).
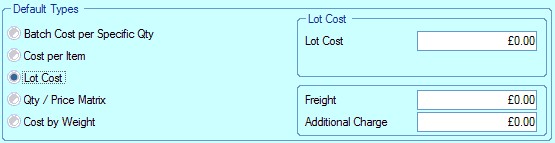
Lot Cost
This option allows the user to enter a single cost for the sub-contract requirement. This is used when a fixed fee has been agreed with the supplier. The example below shows a fixed fee of £100. This would be the same whether the quantity being sub-contracted was 1 or 1000.
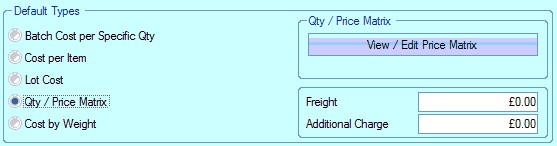
Qty/Price Matrix
This option allows the user to record price breaks against different quantities. The user can add the price breaks for this sub-contract operation by clicking on the VIEW/EDIT PRICE MATRIX option which appears to the right.
Once selected, the user will be presented with the following window.
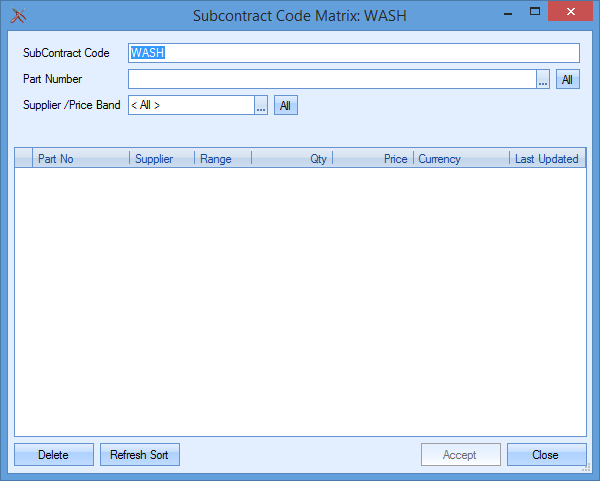
Here the user can select the associated part number and supplier before adding the relevant costing information for all quantities. The window below shows an example part set up with a variety of price breaks.
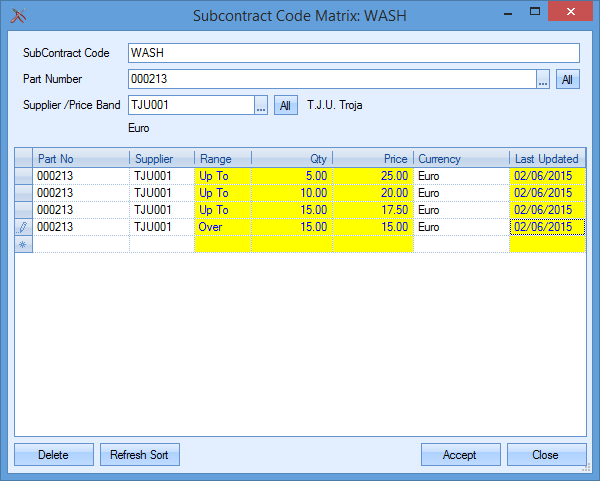
Costing information can be added for multiple suppliers if known by clicking the ALL option beside the supplier field. Costing information can also be set up for all suppliers assigned to a particular price band. Examples of this are shown in the window below.
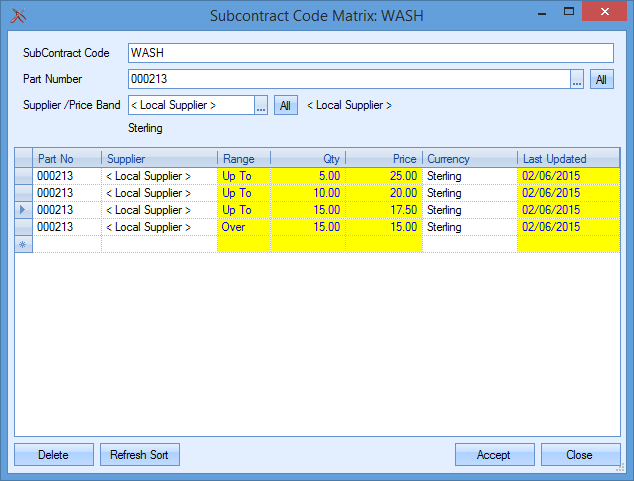
When using price bands, the costings will apply to all suppliers who are assigned to the price band. For more information on price bands, please refer to the supplier section of the manuals.
Batch Cost per Specific Qty
This option permits the user to enter a batch size and cost for that specific batch. The following example has a Batch Qty of 50 and a Batch Cost of £20.
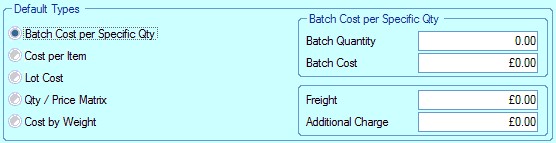
If the user were to send a batch of 200 items for subcontract work the cost would therefore be £80 (200/50 x £20).
Cost By Weight
This option allows the user to specify a cost per weight in kilograms. The system will calculate the total weight based on the quantity and individual unit weight of the units being subcontracted. The unit weight is picked up from the part's inventory record.
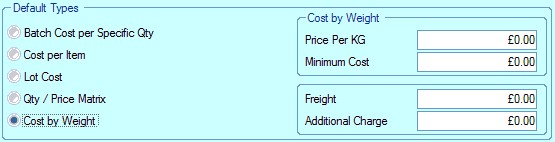
When the subcontract purchase order is raised, the part's unit weight it multiplied by the price per kilogram to calculate the subcontract cost for the purchase order, however, this can be amended on both the part routing operation and the work order operation in cases where the weight of the part is not the weight of the item being dispatched to the sub contractor.
Additional Options
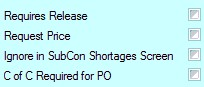
Requires Release
This option places all receipts of purchase orders containing this sub-contract operation on temporary hold. This would apply to ALL instances of this sub-contract code. This is often used where items need to be inspected before being released for use. Individual purchase orders can be set as “requires release” if not all instances need to be handled this way. For more information on this option, please refer to the Inventory section of Progress.
Ignore In SubCon Shortages Screen
This option will stop any requirements for this sub-contract operation from appearing on the Items To Be Sub-Contracted screen. This is often used for operations that do not require purchase orders to be raised and are manually managed within the work orders.
Request Price
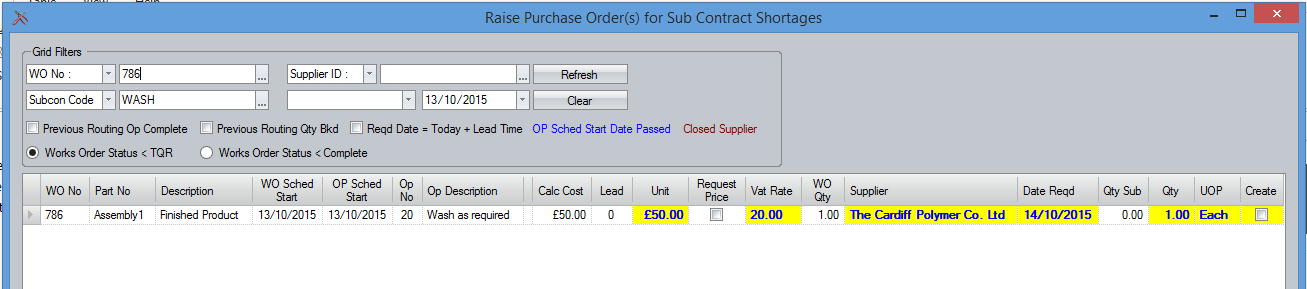
This option allows the user to determine whether the subcontract purchase order price defaults to the calculated price based on the selected costing methods above or not. If this option is left unticked, then the Subcon Shortage screen will default to the calculated price.
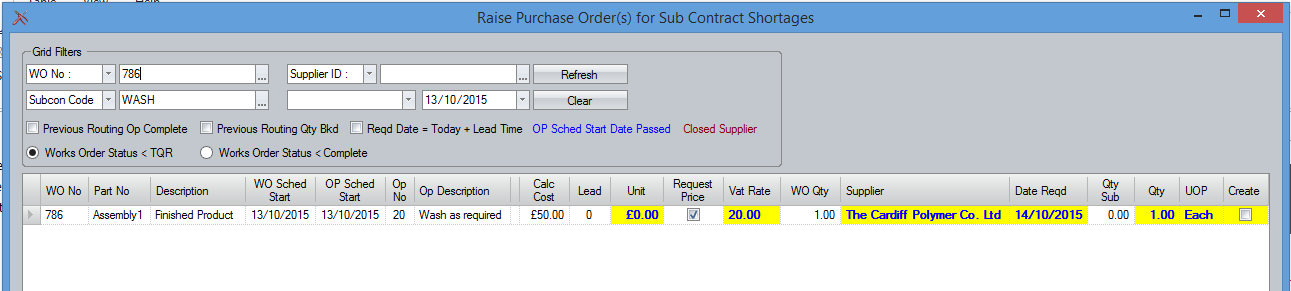
If the Request Price option is ticked, then the Subcon Shortage screen will default to zero to allow the user to specify the price.
Once all the subcontract details have been entered, the user can save the new subcontract code by clicking the ACCEPT option. The user will be returned to the subcontract screen with the new sub-contract code now displayed in the list.
CofC Required For PO
This option automatically ticks the CofC Required field on subcontract PO when its created.
Amending Sub Contract Codes
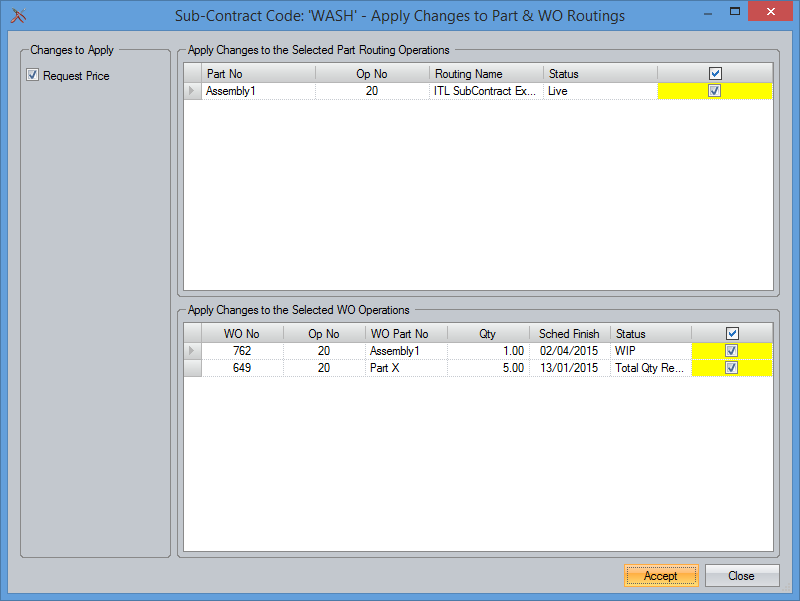
If the user makes changes to existing subcontract codes, the system will highlight the parts and existing work orders where these changes can be applied. This allows the user to ensure the latest subcontract configuration is applied to the appropriate areas of the system.
This prompt is only available on the following field changes:
Instructions
Inspection Notes
Preferred Supplier
Lead Time
Default Type/Cost
Request Price
When the prompt window above is displayed, the user can tick/untick the items they wish to update before clicking ACCEPT to commit the changes. The selected parts and work orders will then be updated accordingly.
User Defined Fields
If the user has set up any user defined fields (UDFs) set up for use against sub-contract codes, then they will appear in this tab for the user to complete.

Related Items
The user can view where sub-contract codes are used and any open purchase orders or work orders for the current sub-contract code on this tab. Clicking the options will display the information accordingly.
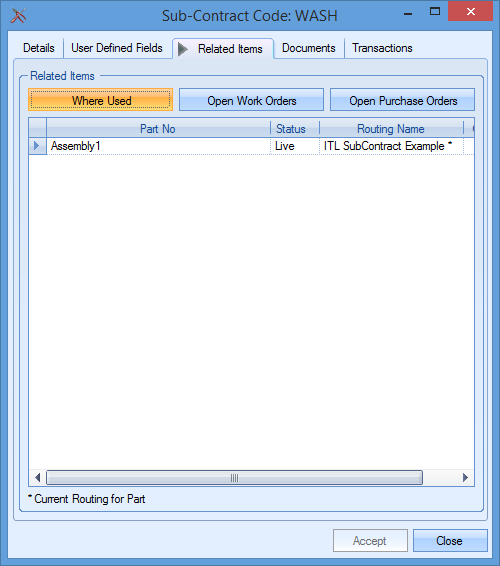
(Where Used)
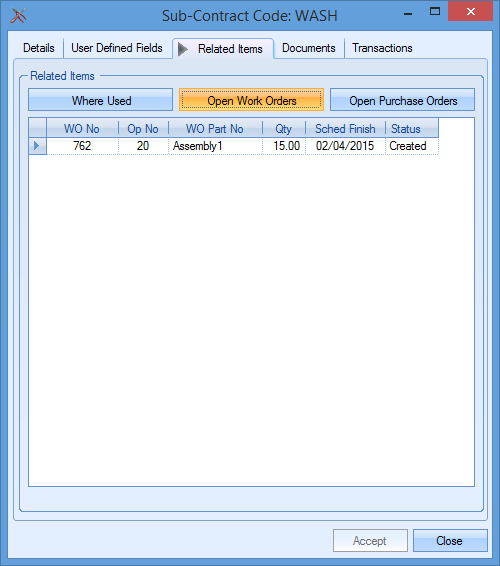
(Open Work Orders)
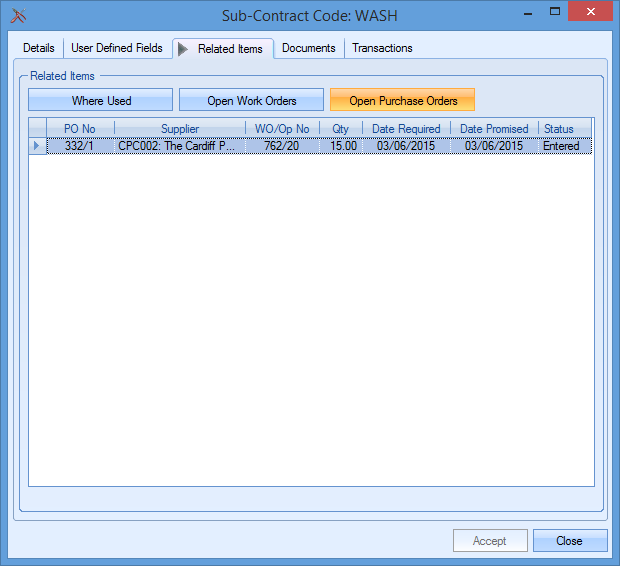
(Open Purchase Orders)
Documents
The user has the ability to record/link documents against the sub-contract record. These could be communications between suppliers or quality control documents associated with the operation.
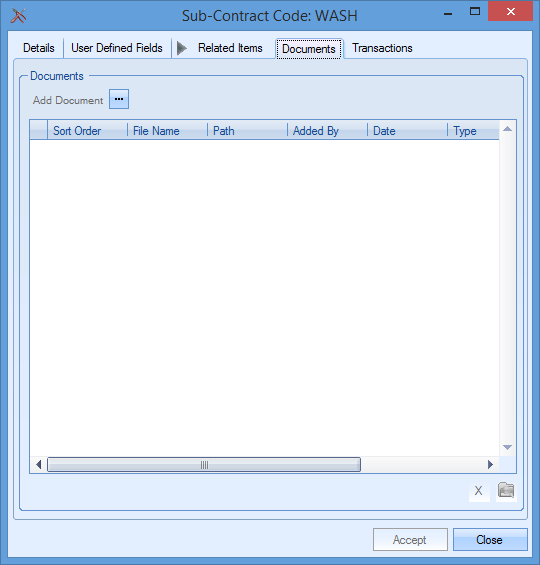
This screen works identically to all the other similar screens in Progress in that the user can add, view and delete linked files from the sub-contract record.
To add files, the user can click on the Add Document ![]() option at the top and then select the file required.
option at the top and then select the file required.
To view any of the linked documents, the user can highlight a document and click on the View File option ![]() at the bottom right hand corner. This will open the selected file for view.
at the bottom right hand corner. This will open the selected file for view.
To delete any linked documents, the user can highlight a document and then click on the Delete option ![]() to remove the document from the record.
to remove the document from the record.
Transactions
The transactions tab shows all the activity against the employee, along with which employee did it and the date and time of the activity. Details are also provided of what the changes were in the Details field.

The user can also search/filter the transactions screen for particular activities using the filter row along the top of the grid.