All internal routing operations are assigned to work centres. This section of Progress allows the user to create the work centres to be used. Clicking on this option presents the user with the following screen.

All existing work centres are displayed in the main grid with the option to filter by a variety of means at the top using the grid filters (like most of the other Progress screens).

The options at the top allow the user to create new work centres, view/amend existing work centres as well as export the list of work centres out to Excel for further use out with Progress. The PRINT option allows the user to print of a list of all work centres that includes a bar-code representation of the work centre which can be used for scanning in the SFDC modules.

The main grid will display all existing work centres in the system. Old work centres which have been marked as obsolete are not shown by default but can be included in the grid by clicking the SHOW OBSOLETE option at the bottom of the screen and clicking REFRESH at the top.
Adding New Work Centres
The user can create new work centres by clicking the NEW option at the top of the screen. This will present the user with the following screen.
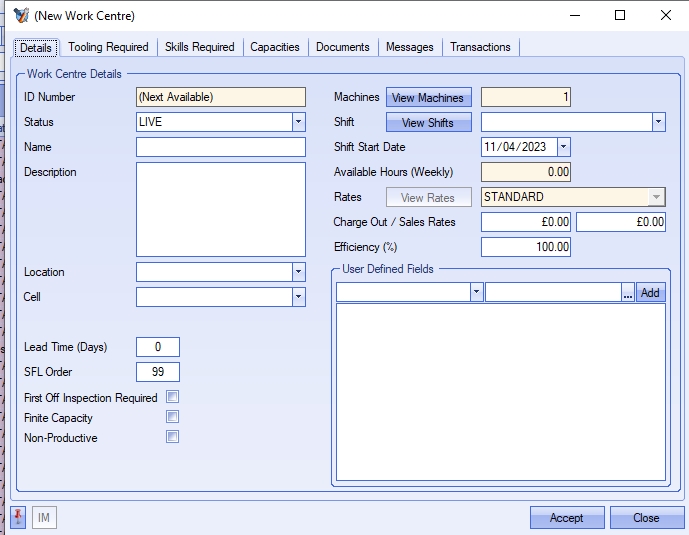
The first tab of the window shown contains all the main details for the work centre. The fields available are as follows:
ID Number
This is a unique, sequential, system assigned number and is populated when the user clicks ACCEPT to save the work centre.
Status
This is the status of the work centre. This dictates whether the work centre is active (LIVE) or inactive (OBSOLETE). This status determines whether the work centre is available for selection throughout the system.
Name
This is the name assigned to the work centre. If there are multiple machines represented by this work centre then this could be a generic name (i.e. Lathes, Assembly, CNC Milling, etc.). If the work centres are being set up for single machines then the name can be more specific (i.e. 5-Axis M/Cntr, Lathe 1, CNC Mill 2, etc.)
Description
This is the work centre description.
Location
This is the location of the work centre. This field works in conjunction with the Work Centre Location list created in the List Maintenance section of the system. This value allows reports and screen to be filtered by location. Often used together with the Cell field to identify specific work areas within the production area.
Cell
This is the cell of the work centre. This field works in conjunction with the Work Centre Cell list created in the List Maintenance section of the system. This value allows reports and screen to be filtered by Cell. Often used together with the Location field to identify specific work areas within the production area.
Machines
This field allows the user to specify the number of machines in this work centre. If they have multiple duplicate machines, then this will allow them to use a single work centre for all of them. The number specified here will be used to calculate the AVAILABLE HOURS figure displayed just below. If work centres are being set up individually for each machine then this will always be set to 1.
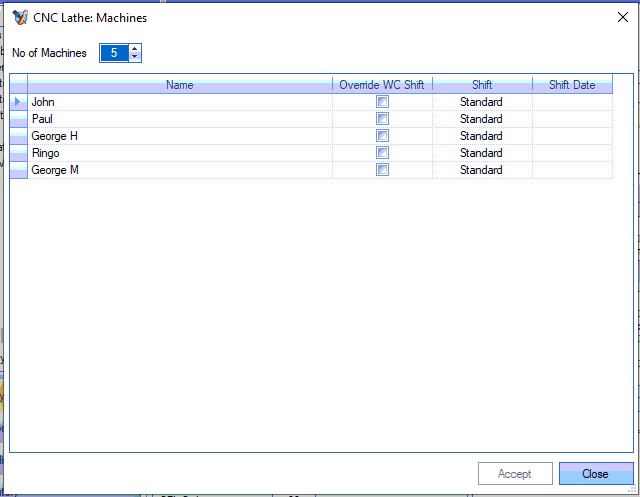
As well as specifying the number of machines available for this work centre, the user also has the ability to identify the individual machines by assigning them a name. This is done via the VIEW MACHINES option.
![]()
Clicking this option presents the user with a window which allows a unique name to be assigned to each of the machines. These names are used to identify the different machines for the current work centre.
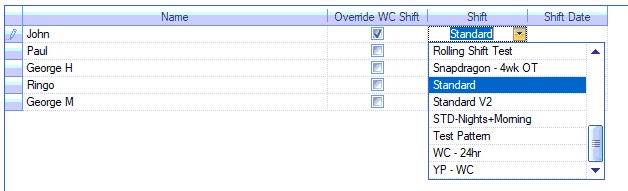
The user also has the ability to assign a specific shift pattern to each individual machine. This is done by ticking the Override WC Shift option and selecting an alternative shift for this machine.
If the system is configured to allow individual employees to be linked to work centre machines, then the user will also have the ability to select an employee against each machine. This system option can be found in the Labour system options. For more information on this, please refer to the Administrator Functions > Options section of the manual
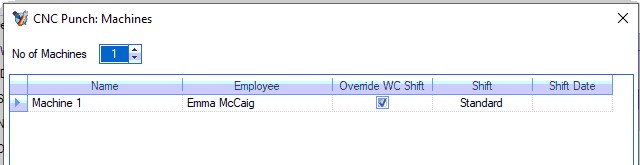
Linking an employee to a work centre machine will reduce the capacity of the work centre if the employee is on holiday. This ensures the availability of the machine reflects the available employees.
(Before employee holiday is added)
(After linked employee holiday is added)
Employee records will also be updated to reflect the linked work centre/machine. This is highlighted in the employee's Time & Attendance details within the employee record.

Again, the system highlights that changing the employee's shift or holiday details will impact the capacity/availability of the linked work centre machine.
Where multiple machines have been specified and named, the specific machine can be assigned to part and work order routing operations when the work centre has been selected for an operation. This is assigned on the routing op of both the part and work order operation as shown below.
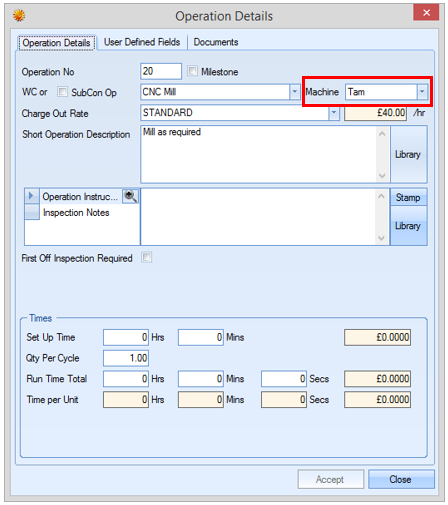
Part Routing operation
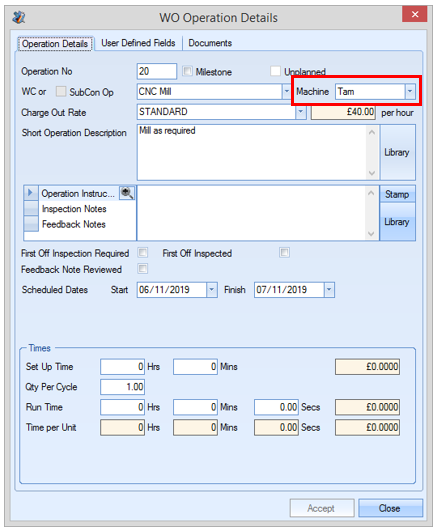
Work Order operation
For more information on part and work order routings, please refer to the inventory and work order sections of the manual respectively.
In additional to being able to select specific machine names for operations, the Shop Floor Loading (SFL) section of Progress will also list the different machines with their names and will schedule the operations against the specific machines where it has been specified.
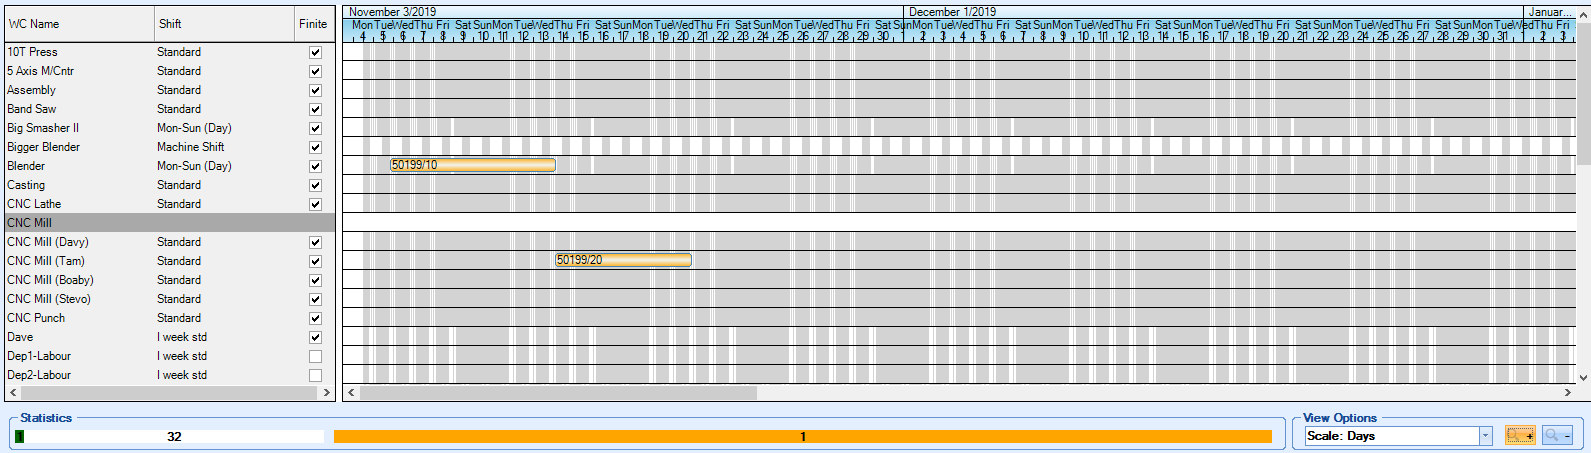
NOTE: If no specific machine names have been assigned, the system will schedule the world across all machines of the work centre
For more information on the Shop Floor Loading (SFL) section and scheduling in Progress Plus, please refer to the SFL section of the manual.
Shift/Shift Start Date
This is the shift pattern that represents the active hours of the work centre. This often mirrors the shift pattern of the users but can also be used to represent machines that run overnight or are available 24hrs a day. The use can select the appropriate shift pattern from the drop-down list. This is based on all the existing shift patterns in the system, so the user must ensure the shift pattern required is available for selection. For more information on shifts and shift patterns, please refer to the relevant section of this manual.
If the selected shift is not a standard 7-day cycle, then the user must also specify the start date of the shift pattern so the system knows what the hours are for any given date. This is often used when there is a rolling shift pattern which covers multiple weeks (for example, a shift pattern that’s one week days, one week evenings and one week nights). If a work centre starts midway through this shift cycle, this date will determine whereabouts in the shift cycle the work centre will be any given date.
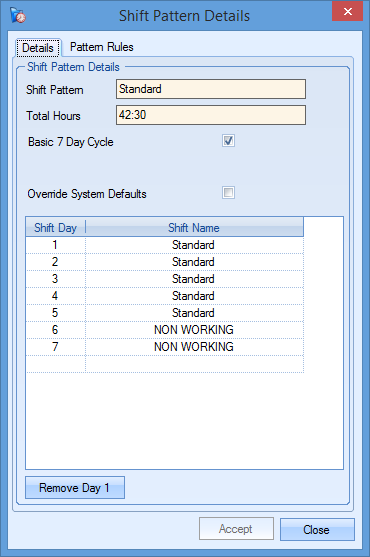
The VIEW SHIFTS option will allow the user to view the details of the shift pattern as shown below.
Available Hours
This calculated field shows the total available hours for this work centre based on the number of machines and the available hours as per the shift pattern. This is calculated as follows:
AVAILABLE HOURS = TOTAL SHIFT PATTERN HOURS * NUMBER OF MACHINES * EFFICIENCY (%)
Rates
This field shows the currently selected set of charge-out rates being used by the system for the work centre. When creating a new work centre, this will default to STANDARD. The VIEW RATES option is only available once the work centre has been created. This option allows the user to crate multiple rates for the work centre. These can then be selected as required depending on the charge-out rates to be used on a job.
Charge Out/Sales Rate
These fields allow the user to set values against the charge-out rate and sales rate of the work centre. The charge-out rate is the value that is used to calculate the planned cost of labour on the work centre while the sales rate value is used when calculating the labour portion of the selling price. These figures can be the same if the user wishes to use the same rate for both.
Efficiency (%)
This field allows the user to record the efficiency of the machine. This will default to 100% but can be amended if necessary. The figure here will affect the available hours figure to compensate for any loss of efficiency of the machine. For example, if the efficiency is 50% then the available hours figure will half. This means that over the course of the shift pattern, the work centre is only producing good product half the time, hence the reduction in the available hours.
First Off Inspection Required
This option allows the user to set the work centre to always require first off inspection as the default. This will default the First Off Inspection option accordingly on any operation the work centre is selected against.
Finite Capacity
This option determines whether the work centre is capable doing multiple jobs at the same time. Ticking this option means the jobs done on the work centre are sequential and are done one at a time. This option is used in the Shop Floor Loading section of the system and influences how the work order operations are scheduled.
Non-Productive
This option is used to indicate whether the work centre is non-productive. This option is used in the Productivity section of Progress and is used to highlight the non-productive time recorded in the system. For more information on the Productivity section of Progress, please refer to the Work Order section of the manual.
Work Centre Lead Time
This option allows the user to specify a lead time for a work centre. When the work centre is used in an operation on a work order, the work centre lead time will be used to calculate the scheduled operation start and finish dates of that work order. It is mainly used for users who do not schedule their jobs using Shop Floor Loading. If a work order is scheduled using shop floor loading, the times from the scheduler will overwrite any scheduled operation times within the work order routing.
For more information on switching on the Work Centre Lead Times, please refer to the Administrator Functions section of the manual, which covers the system settings.
Where Used
This section of the work centre details highlights where the work centre is currently recorded for use in the manufacturing process. This tab is only visible when the work centre exists; not shown on the initial work centre when being created.
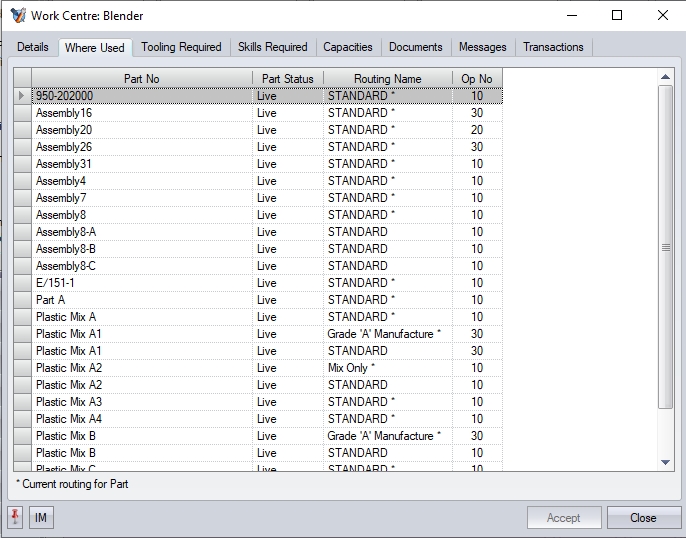
Any manufactured part in the system which references the work centre on its routing operations list will be displayed here. The user can enquire further into any part listed by clicking on the ![]() option at appears at the end of the PART NO field when clicked. This will open the inventory record for this part.
option at appears at the end of the PART NO field when clicked. This will open the inventory record for this part.
Tooling Required
NOTE: This section is only available if Progress Plus has the additional Quality module
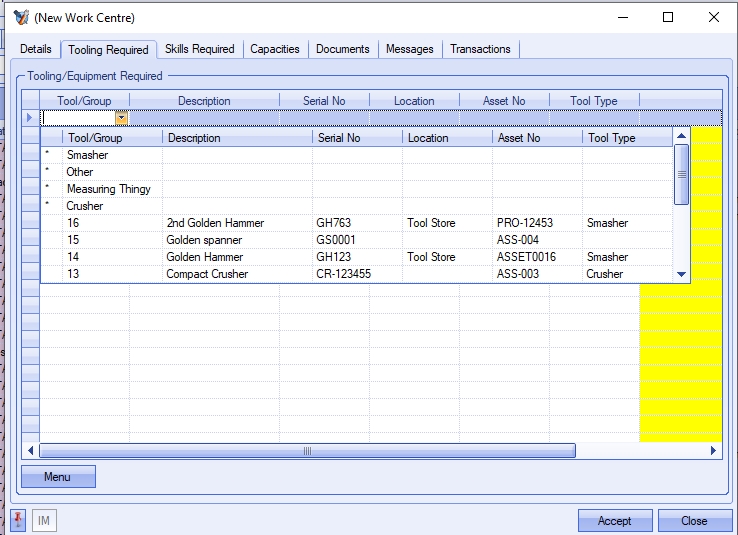
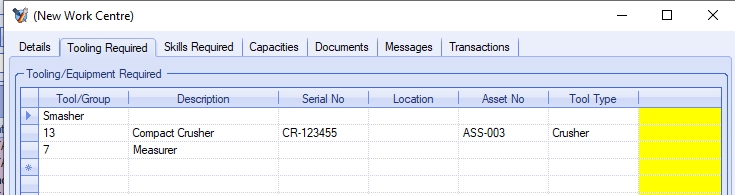
This section allows the user to specify tooling required for the work centre. This tooling will default onto any routing operation created for the work centre. The user can select the tools/equipment from the list set up in the Quality > Tooling & Equipment section.
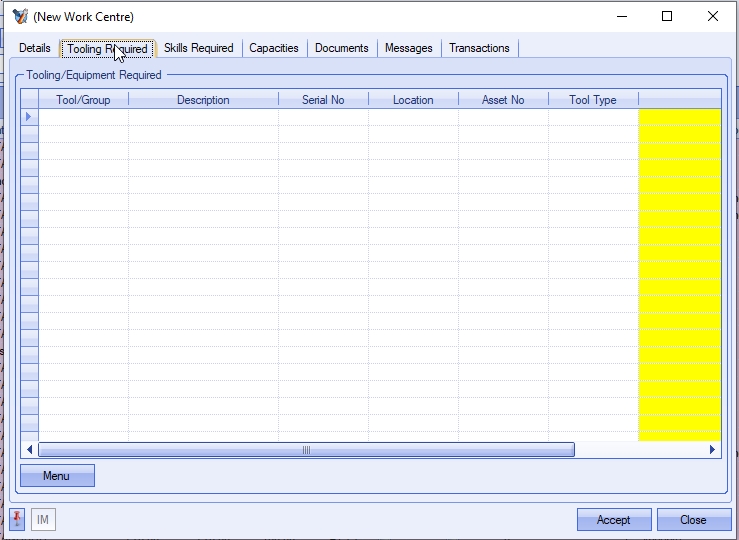
The user can select the tools required for the operation using the drop-down list. The user can select a specific tool or a group of tools for the operation.
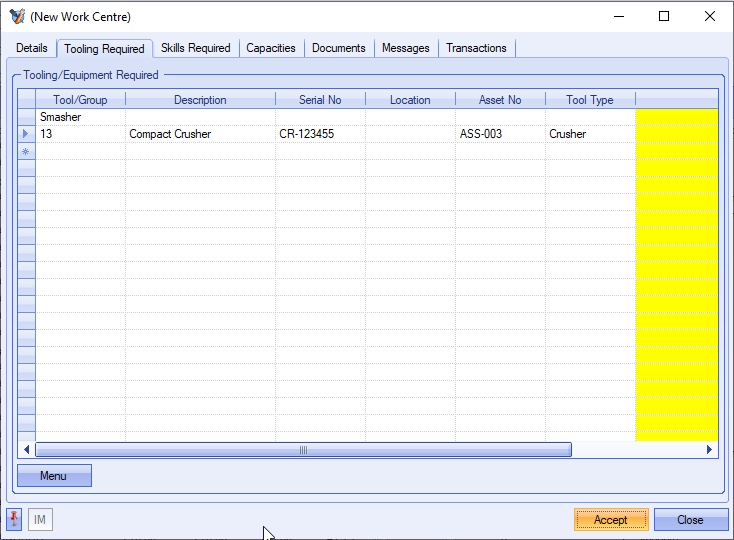
Once the required tools/tool groups are selected, the user can save the information by clicking ACCEPT. This information will default to any work orders that are created for the part number and feed into the Tooling & Equipment Issue/Return functionality that's available.
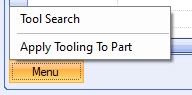
The user can search for specific tools too using the MENU > TOOL SEARCH option.
This will present the user with a list of tooling that they can add to the work centre. The user can tick the tooling required, and click ACCEPT to add to the work centre.
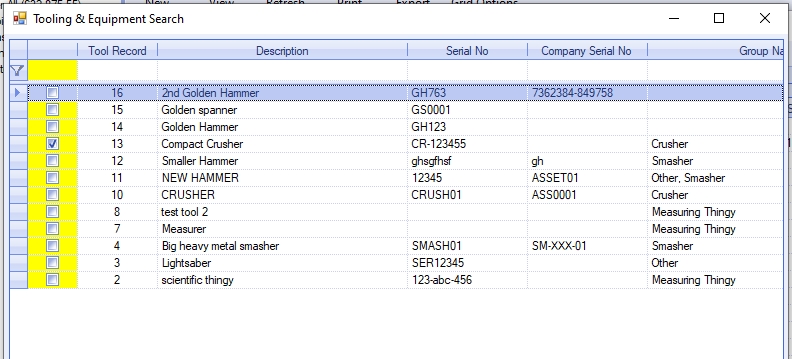
(Tooling Search/Selection)
(Tooling once selected)
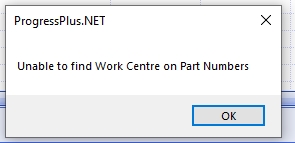
Once tooling has been added to the work centre, the user also has the ability to update existing part routing operations. This can be done via the MENU > APPLY TOOLING TO PART option. If the work centre is not currently on a part routing, the system will inform the user.
If the work centre is current set on a part's routing operation, the system will prompt the user to confirm.
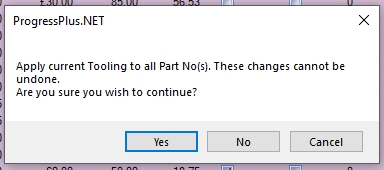
Selecting YES will update the Tooling details on all instances of the work centre on part routings. Selecting NO will cancel the update and leave existing routing operations as they are. CANCEL will return the user to the work centre itself.
Once all changes have been made to the work centre's Tooling details, the user should click ACCEPT to save the changes.
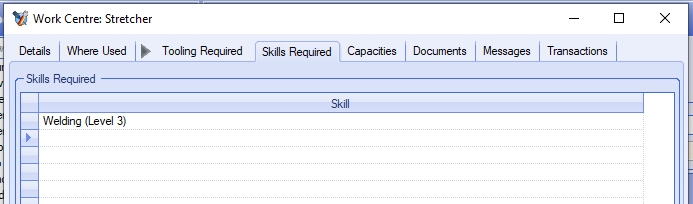
Skills Required
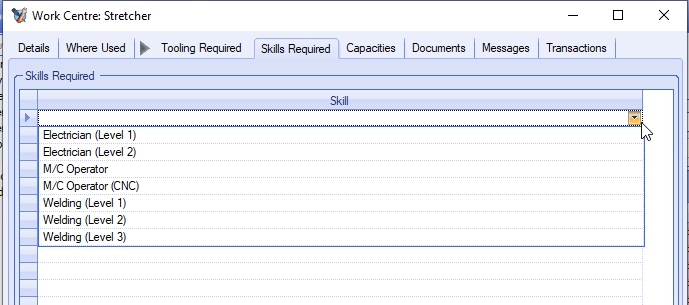
This section allows the user to specify default employee skills required for the work centre. Setting skills against the work centre will automatically add the specified skills to any routing operations created for the work centre. This can be used to ensure only employees with the correct skills carry out the operation.

Skills can be added manually to the operation using the drop-down list.
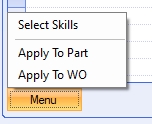
They can also be added via the MENU > SELECT SKILLS option. This allows the user to select multiple skills to be applied to the work centre.
This presents the user with a list of all skills and allows them to be added/removed individually or as multiples, using the single and double arrows respectively.
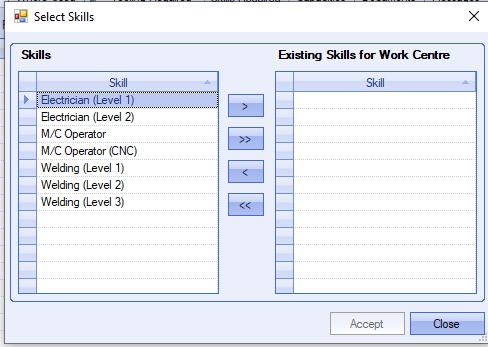
(Adding skills individually)
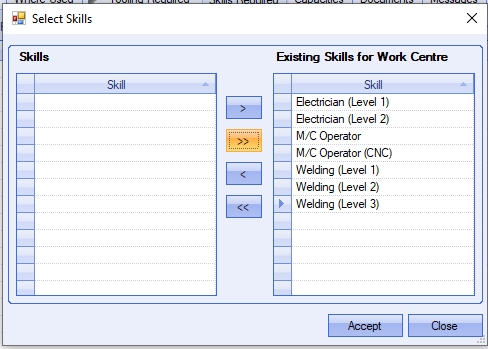
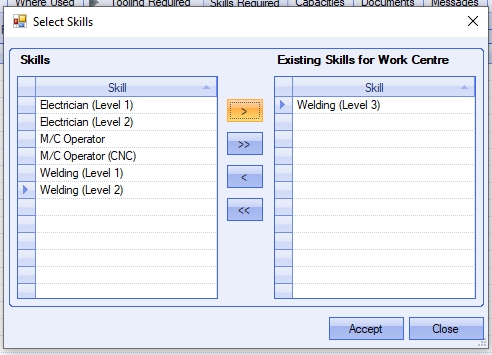
(Adding multiple skills)
Once selected, the user can click ACCEPT to add the selected skills to the routing operation. The Skills Required section of the work centre will be updated accordingly.
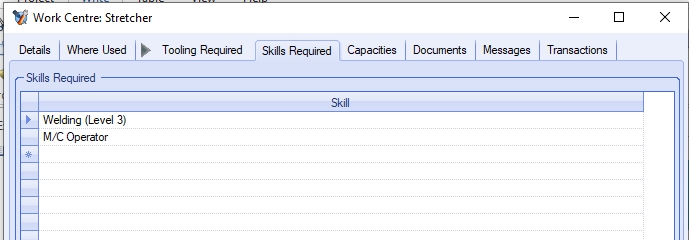
Once all skills have been added, clicking ACCEPT will save the skills against the work centre and will be defaulted to any new routing operations created for the work centre.
Apply To Part
This option allows the user to update the skills on any existing part routings for the work centre.
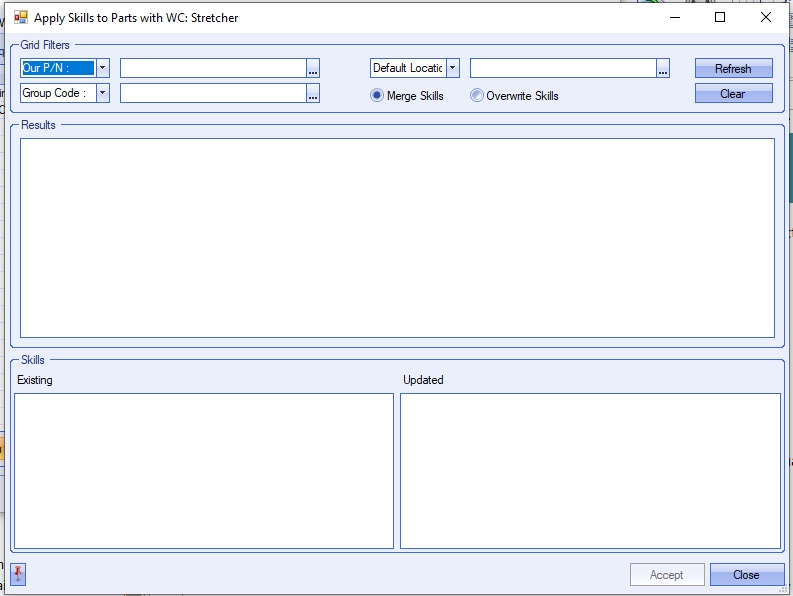
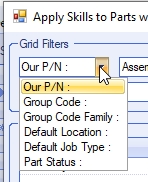
The user can use the grid filter to find parts that contain the current work centre. The user also has options to overwrite the existing routing operations or merge the new skills with the existing skills set in the routing operation.

Once the user has applied the filters, clicking REFRESH will show all parts that meet the selected criteria. Alternatively, clicking REFRESH will show all parts.
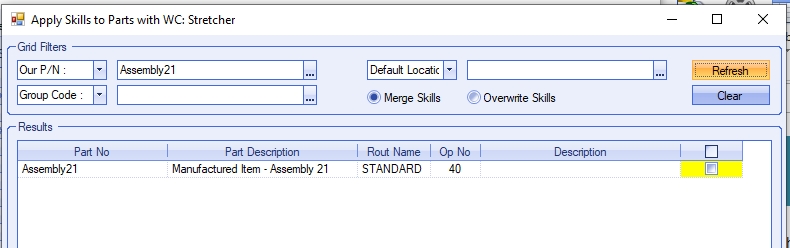
Selecting any of the listed parts will display their current skills, along with the what the updated skills will be.
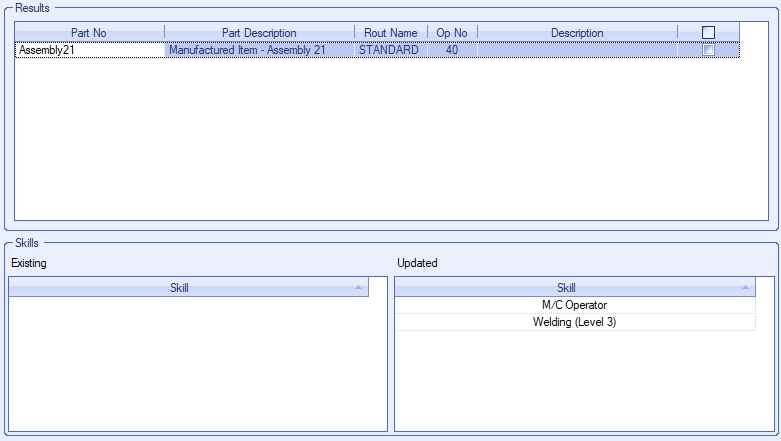
To update the skills on the existing part routings, the user simply has to tick the individual parts that are to have the skills updated, or click the column heading to select all parts listed.

Clicking ACCEPT will update the selected part routings with the work centres skills. If the OVERWRITE option is used, the part routing will be overwritten with the work centre's skills. If the MERGE option is used, the work centres skills will be added to the existing part routings skills.
Apply to Work Order
This option allows the user to update the skills on any existing work order routing for the work centre.
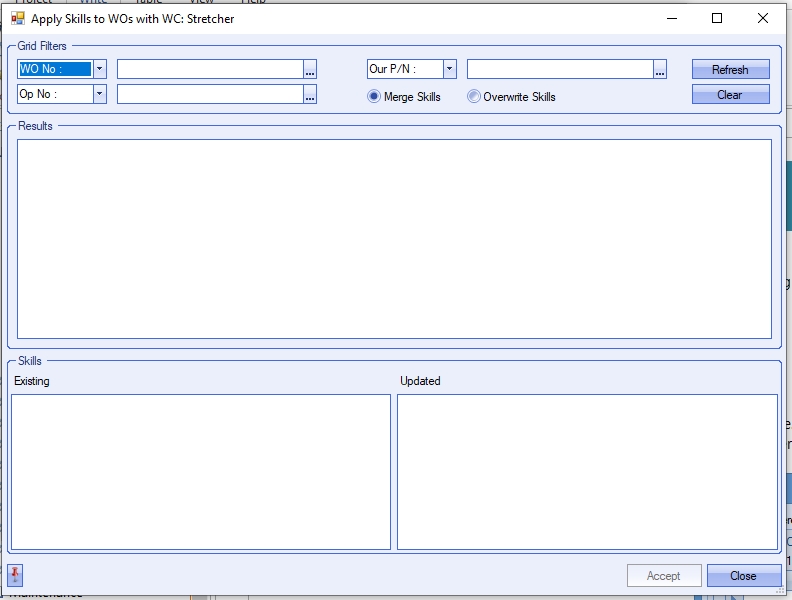
The user can use the grid filter to find work orders that contain the current work centre. The user also has options to overwrite the existing routing operations or merge the new skills with the existing skills set in the routing operation.

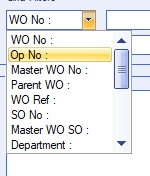
Once the filters have been set, clicking REFRESH will display all work orders that meet the criteria. Alternatively, the user can simply click REFRESH to see all work orders that contain the current work centre.
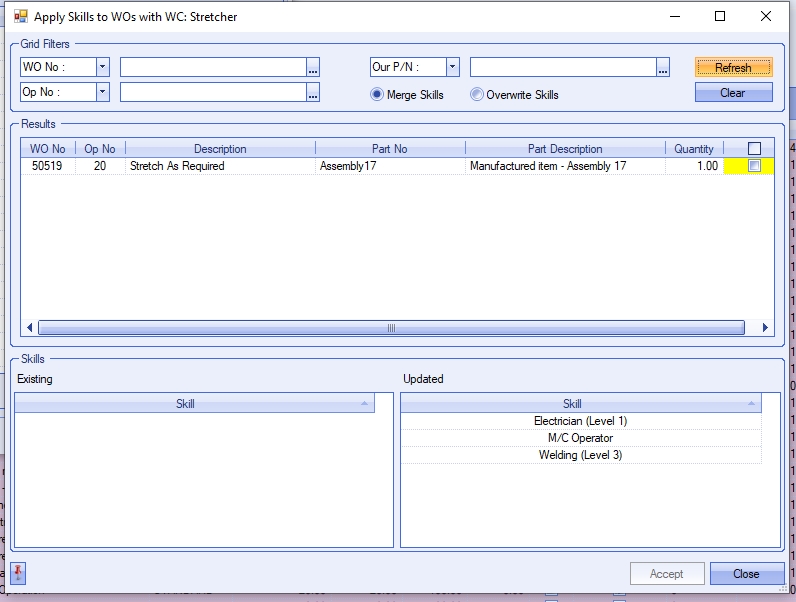
Selecting any listed work order will display the existing skills on the work order routing along with the current work centre skills to allow the user to see what will be updated. The user can select individual work orders by ticking the box against them, or click the column heading to select all listed work orders.

Once the required work orders are selected, clicking ACCEPT will update the work order routings with the new skills. If the OVERWRITE option has been selected, the work order routings will be updated to show the work centre's skills. If the MERGE option has been selected, the work centre's skills will be added to the work order routing operation.
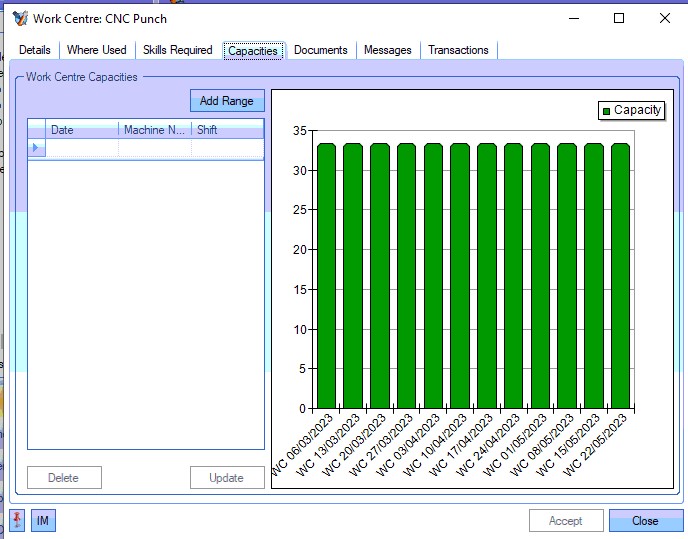
Capacities
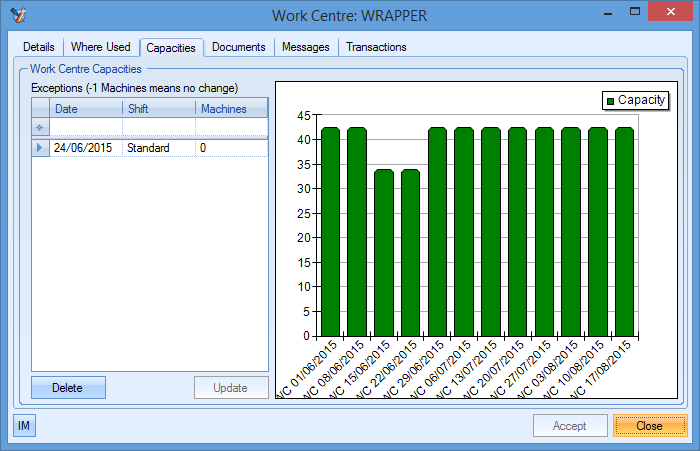
This tab of the work centre shows the current planned capacity of the work centre. This is based on the available hours of the work centre and any work centre holidays, linked employee holidays or exceptions that have been recorded in the system. These capacities are used for the Shop Floor Loading (SFL) section to determining the available time of a work centre when scheduling the work order operations.
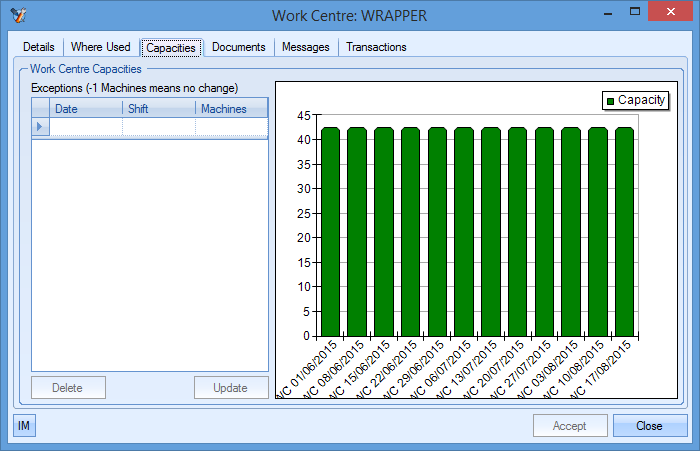
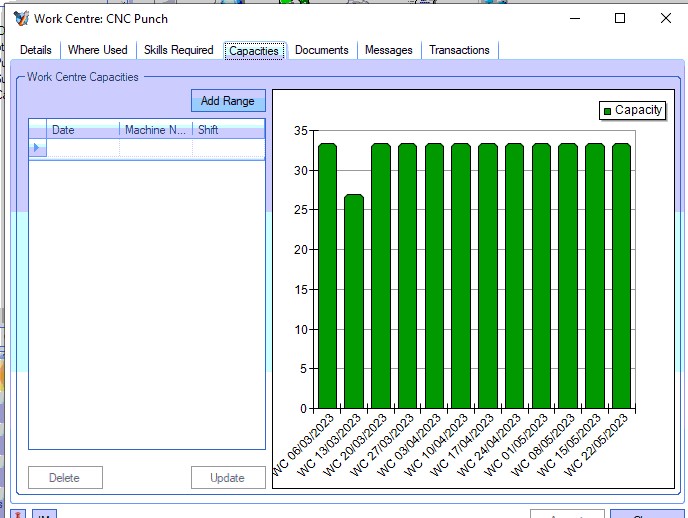
The left hand side of this window shows any recorded exceptions, including the date and the number of machines affected while the right hand side shows the current capacity as a graph for the next 12 weeks. With no holidays or exception applied, the capacity would show similar to the above screenshot i.e. full capacity across all the weeks shown. If holidays or exceptions have been recorded in the system then capacity will be reduced accordingly for the appropriate weeks as shown below.
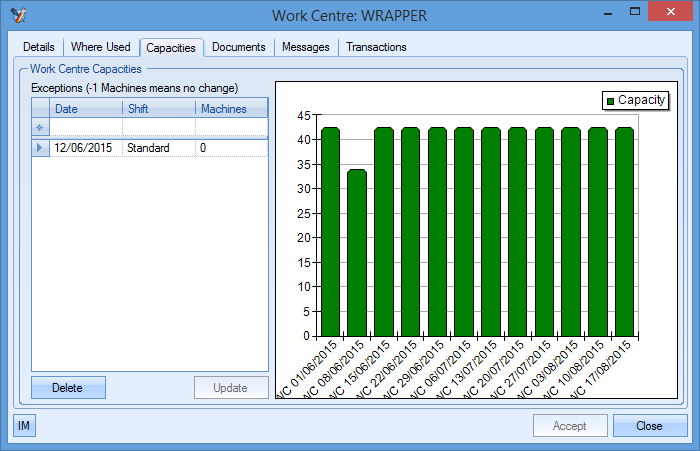
(Work centre exception added)
(Work centre holiday recorded)
(Linked employee holiday added)
Adding Exceptions to Capacity
The user can add exceptions to a work centre to modify its capacity at a particular point in time. This could be due to planned maintenance or repair. The system assumes full capacity of the work centre unless indicated otherwise. As a result, the user must add exceptions to change this.
To add an exception, the user must enter the date, the shift pattern it will be using and the number of machines that will be available on the specified day. This is done on the grid on the left hand side of the screen in the grid provided.
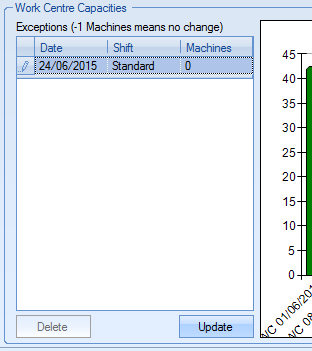
Once added, the user can update the capacity chart by clicking the UPDATE option which will reflect the changes made as shown below.
The SFL section of Progress will not automatically update based on changes to the work centre capacity and would have to be reset/reloaded to pick up the changes. For more information on the SFL section of Progress, please refer to the appropriate section of the manual.
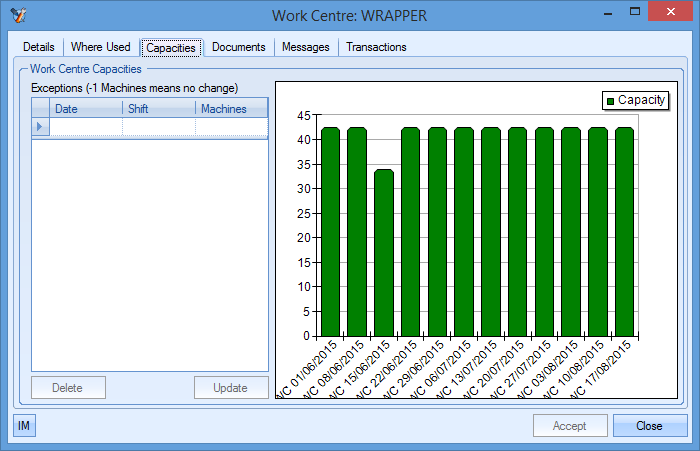
Removing Exceptions to Capacity
Exceptions recorded against the work centre can be removed by the user by simply clicking the exception in question and then clicking the DELETE option. This will remove the exception from the grid on the left. The user can update the chart by clicking the UPDATE option.
Documents
The user has the ability to record/link documents against the work centre record. This could be particular maintenance records that are relevant to the work centre or simply general information as to how the work centre operates.
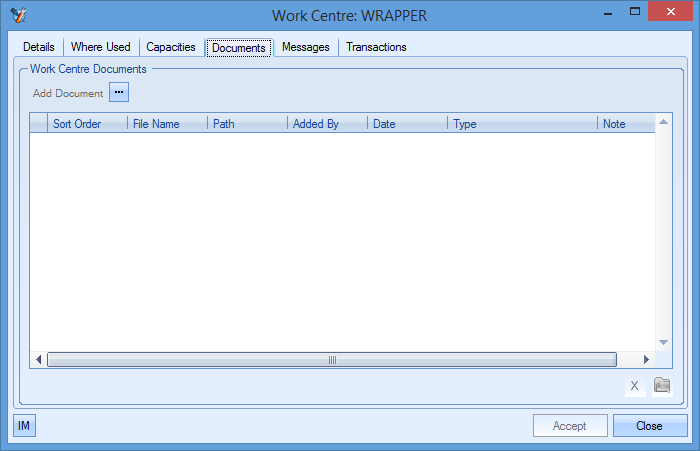
This screen works identically to all the other similar document screens in Progress in that the user can add, view and delete linked files from the work centre record.
To add files, the user can click on the ADD DOCUMENT option at the top and then select the file required.
To view any of the linked documents, the user can highlight a document and click on the VIEW FILE option at the bottom right hand corner. This will open the selected file for view.
To delete any linked documents, the user can highlight a document and then click on the DELETE option to remove the document from the record.
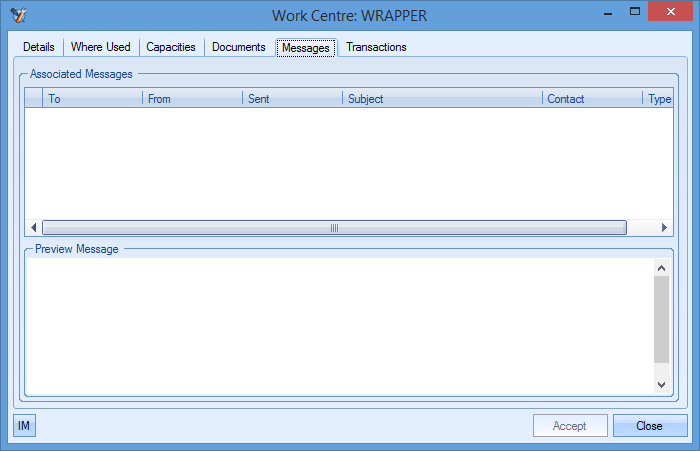
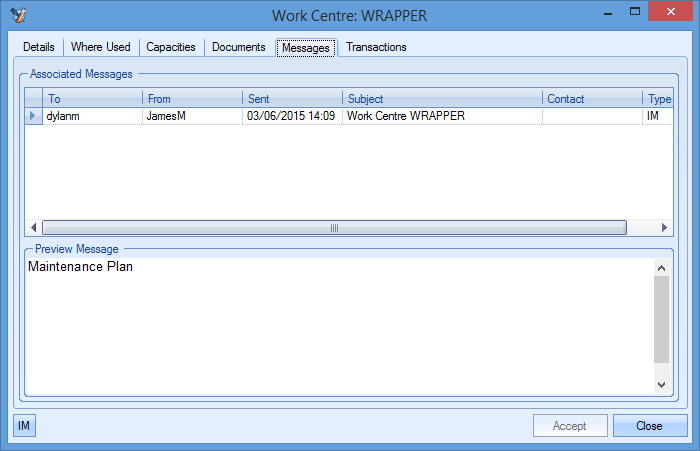
Messages
The messages section of the work centre record allows the user to view any messages, notes, emails or reminders that have been linked to the work centre. These could be in relation to numerous things (discussions on a maintenance plan, who is going to be working in the work centre, etc.) but are all visible in this one screen. Viewing any item listed here can be done by double clicking on the item in the top half of the screen. The bottom half simply shows a preview of the message.
New messages can be added to the work centre’s record by clicking on the IM option ![]() at the bottom left of the employee window. This will present the user with a new IM window from which the user can select the type (email, note, instant message or reminder) and who any recipients are.
at the bottom left of the employee window. This will present the user with a new IM window from which the user can select the type (email, note, instant message or reminder) and who any recipients are.
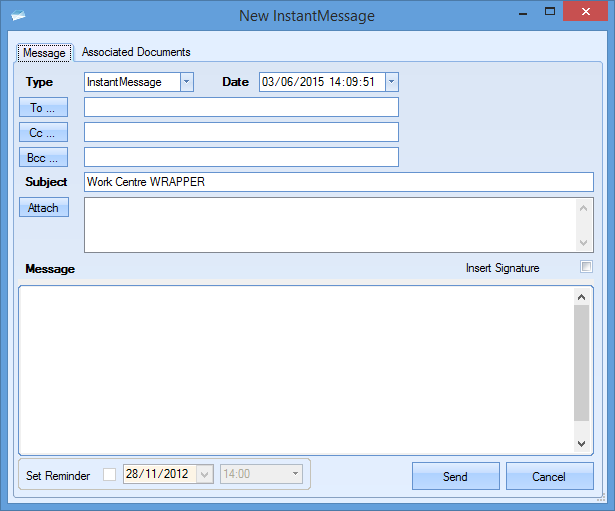
Once all the details have been entered, the user can click the SEND option to send/save. Once created, the item will be displayed in the main Messages screen.
Transactions
The transactions tab shows all the activity against the work centre, along with which user did it and the date and time of the activity. Details are also provided of what the changes were in the Details field.
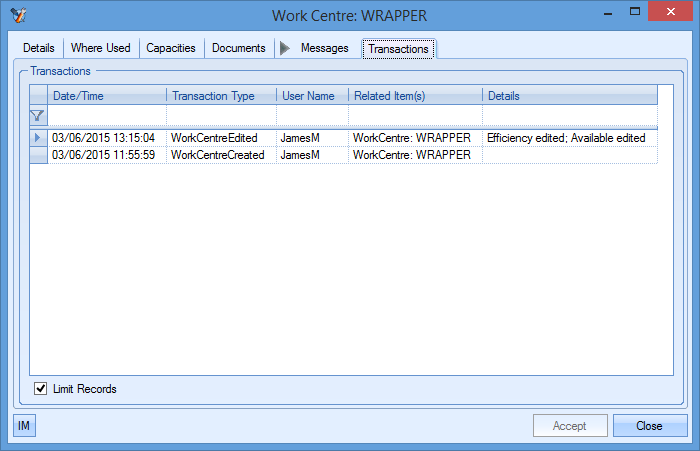
The user can also search/filter the transactions screen for particular activities using the filter row along the top of the grid.