This section of the system allows the user to set up shifts and shift patterns to determine the working hours of both employees and work centres. A shift pattern consists of multiple shifts which dictate the working hours each day. The shifts themselves will detail start and finish times as well as breaks while the shift pattern dictates the sequence of the shifts. The configuration of the shifts and shift patterns depends on whether the company are calculating the overtime on a daily or weekly basis. Progress can do both but only one or the other; no combinations of both.
Shifts
The setup of shifts in Progress is done through the screen displayed below. This is the screen presented to the user when the SHIFT menu option is selected.
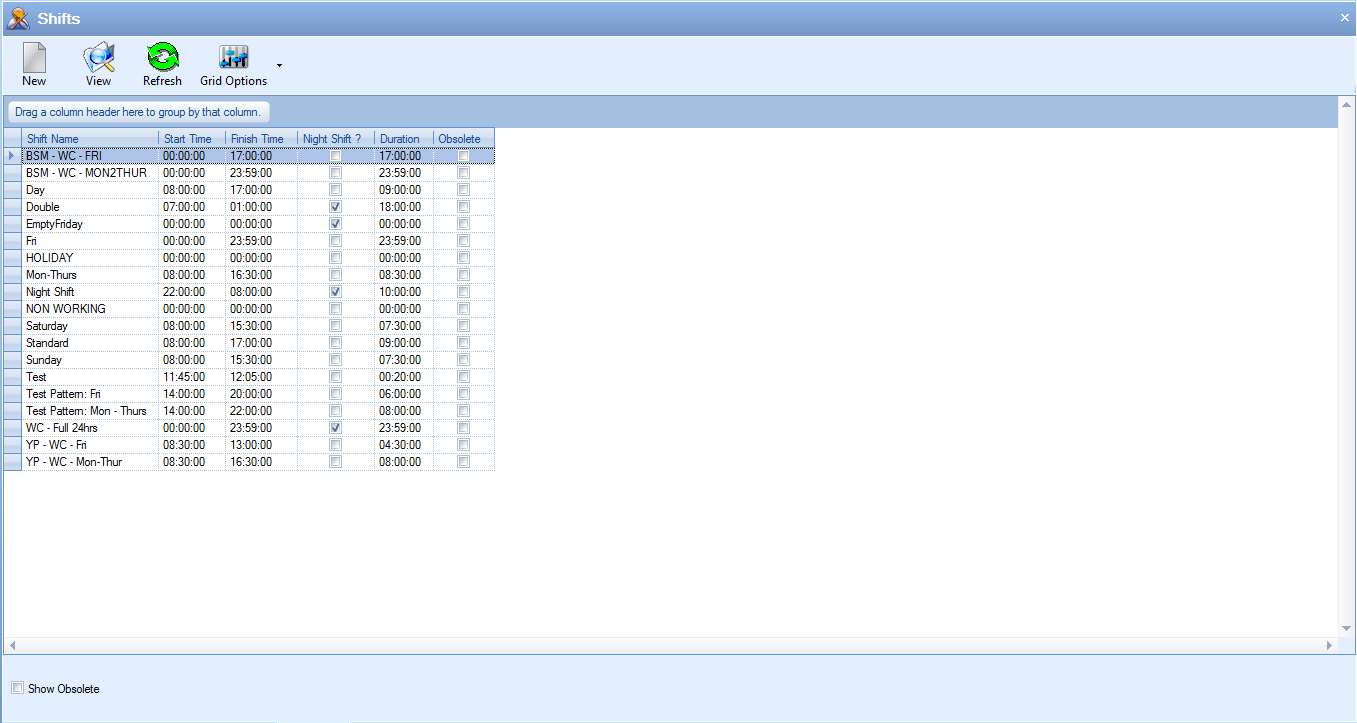
The main grid will display all existing shifts in the system. Old shifts which have been marked as obsolete are not shown by default but can be included in the grid by clicking the SHOW OBSOLETE option at the bottom of the screen and clicking REFRESH at the top.
![]()
Adding New Shifts
The user can add new shift by simply clicking the NEW option at the top of the screen. This will present the user with the new shift window as shown below.
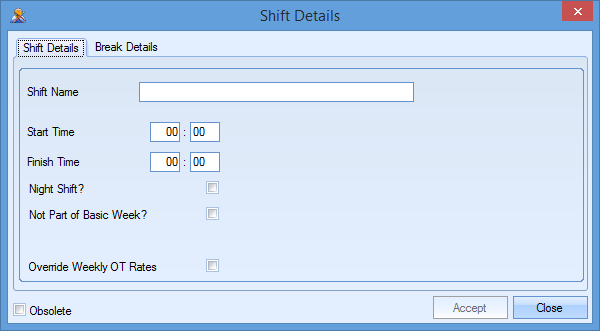
The fields for completion are as follows:
Shift Name
Unique name given to identify this shift.
Start Time
This is the start time of the shift.
Finish Time
This is the finish time of the shift.
Night Shift?
This tickbox indicates whether this shift will cross over to the following day.
Not Part Of Basic Week?
This tickbox indicates whether the shift hours are considered part of the shift pattern’s working week. Ticking this option presents a further option for the user to decide.
Pay as OT Regardless of Basic Hours***
This option is only visible if the Not Part of Basic Week? Option is ticked and determines whether any working hours for this day are treated as overtime based on the employee’s basic hours. For example, you may not want to pay the employee overtime for this day if they have not completed their basic 40 hours. In which case this would be left unticked. If the employee is to receive overtime for this day regardless of their basic hours then his should be ticked.
Override Weekly OT Rates***
This tickbox determines whether the standard overtime rates are used as per the shift pattern or whether this shift has its own set of rules. Often used where employees get specific overtime rates for days that are not part of their basic week. If the user ticks this option, they will be presented with some additional options to set the specific payroll rates for this shift as shown below.
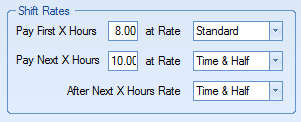
These options allow the user to specify the payroll rates to be used for this shift. The user can then select the hours and associated rates using the fields and drop-down lists. The drop-down lists work in conjunction with the T&A Types list which was created in the List Maintenance section of Progress.
Obsolete
This tickbox determines whether the shift is an active or inactive shift. Obsolete shifts cannot be used in shift patterns and are typically marked as obsolete when they are no longer required.
NOTE: Details above are based on overtime being calculated on a weekly basis. If the system is configured to calculate overtime on a daily basis then the new shift screen will appear as follows.
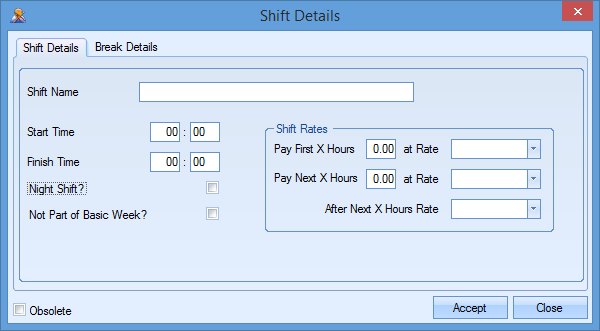
The option for Pay as OT Regardless of Basic Hours and Override Weekly OT Rates are not applicable when calculating overtime on a daily basis, however, the shift rates do need to be set up on a shift-by-shift basis.
Shift Breaks
Breaks can be set up for shifts and are entered on the Break Details tab of the shift record.
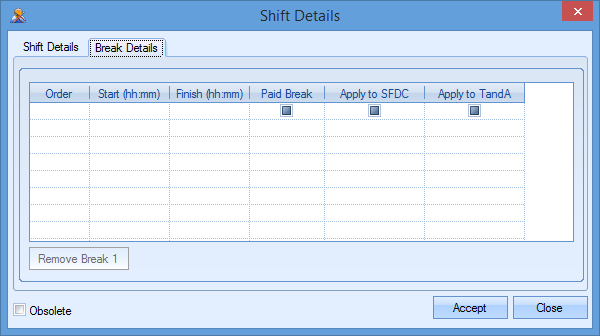
To enter breaks, the user simply adds the information to the grid. The following information can be entered.
Order
This is the sequence number for the break. This is simply a sequential number and is assigned by the system
Start (hh:mm)
This is the start time of the break.
Finish (hh:mm)
This is the end time of the break.
Paid Break
This determines whether the break is included in the employee’s paid hours or not.
Apply To SFDC
This option only applies if the automated breaks are being used. If auto-breaks are being used then the system will automatically job off the employee at the break start time and job the employee back on after completion of break period. With this option applied only, the employee will only have one T&A record for the day.
Apply To TandA
This option only applies if the automated clockings are being used. If auto-clockings are being used then the system will automatically clock the employee out at the start of the break period and then clock the employee back in upon completion of break period. This will result in multiple T&A records for a specific day.
If the user wishes to remove any existing breaks, they can highlight the break in question and the click the REMOVE BREAK option. This will delete the break from the shift record.
Viewing/Amending Existing Shifts
The user can view and amend existing shifts by simply highlighting the shift in question and clicking the VIEW option at the top of the main shift screen. This will open up the shift window and display the current configuration. The user can then amend as required and save the changes by clicking the ACCEPT option.
Shift Patterns
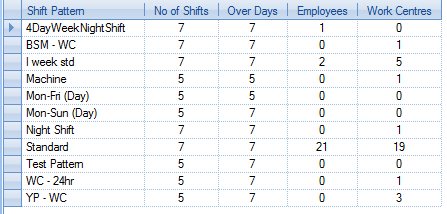
Once the user has created shifts, they can combine these into the required shift patterns. Selecting this option from the Maintenance menu presents the user with the following screen.
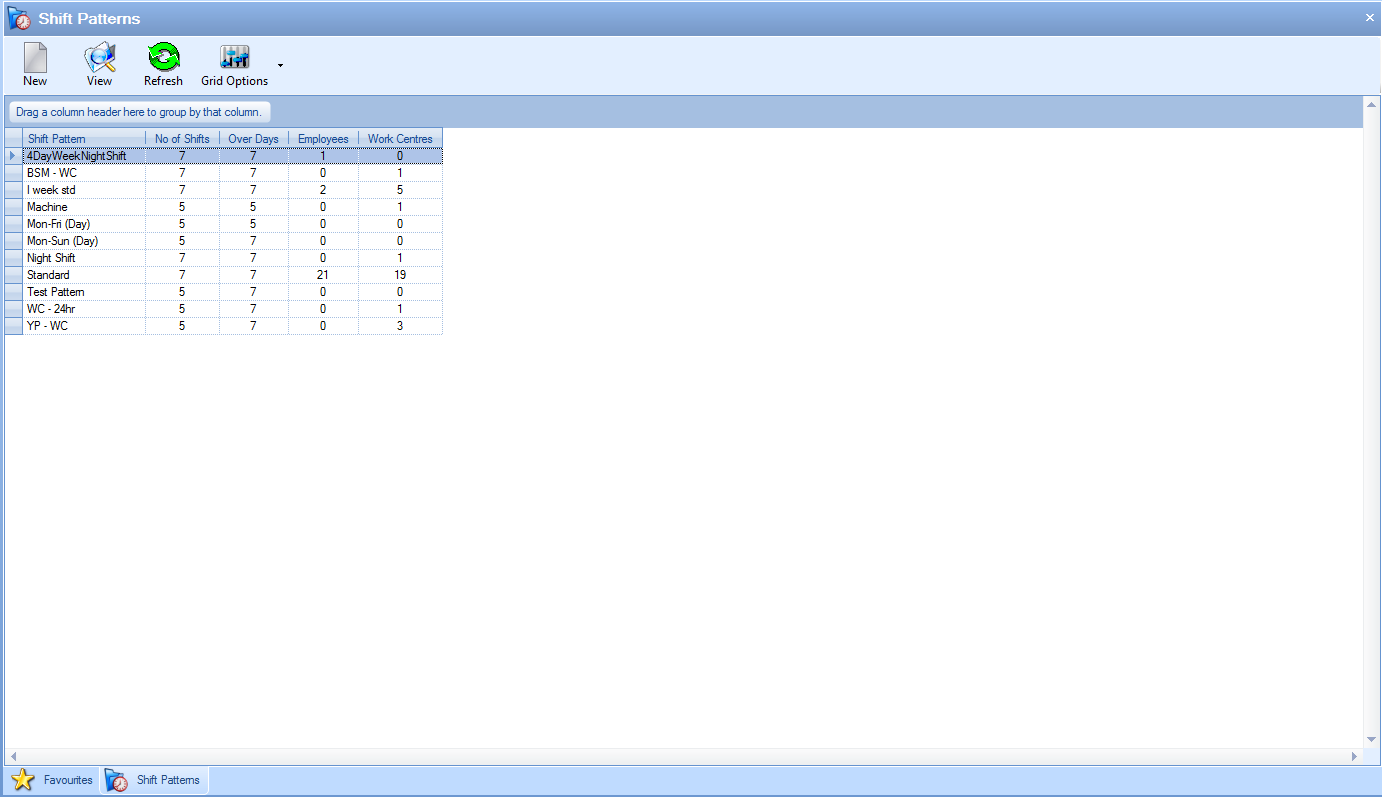
The main grid shows all existing shift patterns as well as the number of shifts each contains, how many days this covers and also how many employees and work centres each shift pattern applies to.
Adding New Shift Patterns
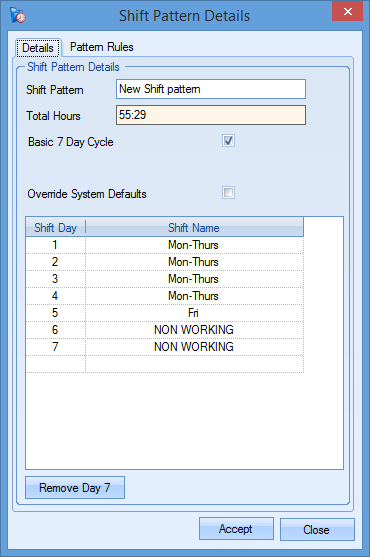
The user can create new shift patterns by clicking the NEW option at the top of the screen. This will present the user with the following window.
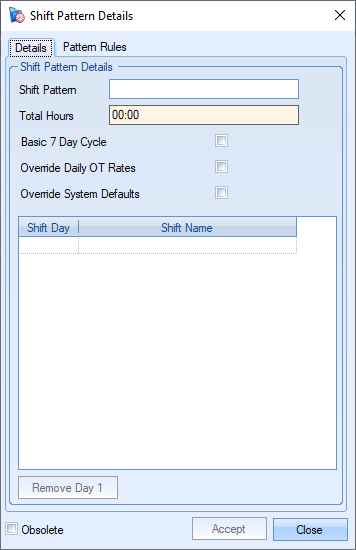
The fields required for this screen are as follows:
Shift Pattern
This is the shift pattern name and will be used for assigning to employees and/or work centres.
Total Hours
This field displays the total number of hours included in the shift pattern based on the hours recorded against each shift. This is a calculated field and is updated as each shift is added to the pattern.
Basic 7 Day Cycle
This option indicates whether the shift pattern is a 7-day cycle (one week) or not. Shift patterns need to be at least a 7-day cycle. For shift patterns where the employees work rolling shifts covering multiple weeks (for example, day shift > back shift > night shift), this would not be ticked and the shift pattern would contain all the shifts the employee would work before the pattern repeated.
Override Daily OT Rates
This option allows the default overtime rates for the shift pattern to be overridden. Ticking this option presents additional options in the Pattern Rules tab as shown below.

Override System Defaults
This option offers the user further settings that can be applied when configuring the shift pattern. These settings are displayed in the Pattern Rules tab and mirror the default system T&A settings as shown below.
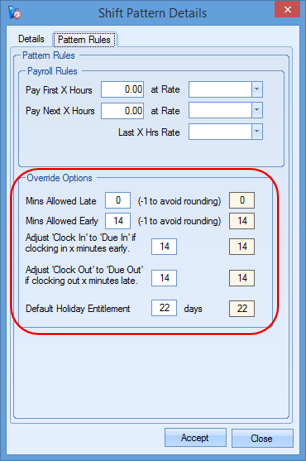
These options determine the time allowances for arriving late, leaving early and also the rounding of arrival and departure times to the employee’s planned start and finish times. The default holiday entitlement is also displayed and will be applied to any employees assigned to this shift pattern.
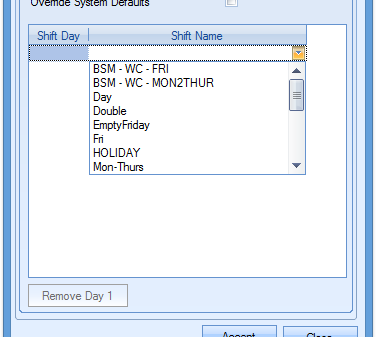
Shift Day/Shift Name
This grid is where the user specifies the shift for each day of the cycle. Starting at the first day, the user simply adds each shift using the drop-down list as shown below. The Shift Day ID is a system assigned ID number.
Once the shifts have been added, the user should have something similar to the following.
Pattern Rules
As well as showing any of the overtime or system override options shown above, this section allows some additional functionality to be set for the pattern.
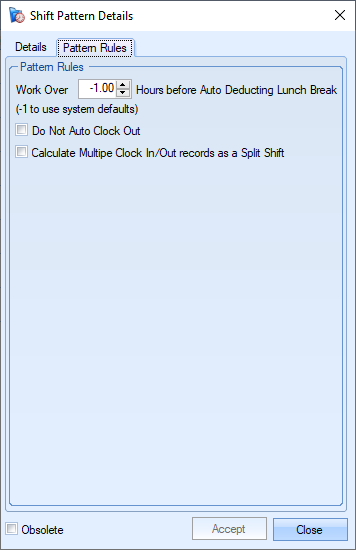
Work Over X Hours Before Auto Deducting Lunch Break
This option allows a specified number of hours to be set forcing the employee to work a minimum number of hours before any lunch breaks are deducted from their payroll hours. This is often used in cases where employees are only entitled a lunch break if they have already worked X number of hours.
Do Not Auto Clock Out
This option stops any employee who has been assigned to this shift pattern being automatically clocked out by the auto-clock out process.
Calculate Multiple Clock In/Out Records As A Split Shift
Where the system is configures to have multiple T&A records for each employee per day, the system would usually consider the period between these T&A records as the employee's lunch break. This option will ignore the periods between T&A records as breaks and will simply total the hours for the day before deducting any lunch breaks.
Once the shift pattern is complete, the user can save the details using the ACCEPT option. This will add it to the main Shift Pattern grid.
Viewing/Amending Shift Patterns
The user can view and amend existing shift patterns by highlighting them in the main Sift pattern grid and clicking the VIEW option. The selected shift pattern window will be displayed with the current details, allowing the user to amend if necessary. Any changes can be saved by clicking the ACCEPT option.