Scheduled Invoicing allows Invoices to be raised against existing Sales Orders where payment is going to be received in multiple stages.
In the following example, the Sales Order will be paid in three instalments: one on order, one before delivery, and one on receipt.
To create a Scheduled Invoice, first the user must navigate to the Menu on an existing Sales Order, and then select Scheduled Invoices.
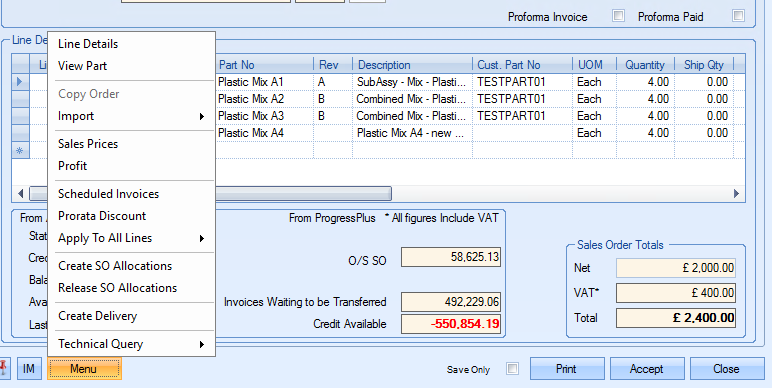
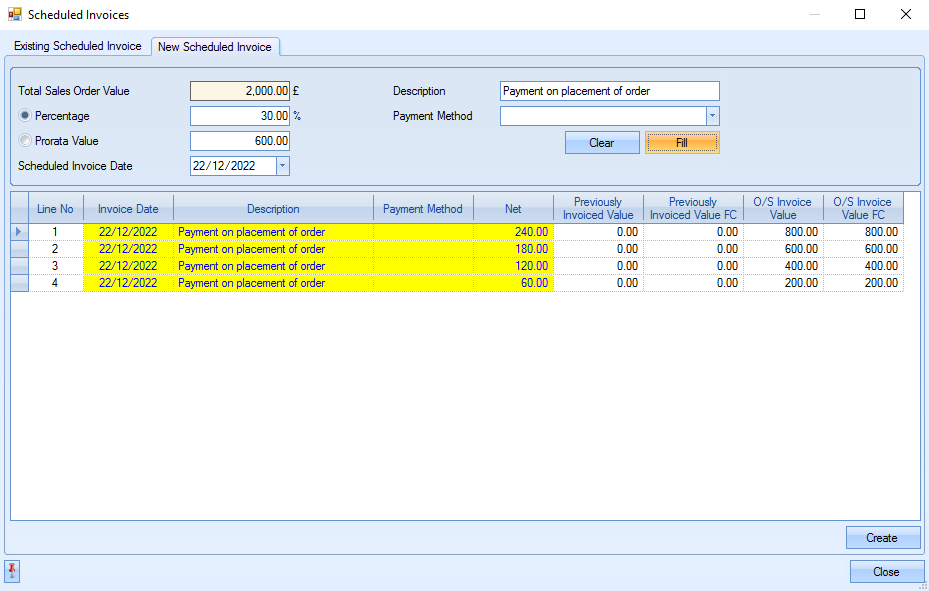
This will open the Scheduled Invoices window, where by going onto the New Scheduled Invoice tab, a Percentage or Prorata Value can be entered alongside a Scheduled Invoice Date.
In the example below, an initial payment of 30% has been entered, which is applied across all four lines on the Sales Order by entering a Description and clicking FILL.
Upon clicking CREATE, the Scheduled Invoice will not appear on the Invoices screen, and can instead be accessed via the Today screen, selecting To Do and then SO Line Scheduled Invoices.

This screen will show the user a list of Scheduled Invoices that are ready to be converted into an Invoice which can be printed or emailed to the customer as needed.
- The Net Value column shows the net value of what is going to be on this particular Invoice.
- The Value Invoiced column shows the value of any existing Invoices against that Sales Order line.
Upon double clicking on one of the lines from the Sales Order, a New Invoice window will open.
Please note that this will include ALL the lines from this Sales Order that have been included in the Scheduled Invoice. The example below would open from double clicking on any of lines 1 through 4.

Upon ticking the relevant lines on the right-hand side, and clicking ACCEPT, then the Invoice will be created.
If the user was to navigate themselves back onto the Sales Order, they would be able to see this under the Existing Scheduled Invoices tab of the Scheduled Invoices window, now with the INVOICED column ticked.

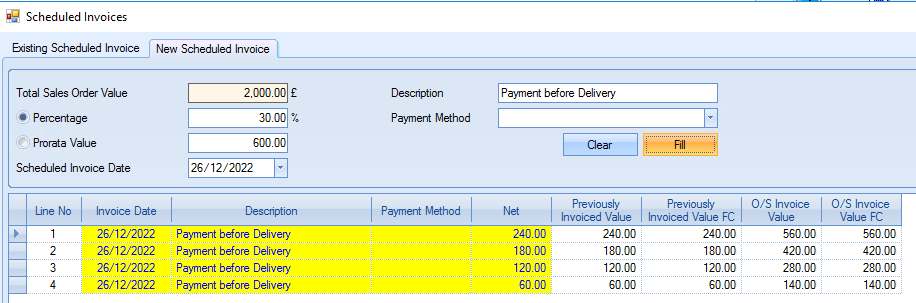
The same process can then be used for the second payment instalment.
Note that the Previously Invoiced Value column will show the value of the first Scheduled Invoice that has since been converted.
Once the user has then created a Delivery for the Sales Order, they can create the final Invoice via the Today screen. This can be accessed from To Do, and then Delivered Not Invoiced.
- The Value column will show the net value of each line on the Delivery.
- The Text Invoices To Date column will show the total of what has been invoiced so far, again on a line-by-line basis.
- The O/S Balance column will show the remaining value that still needs to be invoiced for each line, and this is the value that will appear on the Invoice line when created.

The user now just needs to double click on one of the Delivery Lines to create the final Invoice instalment.
Please note that if there are multiple lines over different Sales Orders and Deliveries, that upon double clicking a line, all lines for the relevant Customer will be brought up on the New Invoice window. These can be ticked and unticked as needed to finalise what lines are to be on the Invoice.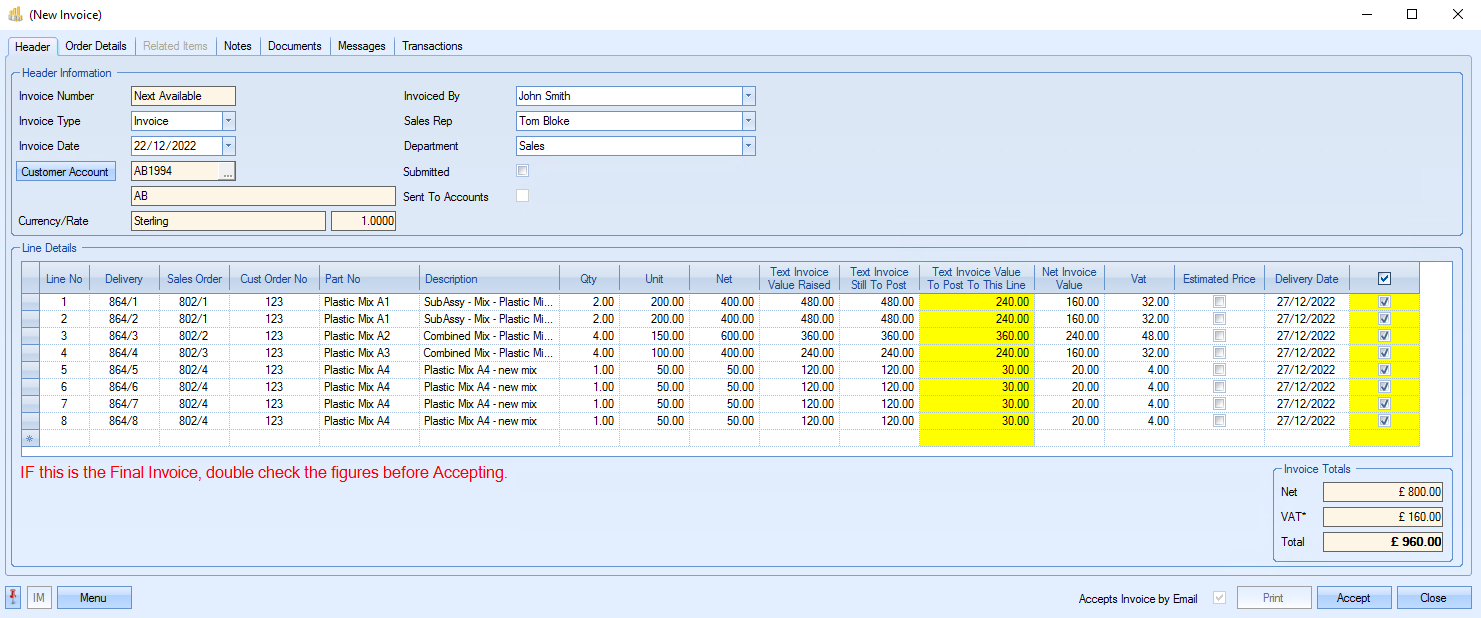
From here, once all the correct lines are ticked, the user just needs to click ACCEPT to create the third and final Invoice.