This section of the inventory screen groups together all incoming or inventory-increasing operations.

The operations listed in this section cover everything from inventory adjustments and work order receipts to purchase order receipts and customer returns. All the options available are described in the following sections.
NOTE: Any stock receipted into a stock location marked as Requires Release will automatically place that batch of stock onto temporary hold. The stock received will have to be released via the Inventory > Release Stock option before it can be used.
Adjustment Receipt
This option allows the user to receipt stock into inventory without a purchase order. This can be used after a stock take has been completed and/or stock quantities need to be adjusted or used in the receipt free issue customer material. Clicking on this option presents the user with the following screen.
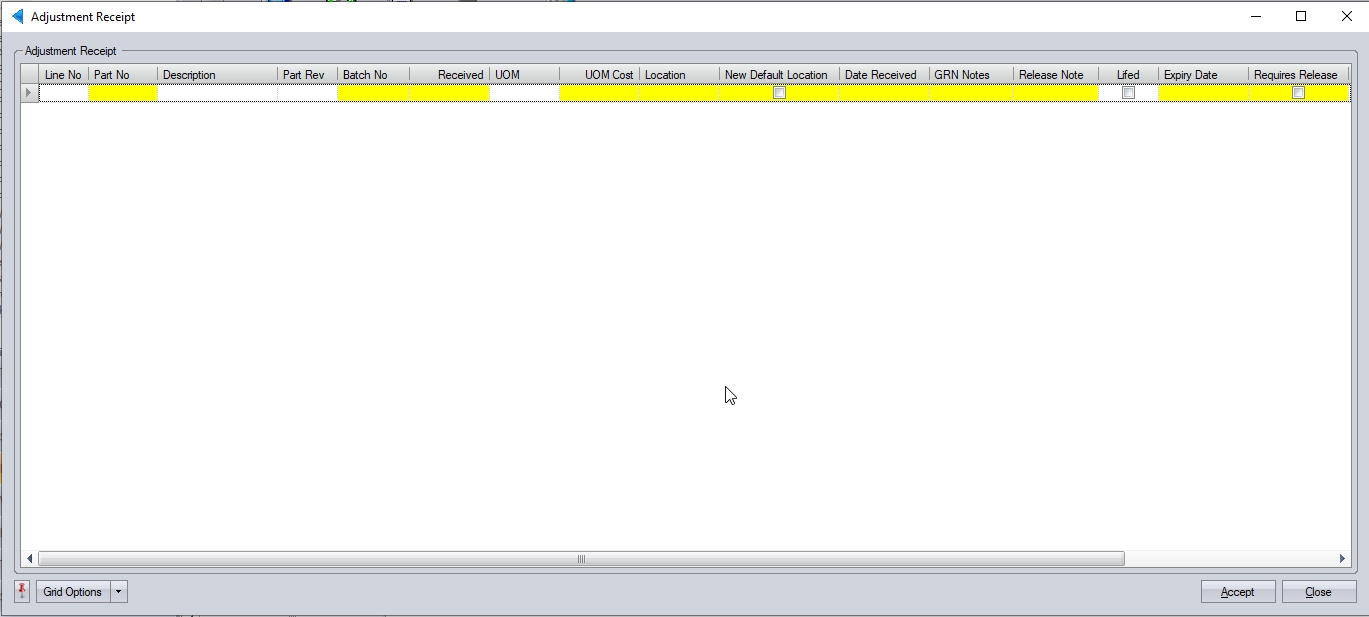
The user can enter the details of the part they wish to receive using the highlighted box in the screen above. Firstly, the user must select the part number they wish to adjust. Clicking on the PART NO field allows the user to search for the part.

Clicking the ![]() option presents the user with the inventory search screen which can be used to identify the part number required.
option presents the user with the inventory search screen which can be used to identify the part number required.
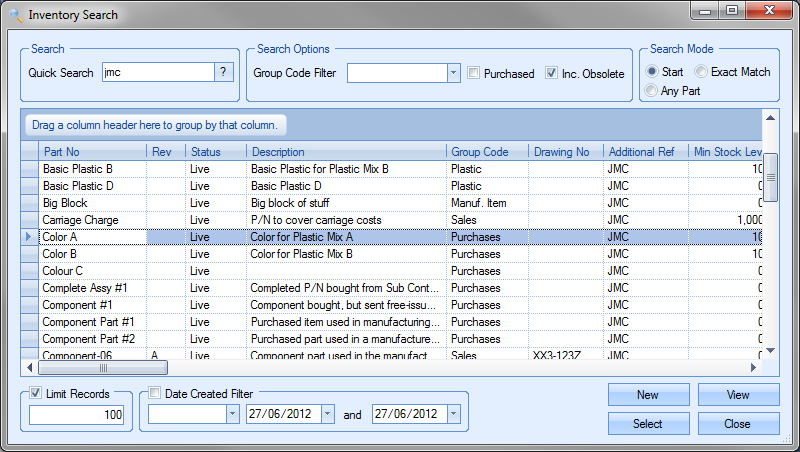
Once the user has selected the part required, they can click the SELECT option to return to the Adjustment Receipt screen.

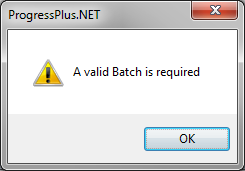
The part description, UOM and unit cost (purchasing) are all displayed based on the inventory part selected. The current revision of the part is also displayed, but the user can amend this as required. The user can complete/amend the highlighted fields if required, but the user must specify a batch number. This is a mandatory field. If no batch number is entered, the user will be presented with the following error.
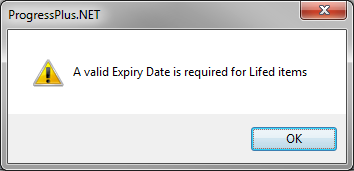
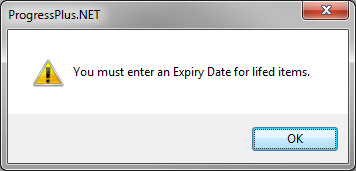
If the part being received is a lifed item (i.e. the part/batch has an expiry date), Progress will recognise this and will force the user to enter an expiry date. If no expiry date has been entered, the user will be presented with the following error.
The user can add multiple items to this screen by adding any additional part adjustments onto the next lines of the screen.

If the user needs to fill in any specific GRN information, add any specific documents or complete any user defined fields relating to the receipt, they can double click on the line to open up the new GRN form, allowing them to complete the additional fields as shown below. NOTE: the user must select at least a part number before they can enter the new GRN form.
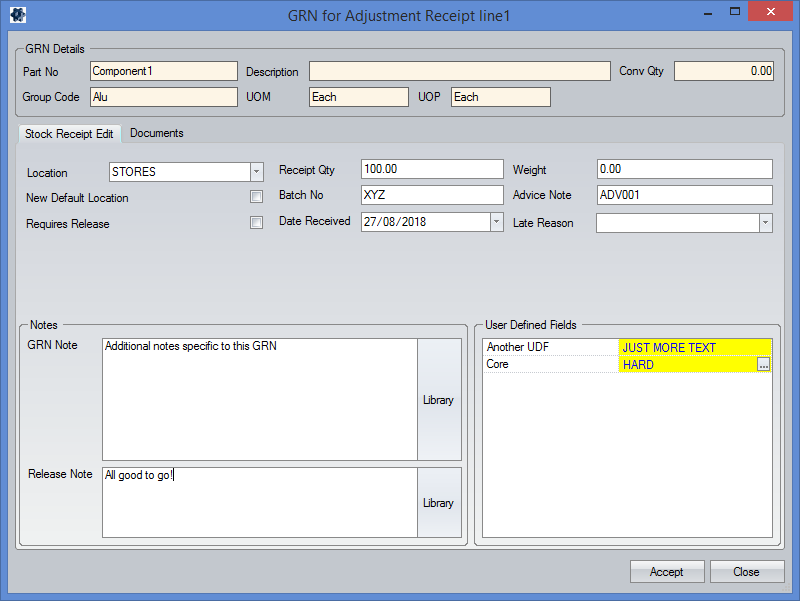
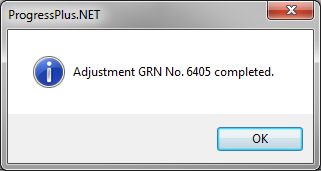
Any information entered in via the new GRN form will be pulled back to the adjustment receipt screen prior to the user clicking ACCEPT. Once all the details have been added, the user can complete the stock adjustment(s) by clicking on the ACCEPT option. The adjustment will be confirmed by the following message.
This option allows the user to do stock adjustment against specific batches. This option can be used when batch numbers are used and traceability is critical. Clicking this option presents the user with the following screen.
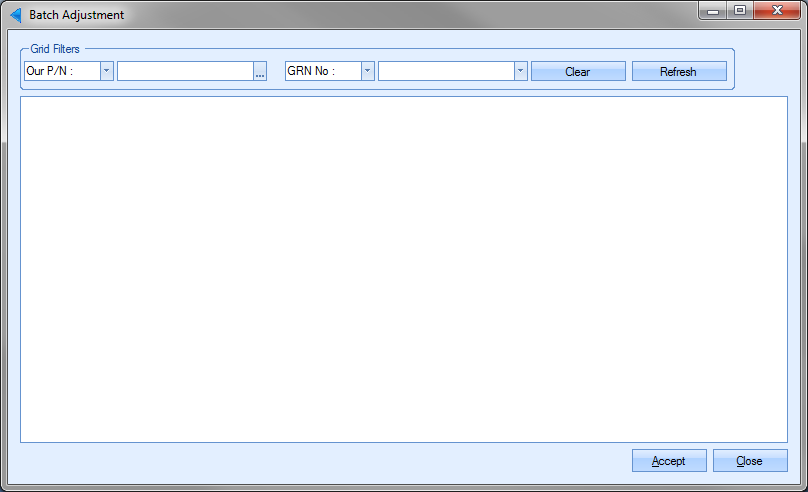
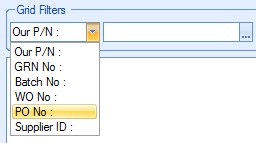
The user can use the grid filters at the top to locate the required part and/or GRN number. The user can locate the batch/GRN required available filters.

Once the user has entered any filters, they can view the details by clicking on the REFRESH option.
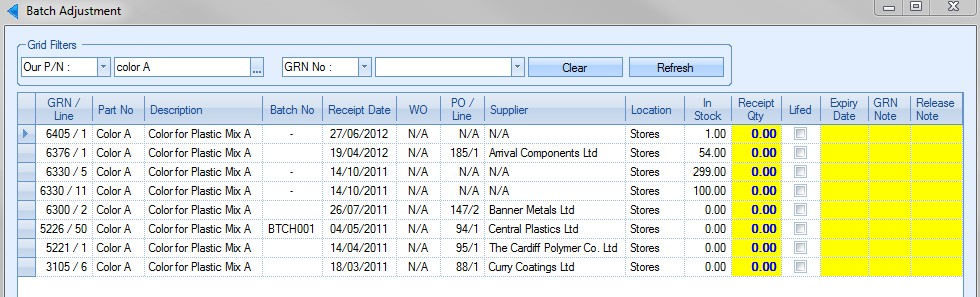
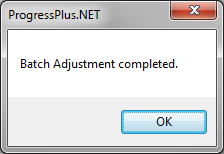
All inventory batches that match the criteria entered will be displayed. The user can enter the quantities to be adjusted onto the specific batches against those batches. Once all the details have been entered, the user can click ACCEPT to complete the batch adjustments. Confirmation is given by the following message.
This option allows the user to receive items back from the customer. This option can also be used to return quantities that have been over delivered or delivered in error. Clicking on this option presents the user with the following screen.
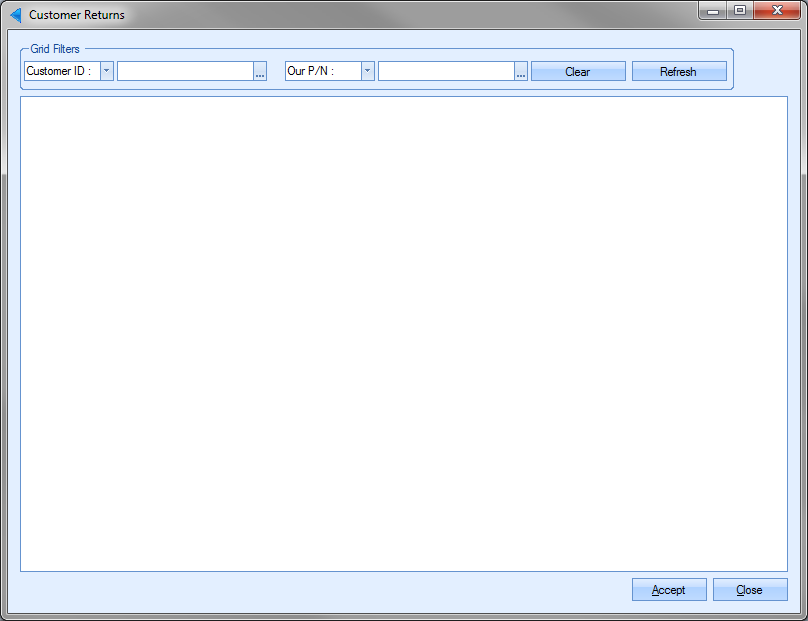
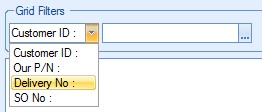
The user can locate the delivery they wish to return using the grid filters at the top of the screen. The delivery can be identified by customer, delivery number, part number or sales order number.
Once any filters have been entered, the user can view the selected delivery by clicking the REFRESH option. This will display all deliveries that meet the selected criteria.

When a customer return is done, the system will either record the returned goods against a new GRN number or it will adjust the goods back onto the original GRN number that they were created under. For traceability purposes we would always suggest the goods are returned to their original GRN, however, the option to do either is available.
If a specific stock location has been set up for customer returns, then the goods being received will ALWAYS be returned to that stock location and WILL ALWAYS have a new GRN number, even if the system is configured to return the goods to the original GRN. This is because you can't have the same GRN in multiple locations, so the system has to assume the original GRN may still have stock so this is why the new GRN is assigned. If no specific customer return location is specified, then the returned goods will always be adjusted onto the original GRN and will take the same location.
The user can enter the quantity being returned to stock against the appropriate delivery line in the Return Qty field. If the part being returned is a lifed item, the item will be marked accordingly. This will require the user to enter the expiry date of the goods being returned. The goods cannot be received into Progress without an expiry date.
If the goods being returned are to be credited, then the user also has an option to trigger this. The RAISE CREDIT tick box will allow this return to be flagged up to others that a credit needs to be raised. The screen also indicates if the delivery has been invoiced, which again, also may help determine whether a credit needs to be raised.

Ticking this option highlights the return on the Today screen on the Customer Returns To Credit screen from where a credit can be raised if required. FOr more information on the Customer Return To Credit screen, please refer to the Today section of the manual.
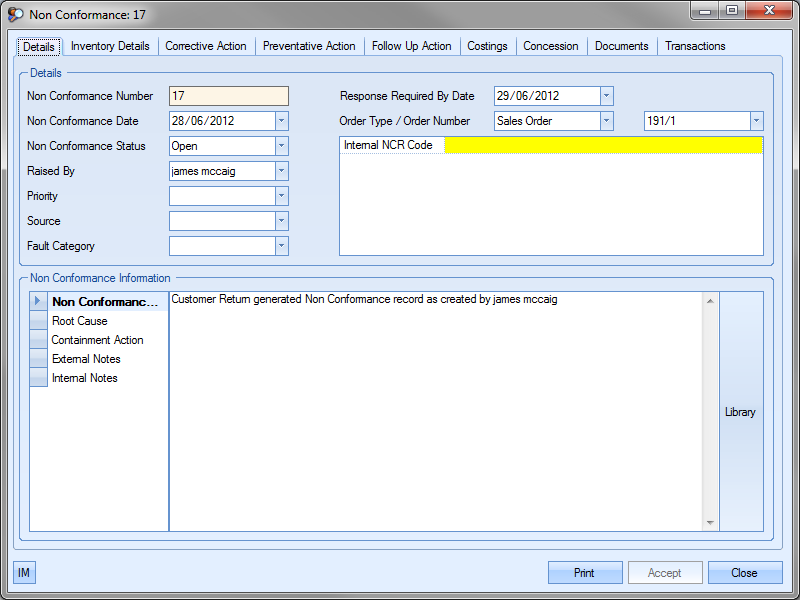
If the Quality module has been purchased as part of the Progress installation, the user will have the option to create a non conformance from the customer return. To create a non conformance, the user must tick the NON CONFORMANCE option.

With this option ticked, clicking the ACCEPT option to complete the customer return will create a non conformance record in the Quality section of Progress.
For more information on non conformances and the Quality section of Progress, please refer to the Quality section of this manual.
The user can complete the customer return by clicking the ACCEPT option. Confirmation will be provided to the user by a message similar to the following.

Upon completion, the inventory returned will be added to stock.
Print Customer Return
This option allows the user to generate a document to accompany goods that have already been systematically returned using using the Customer Return option.
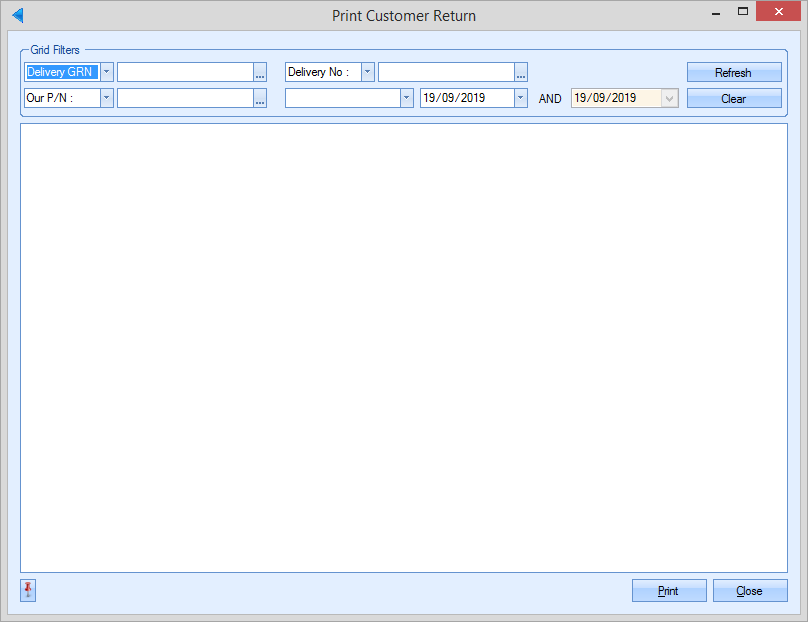
Just like the Customer Return option, the user can search for the original despatch details using the grid filters at the top of the screen as well as by receipt date using the date filter. Once any filters have been applied (if any), the user can click REFRESH to search for anything that meets the search criteria.
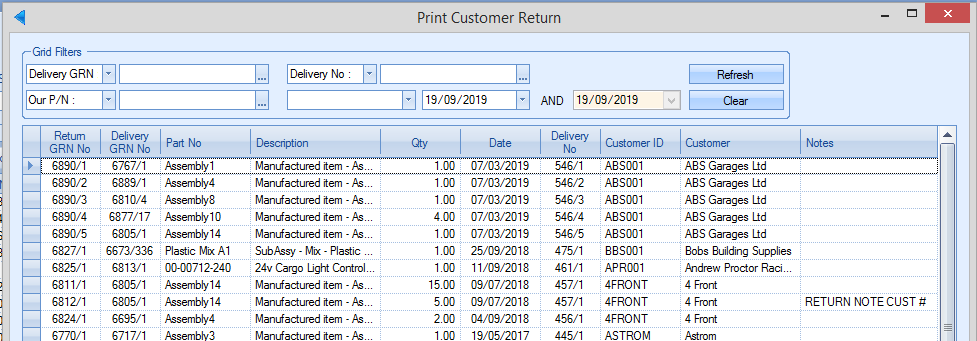
Once the user has identified the despatch they are interested in, they simply highlight the row they are looking for and click the Print option to generate the document.
Free Issue Receipt
On occasion, material may be sent in by a customer for use on an order they have placed. This option allows the user to receipt the items into stock, indicating which customer supplied it and without the need for a purchase order.
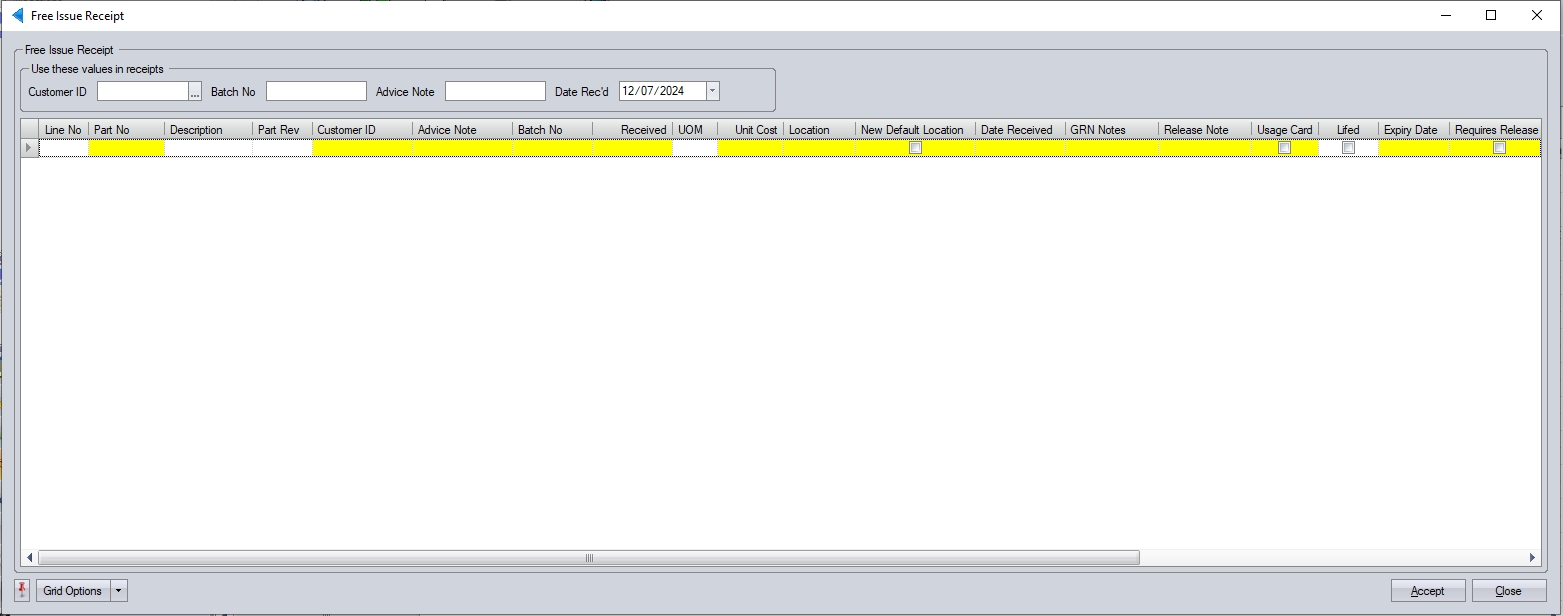
The user can record a variety of information when receiving this material from a customer and can default the customer ID, batch number, advice note number and the receipt date using the default values which can be set at the top of the screen.

Populating these values will default them against all receipts made in the grid below; useful if a number of different items are being received from the same customer together.

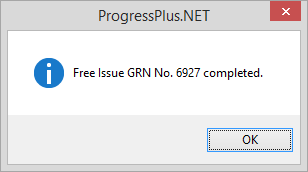
Any additional notes can be added in the GRN and/or Release note fields as well as an expiry if any of the items have an expiry date. Once all the items have been entered, the user can receipt them all into stock by clicking the ACCEPT option. The system will confirm receipt by displaying the associated GRN number.
Free Issue Receipt (Ind. Batch)
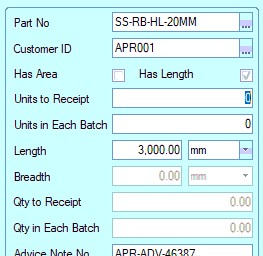
This option allows the user to record receipt of component material from a customer, but as individual batch quantities as opposed to one single batch.
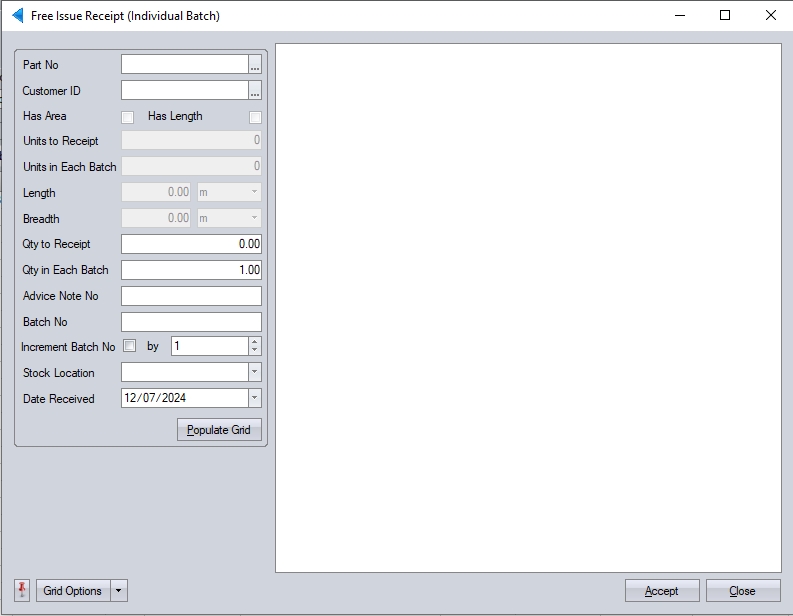
The user can select the part number being received by searching for the relevant part number. Once the part is selected, the user can select the customer providing the material. The advice note number, receipt quantity, individual batch quantity, stock location and the receipt date can all be entered by the user too.
If the user is receipting a HAS AREA/HAS LENGTH part, the system will prompt for the number of units and the dimensions.
Once all the details have been provided, the user will click Populate Grid to generate the individual batches.

The user can enter the individual batch information along with any additional notes and/or expiry dates if required. Once all the details have been entered, the user can complete the batch receipt by clicking the ACCEPT option. This will receipt all the individual batches as specified.
This option allows the user to received inventory from purchase orders that have been created in Progress. This is the same as the receipt process available directly from the purchase order itself. Clicking on this option presents the user with the following screen.
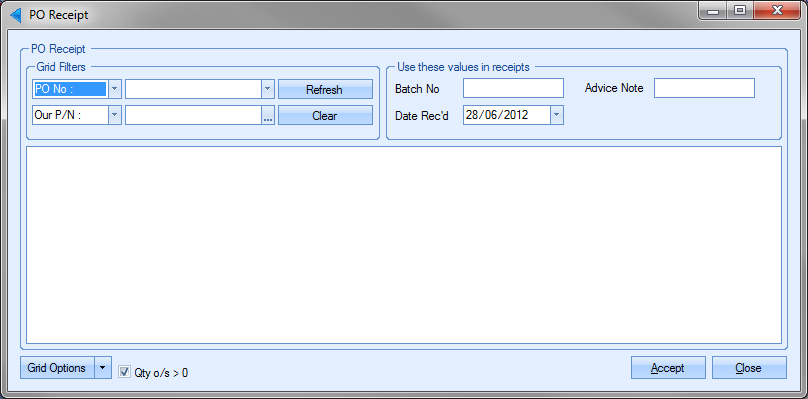
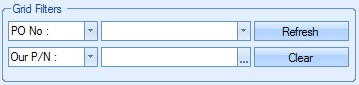
The user can locate the purchase orders required using the grid filters at the top of the screen and can filter by supplier, work order, purchase order, sales order or the part number.
Once the user has specified any filters, clicking the REFRESH option will present the user with any purchase orders that meet the specified criteria.

Only purchase orders with outstanding quantities and which do not have a status of ON HOLD will be displayed by default, but the user can view purchase order lines that have already been fully received, i.e. outstanding quantity of 0, by unticking the option at the bottom right of the screen and clicking the REFRESH option.
![]()
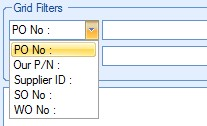
If the user is receiving a large batch of items from the same purchase order, they can use the batch, advice note and received date options at the top of the screen.
These fields allow the user to set default values for all receipts being made. As the user enters receipt quantities against each of the listed purchase order lines, the values entered at the top automatically populate against the purchase order lines.

The fields highlighted in yellow are fields that the user can complete. Some of this information will default based on the part’s inventory record. The Location, Weight and Date Received values will default with the Date Received defaulting to the current date. The user can update any of these fields if required, including the option of updating the default location of the part by ticking the New Default Location. This will update the part’s inventory record.

If the item being received is a lifed item, the user will be prompted to enter an expiry date. This is mandatory for lifed item. If no expiry date is entered, the system will prompt the user to enter one.

Once the user has entered all the details, they can click the ACCEPT option to complete the receipts. Confirmation of the receipts will be provided in the form of the following message.

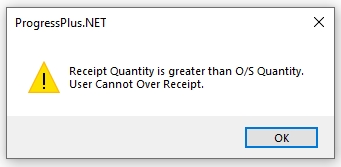
If the user received a larger quantity from the supplier than was ordered, if extras are sent for example, the user can still receive the increased quantity. They user will be notified of this situation by the following message.
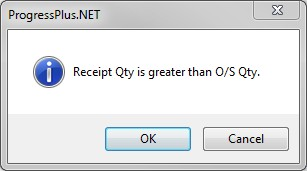
If the user is authorised to over receipt purchase orders, then clicking OK will proceed with the receipt. If the user is not authorised to over-receipt purchase orders, then any attempt to receipt a PO line for a quantity that will exceed the ordered quantity will result in the warning message below.
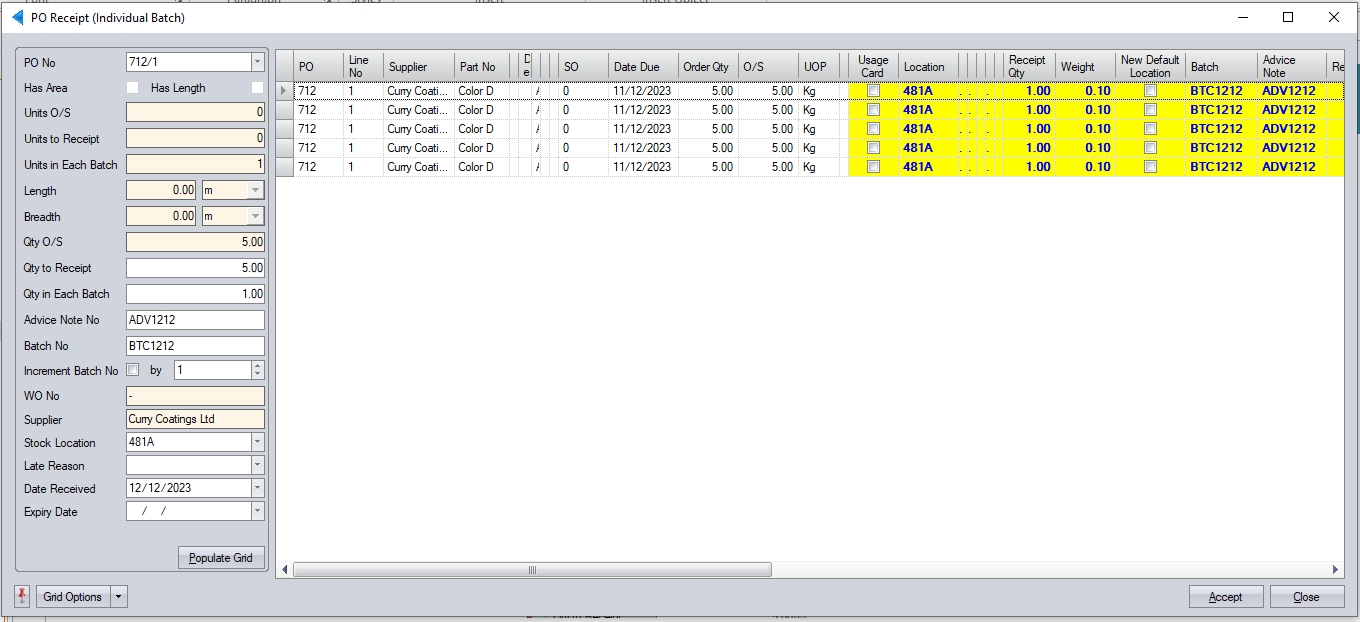
PO Receipt (Ind Batch)
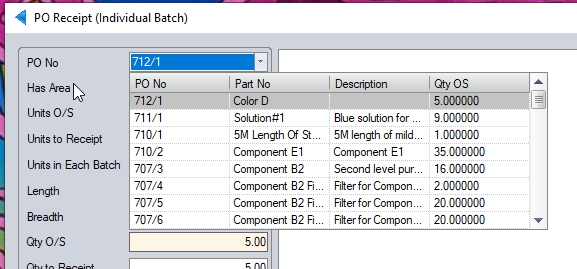
This option allows the user to make a stock receipt against the purchase order in batch-sized quantities. This is the same screen that is available via the Inventory > Receipts section of Progress. Selecting this option presents the user with the following screen.

The user can select the PO line using the drop down list at the top of the screen.
The user can fill in the advice note number, set the batch size, expiry dates, stock locations and also any prefixes that the batch number should retain upon receipt using the options of the left-hand side. This information will be used to populate the individual GRNs created based on the specified batch quantities.
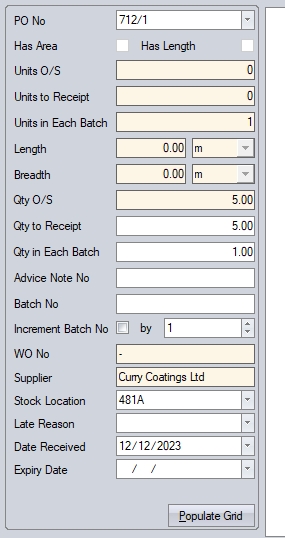
The user also has the ability to increment the batch numbers. This is useful if the user wants to retain the original batch number the goods came in under but sequence them based on the number of individual lots being booked into stock.
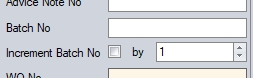
(Unticked - all batches will have the same BATCH number)
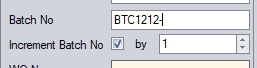
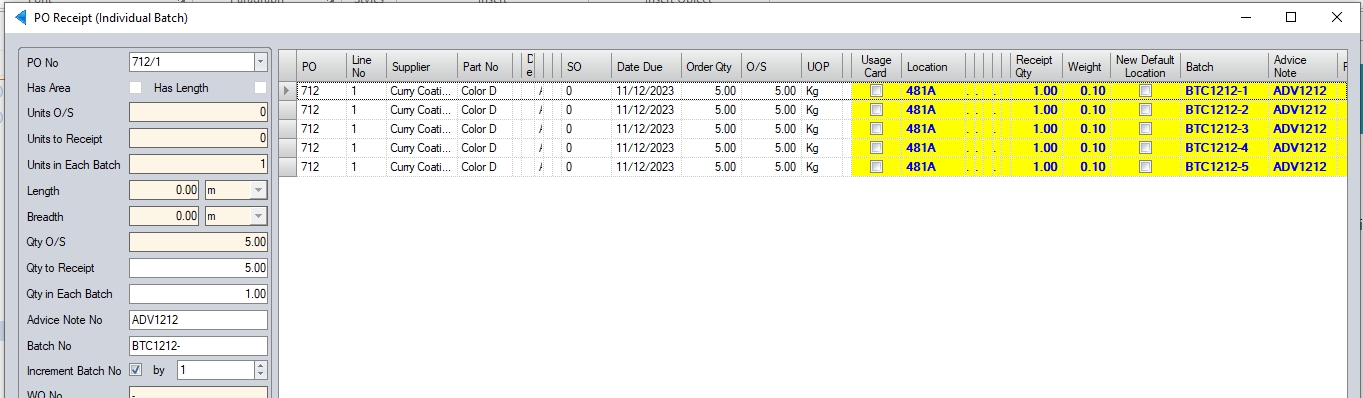
(Ticked - batches will be assigned an incremental BATCH number)
If the user is receipting a HAS AREA/HAS LENGTH part into stock, then the system will record the number of units and the dimensions of the part.
Once all the details have been entered, clicking the POPULATE GRID option will generate all the required batches with associated details in the grid on the right-hand side. The user can also edit any of the fields highlighted in yellow if required. Once the user has all the details verified, the can click ACCEPT to receipt all the batches into stock.
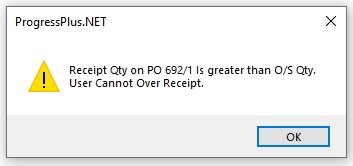
If the user received a larger quantity from the supplier than was ordered, if extras are sent for example, the user can still receive the increased quantity. They user will be notified of this situation by the following message.
If the user is authorised to over receipt purchase orders, then clicking OK will proceed with the receipt.
If the user is not authorised to over-receipt purchase orders, then any attempt to receipt a PO line for a quantity that will exceed the ordered quantity will result in the warning message below.
This option allows the user to return inventory to stock which has been issued to work orders. This can be used where over issues have been made to work orders or where defective material is to be quarantined after being issued to work orders. Clicking this option presents the user with the following screen.
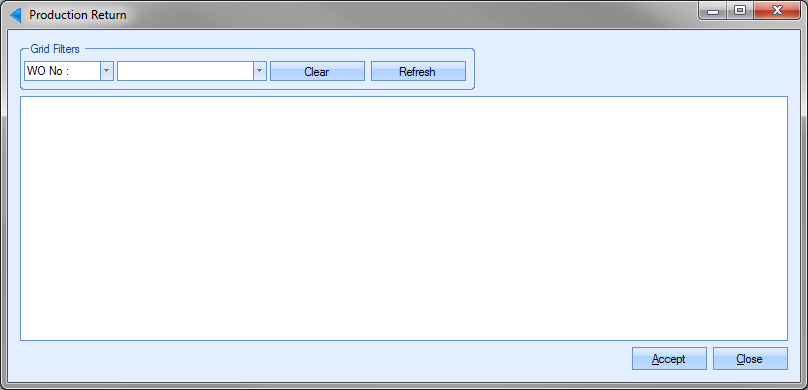
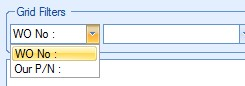
The user can use the grid filters at the top of the screen to locate the work order they need to return inventory. This can be done by work order or part number.

Once the user has identified the work order, they can view the details by clicking the REFRESH option. The screen will then populate with all the inventory issues which match the selected filters.
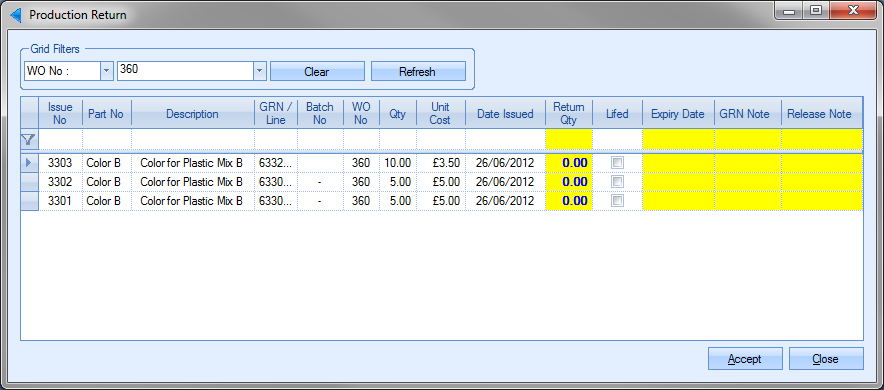
For work orders with large amounts of issues, the user can filter the list further using the top filter line.

Once the user has identified the issues to be returned, they can specify the return quantity against the appropriate part number. Once the quantities have been entered, the user can complete the return by clicking the ACCEPT option. This will return the quantities specified to stock. If all material is to be returned from the job, the user can click the RETURN QTY column heading and the system will default the return quantity to the issue quantity for all parts that were issued. The system will prompt for the user to confirm this.
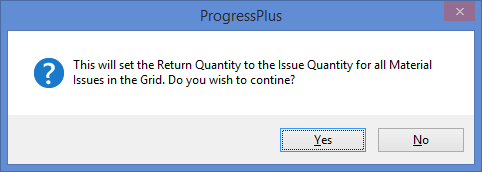
Upon clicking the YES option, the system will continue to populate the RETURN QTY field for all parts listed.
This option allows the user to receipt manufactured items against a work order. This is the same process as the RECEIPT option available in the work order itself. Clicking on this option presents the user with the following screen.
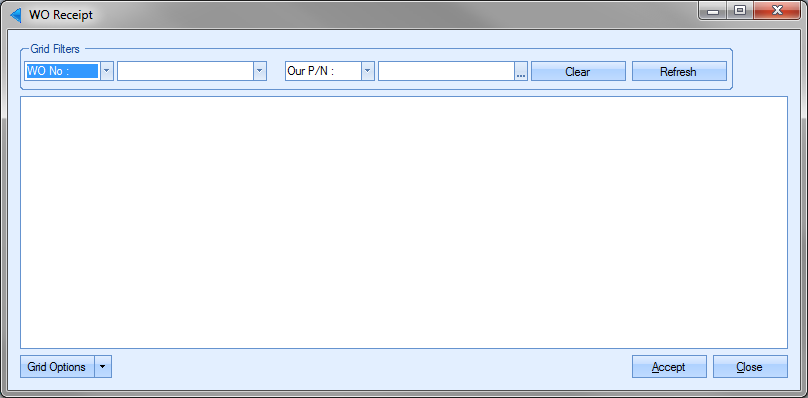
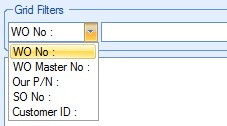
The user can filter this screen using the grid filters at the top. The user can filter based on sales order, work order, part number, customer and master work order.

Once the user has entered the filters required, they can view the work order details by clicking the REFRESH option. this will display all the associated details of the work orders waiting to be received. The system will also set the batch number against each to the default "WO NO/Receipt No" format, however, the user will be able to amend this if necessary in the grid itself.

The user can locate the work order(s) required and enter the quantity being received in the RECEIPT QTY field. If the manufactured part is a lifed item, the user will be forced to enter an expiry date. If the user does not enter a date, the system will highlight this to the user with the following message.

Once all the details have been entered, the user can complete the work order receipt by clicking the ACCEPT option. Confirmation of the receipt will be provided by the following message.

If a work order receipt is made against a part that is subsequently used in the manufacture of another part, the system will prompt the user to issue the received quantity to other work orders where it’s required. Much like the issuing of purchased parts direct from the receipt, this allows the user to issue sub-assembly parts directly to their parent or master work orders. The Issue Child Work Orders Received to Parent Work Orders screen is presented to the user in this situation.
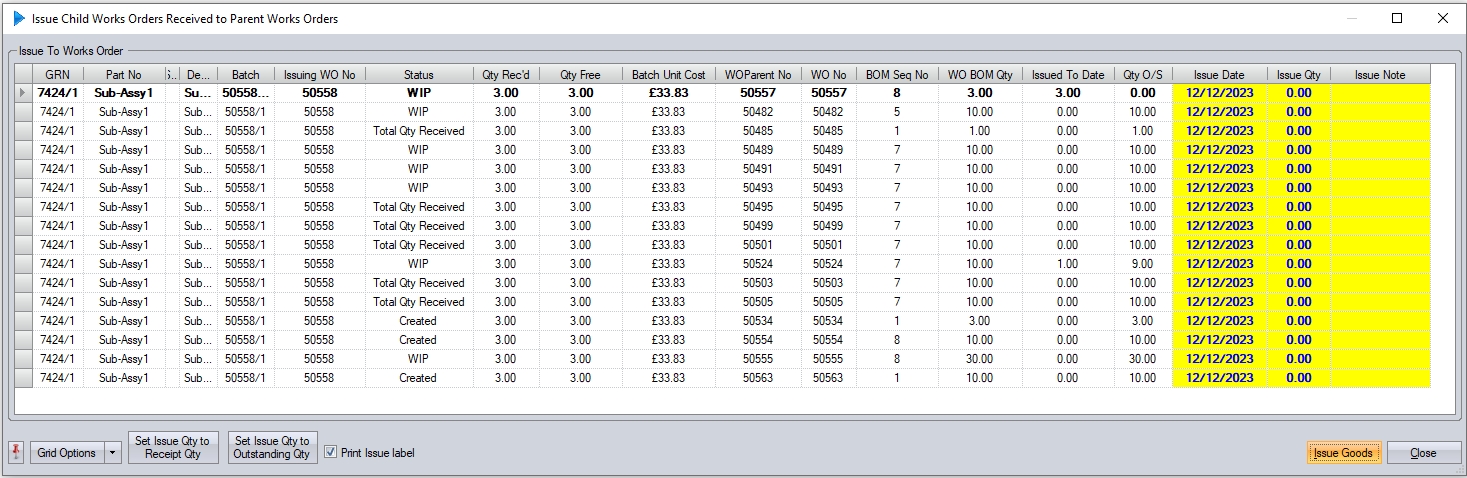
This screen lists all the current work order requirements for the received part. If the received work order was created for a specific work order, for example, to manufacture a sub-assembly component, that work order will be highlighted in bold. All other work orders listed are simply other requirements. The user can enter an issue quantity manually into the highlighted field or can use the two options at the bottom left of the screen to determine the issue quantities.
![]()
| Set Issue Qty to Receipt Qty | This option sets the Issue Qty value to the full receipt value for all lines listed. |
| Set Issue Qty to Outstanding Qty | This option sets the Issue Qty to the full outstanding quantity for all the lines listed. |
Once the ISSUE QTY values have been set, clicking the ISSUE GOODS option will issue the quantities specified. This will be done for as many of the work orders listed until the receipt quantity has been issued in full.
NOTE: If the user selects the SET ISSUE QTY TO RECEIPT QTY option and the receipt quantity is greater than the work order requirement, clicking the ISSUE GOODS option without any further amendments will issue the full receipt quantity to the first work order listed. This can lead to over-issues of component material.
If the system is configured to print an Issue To Production label, then the PRINT ISSUE LABEL option will be ticked at the bottom of the screen.

Label(s) will be generated upon completion of the issue transactions. If the user wishes not to print labels, they can untick the PRINT ISSUE LABEL option before clicking the ISSUE GOODS option. Similarly, if the system is not configured to generate the labels but the user wishes to print them, they can simply tick this option.
WO Receipt (Ind Batch)
This option allows the user to receive the work order quantities in specific batch quantities. This can be used when maximum batch sizes must be adhered to for traceability purposes. Clicking this option will present the user with the following screen.

The user can select the required work order from the drop-down list or manually type the WO required.

Once the work order has been selected, the work order information is displayed on screen.
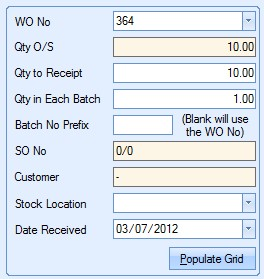
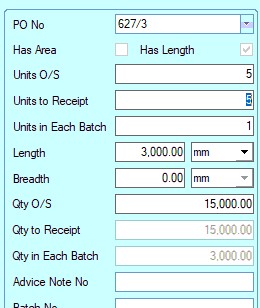
The outstanding work order quantity is displayed as well as any associated sales order and customer information. The user can enter quantity to be received and also the batch size for the receipt. If the user wishes to prefix the batch number with any text, they can enter this in the BATCH NO PREFIX field. Any prefix will have "/X" added at the end, where X is a sequential number starting at 1. Leaving this blank will set the batch number to the work order number.
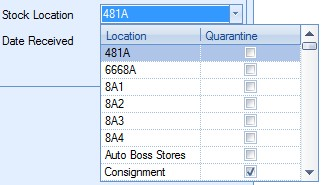
The user can also specify the stock location they wish to use for the receipt using the drop-down list at the bottom.
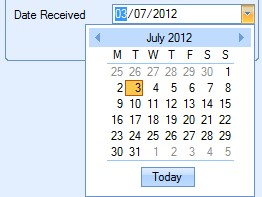
Finally, the user can set the receipt date using the DATE RECEIVED drop-down calendar. The date defaults to the current date, but can be amended by the user if necessary.
Once all the details have been set, the user can click the POPULATE option to generate the receipt batch quantities. This will present the user with the following breakdown in the right-hand grid.

The receipt quantity entered by the user is split down into the batch quantities specified. The user can review the details and amend any of the fields highlighted in yellow if necessary. If the part is a "lifed part", the user must enter the expiry information. If the user tries to receive the items without entering the expiry date required, the system will highlight this.
Once the user is happy with the details entered, they can click the ACCEPT option at the bottom to process the batch receipts. Confirmation of the receipts will be displayed for the user as follows. If GRN labels are configured to print for WO receipts, these will also be generated.

If the receipted work order is a child component of another work order, the system will present the user with the Issue Child Work Order Received to Parent Work Orders screen just like the WO Receipt menu option detailed above.