This section allows the user to raise quotes for items from multiple suppliers before creating purchase orders based on the quotations returned from the suppliers. Selecting the Purchase Enquiries option presents the user with a screen similar to the following.
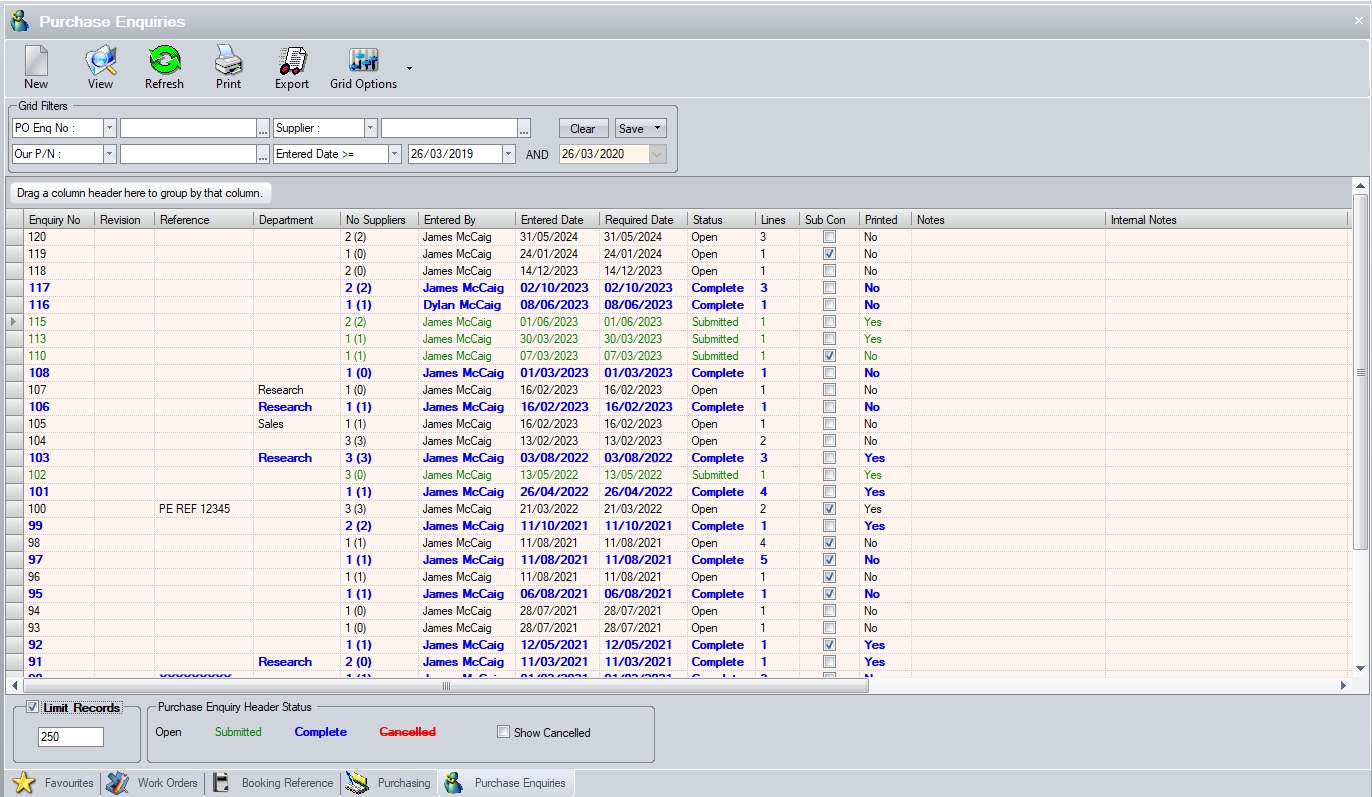
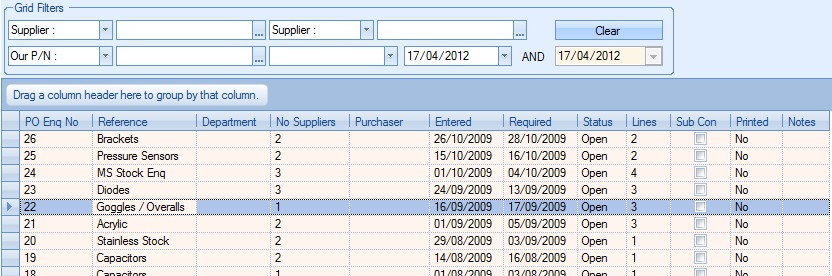
All existing purchase enquiries are listed in the main screen. The user can filter for specific purchase enquiries using the filters at the top of the screen.

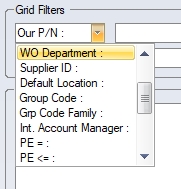
The user can select which pieces of information they wish to filter by using the drop-down lists to select the required field.

The user can then use the associated drop-down list to select the required values for the filters as shown in the next screen.
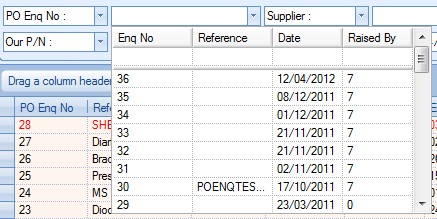
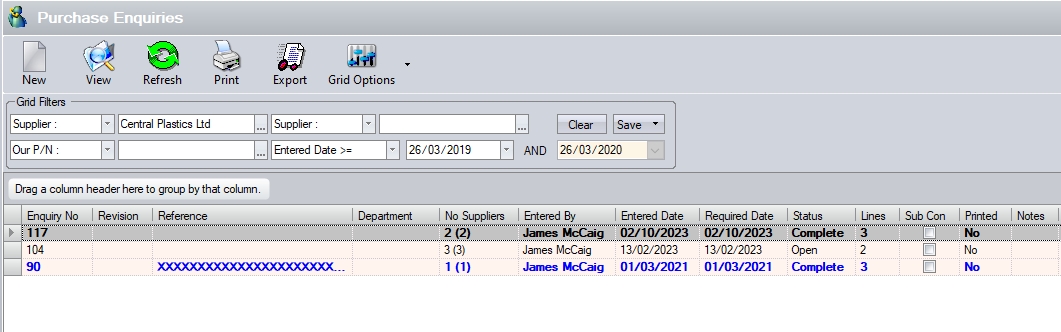
Once the user has selected the required filter, they can see the results by clicking the REFRESH option at the top of the screen. This will reduce the listed purchase enquiries to only those that meet the selected filter criteria.
View
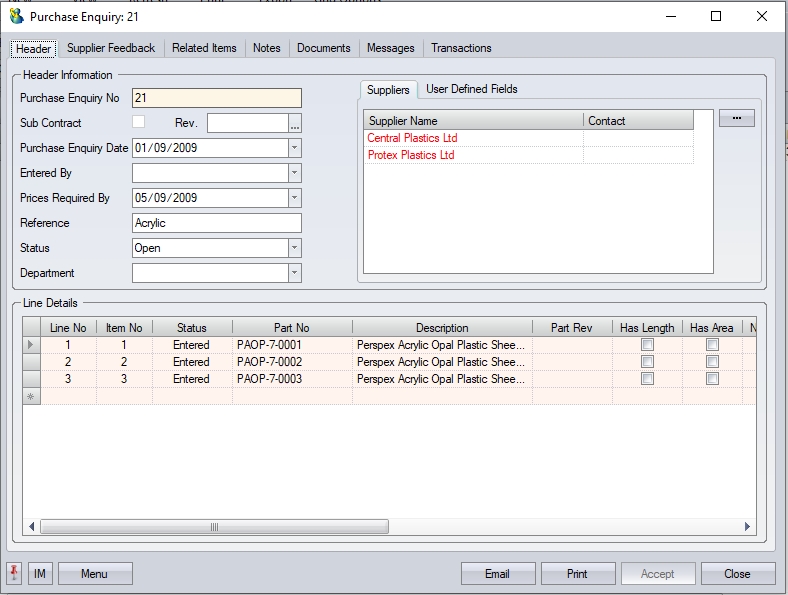
The user can access any of the purchase enquiries by double-clicking on the required enquiry or highlighting the enquiry in the grid and clicking the VIEW option at the top of the screen. Either method will open the selected purchase enquiry and display a screen similar to the following.
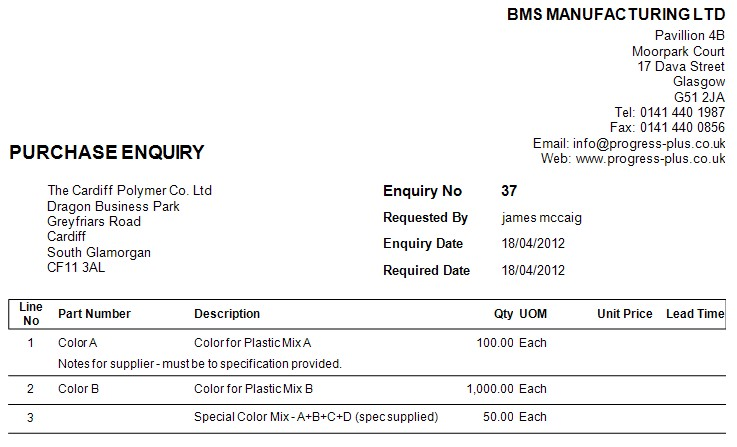
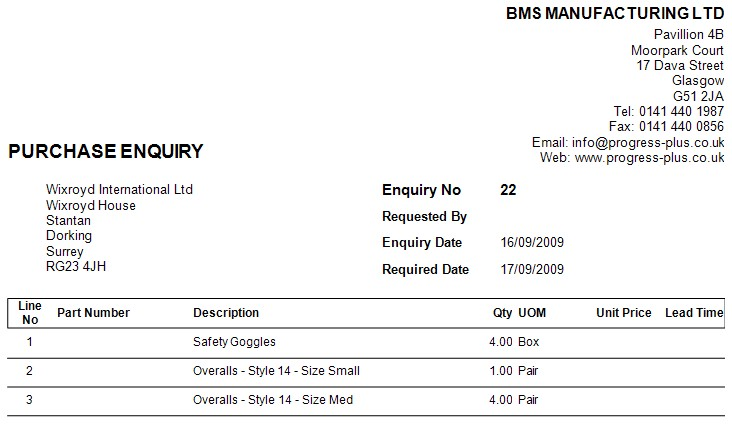
This option allows the user to print out the selected purchase enquiry directly from the main screen. The user simply has to highlight the required enquiry and then click the PRINT option at the top of the screen to generate the purchase enquiry document. The screen below shows the selected purchase enquiry and the resulting purchase enquiry document.
Export
This option allows the user to export the purchase enquiries listed in the browse screen to an Excel spreadsheet. The user can use the grid filters to list the purchase enquiries they want to export and then click the EXPORT option. The user will be prompted to provide a file name for the Excel spreadsheet.
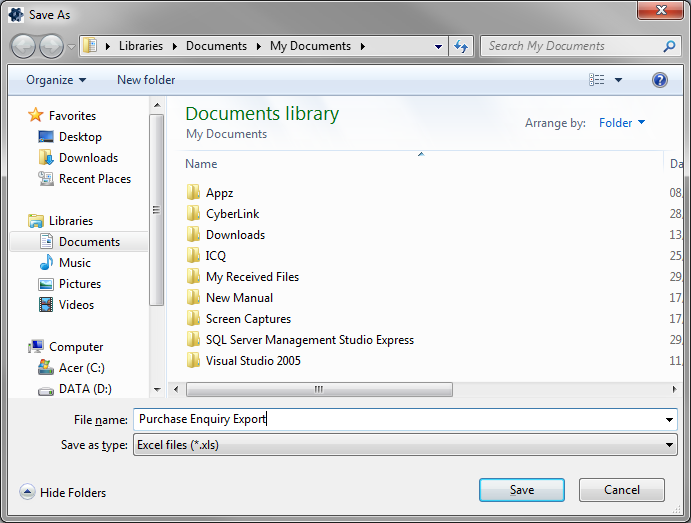
Once saved, the spreadsheet will open for the user to see. An example of the spreadsheet is shown below.

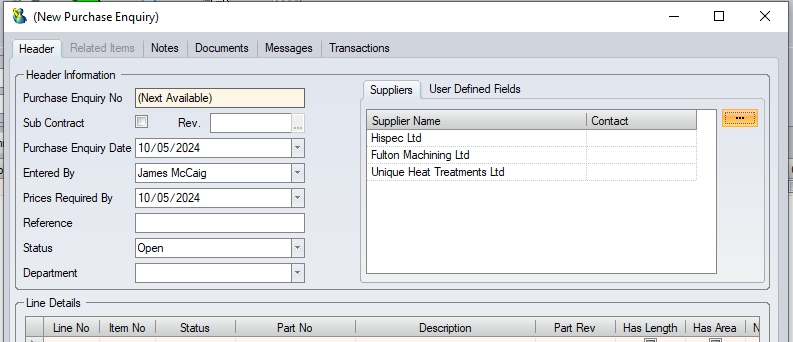
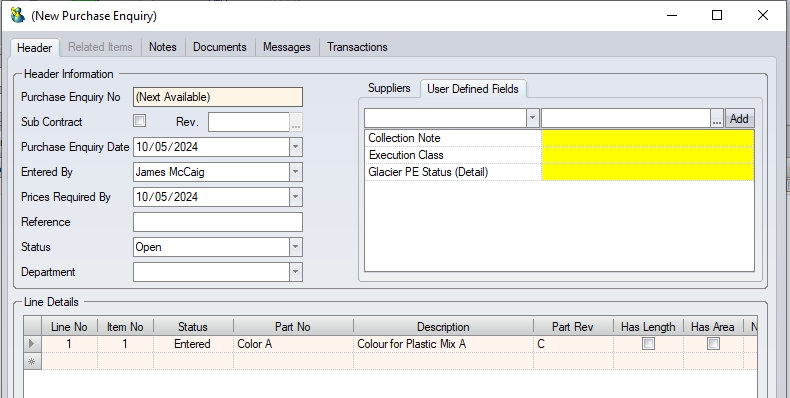
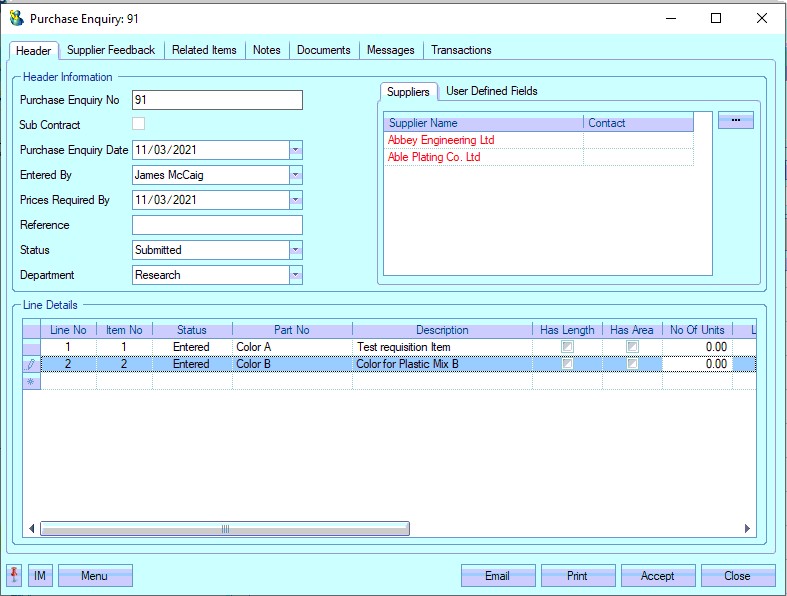
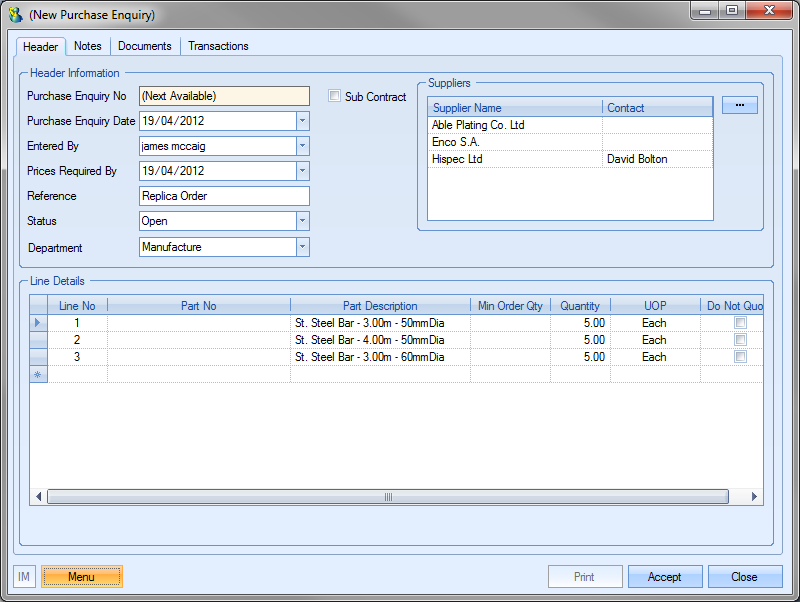
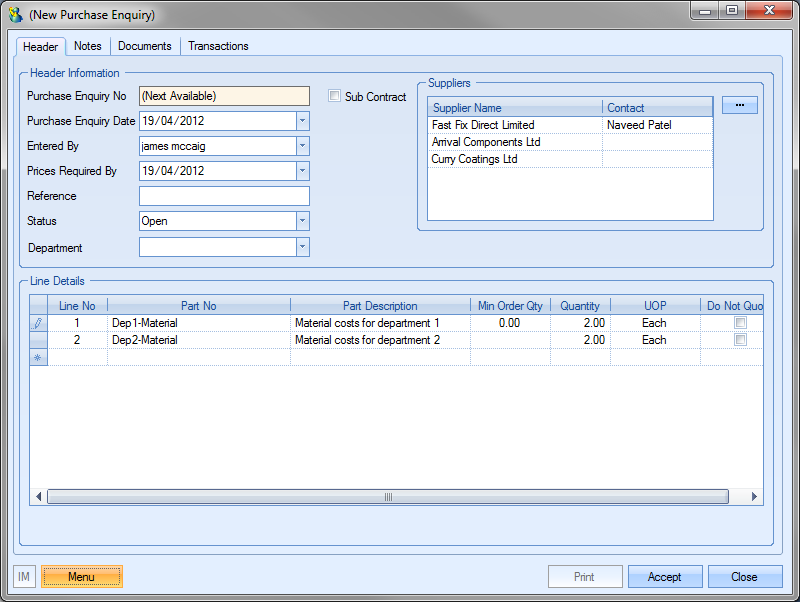
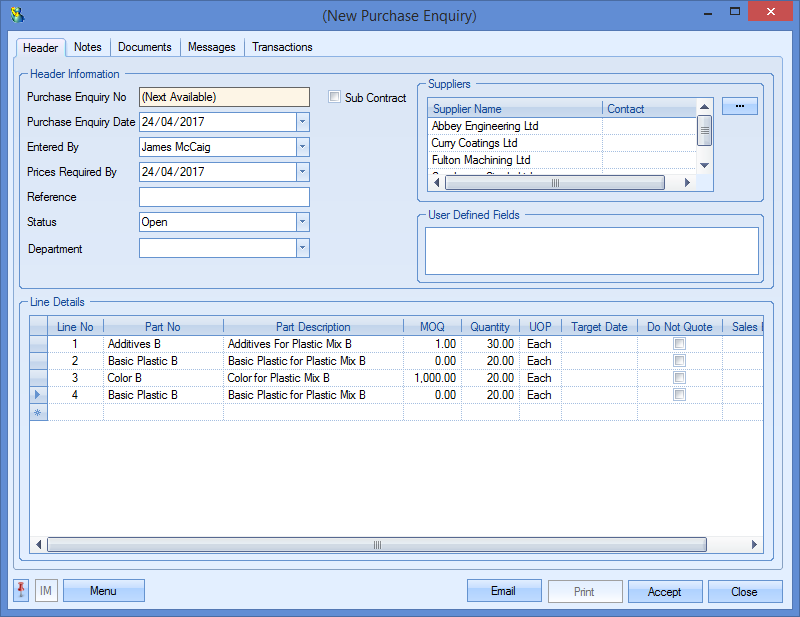
The user can create a new purchase enquiry by clicking on the NEW option. This will present the user with the following screen.
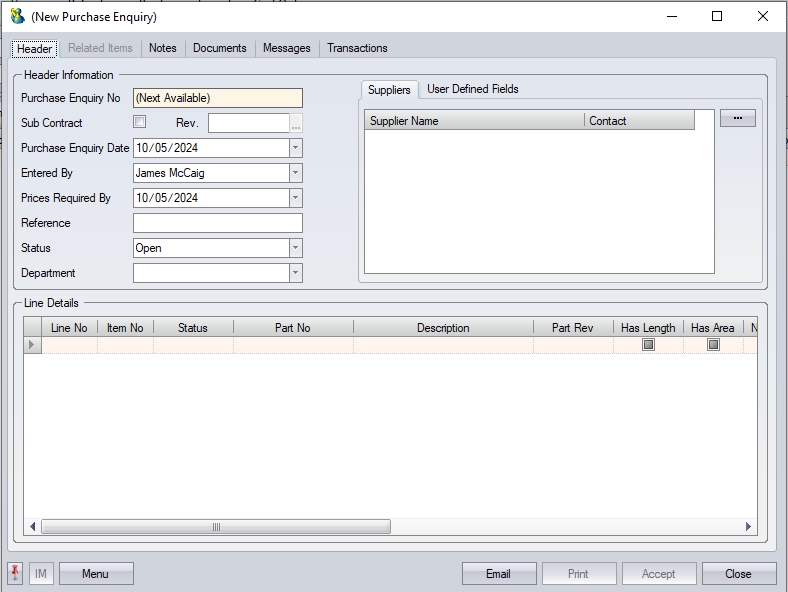
The screen above allows the user to specify some basic information regarding the purchase enquiry as well as the suppliers they wish to enquire against. The basic information is as follows.
| Purchase Enquiry No: | System generated number. Allocated once user clicks ACCEPT option. |
| Sub Contract: | This option indicates whether the purchase enquiry is for a subcontract (i.e. external) process or not. If this is ticked, then the Line Details grid is amended accordingly so the relevant subcontract information can be entered. |

(standard purchase requisition)

(Subcontract purchase requisition)
| Rev. | This allows the user to specify a revision number against the requisition. To add a revision, the user must first create the enquiry. Once saved, the user can click the |
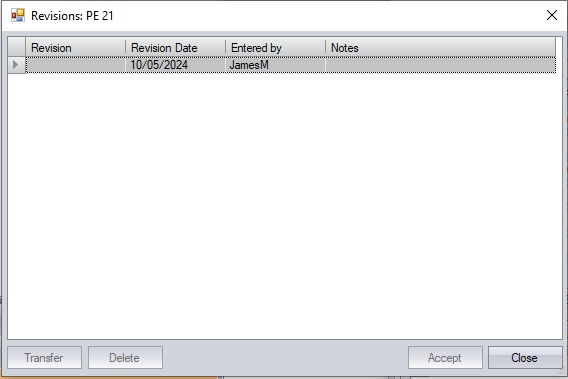
| The user can then add a revision, date and note regarding the revision being created. Once created, the user can select a revision by highlighting and clicking the TRANSFER option. This will pull the revision number through to the enquiry. |
| Purchase Enquiry Date: | Date of enquiry. Defaults to current date, but can be amended using the drop-down calendar. |
| Entered By: | Creator of the enquiry. Defaults to the current user but can be changed using the drop-down list if necessary. |
| Prices Required By: | Date when responses from supplier are required. Defaults to current date, but can be amended using the drop-down calendar. |
| Reference: | Allows user to put a reference against the enquiry. |
| Status: | Enquiry status. Defaults to OPEN. Is updated to SUBMITTED or CONVERTED based on the status of the items on the line details. The status will only be updated when ALL lines are at SUBMITTED or CONVERTED status. |
| Department: | Allows the user to allocate a department to the enquiry from the drop-down list. The department list is maintained via the List Maintenance screen. |
The user can add suppliers to the purchase enquiry using the supplier window at the top of the enquiry screen.
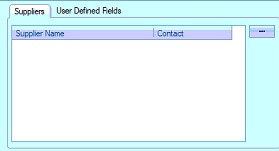
To add suppliers, the user can click on the ![]() option. This will present the user with a supplier list to select the user from.
option. This will present the user with a supplier list to select the user from.
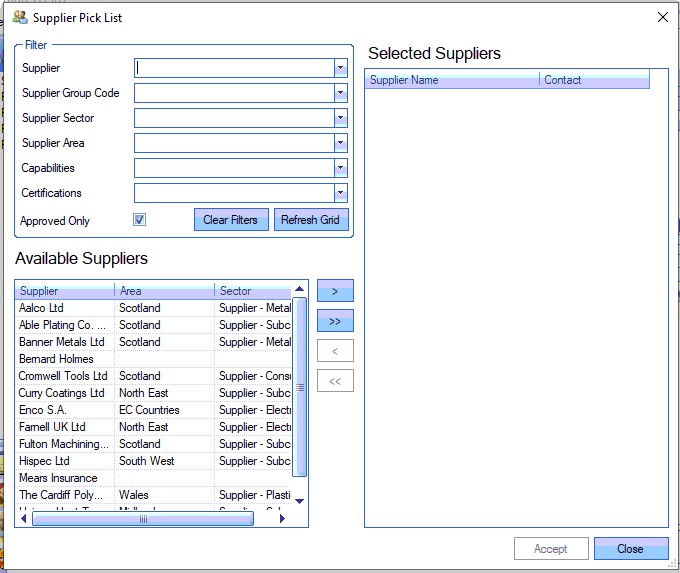
The user can use the filters at the top to find specific suppliers or groups of suppliers. The user can then add the suppliers by highlighting the required supplier and clicking on the ![]() option to add the selected supplier or the
option to add the selected supplier or the ![]() option to add all the suppliers listed. The user can also remove suppliers that have been selected by clicking on the
option to add all the suppliers listed. The user can also remove suppliers that have been selected by clicking on the ![]() option (removes selected supplier) or the
option (removes selected supplier) or the ![]() option (removes all suppliers). All suppliers selected are shown in the right-hand list as follows.
option (removes all suppliers). All suppliers selected are shown in the right-hand list as follows.
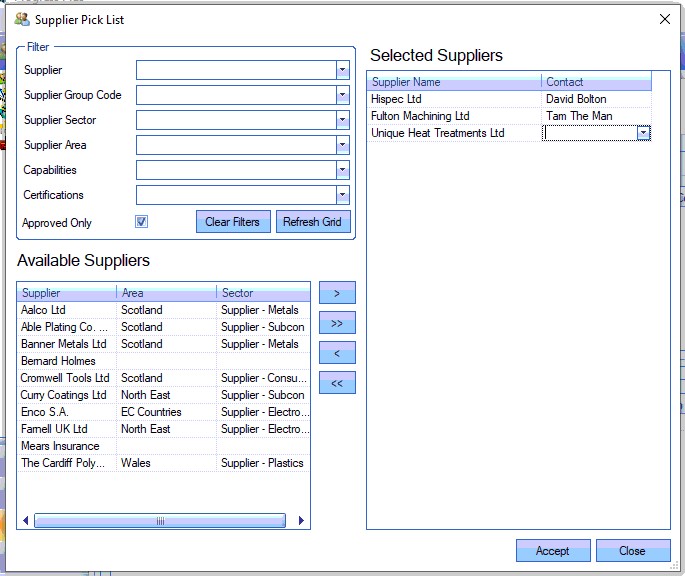
Clicking the ACCEPT option returns the user to the purchase enquiry screen along with the chosen suppliers. Any default or selected contacts for the suppliers will also be pulled through to the purchase enquiry and will flow through to any purchase orders created by converting the enquiry.
If the system has any user defined fields (UDFs) set up for the purchase enquiries header section, these will be visible in the tab shown below and can be filled in as required by the user.
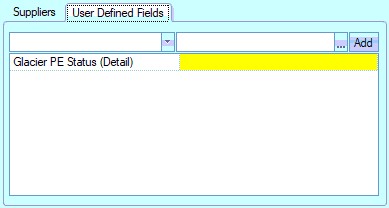
Once the user has completed any user defined fields and selected the suppliers they wish to contact regarding material prices, they can then enter the details of the material or parts they are looking for.
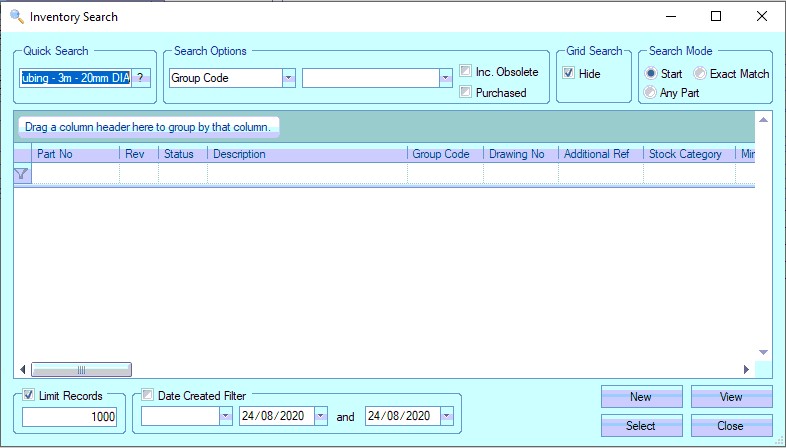
If the user is enquiring on an existing part number, they can click on the ![]() option against the Part No field to open the inventory search window.
option against the Part No field to open the inventory search window.
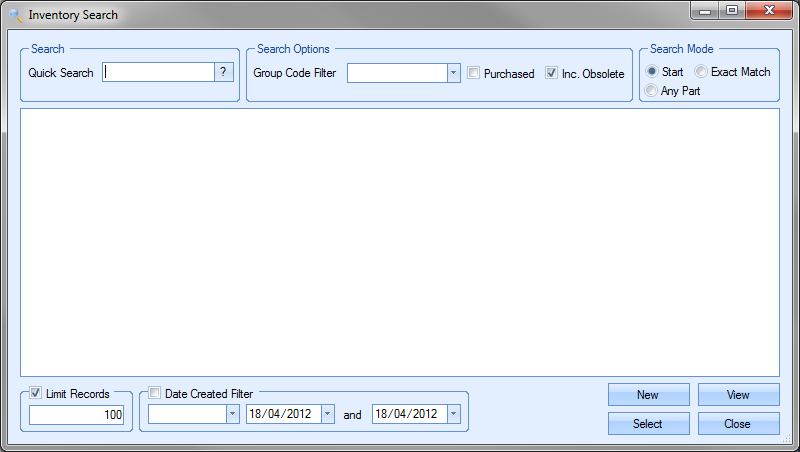
The user can search for the part number required. This will present a list of parts based on the search criteria entered by the user.
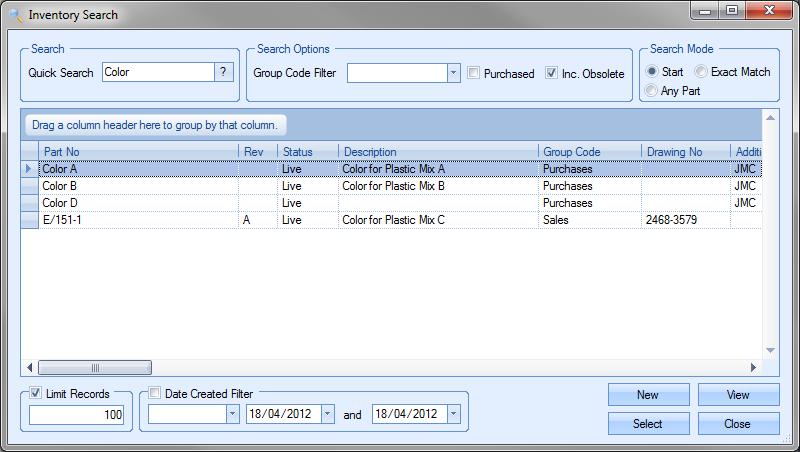
Once the item has been located, the user can simply highlight the part and click the SELECT option to add the part to the purchase enquiry. The user will be returned to the purchase enquiry screen with the part number selected.
If the item does not already exist in Progress, the user can create a new part number by selecting the NEW option in the Inventory Search window above. They can then proceed to create the new part number as required. For more information on creating part numbers, please refer to the Inventory section of this manual.
For existing and newly created parts, the part description field will populate from the inventory record along with the unit of purchase (UOP) and minimum order quantity. The user can specify the required quantity here. If any additional items are to be enquired upon, the user can complete the next lines of the purchase enquiry with the required information and quantities.
If the user wishes to enquire upon an item that does not currently exist in Progress, they can simply use a description to detail what they are enquiring upon.

Sub-Contract Enquiries
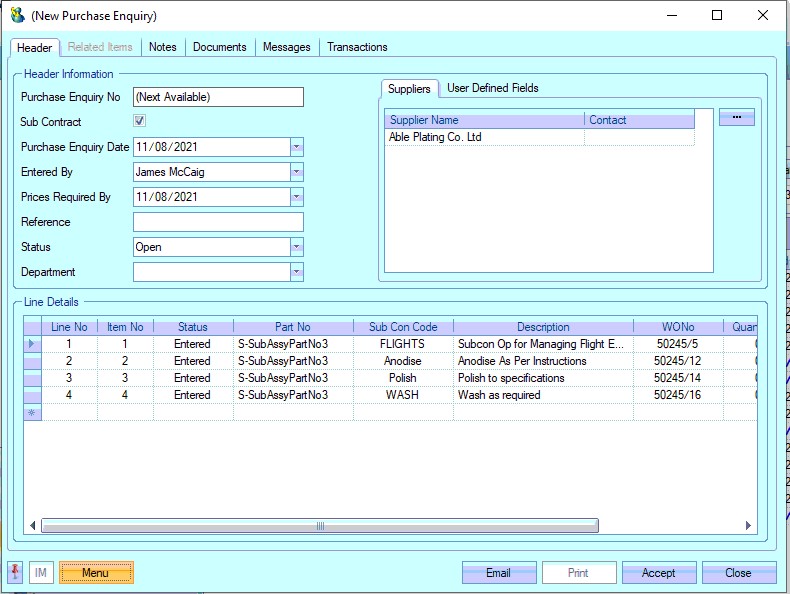
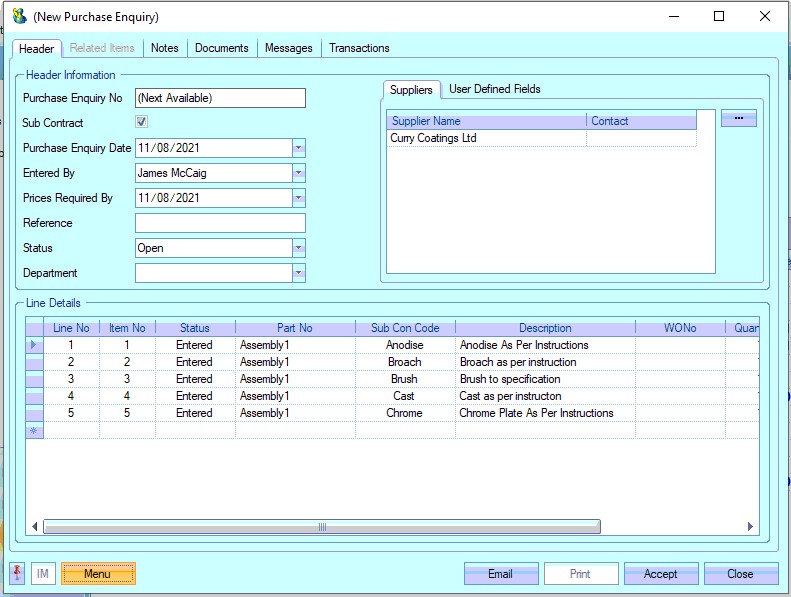
If the purchase enquiry is being raised for a subcontract process, then the process is very similar except the purchase enquiry is marked as subcontract using the tickbox in the header of the purchase enquiry.
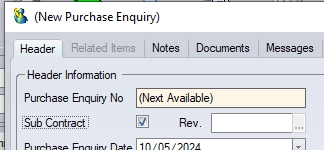
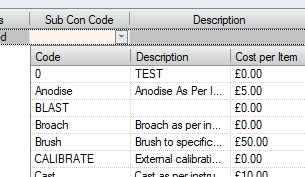
This changes the line item grid so the user can select the relevant sub-contract code.

The user can select the sub-contract code required from the drop-down list, and then the associated WO and operation (if applicable).

If the user has added a line to the purchase enquiry in error, they can delete the line in question AS LONG AS THE ENQUIRY HAS NOT YET BEEN SAVED. To delete the offending line, the user simply highlights the line and then presses the DELETE key on their keyboard.
Clicking the YES option will remove the line from the purchase enquiry whilst clicking NO will leave the line on the purchase enquiry. If the purchase enquiry has already been saved, then the unwanted line must be marked as cancelled. This can be done by amending the line status to DO NOT QUOTE.
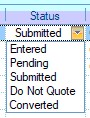
All lines added to the purchase enquiry will be assigned ENTERED status. As the purchase enquiry is submitted to the customer, the line status will be updated to SUBMITTED to indicate its been sent to the supplier. Upon conversion to a purchase order, the line status will be updated to CONVERTED. Assuming all line statuses are the same for these actions (i.e. ALL submitted or ALL CONVERTED) the purchase enquiry status will be updated to reflect this.
The user can select individual statuses for each line, including DO NOTE QUOTE, which removes an item from the purchase enquiry being sent out to the supplier. Can be used if the user decides against asking for a quote for the item or if the line is added in error.
Purchase Enquiry Supplier Feedback
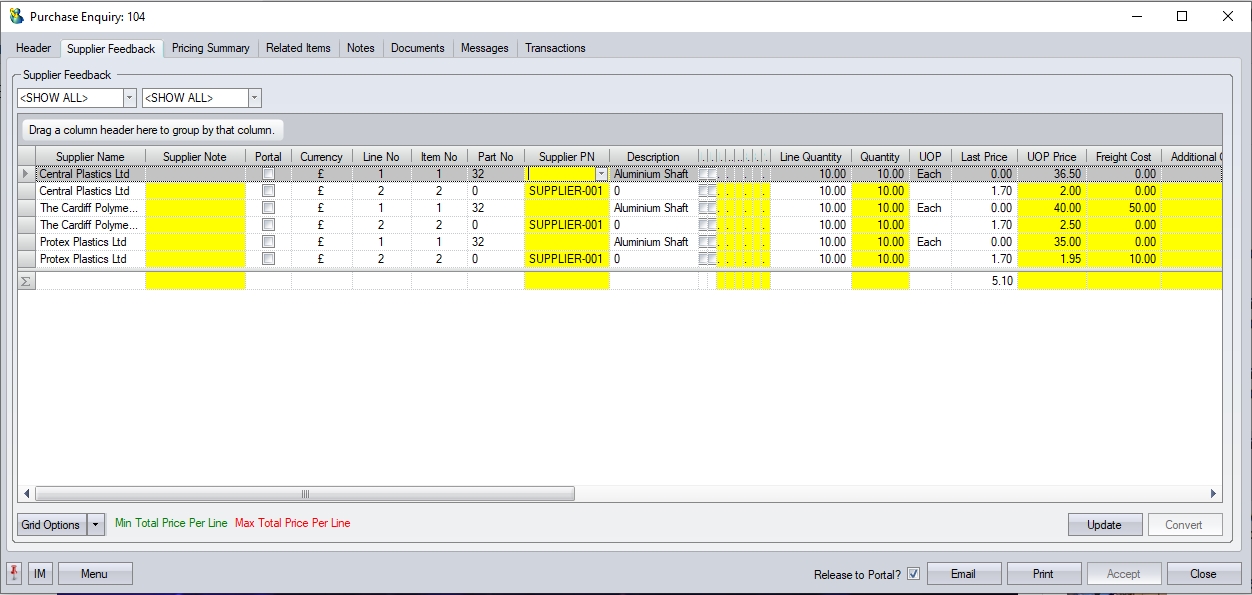
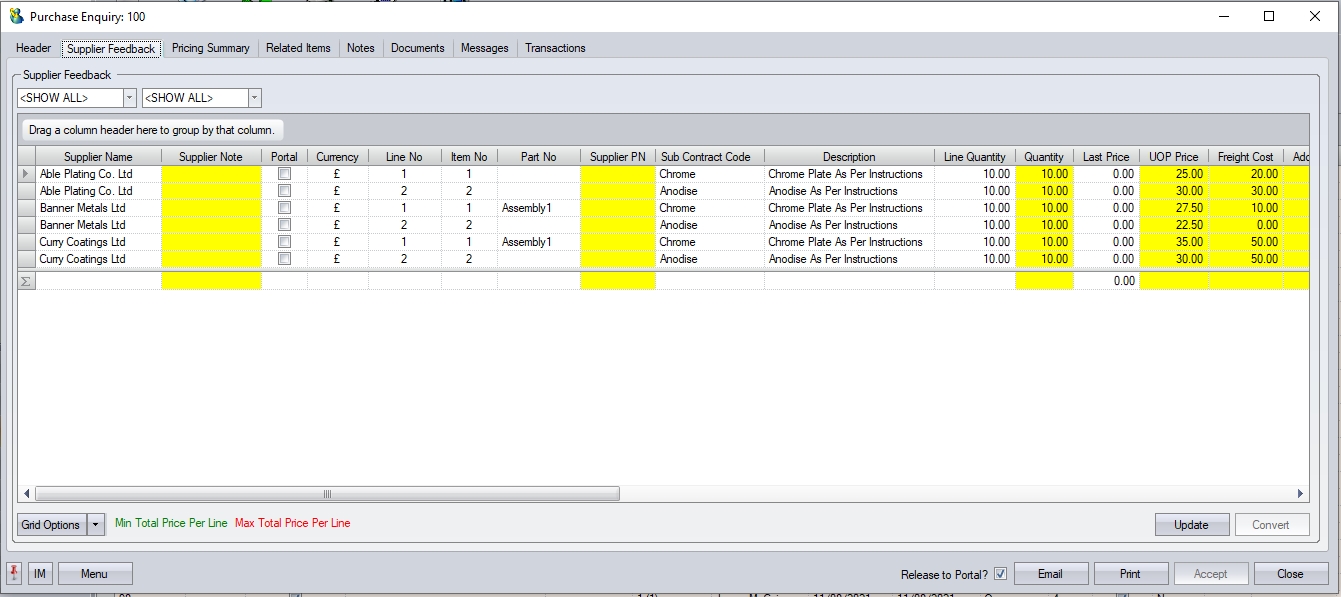
Once the purchase enquiry has been created and suppliers start to respond to the enquiry that was sent out, the user can record the responses for each supplier in this section. Initially, this screen will list all items and all suppliers, so the user can enter the price for each item provided by each supplier.
(standard PE example)
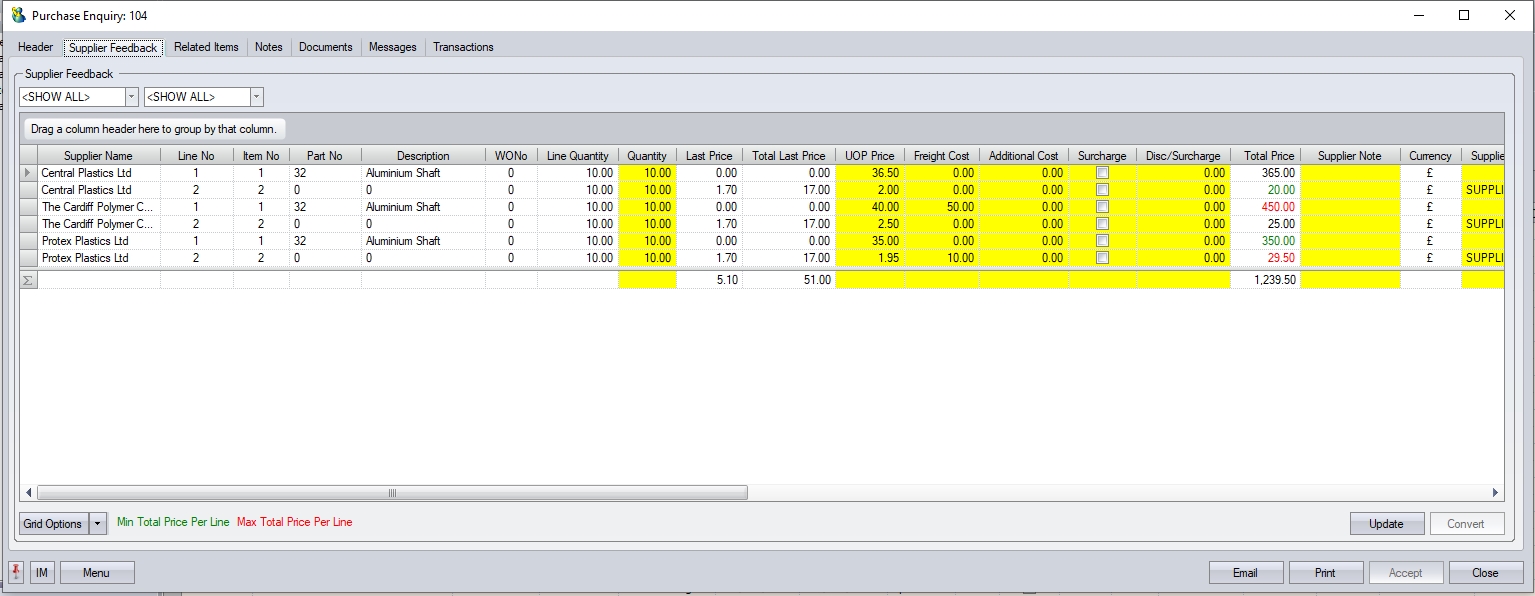
(Subcontract PE example)
The user can select the supplier and/or purchase enquiry line number to record against from the drop-down list at the top, or can select <SHOW ALL> to see all details.
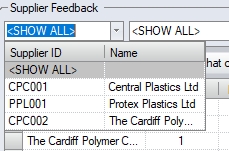
(supplier filter)
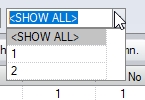
(Purchase enquiry line filter)
Once the user makes their selection, or leaves the filter at <SHOW ALL>, the grid will show the matching records.
The user also has the ability of grouping the information on the grid so it grouped by whatever field they select (i.e. supplier, part number, etc.). The user simply has to drag the column header up to the space above to apply the grouping. Multiple groups can also be applied if additional breakdown of the listed details is required.
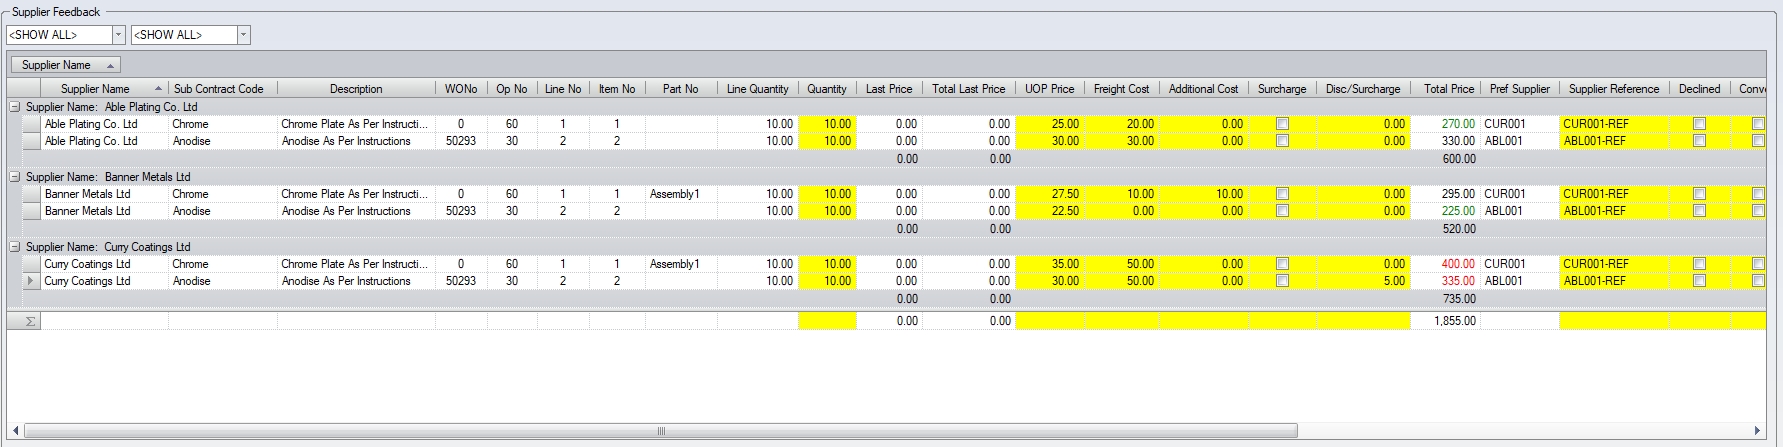
(Grouped by Supplier Name)
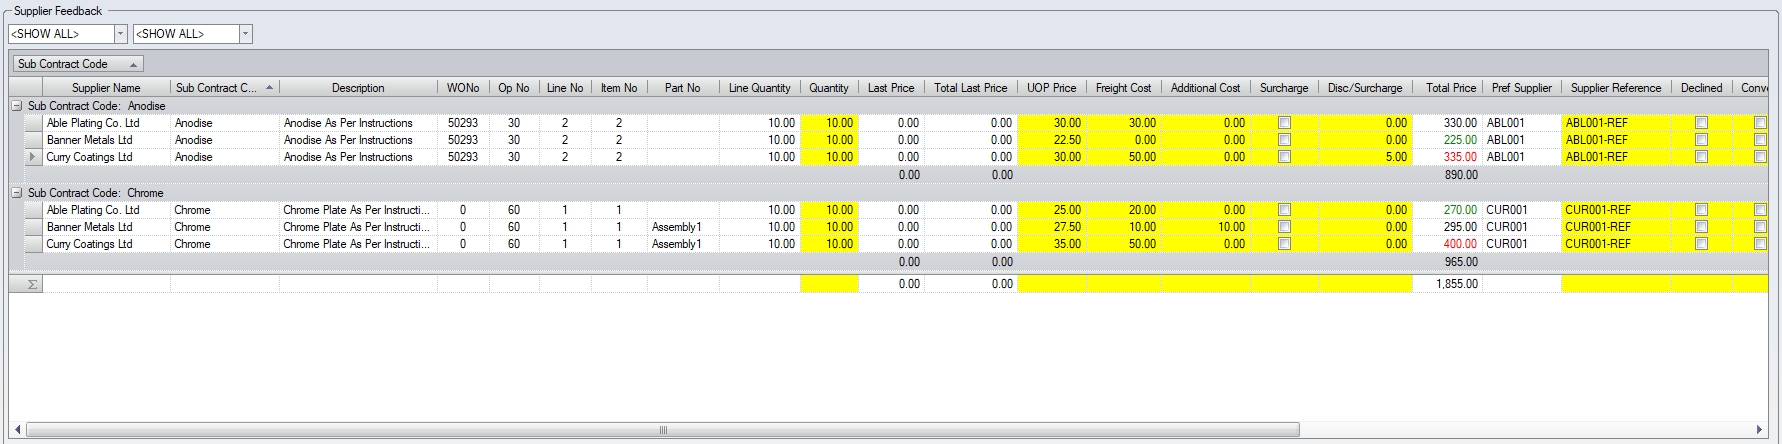
(Grouped by subcontract code)
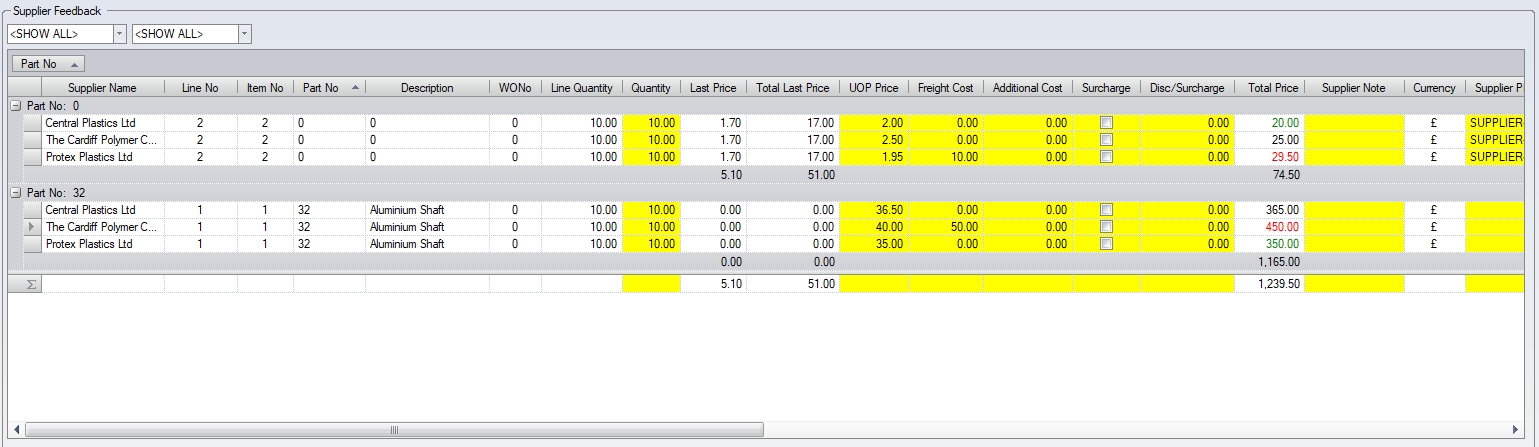
(Grouped by part number)
If the user wishes to save the groupings they have set, or rearrange the columns into a more suitable format for themselves, they can save the changes using the GRID OPTIONS > SET AS DEFAULT option at the bottom of the screen.
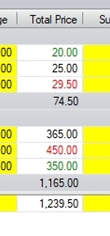
The user can record the supplier responses against the lines listed. This allows the capture of unit prices, freight and any additional costs as well as any discounts/surcharges that might be given along with lead times and references. Once the details are completed, the system will highlight the maximum and minimum totals for each enquiry line in red and green respectively, allowing the user to see quickly which supplier is providing the best price for each item.
![]()
Once the user has entered the suppliers response to the enquiry, they can click ACCEPT to save the details
Converting An Enquiry To A PO
Once all the details have been received from the suppliers and the user has filled in all the details on the Supplier Feedback screen, the user can accept or decline quotes from suppliers. To decline, the user simply needs to select the supplier and part details that they want to decline and tick the DECLINE option. If the user wishes to proceed with an order based on the quotation, this is done by ticking the CONVERT option against the lines they wish to raise POs for and clicking the CONVERT option.
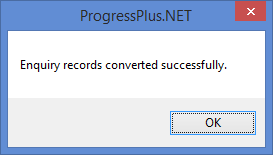
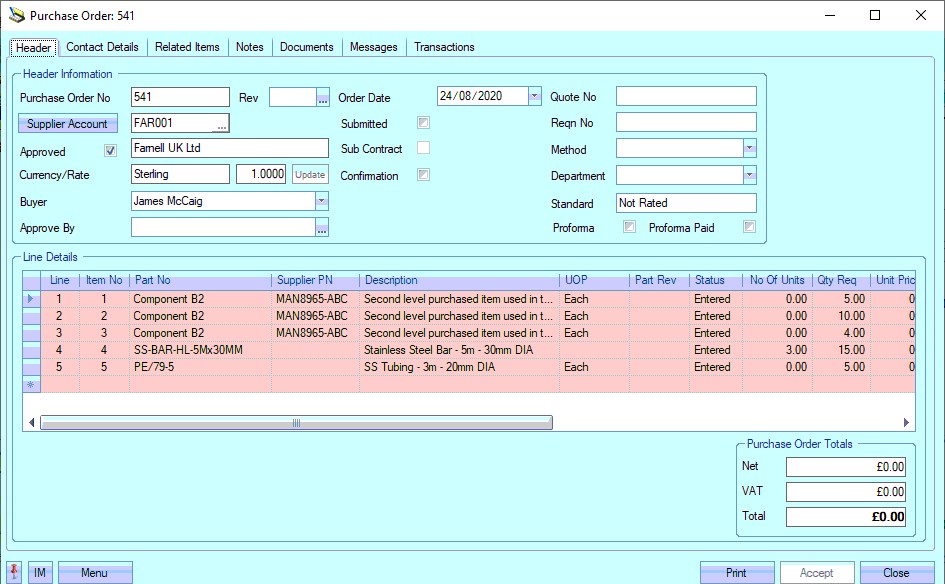
The CONVERT option will create the PO(s) from the enquiry lines marked for conversion and will pull across all the relevant information to the PO created, including supplier contact and additional charge information if this has been recorded in the purchase enquiry. In addition to this information, the enquiry line Target Date will be pulled through to the PO and set as the Required and Promised dates. If left blank, this will be the current date plus any purchasing lead time set against the part. Lastly, the user also has the ability to amend the quantity for the PO here too. When the PO(s) has been successfully been created, the system will confirm with a message as follows.
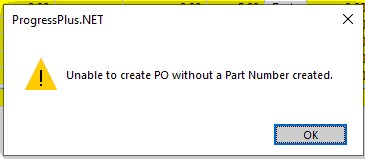
If the purchase enquiry line was entered as a description only, the system can force the user to create a new part number before conversion can be done. Attempting to convert a text line to a PO when this option is switched on will result in the following message being displayed.
Before a PO can be created for this item from the purchase enquiry, the user must assign a part number, existing or new, to the purchase enquiry line. Clicking in the PART NO field will prompt the user to create a new part number.
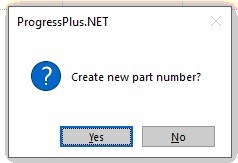
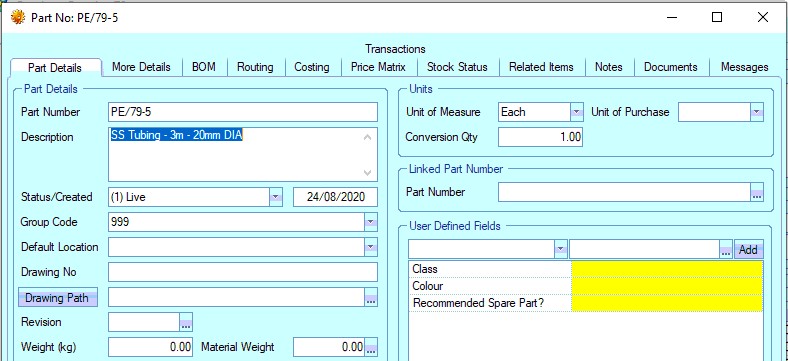
Clicking YES will open up a new part record with the part number defaulted to reflect where it was created from, the PE prefix indicating a purchase enquiry, the numbers reflecting the purchase enquiry number and line number.
If the user clicks NO, then the system will prompt them to select an existing Progress part number.
Once the user has selected a valid part number, they can proceed with the conversion to a purchase order. The user can then view the PO created via the Purchasing screen as usual.
If the system is not configured to force a part number for purchase enquiry lines, the PO would be created with a text line as per the enquiry.
Subcontract purchase enquiries will be converted to subcontract purchase orders via the same process.
Updating Pricing and Supplier Information From Purchase Enquiry
As well as creating purchase orders from the purchase enquiry, the user also has the option to update the supplier price matrix prices and the purchase/operation cost. This can be done by ticking the UPDATE PRICE MATRIX, UPDATE PURCHASE COST, UPDATE OP COST and/or the UPDATE PREFERRED SUPPLIER options on the supplier feedback tab of the purchase enquiry.
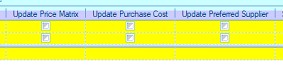
(Standard purchase enquiry options)
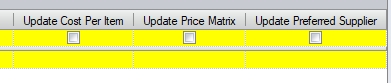
(Subcontract purchase enquiry options
Once selected for update, the user simply clicks the UPDATE option to update the elements as selected.
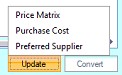
(Standard purchase enquiry UPDATE options)
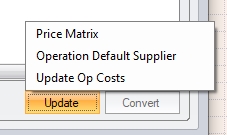
(Subcontract purchase enquiry UPDATE options
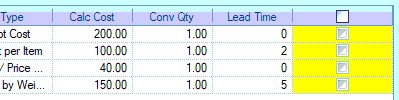
Selecting the PRICE MATRIX option will update the supplier price matrix for all those items selected, while the PURCHASE COST option does the same for the purchasing cost of the selected parts. Selecting the PREFERRED SUPPLIER option will allow the user to select a supplier and update this information against the part(s) or subcontract routing operation. Subcontract purchase enquiries also have the option to update the OP COST for the selected part operation(s) which updates the master part's operations' Cost Per Item value.
Pricing Summary
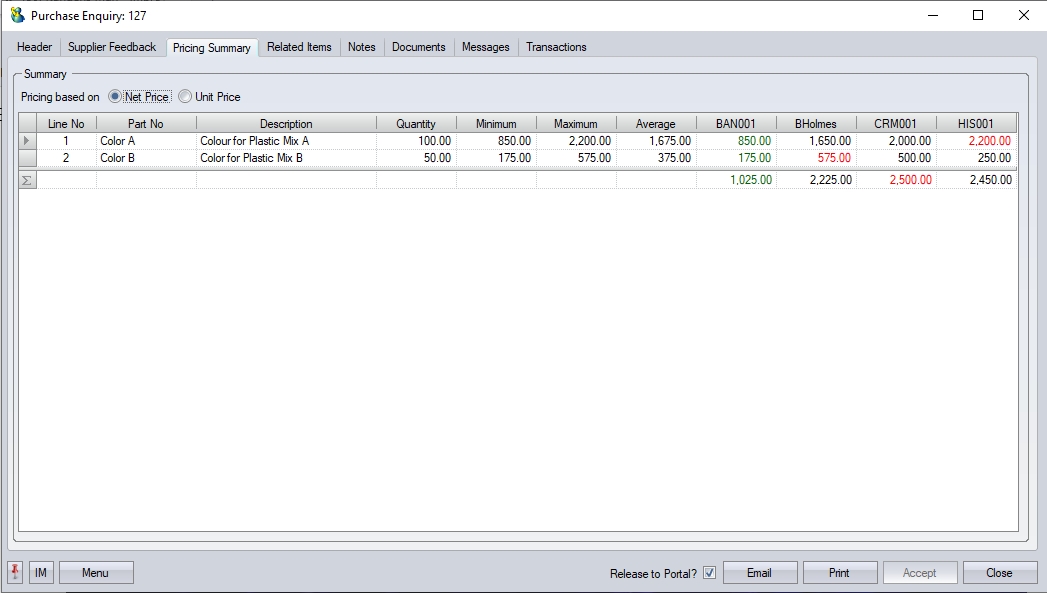
This tab provides a summary view of the parts, the suppliers and their responses. The screen lists all the parts, or subcon codes if an subcon purchase enquiry, the supplier prices, and a summary maximum, minimum and average value.
(Standard purchase enquiry example)
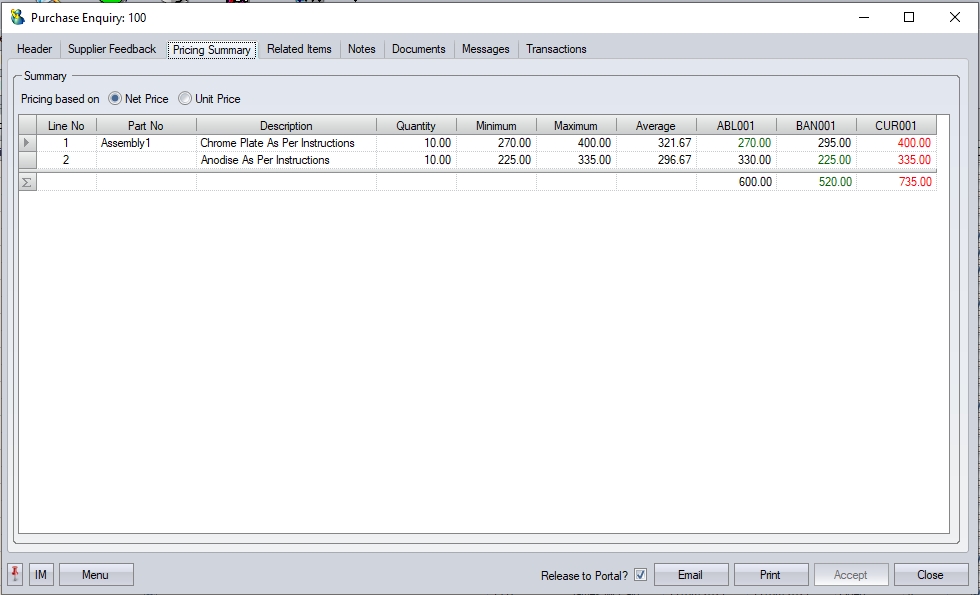
(Subcontract purchase enquiry example)
The screen shows the lowest pricing in green, and the highest in red against the supplier accounts based on their responses, along with a minimum, average and maximum values. The user can view the information on screen based on the individual unit price, or based on the overall NET price using the options at the top of the screen, with the NET figure also taking into consideration any additional charges or freight costs also provided by the supplier(s).
![]()

(Based on NET Price)
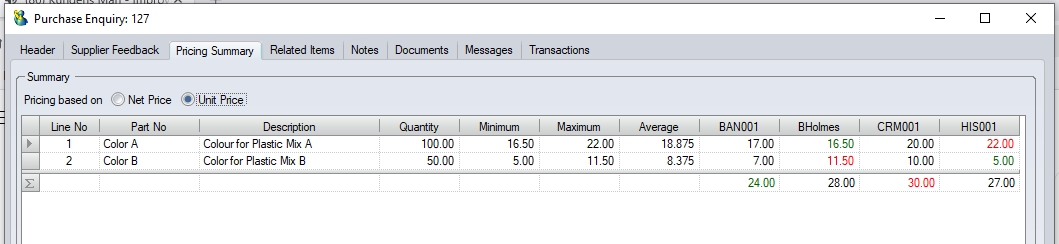
(Based on Unit Price)
Purchase Enquiry Related Items
This section shows all the items in Progress related to the current purchase enquiry. The user can select from the options on the left to see the associated purchase orders, requisitions, sales enquiries, etc..
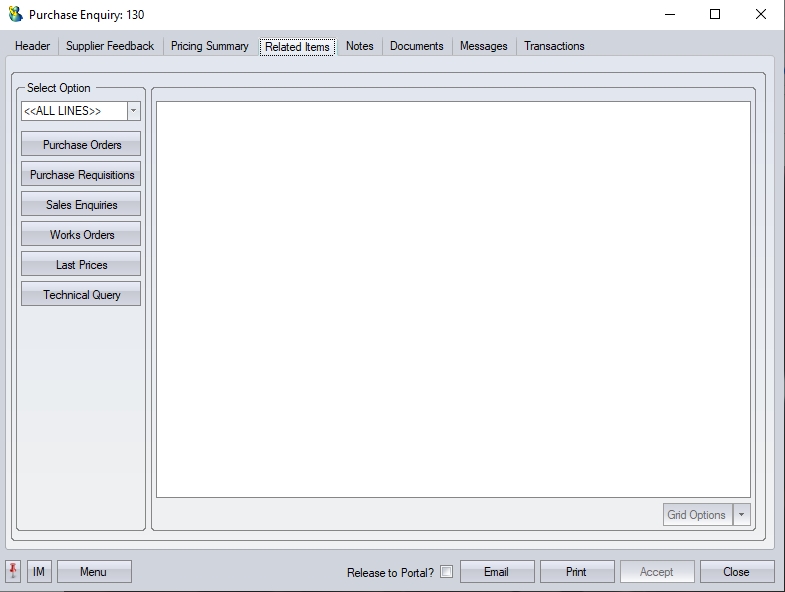
The user can select the required enquiry line from the drop-down list at the top if they wish to look at a specific line of the enquiry, or set it to <<ALL LINES>>> to see all associated items for all lines. The PURCHASE ORDER option here will only show related purchase orders once the enquiry line has been converted to a purchase order. The LAST PRICES option will only show items where previous purchase orders have existed for the selected part number.
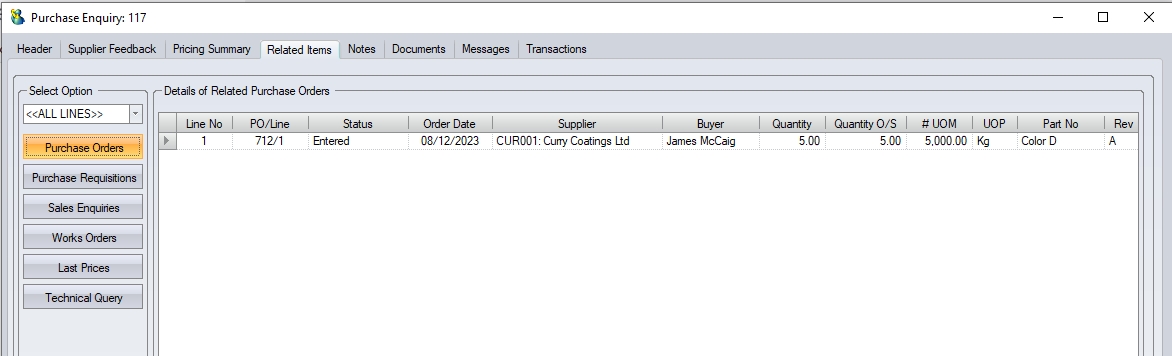
(Example with associated purchase orders)
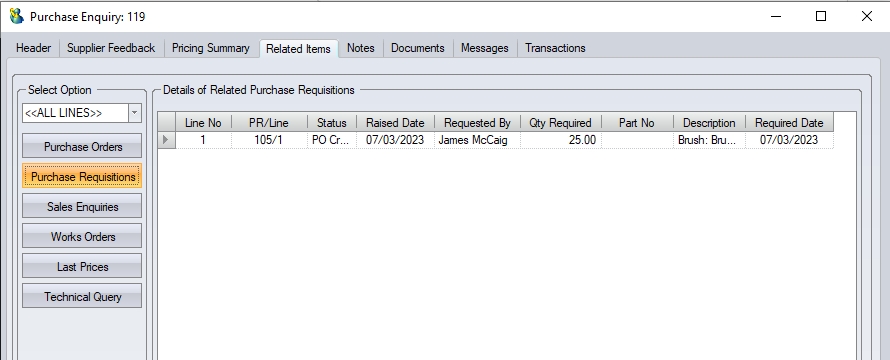
(Example with associated purchase requisitions)
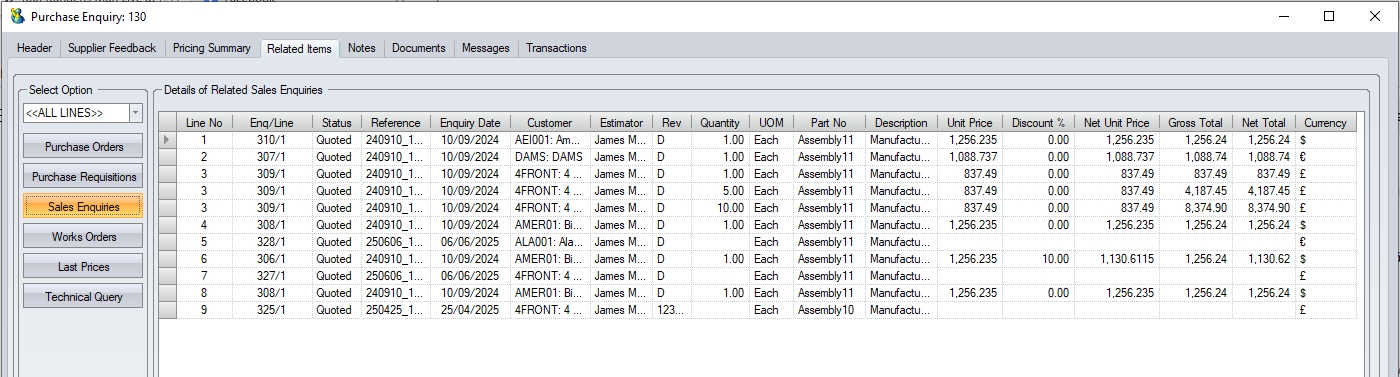
(Example with associated customer enquiries)
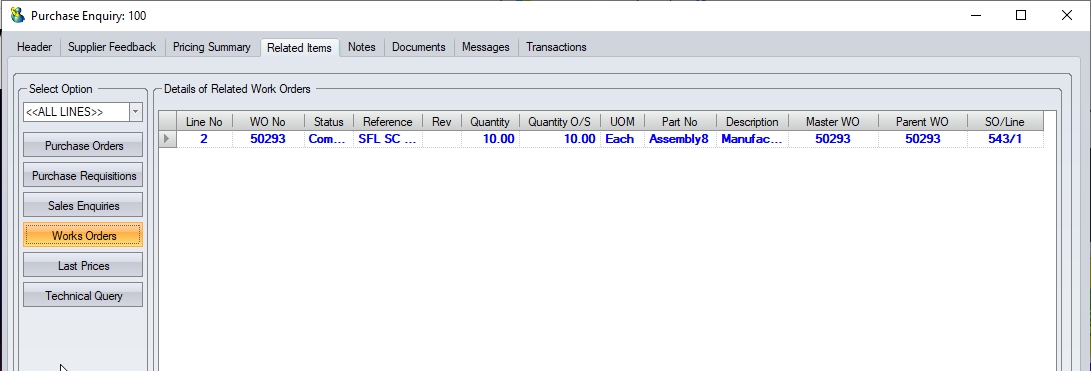
(Example with associated work orders)
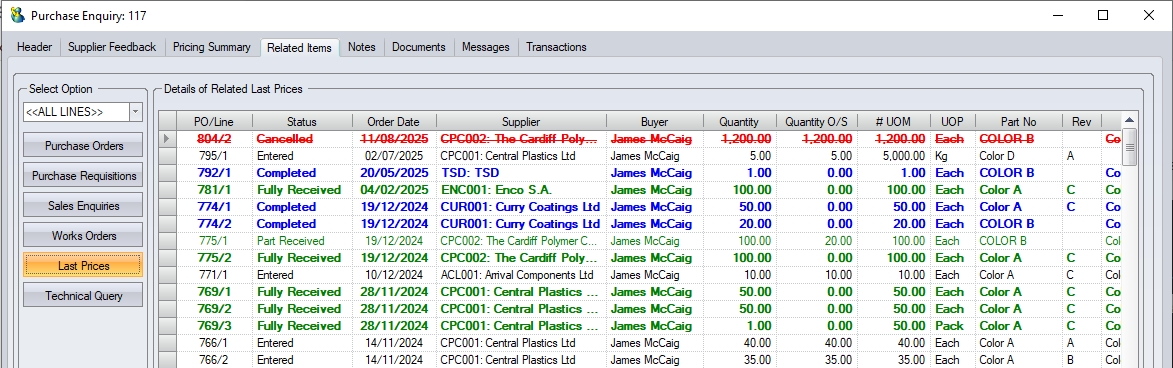
(Example with associated last prices)
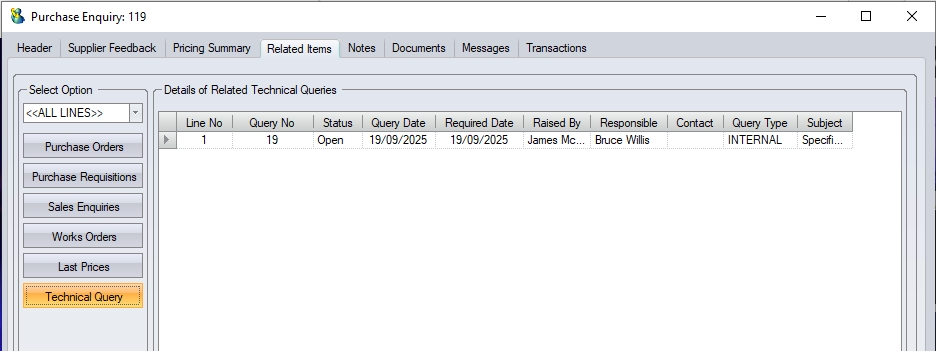
(Example with associated technical queries)
Like all Related Items screens, the user can access any of the listed associated items by double-clocking on them, or drilling into the order, enquiry, part number.
Purchase Enquiry Notes
This section allows the user to add notes to the purchase enquiry.
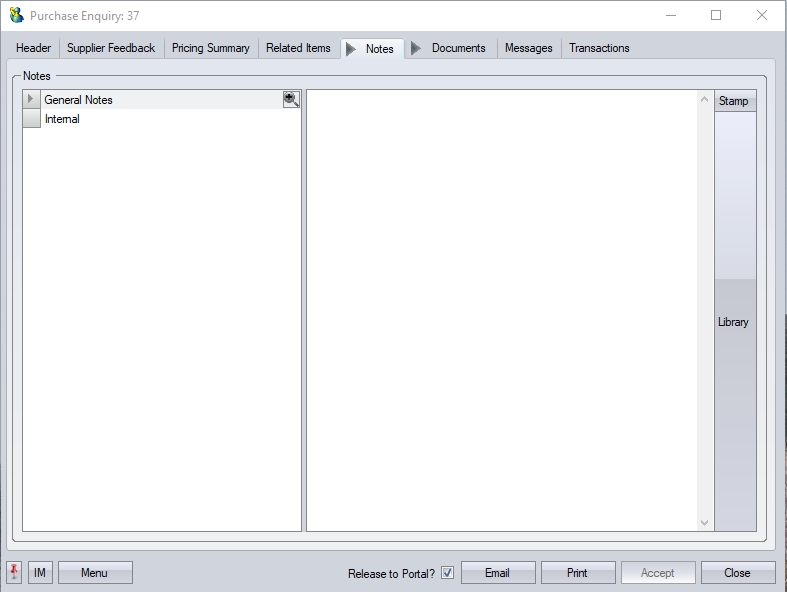
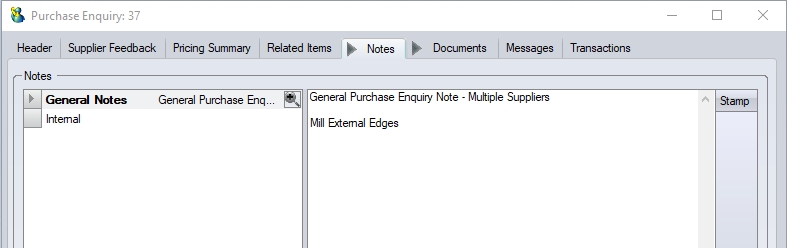
General Note
The user can enter any general comments in the GENERAL notes section regarding the enquiry; a specification, instructions, etc that they wish to appear on the printed enquiry sent to the suppliers. They can also select a comment from the Notes Library within Progress using the LIBRARY option. Clicking on this presents the user with the library list of notes they can choose from.
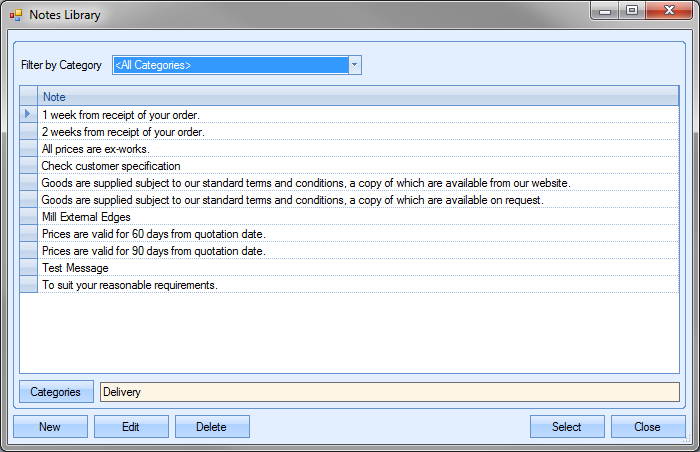
The user can select an existing note or add new notes if required. For more information on the Notes Library in Progress, please refer to the Maintenance section of this manual. Once the user has selected the note they wish to use, the can click the SELECT option to pull it through to the enquiry.
Internal Note
This section is not used elsewhere in Progress but is for use within the purchase enquiry record for adding internal notes regarding the supplier. This information does not replicate anywhere else within Progress.
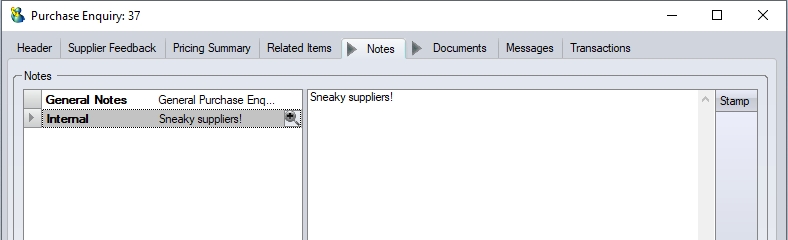
Again, the user can also select a note from the Notes Library within Progress by selecting the LIBRARY option. Once the user has added any comments/notes they require, they can save the information by clicking the ACCEPT option.
Purchase Enquiry Documents
This section allows the user to attach documents, folders, hyperlinks or images to the purchase enquiry. These may relate to specifications of the material being enquired upon, for example, or maybe an email of correspondence between the user and the supplier.
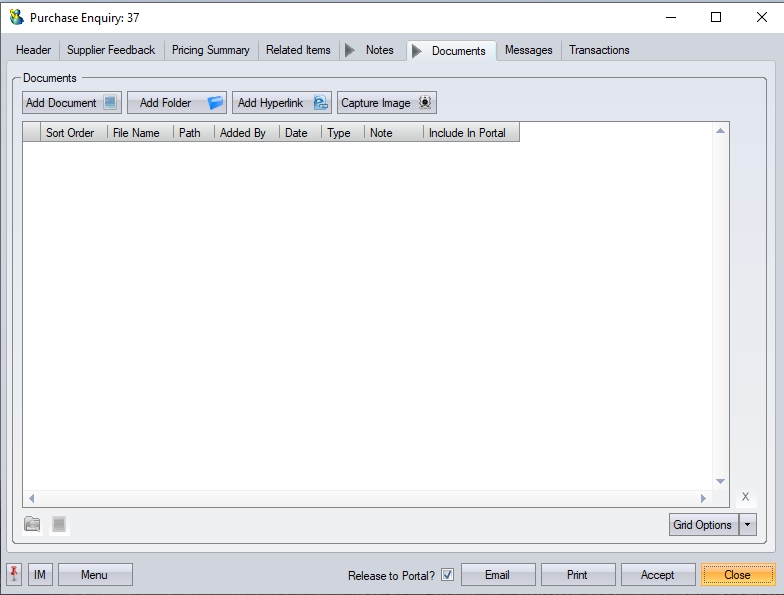
The ADD DOCUMENT option will allow the user to search for and select any individual file they wish to link to the enquiry.
The ADD FOLDER option will allow the user to search for and select a folder that they wish to link to the enquiry.
The ADD HYPERLINK option will allow the user to record a web address that they wish to link to the enquiry.
The CAPTURE IMAGE option allows the user to save an image captured by a camera on the device.
Once all documents and details have been added, the user can save the changes by clicking on the ACCEPT option. This will also return the user to the main purchase enquiry screen.
Purchase Enquiry Messages
This section shows all associated messages and emails relating to the enquiry.
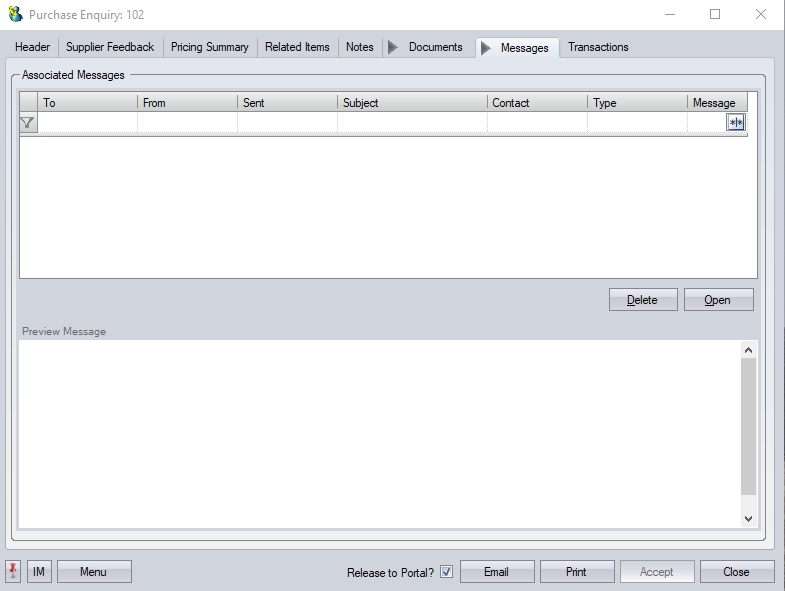
Any communication relating to the enquiry (i.e. emails, instant messages, etc.) will all be listed here for the user to view.
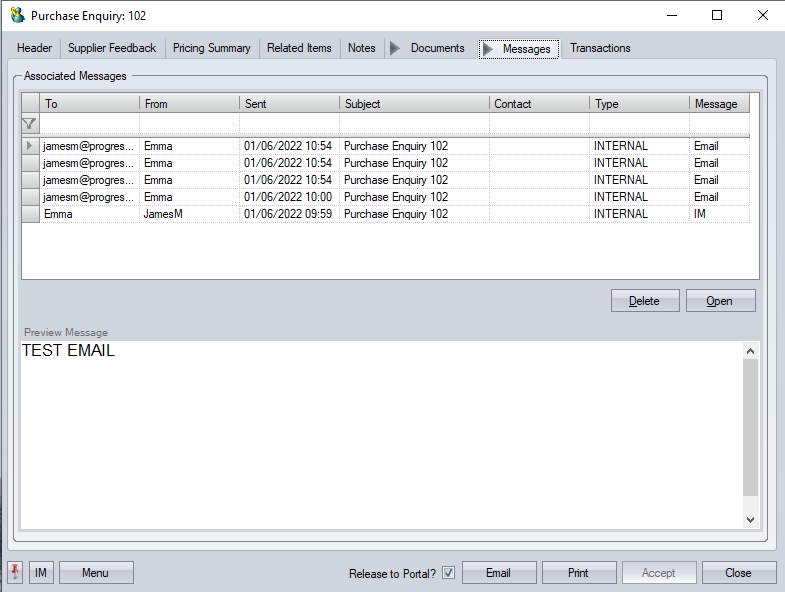
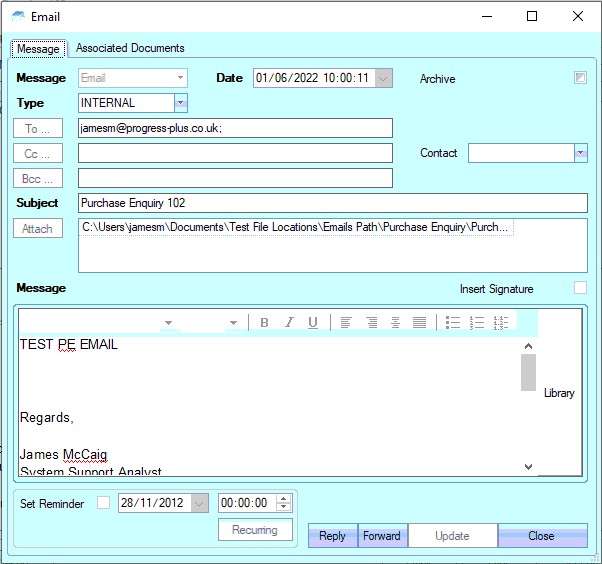
The user can open any of the items listed on this screen but either double-clicking on the listed item or by highlighting and clicking OPEN. The selected item will then be displayed for the user to view.
The user also has the ability remove messages recorded, if permitted. Permission to delete messages is set up against the user permissions. For more information on user permissions, please refer to the Administrator Functions > Access section of the manual. If the user has permission to remove messages, then the DELETE option will be available.
Messages can be deleted by simply highlighting the item and clicking the DELETE option. The user will be prompted to confirm the deletion.
Clicking YES will delete the selected message, and the screen will be updated.
Purchase Enquiry Transactions
This section of the supplier details shows a complete list of transactions made in Progress by the users which relate to this purchase enquiry.
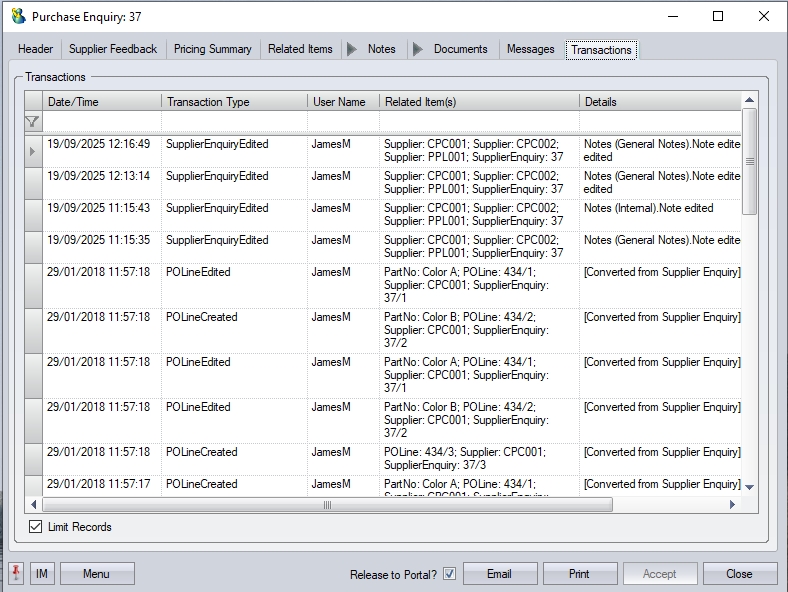
The user can see what transactions have occurred as well as details on the changes made. This is often very useful when trying to find out why something has changed unexpectedly or if the user needs to find out who made a particular change.
| Date/Time: | The date and time that the transaction occurred. |
| Transaction Type: | The type of transaction recorded. This references both the area of Progress and the action, i.e. SupplierEdited – change made to a supplier, PurchaseInvoiceCreated – new PI created, etc. |
| User Name: | User who made the transaction. |
| Related Item(s): | Reference information on the exact record that was amended, i.e. Purchase order number, Supplier, Non Conformance, etc |
| Details: | Brief explanation of edited information. |
Additional Menu Options
Line Details
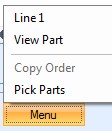
The purchase enquiry has some additional options available for the user. These are accessible via the Menu option.
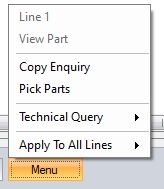
If the user has further information they wish to record against the purchase enquiry line, they can record the information in the purchase enquiry line details screen. To access this, the user can select the Line No option from the Menu options. This will present the following screen.
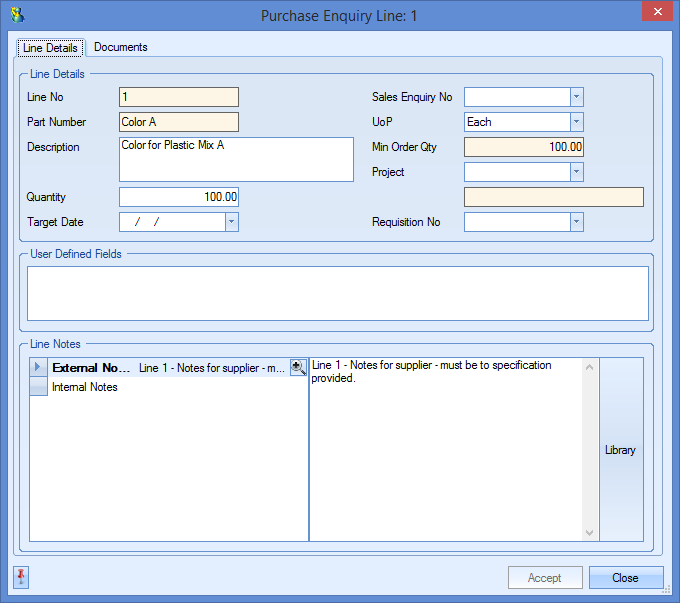
The user can add additional notes to the Line Notes sections as required and also populate any user defined fields that may have been set up for use on the purchase enquiry lines as highlighted below.

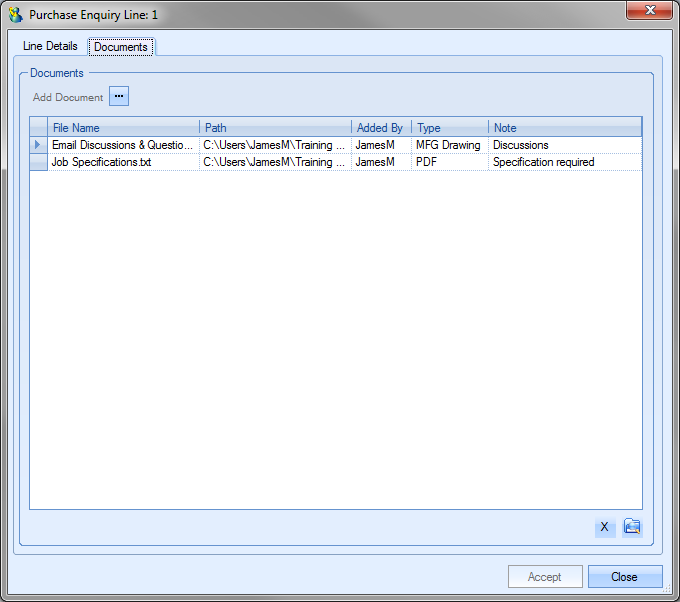
The user can also add documentation to the enquiry line. This can be done via the Documents section of the Line Details screen. For example, these may relate to material specifications of the material being enquired upon.
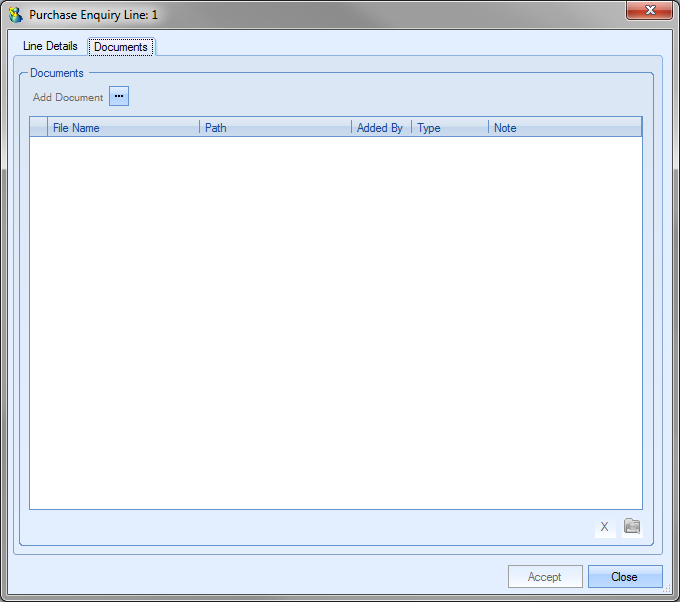
Similarly to the other document sections of Progress, the user simply clicks on the Add Document option to select the file required.
![]()
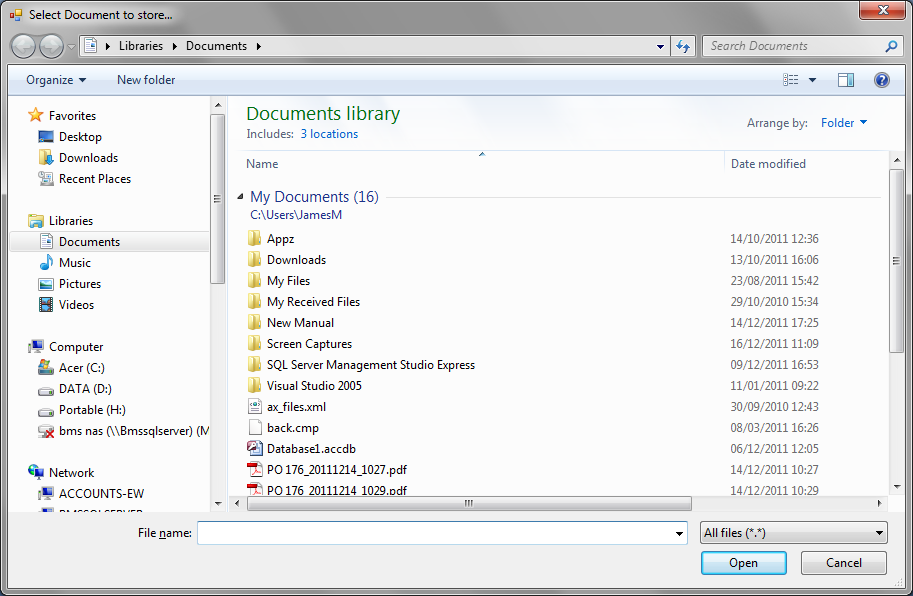
This will open a standard Windows explorer window to allow the user to search for the file to be attached.
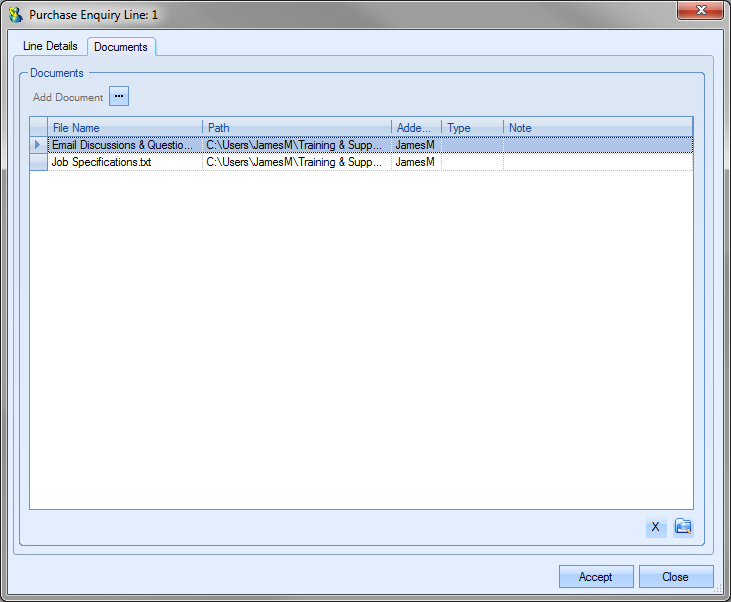
Once the user has selected the file required, Progress will return the user to the documents screen and list the selected file.
NOTE: To allow access for other users to the files added to the purchase enquiry record, the user must ensure that these files are held in a folder accessible by all users. Typically a shared network folder would be created for this purpose.
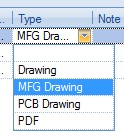
Once the file(s) have been added, the user can specify a file type or comment associated with the document. The Type can be chosen from the drop-down list.
This drop-down list can be populated from the List Maintenance section of Progress in the Document Types list as shown in the screen below.
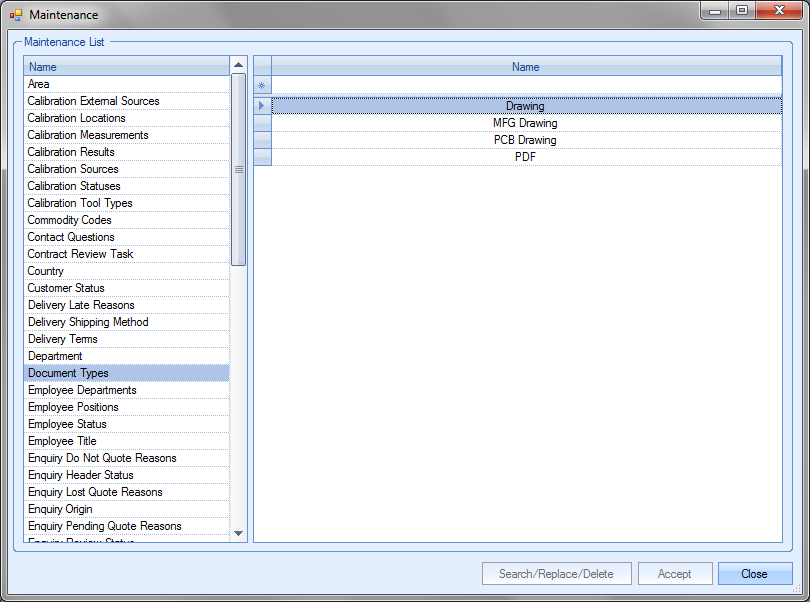
For more information on maintaining lists and the List Maintenance section of Progress, please refer to the List Maintenance section of this manual.
A note for the document can be added directly to the Note field as shown.
Once all documents and details have been added, the user can save the changes by clicking on the Accept option. This will also return the user to the main purchase enquiry screen.
View Part
If the purchase enquiry is for an existing part number, the user can access the inventory record for the part by selecting the View Part option from the Menu options.
Selecting this option will present the user with the inventory screen for the selected part as shown below.
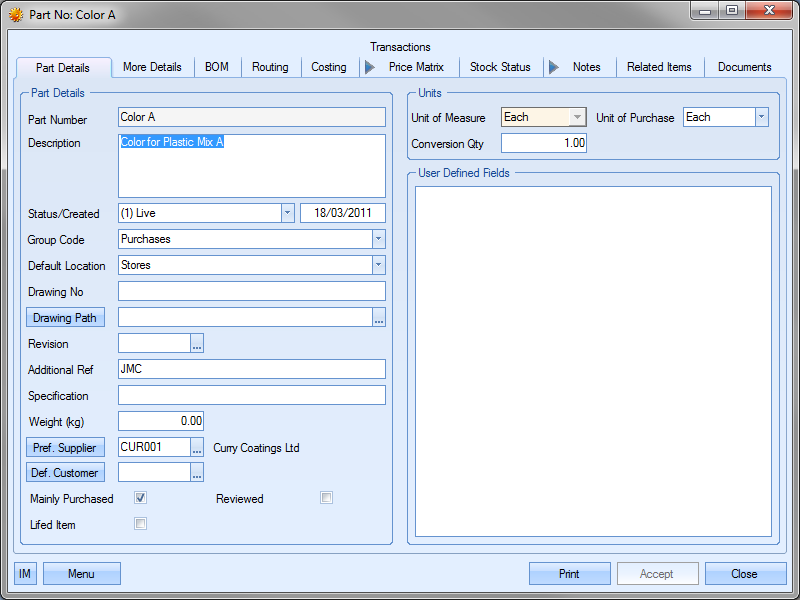
The user may if required change the information contained in this screen if he or she has permission to do so as determined within the User Access Rights section of the Admin section of Progress. For more information on amending information on these screens, please refer to the relevant section of this manual.
Clicking the Accept or Close options will return the user to the purchase enquiry.
Copy Enquiry
If the user wishes to copy an existing purchase enquiry, they can use the COPY ENQUIRY option from the MENU options. Once the user has opened a new purchase enquiry and selected the supplier(s) required, the user can select the COPY ENQUIRY option. This will present the user with the following screen to allow them to search for the enquiry they wish to copy.
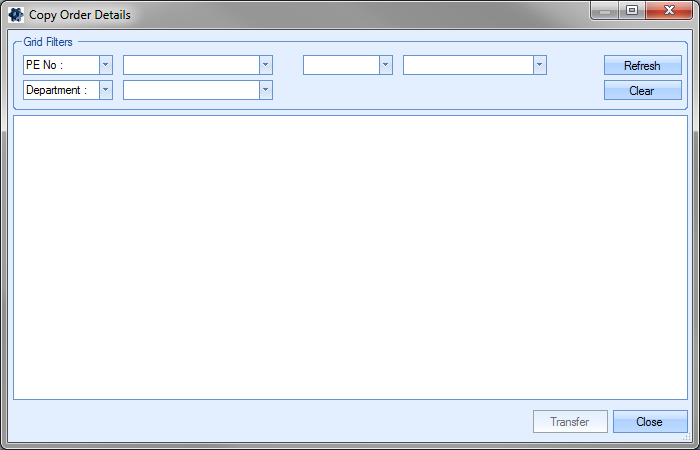
The user can use the filters available to help identify the enquiry they want to copy. Once the filters have been set, clicking the REFRESH option will present a list of enquiries available based on the selected filter criteria.
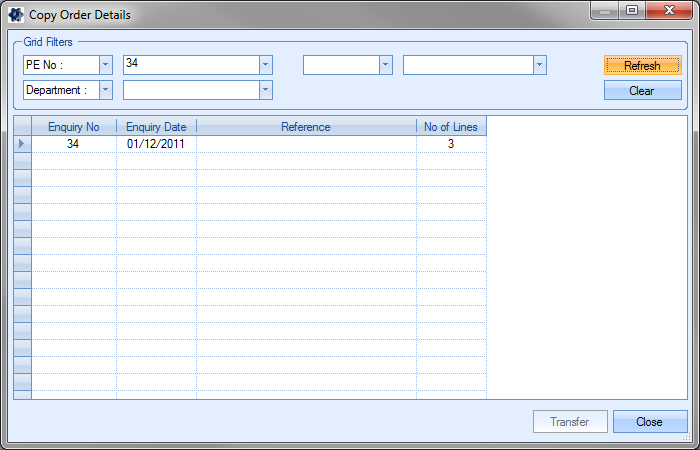
To copy the enquiry listed, the user can highlight the enquiry required and click the TRANSFER option. The user will be asked for confirmation before the details are copied to the enquiry.
Once the details have been copied and verified, the user can click on the ACCEPT option to save the purchase enquiry.
Pick Parts (standard)
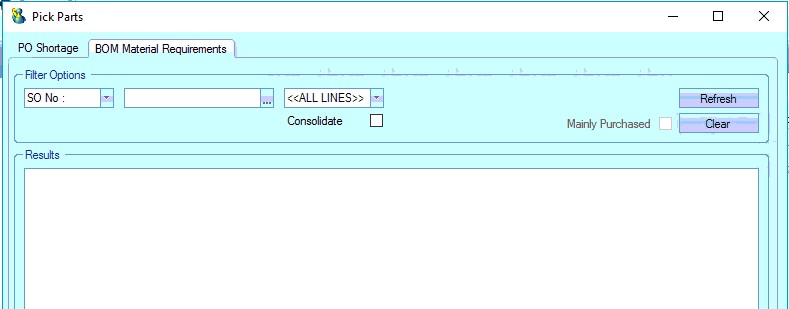
The user also has an option to raise the purchase enquiry based on two other methods – PO Shortages and BOM Material Requirements. The user can access these through the PICK PARTS option from the Menu options. Selecting this option presents the user with the following screen.
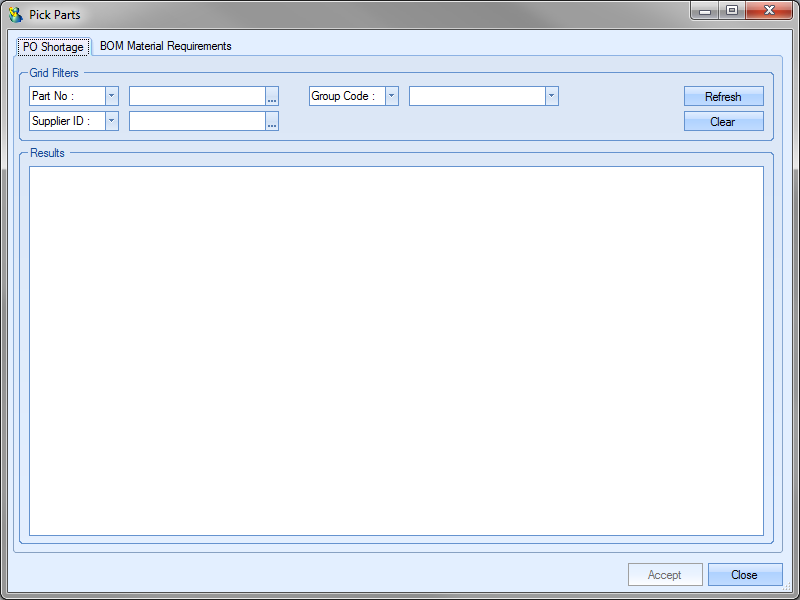
PO Shortage
This option allows the user to create an enquiry based on parts that have a current shortage. This screen presents the same parts that appear on the Items To Be Purchased screen. The user can filter this screen using the grid filters at the top to find what they are looking for and then click REFRESH to view the selected parts. This will present a screen similar to the following.
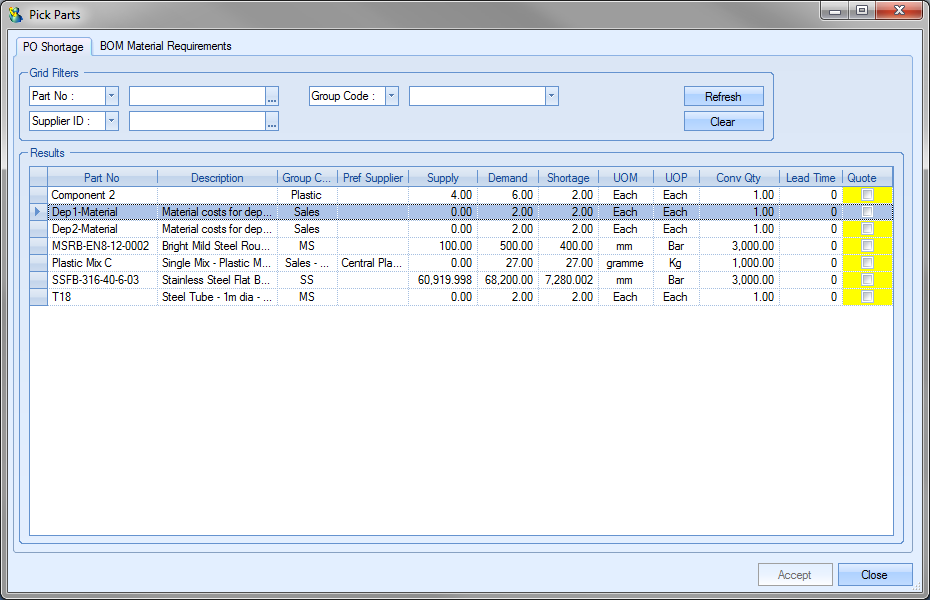
From here the user can select the parts they wish to add to the purchase enquiry by clicking on the QUOTE tick box. Once the items have been selected, the user can click the ACCEPT option. The purchase enquiry will then be updated with the selected parts and quantities based on the material shortages chosen.
The user can save the purchase enquiry by clicking on the ACCEPT button.
BOM Material Requirements
This option allows the user to create an enquiry based on the BOM of a selected manufactured item.
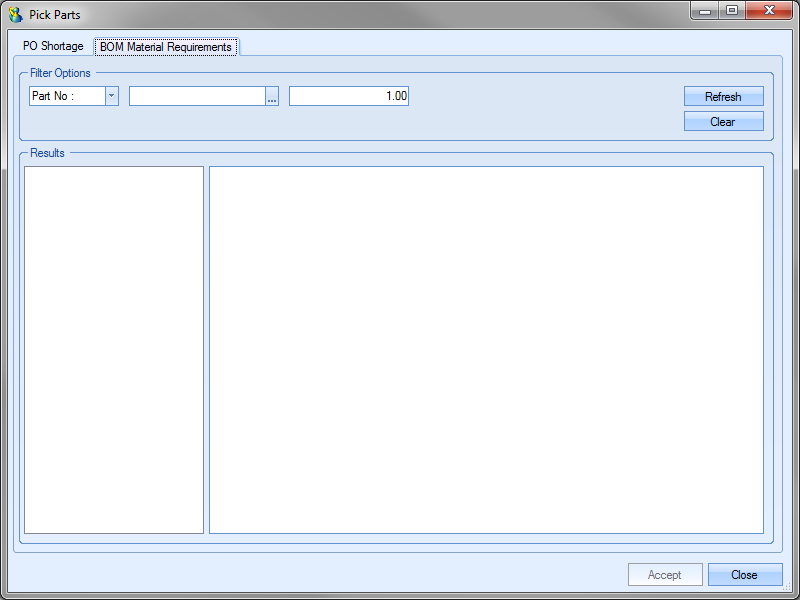
From the screen above, the user can select where the BOM is to be pulled from, with the first drop down allowing the user to select from a number of options; Part number, enquiry, sales order, group code, etc. to help identify the parts they are interested in. Below shows some examples of how the data is displayed when the filters are used.
Source: Part Number
The user can search for a specific part number in the system. Once selected and quantity required set, clicking the REFRESH option presents the user with the full BOM of the selected part with the quantities reflective of the quantity the user entered at the top.
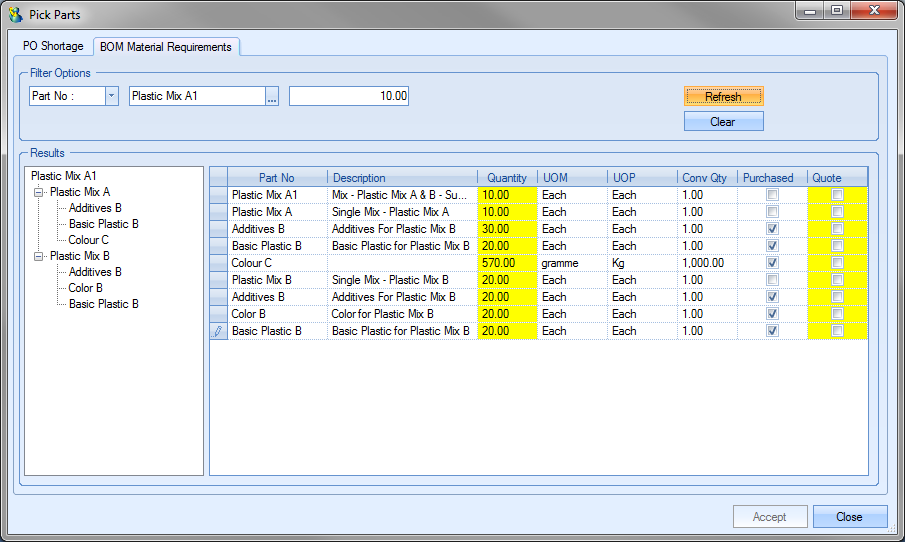
The user can select the parts required from those listed by ticking the Quote tick box. Clicking ACCEPT will return the selected parts to the enquiry.
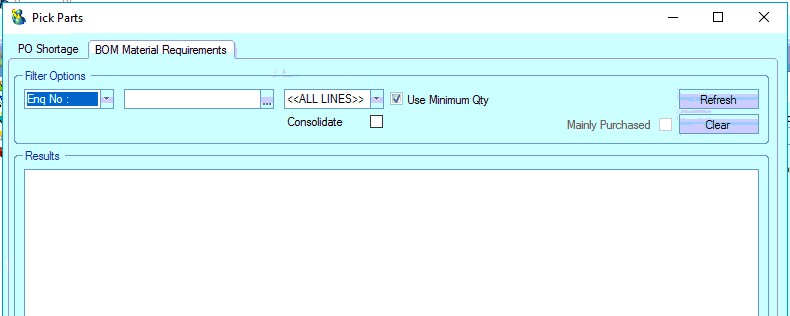
Source: Enquiry Number
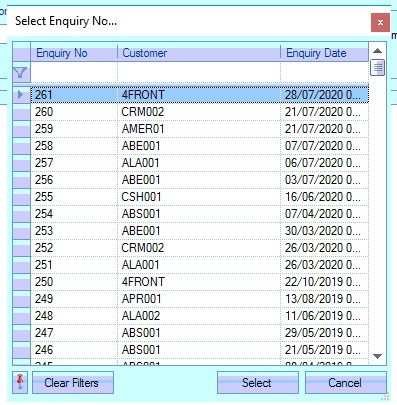
The user can search for an existing enquiry to pull the BOM details based on the parts being quoted to a customer. For example, selecting the ENQ NO option from the drop down will change the screen as follows.
The user can search for a specific enquiry using the filter at the top of the screen.
Once selected, clicking refresh will refresh the grid with the BOM details based on the selected enquiry number.
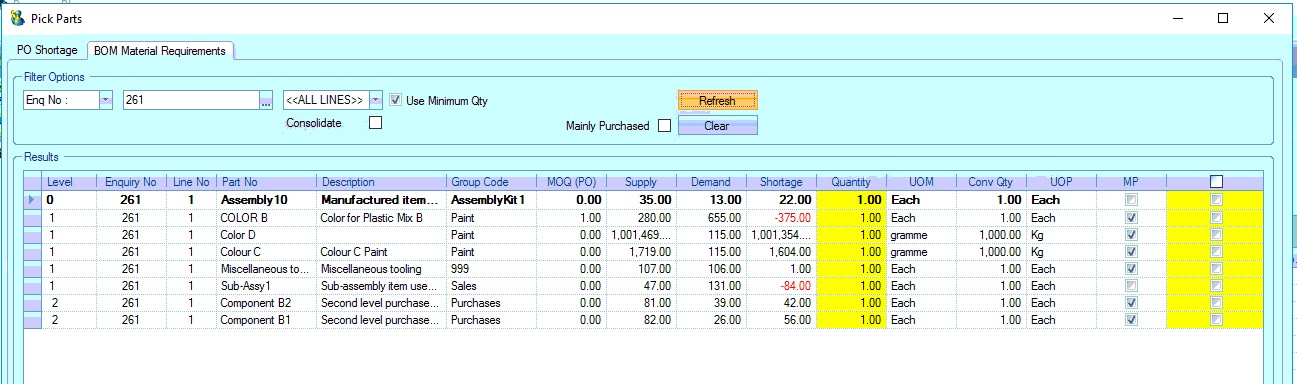
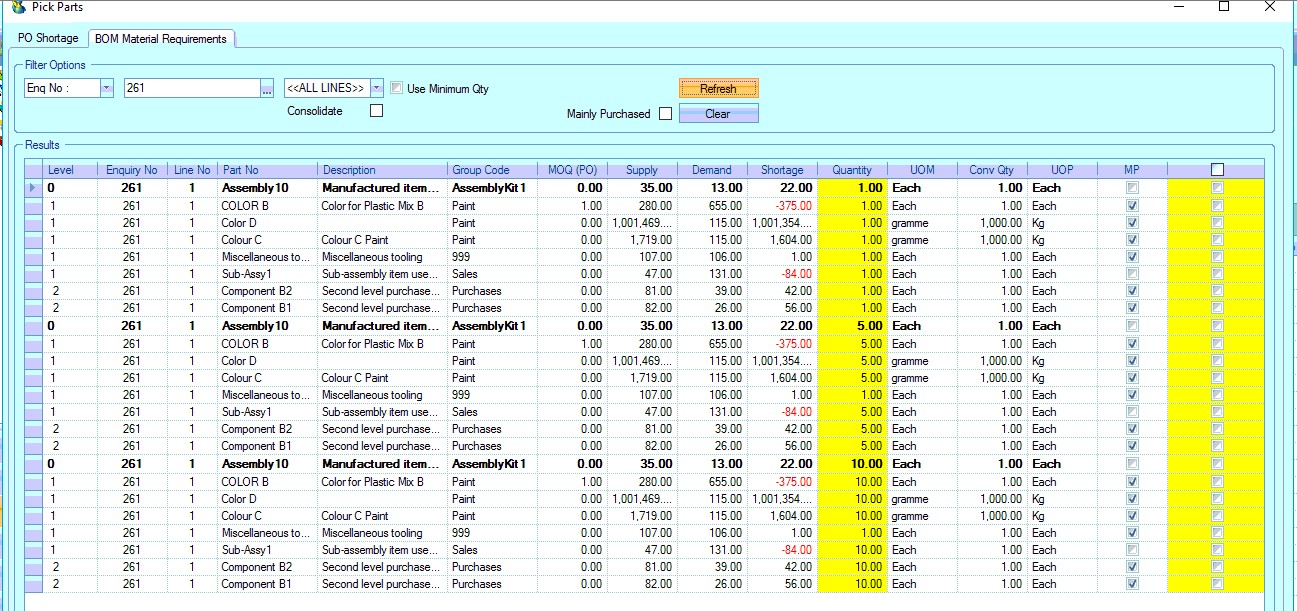
By default the screen will show the BOMs of all enquiry line items, but the user can look at specific enquiry lines using the <<ALL LINES>> filter at the top of the screen. Clicking REFRESH after selecting a specific line will update the grid to show just the BOM for that enquiry line item.
The USE MINIMUM QTY option, which is ticked by default, shows only the BOM details based on the minimum quantity quoted on the sales enquiry line. Unticking this option will update the grid to show the BOMs and quantities for ALL quoted quantites.
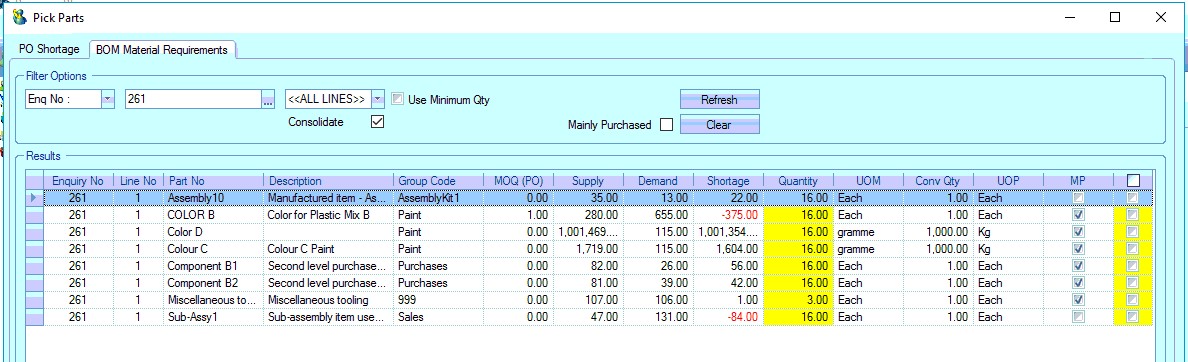
The CONSOLIDATE option will summarise the grid by part number, effectively giving the user a total quantity across all sales enquiry lines. This is particularly useful if top-level parts share common parts as this gives an overall requirement for the part for that enquiry or all the quoted lines of a specific enquiry line.
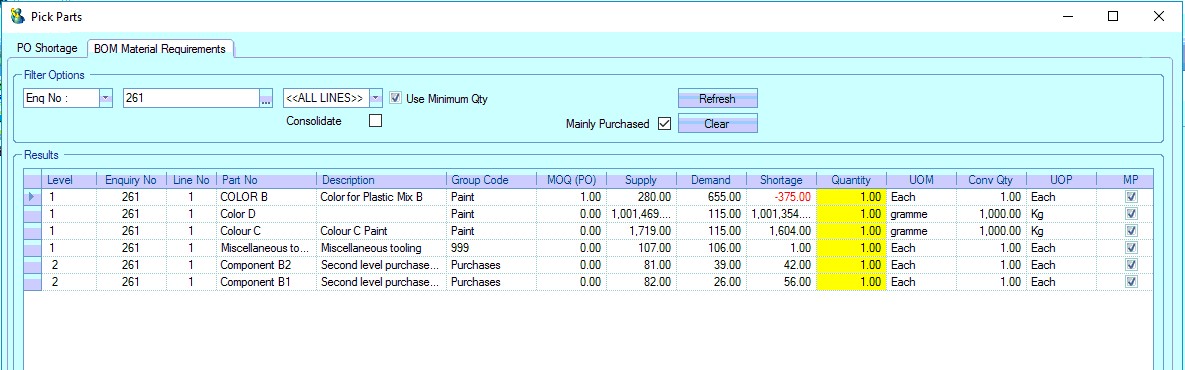
The MAINLY PURCHASED option will remove all assembly items from the grid, leaving only those that need to purchased from a supplier. This removes parts that the user may not be interested in or doesn't have to purchase, allowing them to focus on just the parts they do.
Once the user has selected the appropriate filters and ticked the parts for their purchase enquiry, clicking ACCEPT will pull those through to the main purchase enquiry screen.
Source: SO No
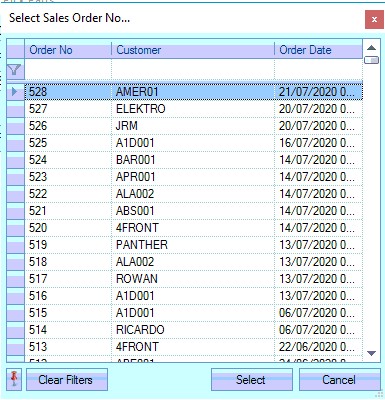
The user can search for an existing sales order to pull the BOM details based on the parts being sold to a customer. Selecting the SO NO option from the drop down will change the screen as follows.
The user can search for a specific sales order using the filter at the top of the screen.
Once selected, clicking refresh will refresh the grid with the BOM details based on the selected sales order number.
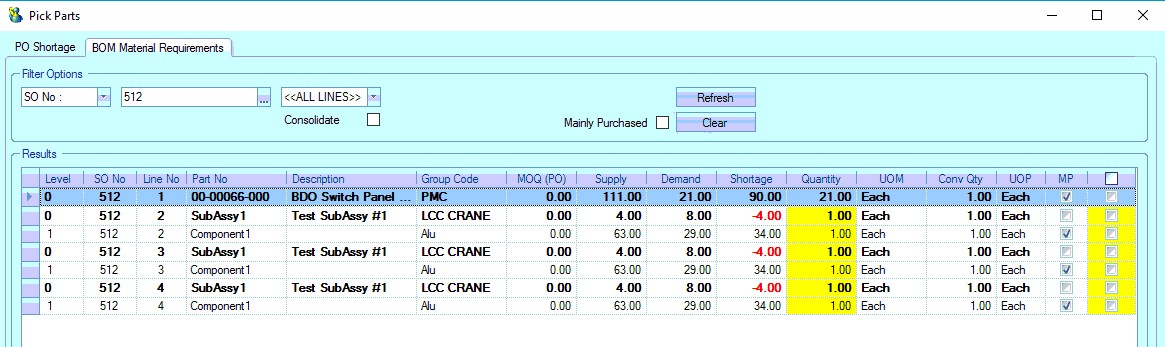
The user has the option of viewing specific lines of the selected sales order using the <<ALL LINES>> filter. They also have the MAINLY PURCHASED filter to highlight only mainly purchased parts on the grid.
The CONSOLIDATE option will summarise the grid by part number, effectively giving the user a total quantity across all sales order lines. This is particularly useful if top-level parts share common parts as this gives an overall requirement for the part(s) for the sales order items being sold.
Once the user has selected the appropriate filters and ticked the parts for their purchase enquiry, clicking ACCEPT will pull those through to the main purchase enquiry screen.
Once all the details have been added to the purchase enquiry, the user can save the purchase enquiry by clicking the ACCEPT option.
Pick Parts (subcontract)
Much like the standard purchase enquiry process above, this allows the user to populate the purchase enquiry with subcontract information based on existing shortages or directly from parts, sales orders, etc. This can be particularly useful if no work orders have yet been created and the user is simply quoting for costs in advance.
PO Shortage
This screen allows the user to get the subcontract details based on current requirements. This is based on all current WOs that have outstanding subcontract requirements. The user has grid filters to search for specific items if required, however, clicking REFRESH will display all current subcontract shortages.
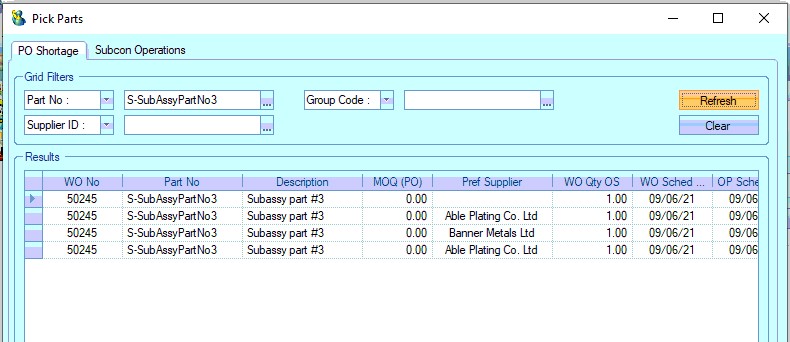
The user can select any of the items listed for inclusion on the purchase enquiry by ticking the box to the right-hand side of the grid.
Once the required items have been selected, clicking ACCEPT will pull the details into the purchase enquiry.
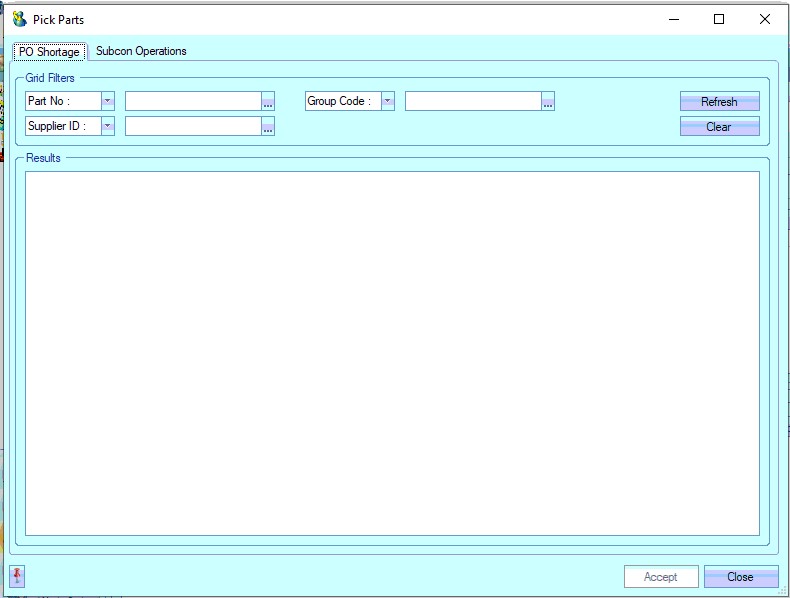
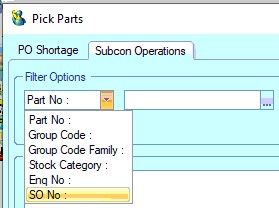
Subcon Operations
This screen allows the user to select the subcontract operations of any parts in the system, regardless of whether there is an actual WO requirement for it. As per the standard purchase enquiry options, the user has a selection of grid filters that can be used to identify the subcontract codes they are looking for.
NOTE: The CONSOLIDATE and MAINLY PURCHASED options are not applicable for subcontract operations, so these are not available for use.
Once selected, the user can click REFRESH to populate the grid with a list of subcontract operations that meet the selected criteria.
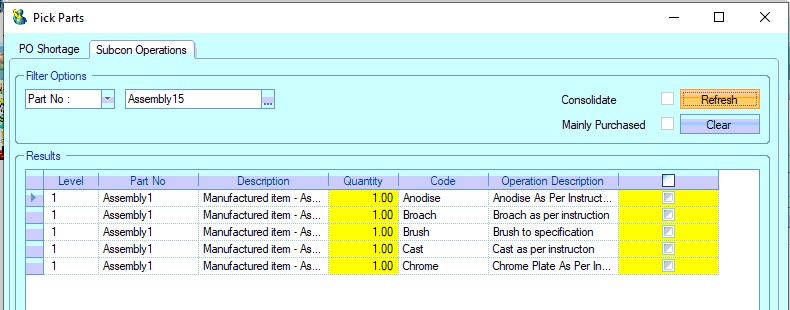
The user can again select the items required for the purchase enquiry by ticking the box on the right-hand side and clicking the ACCEPT option to pull the details through to the purchase enquiry.
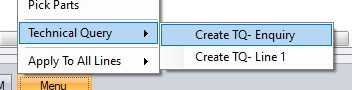
Technical Query
NOTE: Option only available if the additional Quality module has been purchased for Progress Plus.
This option allows the user to create a technical query for the enquiry as a whole, or against a specific enquiry line. The user can select from the menu which they wish to create.
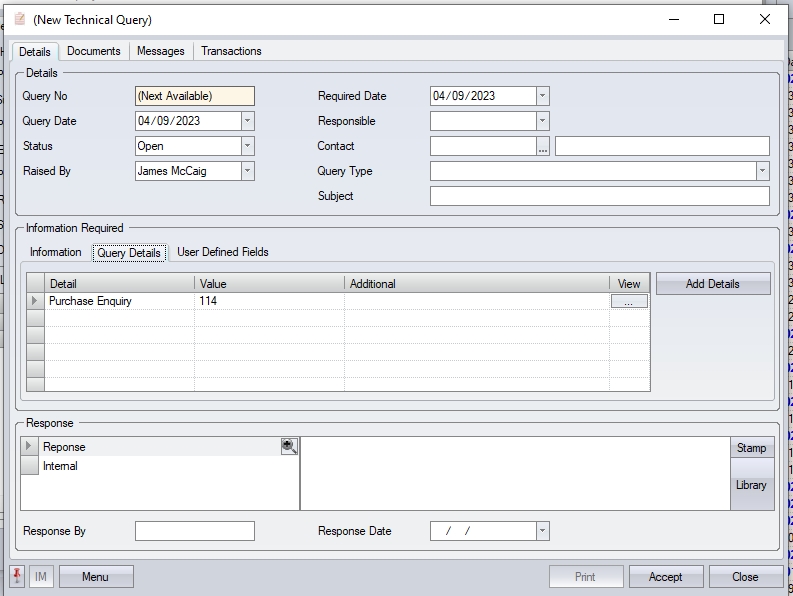
(Technical Query created for the purchase enquiry as a whole)
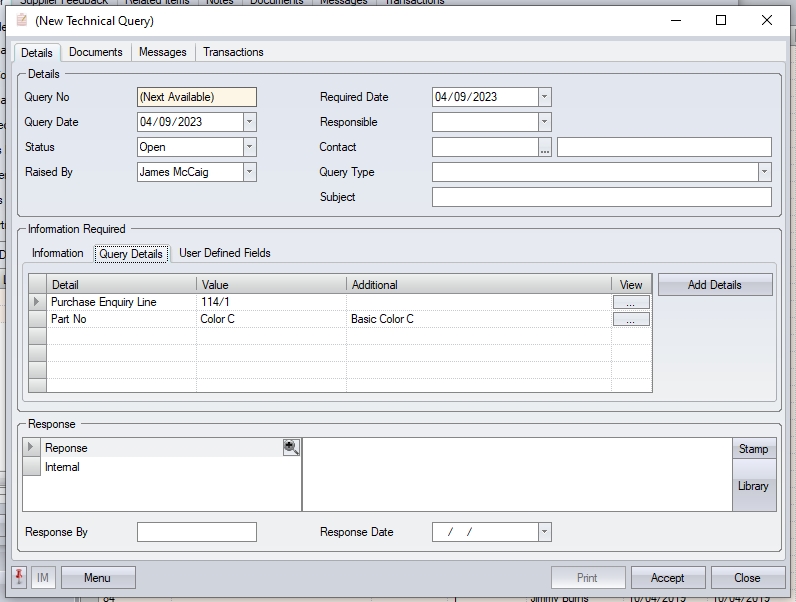
(Technical Query created for the selected purchase enquiry line)
The user can complete any further details required for the technical query, and then click ACCEPT to save. For more information on Technical Queries, please refer to the Quality section of the manual.
Apply To All Lines
This option allows the user to update specific information across all lines of the purchase enquiry. Currently, the user can update the PROJECT and TARGET DATE of all lines using the options available.
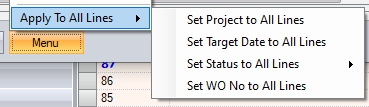
Selecting the Project, Target Date or WO No option will prompt the user to select a the value they wish to apply to all lines.
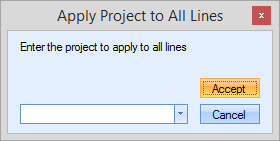
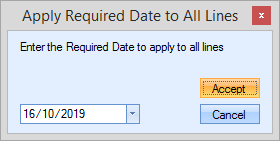
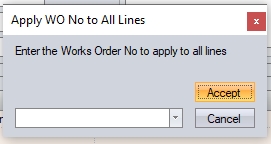
Once selected, the system will proceed to update the lines as requested.
Selecting the Status option gives the user further options to select as shown below.
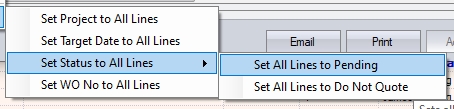
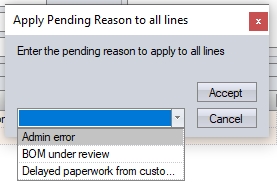
Selecting the Pending option will set the status of all purchase enquiry lines to PENDING, and will prompt the user for a reason.
Similarly, selecting the Do Not Quote option will set the status of all enquiry lines to DO NOT QUOTE, and will prompt for a reason.
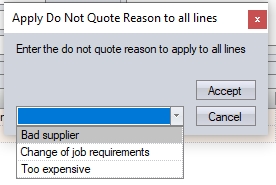
Clicking ACCEPT will update the status of the purchase enquiry lines accordingly.
Emailing Purchase Enquiries
The EMAIL option allows the user to email the purchase enquiry to all the suppliers enlisted on the enquiry. The user will be presented with the following screen when the EMAIL option is clicked.
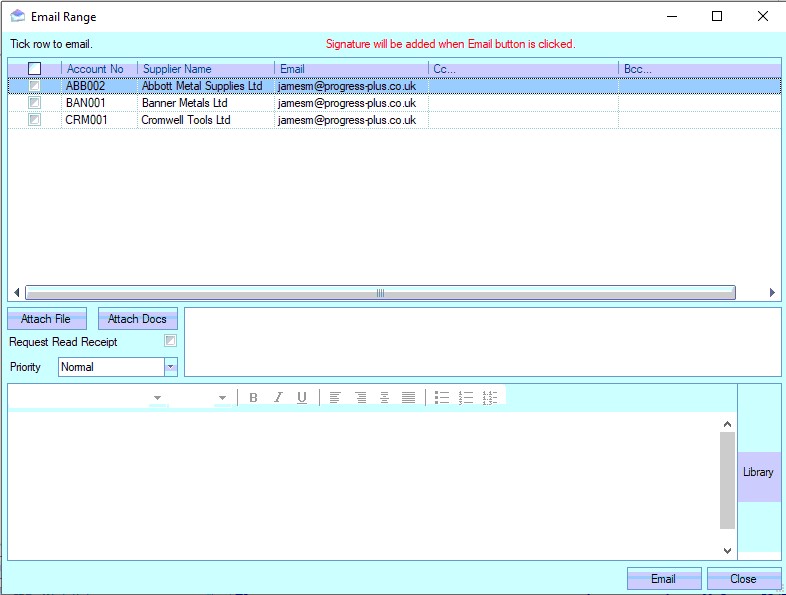
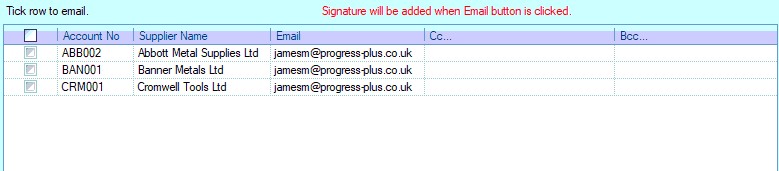
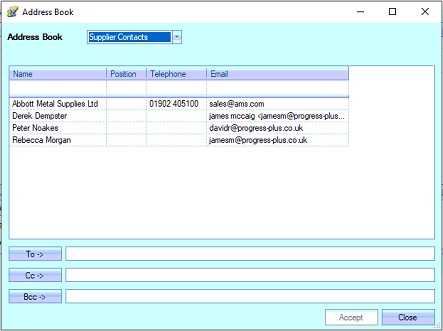
The top part of the screen shows all the suppliers, with the selected contacts' email address. This will be the primary email address the purchase enquiry is sent to. The user can add additional email addresses to the CC and BCC section manually or they can select from other email contacts within Progress.
The middle section allows the user to add any associated documents or any additional files they want to send to the suppliers. These can be added using the ATTACH FILE and ATTACH DOCS options. Read receipts and priority can also be set here if required.

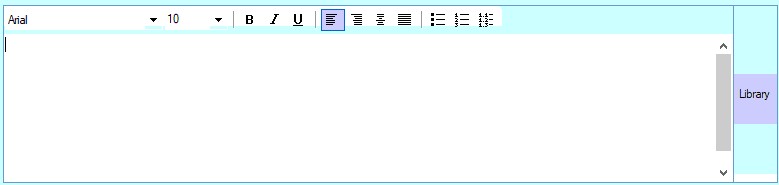
The final part of the screen allows the user to enter the email text itself. This can be manually added or the user can use the LIBRARY option to select a note saved in Progress.
Once all the details have been entered, clicking the EMAIL option at the bottom of the screen will send the purchase enquiry, and any other files included, to each of the supplier email addresses selected. The system will prompt the user for confirmation before confirming the emails sent.
(User confirmation)
(Email confirmation)
Once done, the user can return to the purchase enquiry by clicking the CLOSE option.
Printing Purchase Enquiries
Once the user has added all the details to the purchase enquiry, they can print off the purchase enquiry for sending to the suppliers. The Print option allows the user to print off the enquiries for all suppliers or for only the selected supplier.
Selecting the Purchase Enquiry option will print the enquiry document off for just the selected supplier (defaults to the first supplier if none are selected) whereas the All Suppliers option will generate an enquiry document for each of the suppliers chosen. An example enquiry document is shown below.