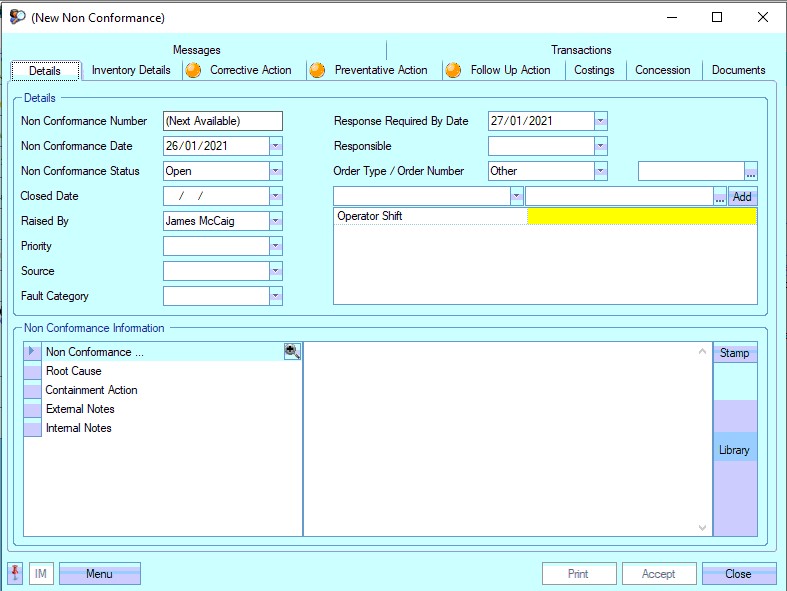
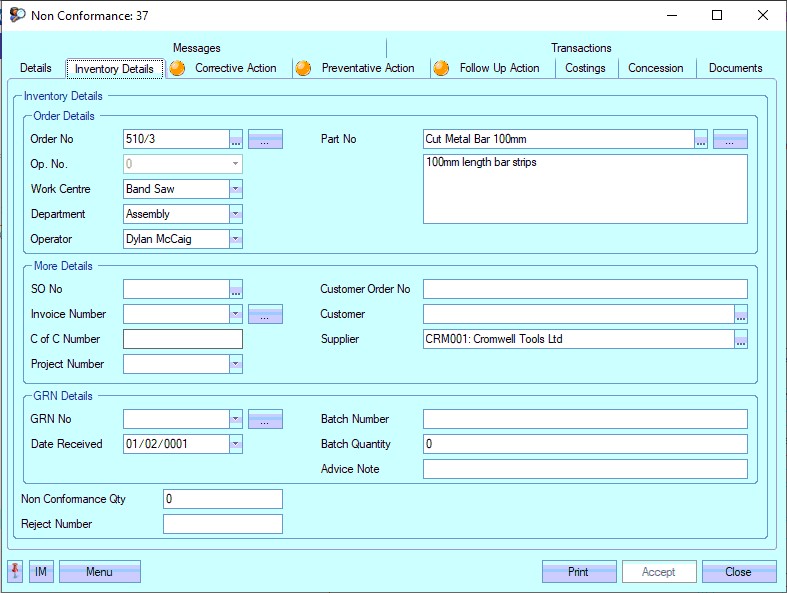
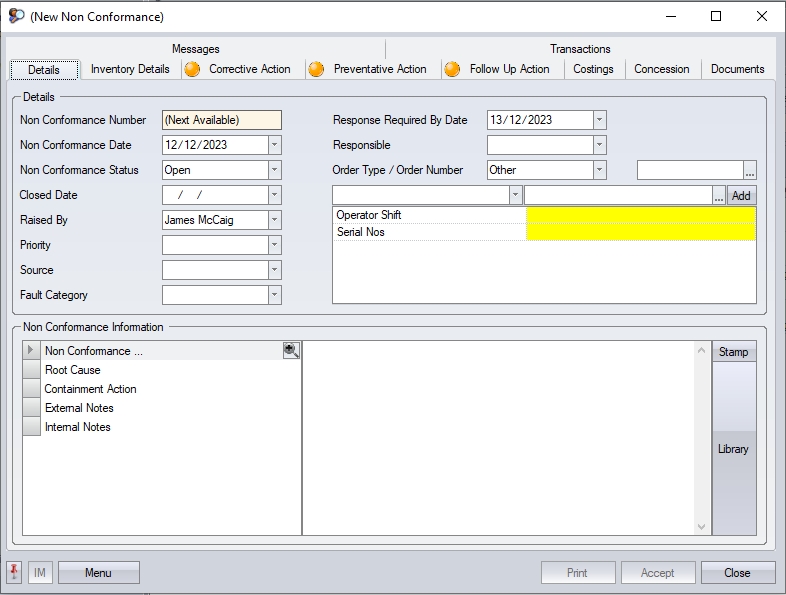
This section allows the user to view, create or amend non-conformance information in Progress. The screen below is the main NCR browse screen.

The main Browse screen indicates the individual NCR status using the colour coding set up against the statuses in the List Maintenance section.
NOTE: If these grid colours are changed, its necessary to reset the main NCR grid options for the changes to be picked up.
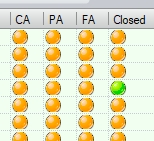
The main screen also includes coloured indicators to show status of the NCR itself, but also for the individual elements (i.e. corrective, preventative and follow up actions). These colour codes mirror those shown in the NCR itself in the tab headings and indicate whether that element is open (amber) or closed (green).

The filters at the top of the Browse screen allow the user to search and display all non-conformances based on the search criteria entered.

If any filters have been specified, the user must click the REFRESH option at the top of the screen to update the list based on the filters chosen.
In addition to the filter options above, the user can also specify whether closed NCRs are included in the grid. The option for this is directly under the grid. By default, this option is unticked.
![]()
The number of NCRs shown in the grid is also summarised at the bottom of the screen. This gives a total count of the NCRs shown.
The user can also set the maximum number of records to be displayed on the browse grid using the Limit Records option.
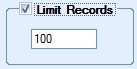
The default value of this option is set in the system options and is useful when large amounts of data are held in Progress as this limits the amount of data being displayed. The limit can be removed by the user if necessary by simply unticking the option, or they can simply increase the limit quantity to a more suitable value and then click the Refresh option to update the data displayed.
This option allows the user to manually create a new NCR record. Clicking this option presents the user with a blank NCR record.
NCR Details
The first NCR screen holds the main NCR details.
| Non Conf. No. | This is the unique NCR number. This is generated when the user clicks the Accept option to save the NCR. |
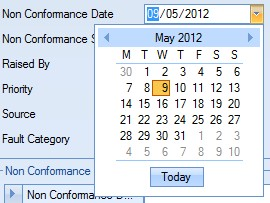
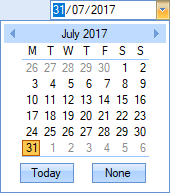
| Non Conf. Date | This is the date of the NCR and defaults to the current date. The user can change the date if necessary using the drop-down calendar. |
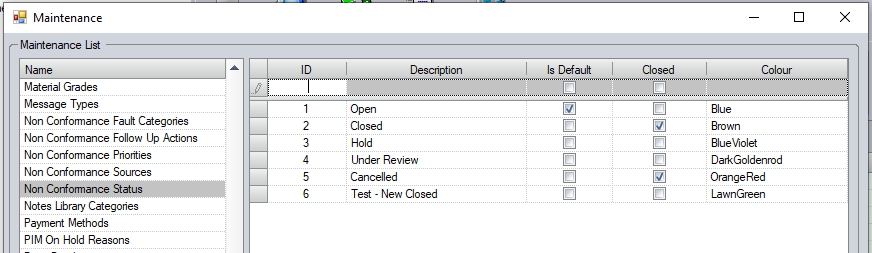
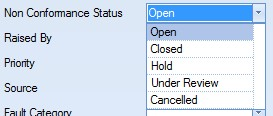
| Non Conf. Status | This is the status of the NCR. New NCRs will default to “Open” status, but the user can select an alternative status from the drop-down list. |
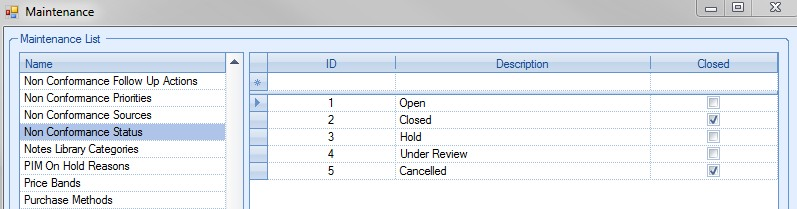
The user can change or add more suitable statuses by amending the list of NCR statuses available via the List Maintenance > Non Conformance Status screen as shown in the next screen.
If the status of all NCR sections are set to closed, the header status will automatically be updated to closed too.
For more information on maintaining lists in Progress, please refer to the List Maintenance section of this manual.
| Closed Date | This is the date that the NCR is closed. This will default to the date that the status is changed to a "closed" status but can be changed by the user. |
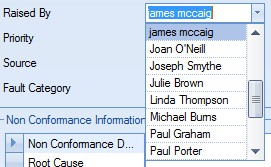
| Raised By | This is the user who created the NCR. This will default to the current user but can be changed to another employee using the drop-down list. |
| Priority | This is the priority set against the NCR. The user can select the required value from the drop-down list. |
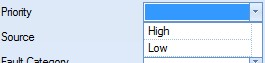
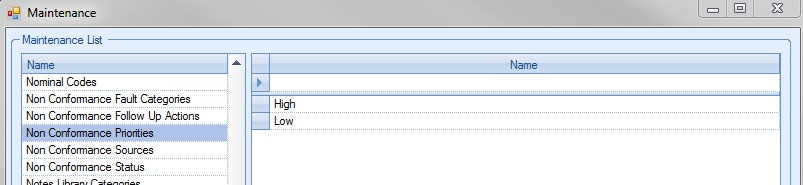
The user can change or add more suitable priorities by amending the list of NCR priorities available via the List Maintenance > Non Conformance Priorities screen as shown below.
For more information on maintaining lists in Progress, please refer to the List Maintenance section of this manual.
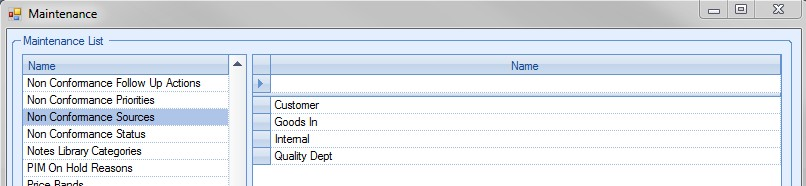
| Source | This is the source of the NCR. The NCR may be due to bad material from a supplier, internal quality issues or returns by a customer. The user can select the required value from the drop-down list. |
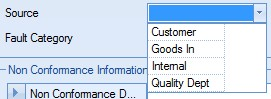
The user can change or add more suitable sources by amending the list of NCR sources available via the List Maintenance > Non Conformance Sources screen as shown below.
For more information on maintaining lists in Progress, please refer to the List Maintenance section of this manual.
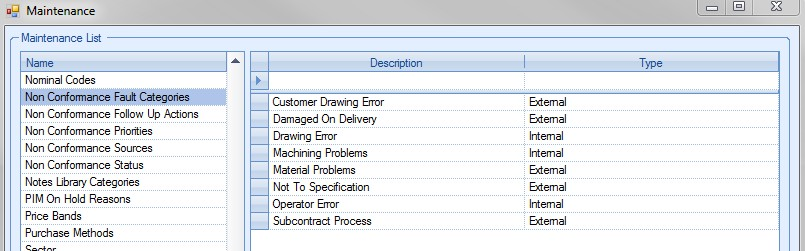
| Fault Category | This is the fault category assigned to the NCR. The user can select the required category from the drop-down list. |
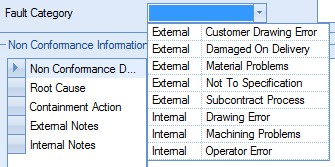
The user can change or add more suitable categories by amending the list of NCR categories available via the List Maintenance > Non Conformance Fault Categories screen as shown below.
For more information on maintaining lists in Progress, please refer to the List Maintenance section of this manual.
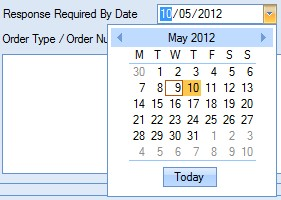
| Resp. Req Date By | This is the date that the NCR is to be responded to. This may be a date that is set by the customer or a date set internally depending on the circumstances. The date defaults to the next day but the user can change that date using the drop-down calendar. |
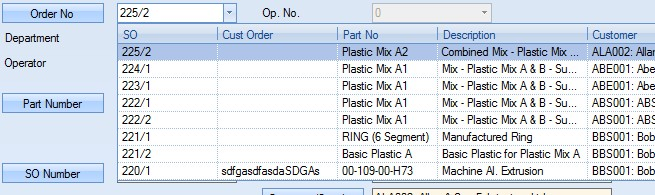
| Order Type / Number | This allows the user to link the NCR to an existing order within Progress. This might be a sales order, purchase order, work order or other. The user can select the order type from the drop down list. |
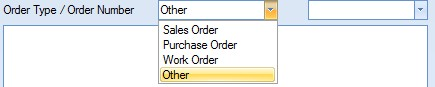
Once the user has selected the Order Type, they can choose the corresponding Order Number from the second drop-down list.
| Selecting a sales order, purchase order or a WO will auto-populate some of the information on the Inventory Details tab, based on the details of the selected order. Selecting OTHER will leave this information blank, allowing the user to complete manually if relevant information is know. |
| User Defined Fields | If Progress has been configured to have user defined fields available for NCRs, they will be displayed in this box. The user can complete these if necessary. |
Once the details have been entered, the user can click Accept to save the NCR and allocate it a system-generated NCR number.
Once the user has completed the information above, they can then record the more in-depth details of the non-conformance using the note sections at the bottom of the screen.
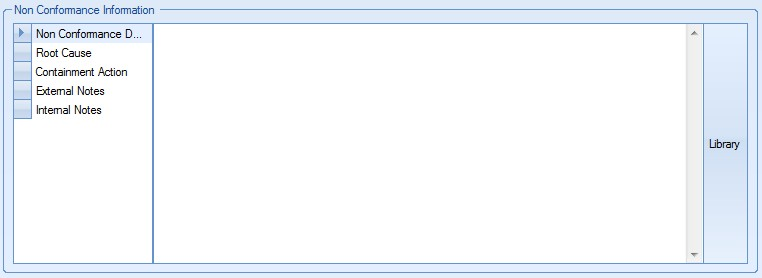
This section allow the user to specify the details of the NCR. The user has access to the Progress Plus Notes Library using the option to the right if they wish to add any notes already in the Notes Library. The user can record the NCR details, root cause, containment actions as well as external and internal notes associated with the NCR.
Once the all the details have been entered, the user can click Accept to save the NCR details and notes.
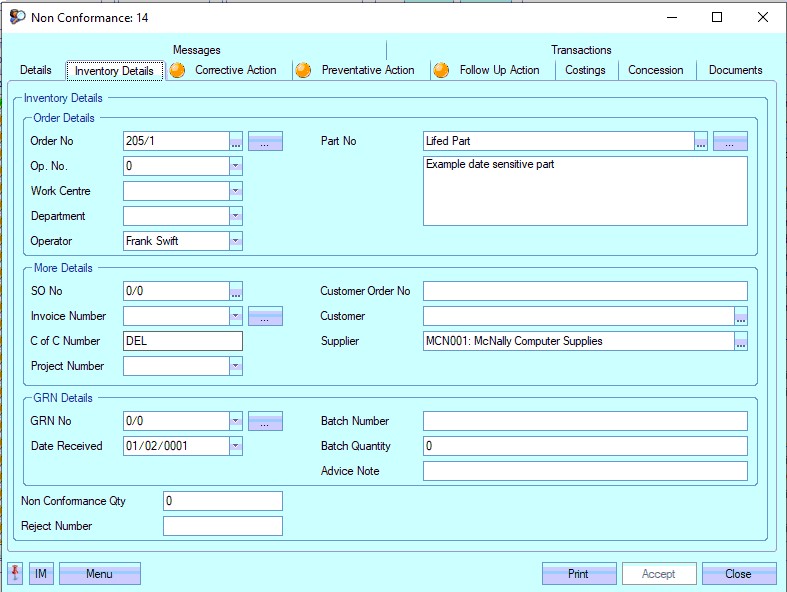
NCR Inventory Details
This section of the NCR shows the inventory stock details associated with the NCR. If the user has selected an order type and number, details of this order will pull through to the inventory details section.
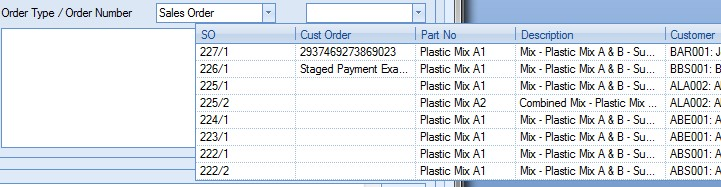
When the user selects a sales order for the NCR, the inventory details section displays the following:
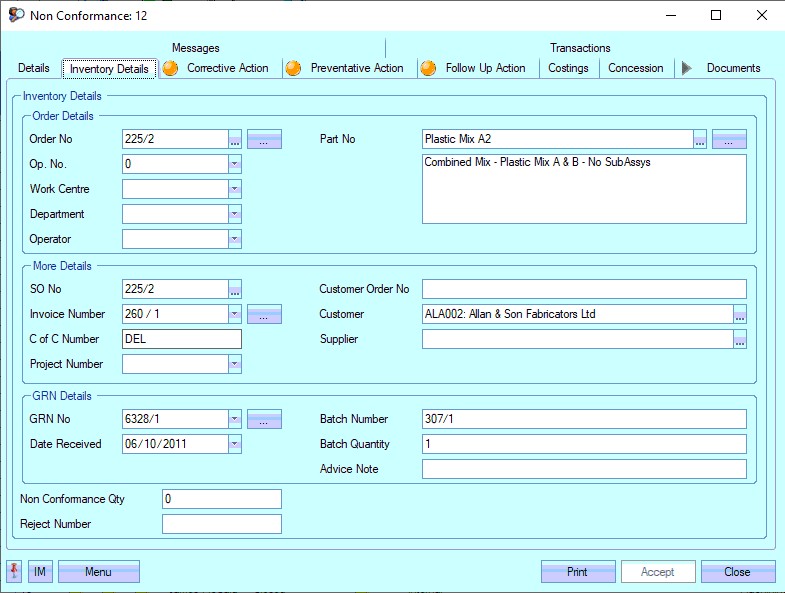
As can be seen above, the order number, part number and customer information are displayed.
When the user selects a work order for the NCR, the inventory details section displays the following:
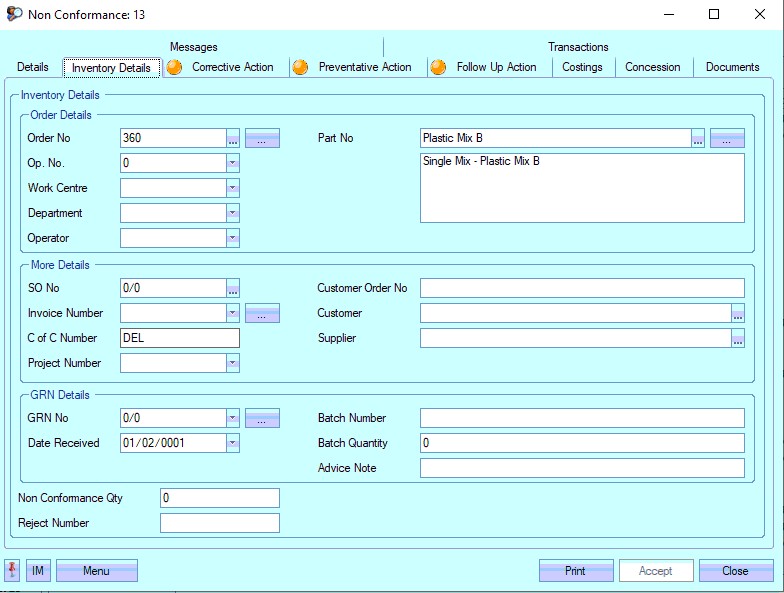
As can be seen above, the order number and part number are displayed.
When the user selects a purchase order for the NCR, the inventory details section displays the following:
As can be seen above, the order number, part number and supplier information is displayed. The user can complete the rest of the Inventory Details fields as necessary.
| Order No | This is the selected sales/work/purchase order number selected by the user. The user can change the order number here if required from the drop-down list. |
The user can also see the order details directly from the screen by clicking on the Order No box. This will open the order for the user as follows.
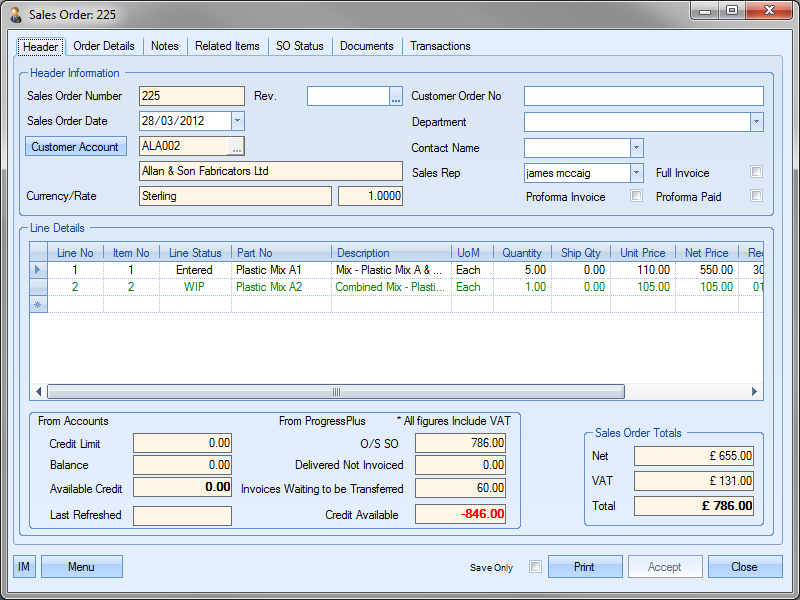
The user can return to the NCR screen by clicking either the Close or Accept option.
| Op No | If the user has selected a work order number for the NCR, the user can also specify the work order operation number here. The user can select the operation number from the drop-down list. |
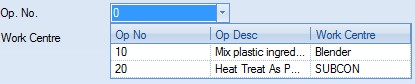
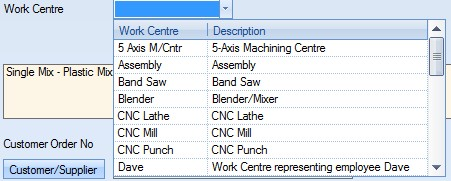
| Work Centre | The user can specify the associated work order operation work centre. This could be used to specify the work centre where the issue occurred. |
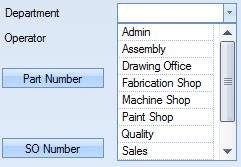
| Department | The user can select a department to record against the NCR if required. The user can select the department from the drop-down list. |
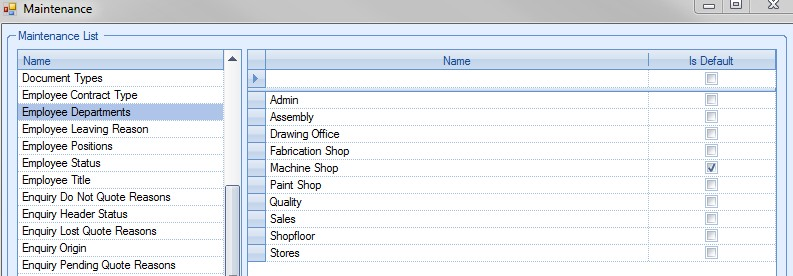
The user can change or add more suitable departments by amending the list of employee departments available via the List Maintenance > Employee Departments screen as shown below.
For more information on maintaining lists in Progress, please refer to the List Maintenance section of this manual.
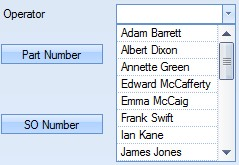
| Operator | The user can select a specific operator for the NCR. The user can select an operator from the employee drop-down list. |
| Part Number | If the user has selected an order type and number, the part number field will be populated with the appropriate part number associated with the chosen order number and type. |
![]()
If the user wishes to see more information regarding the part number specified, they can click on the Part Number box to open the inventory record for the part displayed.
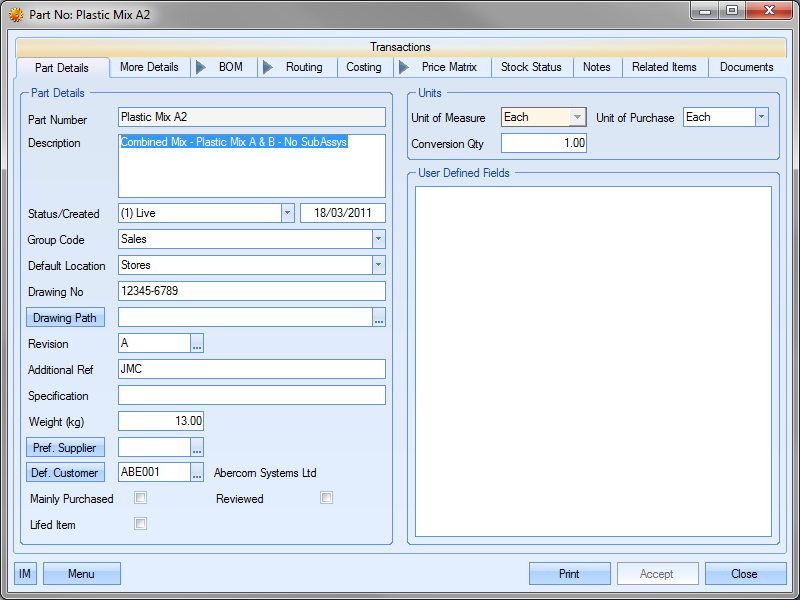
The user can return to the NCR record by clicking Close or Accept.
If this part number field is blank due to the user not having selected an order type and number, the user can select a part number for the NCR by clicking on the ![]() option at the end of the field. This will present the user with the Inventory Search window.
option at the end of the field. This will present the user with the Inventory Search window.

The user can use this screen to search for the part required. Once located, the user can highlight the part and click on the Select option to return the part to the NCR record. The part’s description is displayed in the box to the immediate right of the part number field.

| SO Number | This is the associated sales order number for the NCR as chosen by the user. The sales order number is shown along with the customer order number and the customer account and name. |

The sales order information will also show for work orders and purchase orders with associated sales orders.
The user can view the customer details by clicking the Customer/Supplier box. This will present the customer/supplier details.
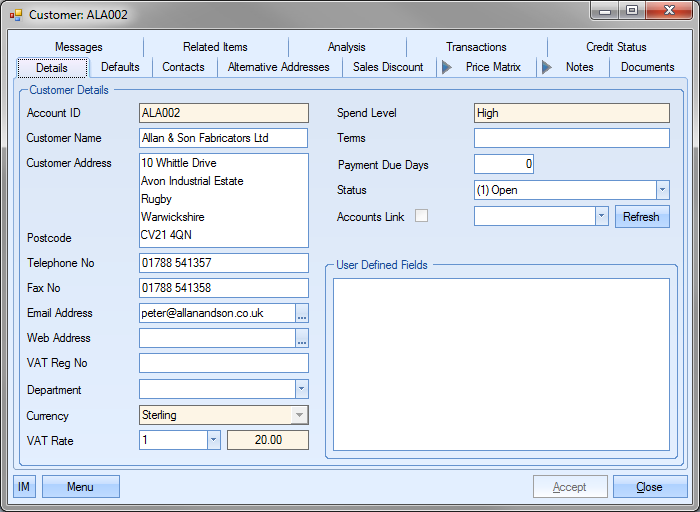
The user can return to the NCR record by clicking the Close or Accept option.
| Invoice Number | This allows the user to specify an invoice to link to the NCR record. The user can select an invoice from the drop down list. The list only shows invoices raised against the associated sales order. |

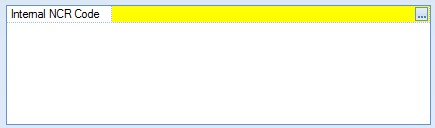
| C of C | Displays the associated C of C number of the delivery which has been returned by the customer. |
![]()
| Project No | This allows the user to specify a project that the NCR is associated with. The user can select a project from the drop-down list. This list shows all projects currently listed in Progress. |
![]()
| GRN Number | This field allows the user to record a specific GRN number against the NCR. This could be the GRN of the faulty batch. The user can select the GRN from the drop-down list. The list contains a list of all the GRNs for the selected part number. |
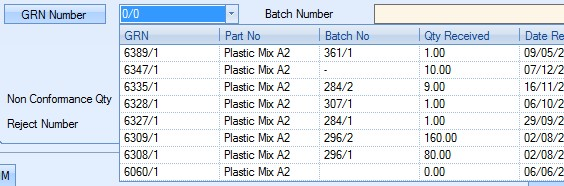
| Batch Number | This is the batch number of the selected GRN number. This is populated once the user selects a GRN. |
![]()
| Batch Quantity | This is the total GRN quantity of the selected GRN. This is populated when the user selects a GRN. |
![]()
| Date Received | This is the receipt date of the selected GRN. This is populated when the user selects a GRN. |
![]()
| Non Conf. Qty | This is the quantity associated with the NCR. This could be the reject quantity or the batch quantity if the full batch is being investigated. |
![]()
| Reject No | This is the external reject number. This might be supplied by the customer in relation to the NCR quantity. The user can simply type this in if known. |
![]()
Once the user has added all the details to the Inventory Details section of the NCR, they can save the changes by clicking the Accept option.
NCR Corrective Action
This section of the NCR allows the user to record details of the corrective actions relating to the NCR.
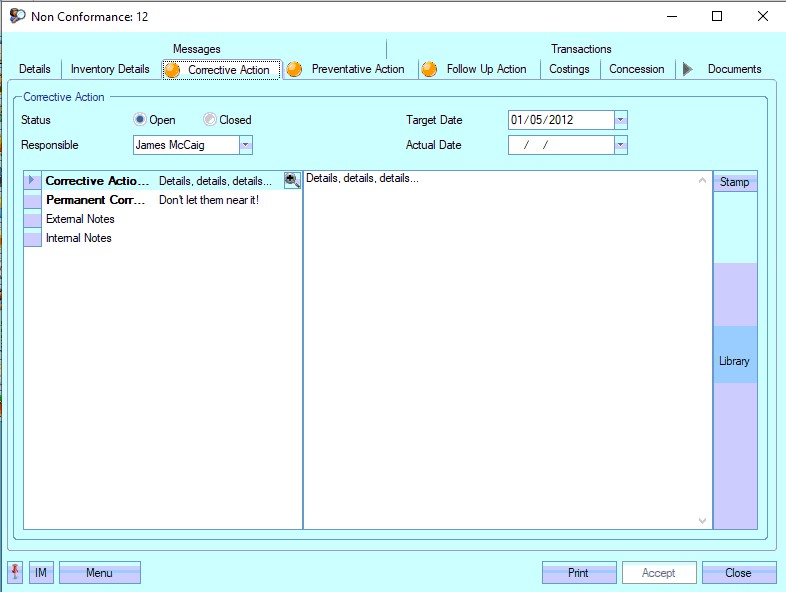
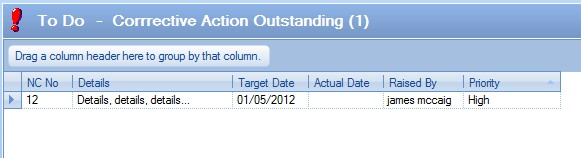
The user can specify target dates and specify an employee as responsible for completing the corrective actions by this date. The status of the corrective action is OPEN by default. If the corrective action status is not updated to CLOSED prior to the Target Date set, it will be highlighted by the Today > To Do > Corrective Actions Outstanding screen.
The user can use the note section at the bottom of the screen for specifying the details and resulting actions of the corrective action. Once any amendments have been made to the corrective actions section of the NCR, the user can click Accept to save the changes.
NCR Preventative Action
This section of the NCR allows the user to record details of the preventative actions relating to the NCR.
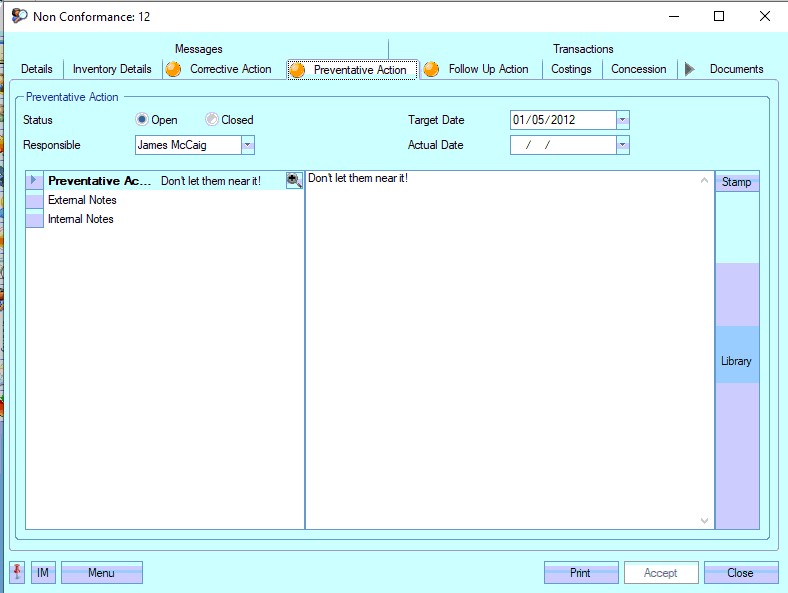
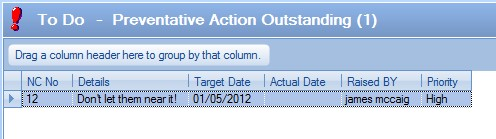
The user can specify target dates and specify an employee as responsible for the completing the preventative actions by this date. The status of the preventative action is OPEN by default. If the preventative action status is not updated to CLOSED prior to the Target Date set, it will be highlighted by the Today > To Do > Preventative Actions Outstanding screen.
The user can use the note section at the bottom of the screen for specifying the details and resulting actions of the preventative action. Once any amendments have been made to the preventative actions section of the NCR, the user can click Accept to save the changes.
NCR Follow Up Action
This section of the NCR allows the user to record details of the follow up actions relating to the NCR.

The user can specify target dates and specify an employee as responsible for the completion of the follow up actions by this date. The status of the follow up action is OPEN by default. All follow up actions are shown in the Today > To Do > Follow Up Action screen until their status is updated to CLOSED.

The user can use the note section at the bottom of the screen for specifying the details and resulting actions of the follow up action. Once any amendments have been made to the follow up actions section of the NCR, the user can click Accept to save the changes.
NCR Costings
This section of the NCR allows the user to record costing for material, labour, overhead and liability costs which are summarised to give a total. These costing fields can be used to record potential rework costs associated with the NCR.
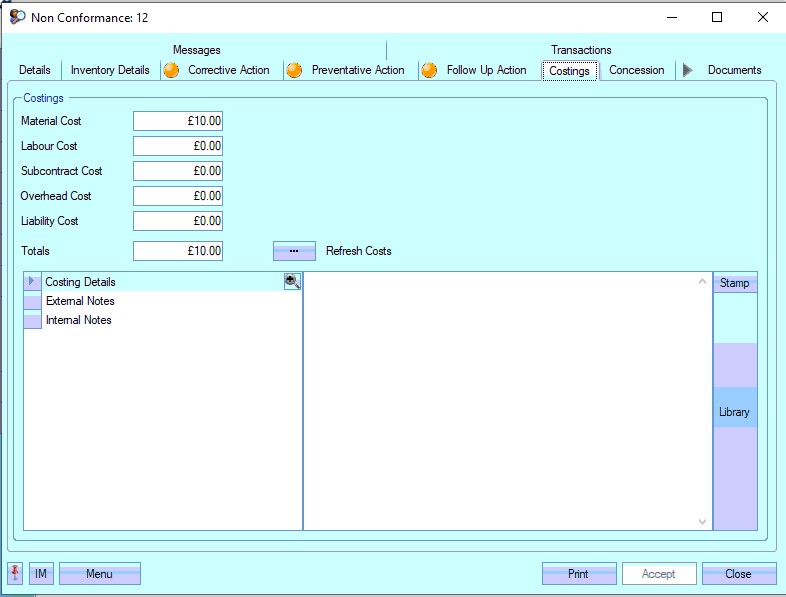
If the NCR is linked to an order (WO, PO or SO), the user can pull the costs through to the NCR using the REFRESH COSTS option at the top of the form. Depending on the order type selected by the user on the Details tab the user will have the following options available.
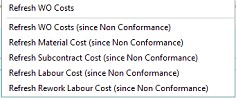
(WO Options)
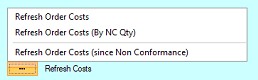
(PO and SO options)
The WO costs are pulled through based on the actual costs recorded against the WO. Options to pull through all the costs incurred since the NCR was raised or individual elements of the WO costs are also available.
For purchase and sales orders, the REFRESH ORDER COSTS option will pull through the current NET value against the associated order line, the REFRESH ORDER COSTS (BY NC QTY) will pull through the costs based on the NCR quantity alone, whereas the REFRESH ORDER COSTS (SINCE NON CONFORMANCE) option will pull through just the change in NET value since the NCR was raised.
If the NCR is linked to a PO or SO, by default, the individual costing elements are not available to edit, and the user can only record a total value, however, there is a system option that will allow this these elements to be editable. For more information on this, please refer to the Miscellaneous system options settings in the Administrator Functions section of the manual.
The user can also record explanations or notes on these costs using the notes sections at the bottom of the screen, where they also have the option of selecting a predefined note from the Notes Library. Once any amendments have been made to the costing section of the NCR, the user can click ACCEPT to save the changes.
NCR Concessions
This section allows the user to record details of any concessions that have been raised against the NCR.

The user can link the concession document to the NCR using the Concession Path option shown above. Once any amendments have been made to the concessions section of the NCR, the user can click Accept to save the changes.
NCR Documents
This section allows the user to save specific documents against the NCR. These may be general customer correspondence emails or specific quality documents that relate to the NCR.
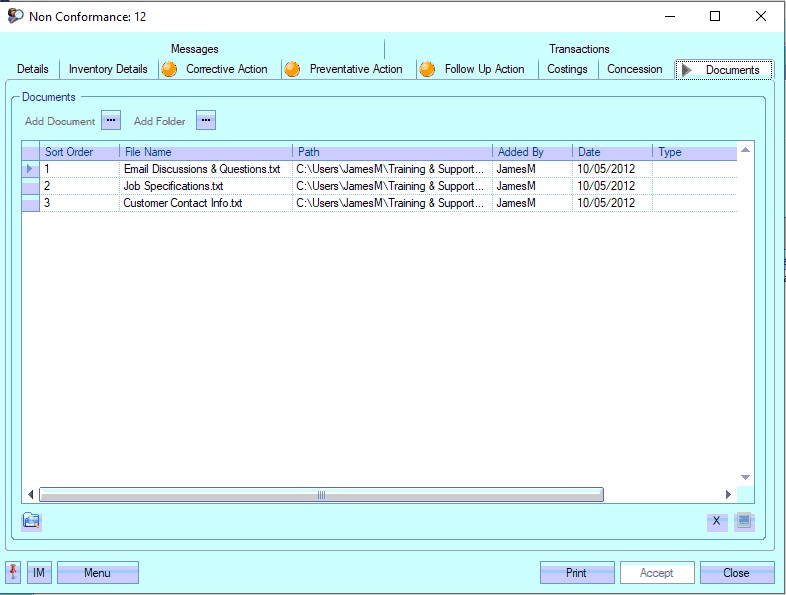
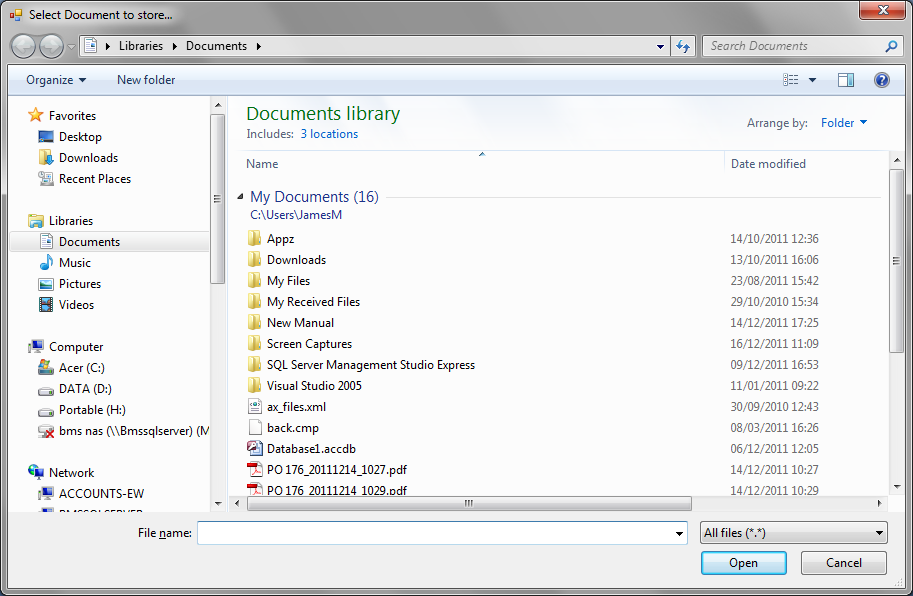
To record documents in Progress, the user simply clicks on the Add Document option to select the file required.
![]()
This will open a standard Windows explorer window to allow the user to search for the file to be attached.
Once the user has selected the file required, Progress will return the user to the documents screen and list the selected file.
NOTE: To allow access for other users to the files added to the supplier record, the user must ensure that these files are held in a folder accessible by all users. Typically a shared network folder would be created for this purpose.
Once the file(s) have been added, the user can specify a file type or comment associated with the document. The Type can be chosen from the drop-down list.
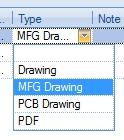
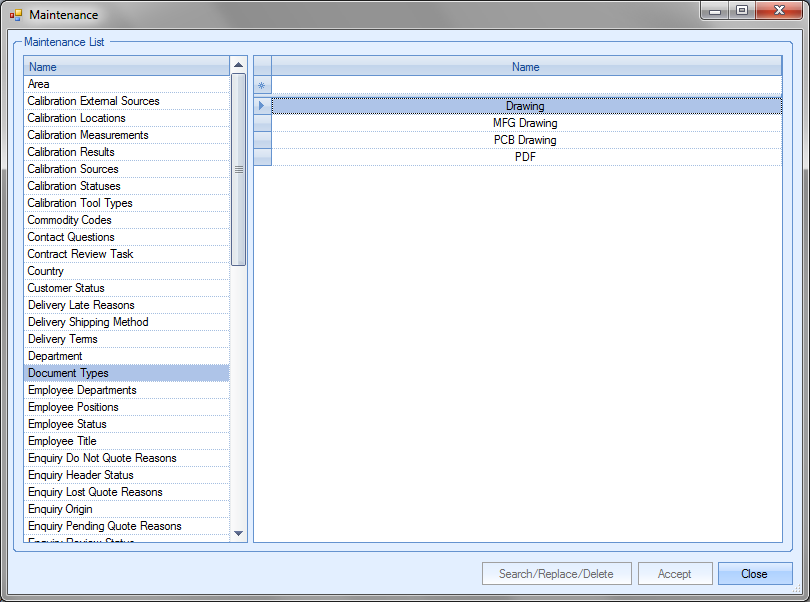
This drop-down list can be populated from the List Maintenance section of Progress in the Document Types list as shown in the screen below.
For more information on maintaining lists and the List Maintenance section of Progress, please refer to the List Maintenance section of this manual.
A note for the document can be added directly to the Note field as shown.
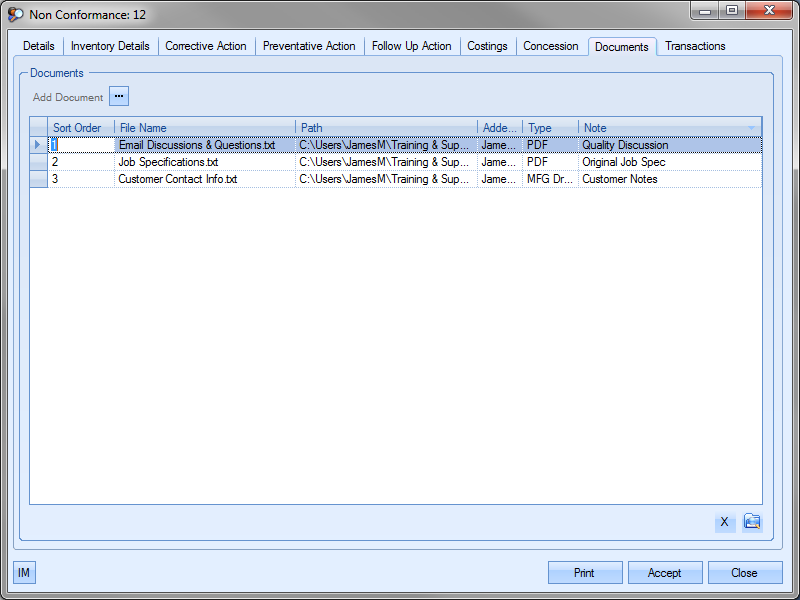
Once all documents and details have been added, the user can save the changes by clicking on the Accept option.
NCR Messages
This section shows all associated messages and emails relating to the non-conformance.
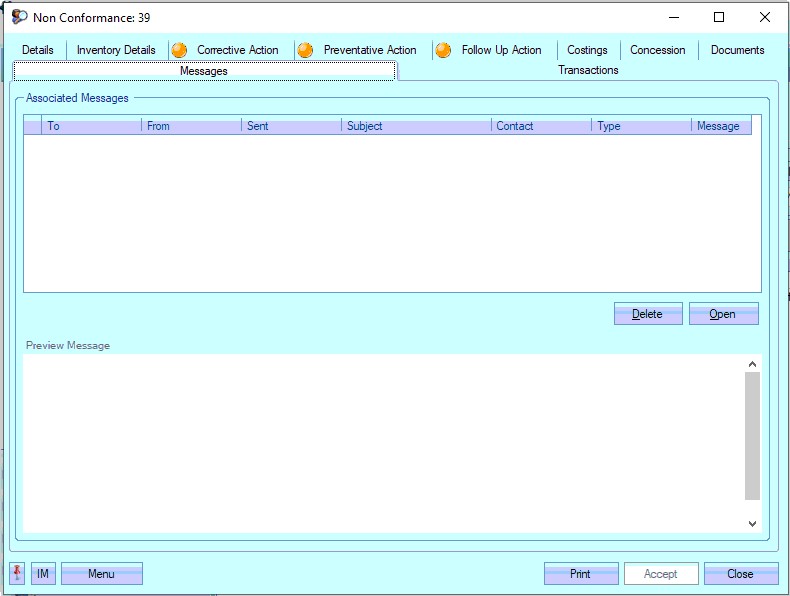
Any communication relating to the non-conformance (i.e. emails, instant messages, etc.) will all be listed here for the user to view.
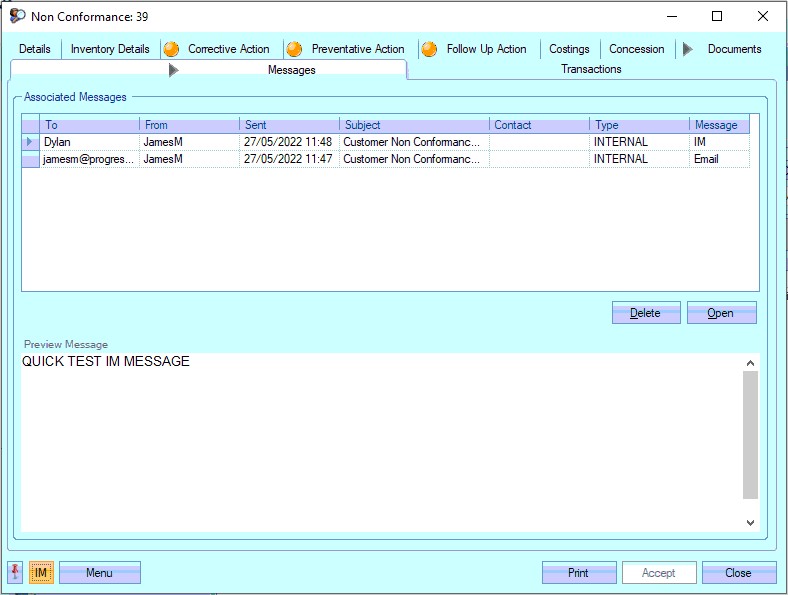
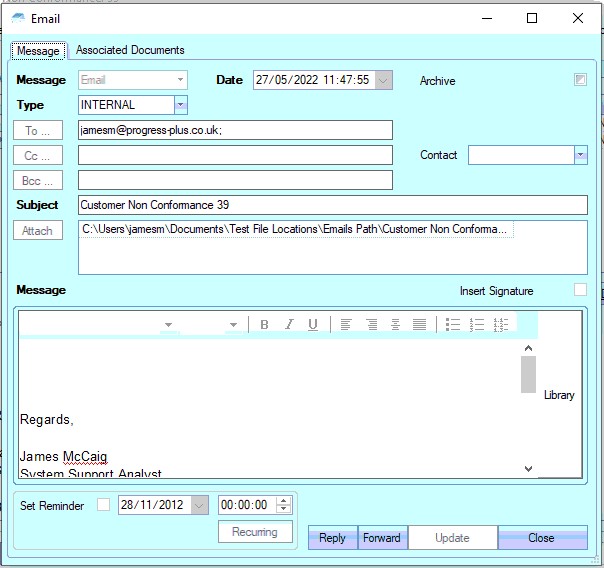
The user can open any of the items listed on this screen but either double-clicking on the listed item or by highlighting and clicking OPEN. The selected item will then be displayed for the user to view.
The user also has the ability remove messages recorded, if permitted. Permission to delete messages is set up against the user permissions. For more information on user permissions, please refer to the Administrator Functions > Access section of the manual. If the user has permission to remove messages, then the DELETE option will be available.
Messages can be deleted by simply highlighting the item and clicking the DELETE option. The user will be prompted to confirm the deletion.
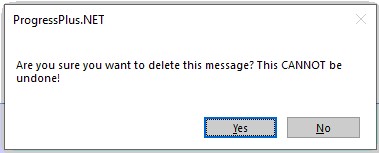
Clicking YES will delete the selected message, and the screen will be updated.
NCR Transactions
This section of the NCR shows a complete list of transactions made in Progress by the users which relate to this NCR.
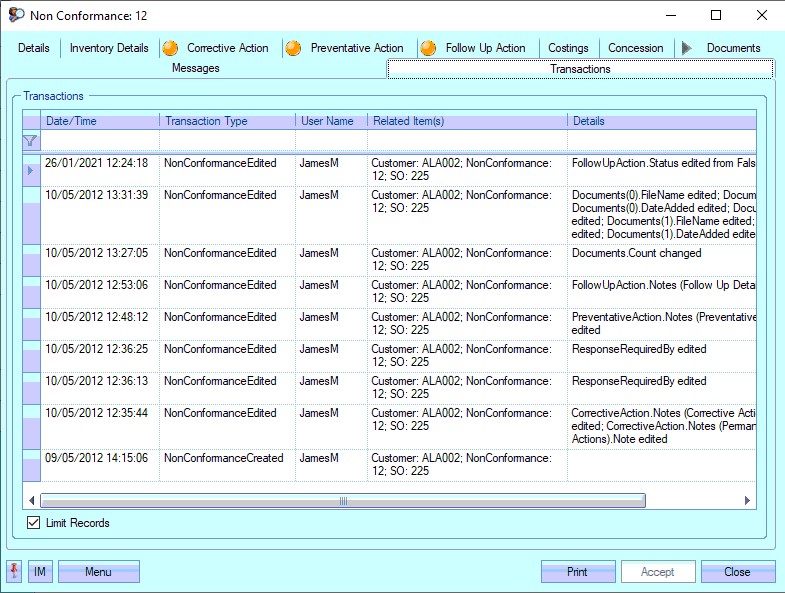
The user can see what transactions have occurred as well as details on the changes made. This is often very useful when trying to find out why something has changed unexpectedly or if the user needs to find out who made a particular change.
| Date/Time: | The date and time that the transaction occurred. |
| Transaction Type: | This field names the type of transaction recorded. This references both the area of Progress and the action, i.e. NonConformanceEdited – change made to a NCR, NonConformanceCreated – new NCR created, etc. |
| User Name: | User who made the transaction. |
| Related Item(s): | Reference information on the exact record that was amended, i.e. NCR number, Customer, Sales Order No, etc |
| Details: | Brief explanation of edited information. |
Printing Options
Once all the details have been entered into the NCR, the user can print a copy of the NCR. The Print option at the bottom of the screen provides two options; Layout and Report.

The Report option will generate a standard NCR report with all the details of the NCR and is the same report as the Non-Conformance Detail report available in the Quality Reports section of Progress. The Layout option generates an NCR document that can be used for sending to external sources, i.e. customers, suppliers, etc.
Menu Options
The MENU option at the bottom-left corner gives the user some additional options.
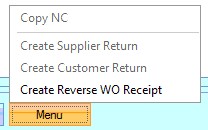
Copy NC
This option allows the user to copy the details from an existing non-conformance. The user opens the new NCR as normal, but can then use this option to select the NCR they wish to copy.

When this option is selected, the user will be presented with the following screen.
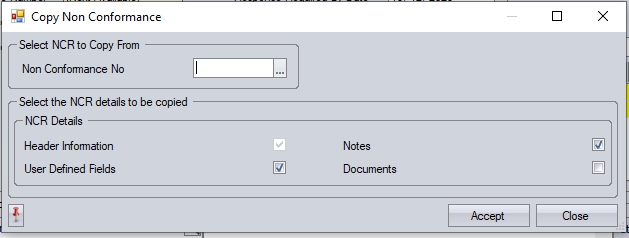
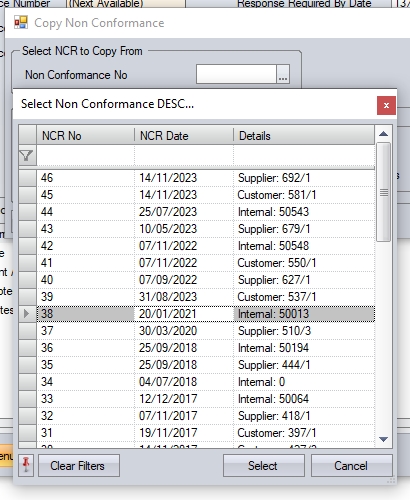
The user can select the existing NCR to be copied using the selection box provided. Clicking this will present the user with a list of NCRs to choose from.
Once selected, the user can then select which details are to be copied to the new NCR. The header information will be copied by default, but the user can include notes, user-defined fields (UDFs) values and associated documents using the tick boxes provided.

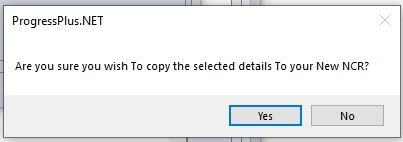
Once the relevant options have been selected, clicking ACCEPT prompt the user to confirm the copy, before copying the selected details to the new NCR.
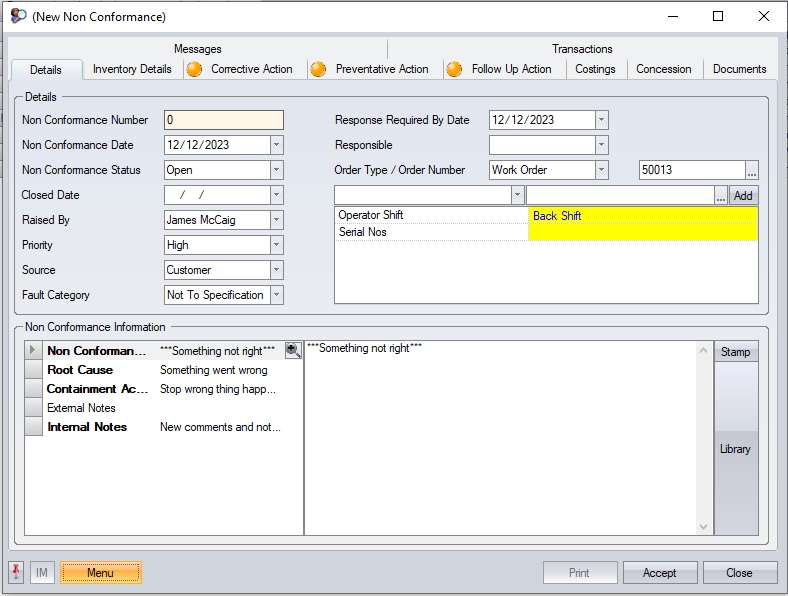
The user can then add any additional information, or amend as required, before clicking ACCEPT to save the new NCR.
Create Supplier Return/Customer Return/Reverse WO Receipt
These options are linked to the type of NCR that's been raised. Based on the linked ORDER TYPE (i.e. SO, WO, PO), the system gives the user the option to reverse the associated inventory transactions associated with that type. The options are the same Inventory options that are available in the Inventory Issues and Inventory Receipts section of the system but saves the user having to leave the NCR to carry them out. Only the associated option is available to ensure the correct transaction is carried out.
Create Supplier Return allows the user to carry out a supplier return of the units received against the selected PO line.
Create Customer Return allows the user to carry out a customer return of units shipped against the selected SO line.
Create Reverse WO Receipt allows the user to return finished units back onto the selected WO.
Each option opens the relevant Inventory screen, filtered by the selected order number, from which the user can complete the transaction.
View
The user can view the details of any NCR displayed in the browse grid by highlighting the required NCR and then clicking the View option at the top of the screen. They can also open an existing NCR record by double-clicking on the required record directly in the grid. Either method will display the following screen.
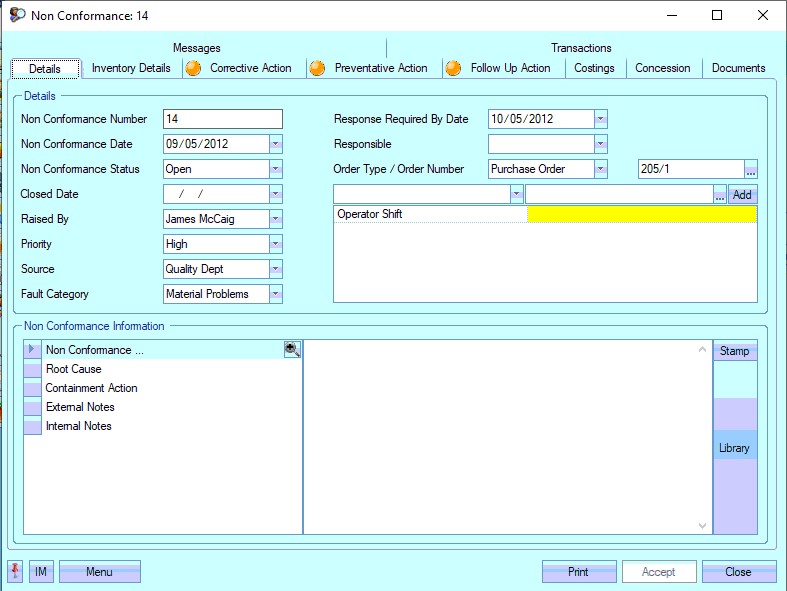
The details of the NCR can be viewed on the screen that appears. The user can amend the details shown if required and can save by clicking on the Accept option.
Export
The Export option allows the user to export the current list of NCRs to an Excel spreadsheet for further analysis. This option can be used in conjunction with the filters available at the top of the screen or can be used with the full list of NCRs if required. Clicking the Export option will prompt the user to create an Excel file.
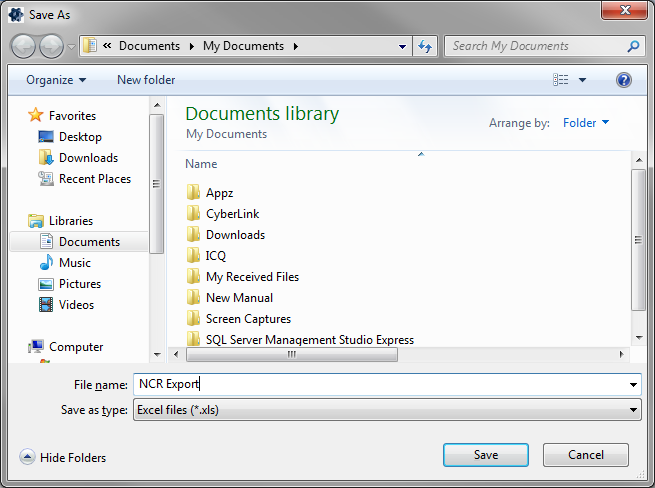
The user can specify the name required and where the exported file is saved. Clicking SAVE will generate the file. Once created, Progress will open the spreadsheet in Excel.
