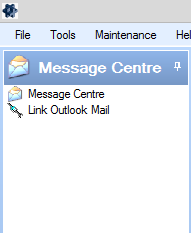
Progress Plus has an internal messaging system that allows a variety of functionality to be used for communicating with customers, supplier and other users from within the system itself. The Message Centre can be accessed from the option on the left of the main system as shown below.

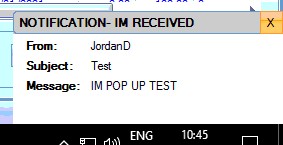
Notification of any messages received via the Message Centre are highlight by a windows notification pop-up (which can be switched off if preferred, via the Tools menu shown below) and also with a number shown against the Message Centre itself on screen.

![]()
Within this section of Progress, the users have access to the internal messaging tools as well as the ability to see any emails that have been imported from Outlook using the Outlook Add-in tool.
Message Centre
This option gives the user direct access to their message centre. From here the user can send emails and messages to other Progress users and customer and supplier contacts, set personal reminders or simply create notes.
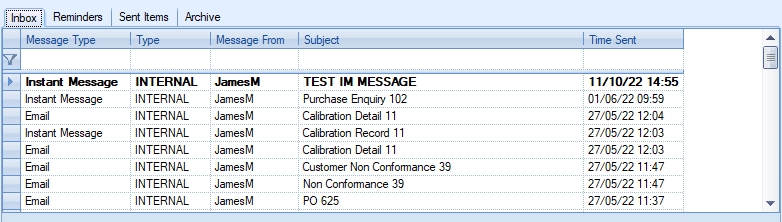
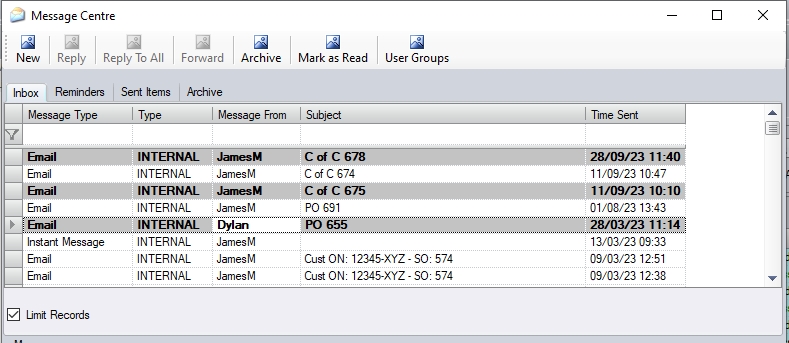
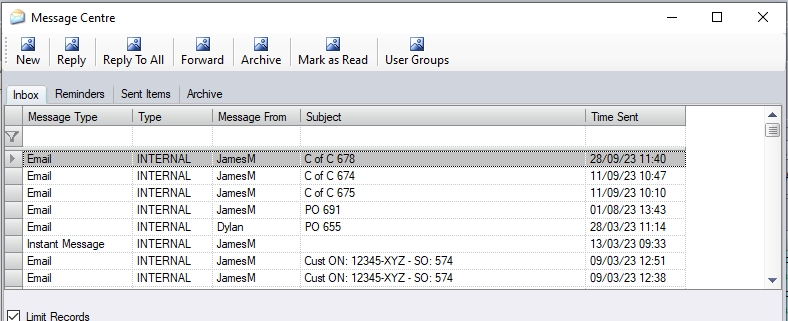
Any unread messages, emails, etc. are highlighted in BOLD as shown below.
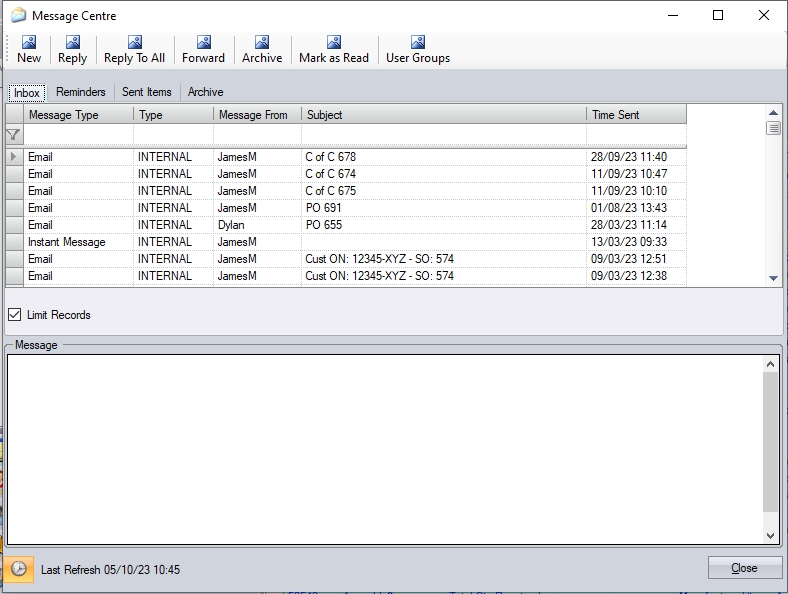
The main message window above lists all the current messages received via email or instant message along with tabs to see any reminders that have created for themselves, items they have sent and also those they have archived. The user can filter the messages using the grid filter row at the top of the message list.


(filtering by message sender)

(filtering the message subject)
The user also has options to reply, reply to all and forward at the top of the screen to allow them to quickly respond to messages from the main screen.
![]()
Any of the listed items can be viewed by simply double-clicking to open it.
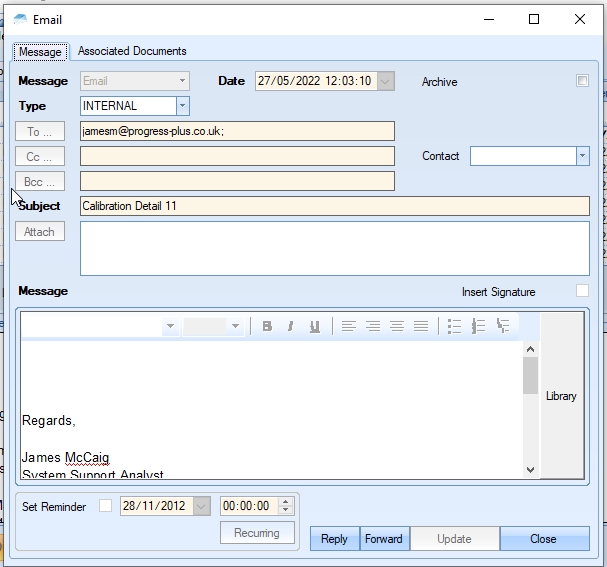
Options to reply or forward to the selected message are also available at the bottom of the message.
Creating New Messages/Notes/Reminders/Instant Messages
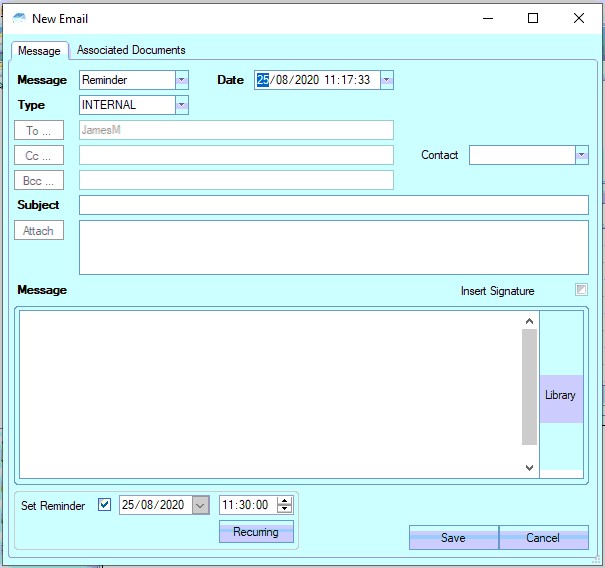
The user can create all items from the message centre using the NEW option, presenting the user with a blank message window.
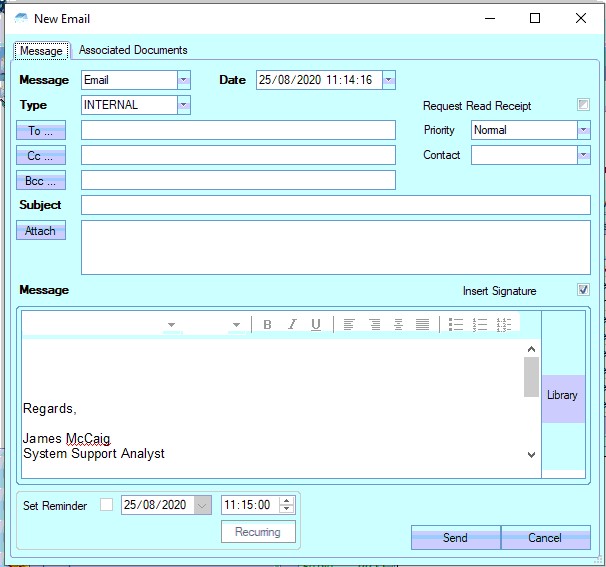
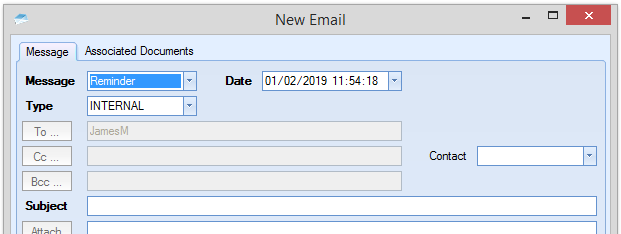
The user can determine the type of item they want to create using the drop-down options in the MESSAGE option at the top. This allows them to select between an email, an internal message, a reminder or a note. Based on the selected type, certain fields become inaccessible as they are not relevant to the message type. For example, selecting the REMINDER option removes the ability to enter email addresses/contact names since these are restricted to personal reminders as opposed to reminders for other users.
Emailing
When creating an email from within the Message Centre, the user can select from all contacts recorded in Progress. Clicking on the TO, CC or BCC options lets the user select contact details from within Progress.
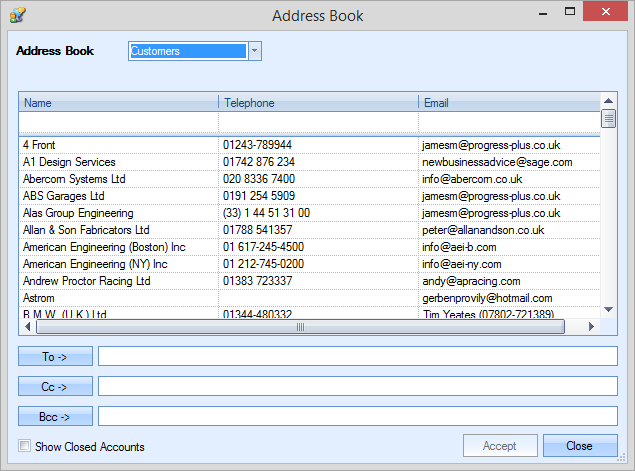
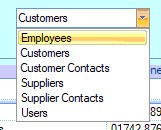
The drop-down list allows the user to filter for the type of contact they are looking for, updating the list below based on the user's selection. If the email address is not stored within Progress, the user can manually enter any email address they wish to use.
The user can also access the Message Centre via any item within Progress Plus (i.e. purchase orders, sales orders, invoices, etc.) via the IM option within the item itself (shown below). This option directly opens a new IM for the user, and automatically associates it with the customer/supplier and item.
![]()
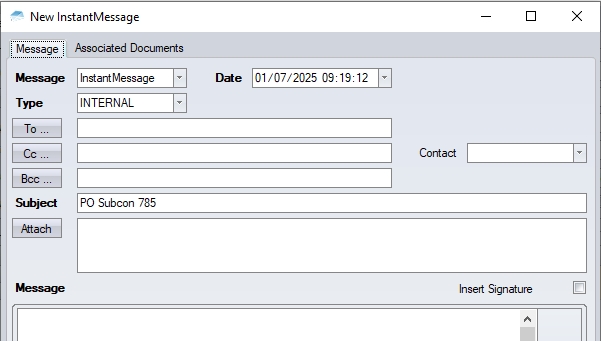
(Example: IM from PO - Subject set to associated item)
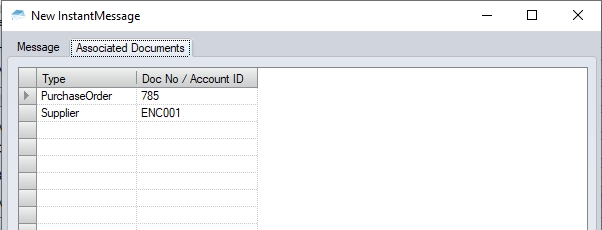
(Example: IM from PO - Associated Documents automatically linked to associated item)
Typically, the IM opened from within an item will be restricted to just the contacts associated with the customer or supplier they are dealing with, however, they do have a SHOW ALL option to view all contacts if they choose. This option is only available against the CUSTOMER CONTACTS and SUPPLIER CONTACTS options from the drop-down list when selected.
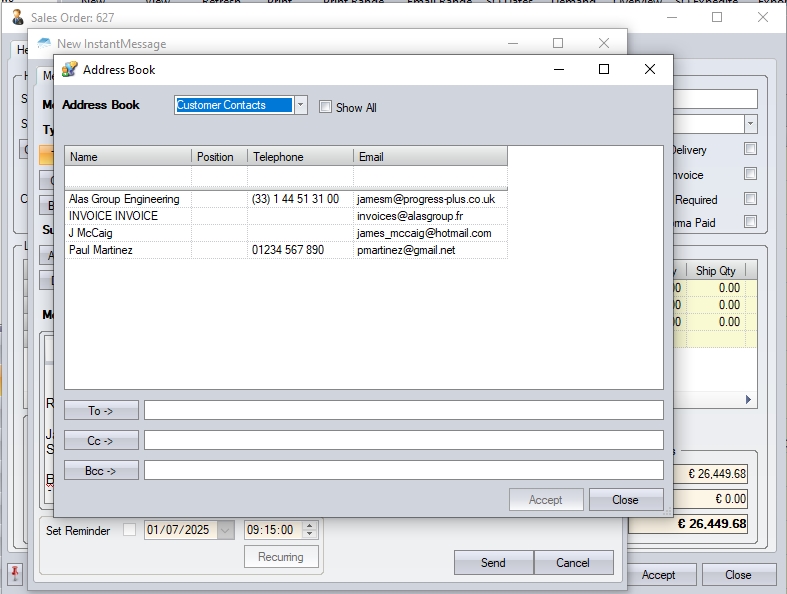
(Emailing from within an SO - defaults to only contacts associated with customer)
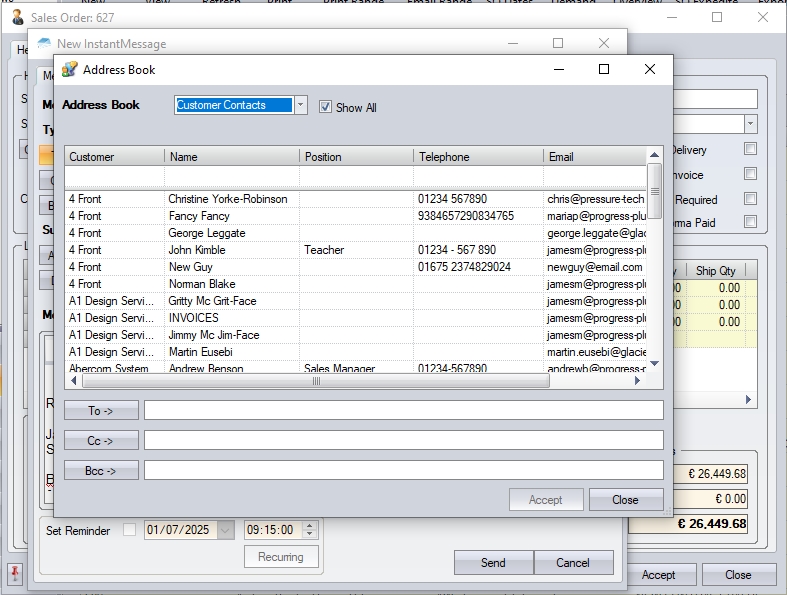
(Emailing from within an SO - SHOW ALL option showing all customer contacts)
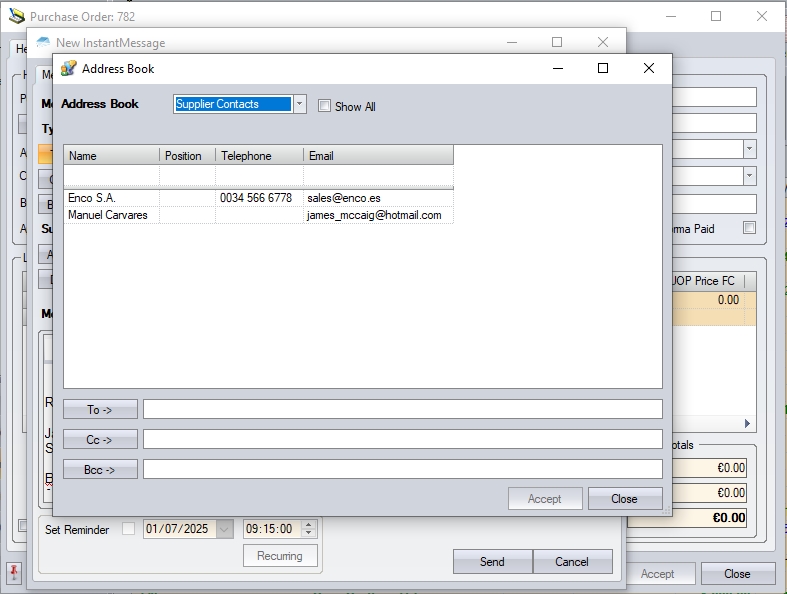
(Emailing from within a PO - defaults to only contacts associated with supplier)
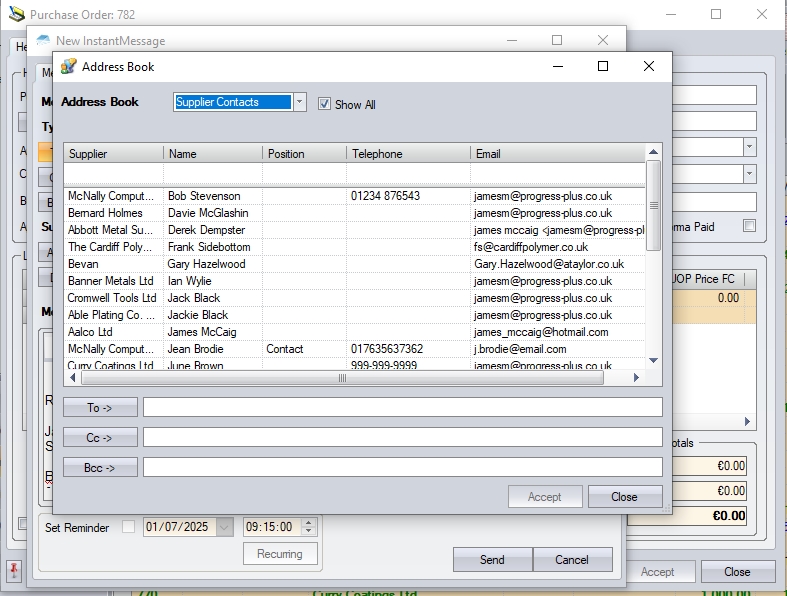
(Emailing from within a PO - SHOW ALL option showing all supplier contacts)
Attaching Documents
Attachments can also be added to the email via the ATTACH option on the form. This will allow the user to select files from their PC.
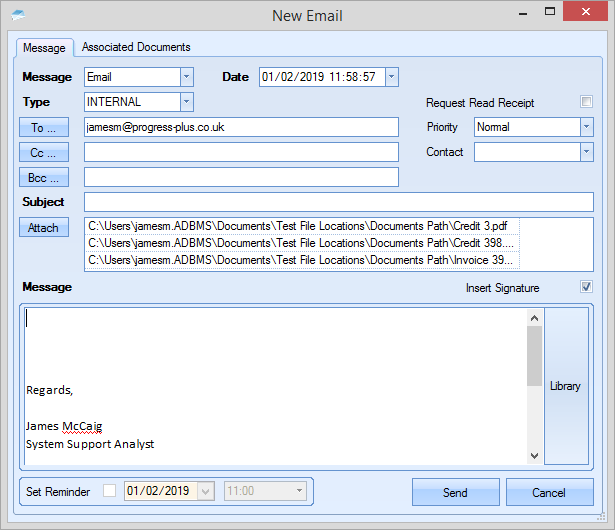
The user can complete the email by adding any message they wish to add, either by selecting from the Notes Library itself or by manually entering the desired text. Once done, clicking SEND will send the email.
Instant Messages
The process of creating an instant message via the Message Centre is similar to the email process above, but limits the user to select the recipient from the list of Progress users or their departments.
The rest of the process for creating the instant message is much the same as the email option - the user can select files to attach, can add a suitable message both manually or using the Notes Library. Again, once complete, the user simply clicks SEND to send the message to the selected recipients.
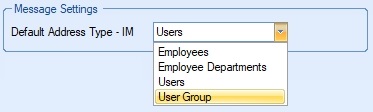
The user can also specify what the default address book is for instant messages. This is set in the Admin section of Progress in the Miscellaneous options (shown below).
If replying to a instant message, the user can respond directly from within the message using the options provided.
![]()
Notes
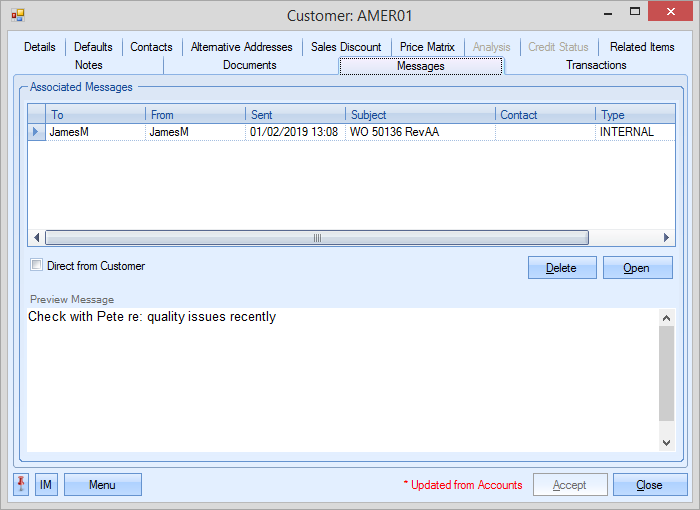
The notes option is designed for use within other areas of the system. The idea of these is to record notes relating to items in Progress, for example sales orders, invoices, suppliers, etc. When a note is created from within one of these items, the NOTE is tagged with related details. The screen shot below shows a note that has been created from a purchase order.
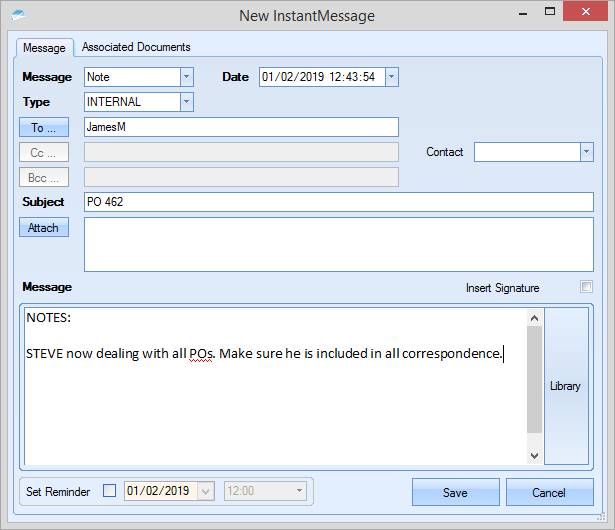
As can be seen in the example above, the subject text of the note is set to the PO number it was raised from. In addition to this, the ASSOCIATED DOCUMENTS tab also records the linked items.
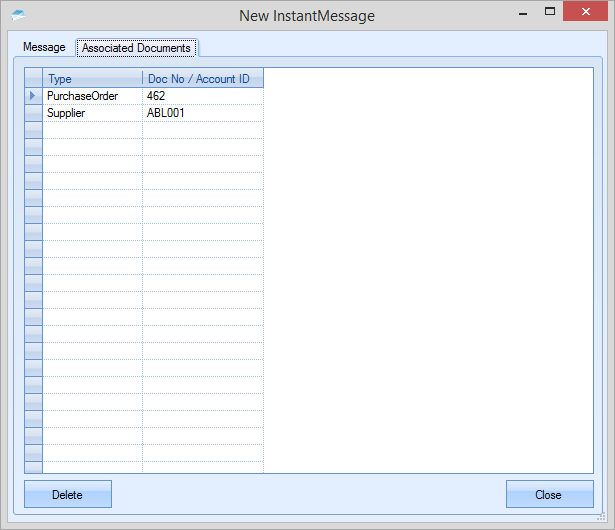
By linking the note to both the supplier and the PO, the note can be viewed from either of these references, as shown below.
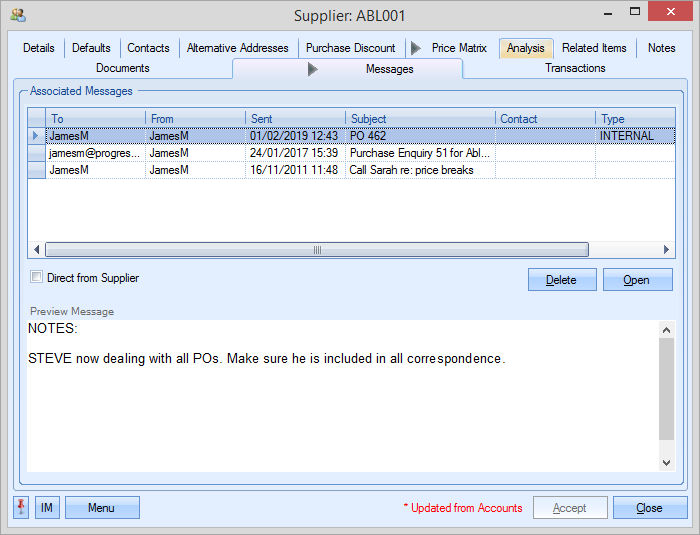
(Viewed via the Supplier messages)
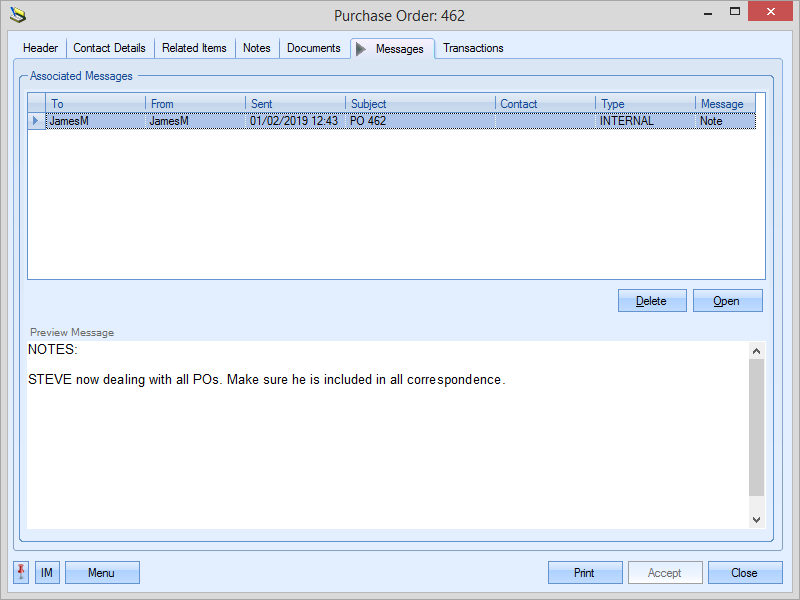
(Viewed via the PO messages)
If the user sets a reminder on a note they are creating, the system will record both a note AND a reminder. For more information on reminders, please see the Reminders section of this manual.
Reminders
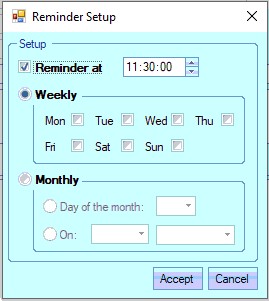
This option provides the user with a means to set up reminders in Progress. These can be both standalone reminders (i.e. not specifically linked to an item) or created from within items in Progress (i.e. links to associated items). Selecting the reminder option removes access to many of the fields, leaving only the Subject and Message boxes available for completion along with the reminder date/time settings.
As per the Notes option above, creating a reminder from within a PO, SO, etc will record associated items to the reminder.

Although the reminder is set up for the user who creates it, the reminder is still visible from any of the associated items listed on the reminder as shown below.
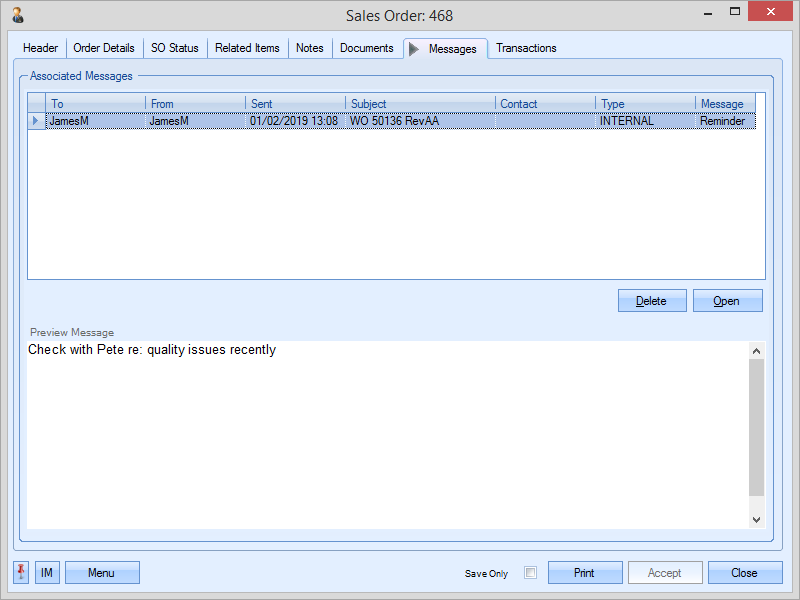
(via the SO messages)
(via the Customer messages)
The user can also set a specific date and time for the reminder using the details at the bottom of the form. From here, they can also set up recurring reminders if the reminder is for a regular event or meeting.

By default, the reminder will be a single reminder, however, the user can click the RECURRING option and assign the recurring nature of the reminder, allowing specific days and dates to be set.
Once the reminder has been configured and saved, the system will pop up a message when the reminder date/time comes round.
Archiving Messages/Notes
The user can archive messages and notes when they have been dealt with for future reference. This can be done directly from the Message Centre front screen or individually in each message.
The user can archive individual messages by ticking the ARCHIVE option within the message, and then clicking the UPDATE option to save the message. This will drop off the user's Inbox and move the message to the Archive section.
![]()
The user can also archive multiple message and notes directly from the Inbox, by selecting the items to be archived using the SHIFT or CTRL keys to multi-select them. Once selected, clicking the ARCHIVE option will archive all the messages selected and remove them from the Inbox.
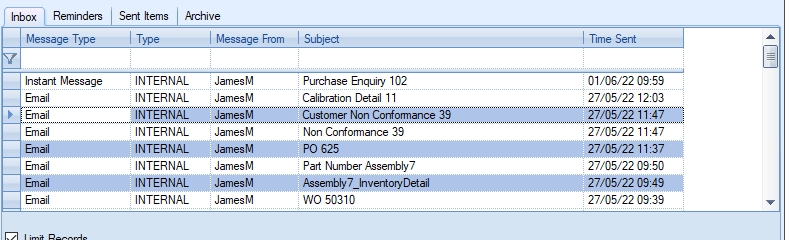
Marking Messages as Read/Unread
Users can mark messages as read or unread by highlighting the message(s) and clicking the MARK AS READ option. This will mark the message "read" (if unread) or "unread" (if read).
(before MARK AS READ is clicked)
(after MARK IS READ is ticked)
User Groups
The user is also able to create groups of users for use with the Message Centre. These are created and maintained via the USER GROUPS option at the top of the screen.
![]()
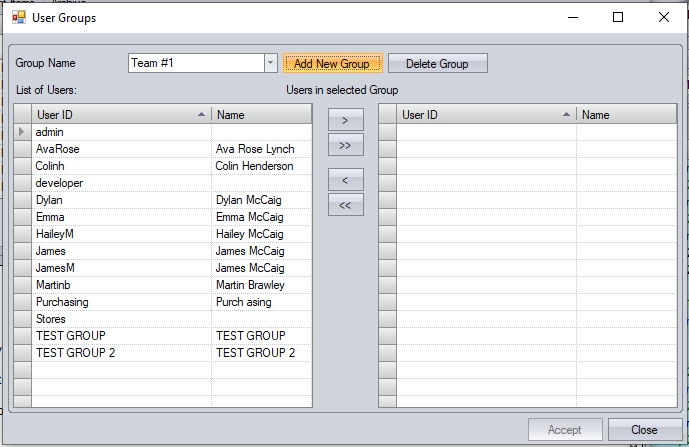
Selecting this option will present the user with the following screen.
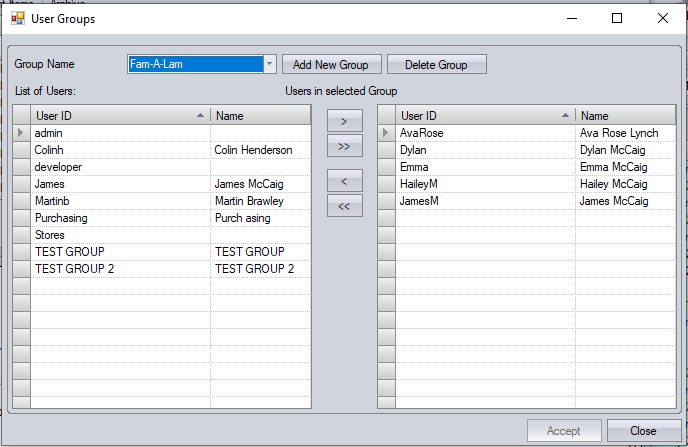
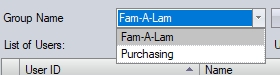
Any existing groups can be selected from the drop-down list at the top of the screen.
Once a group has been selected, the grids below will update to show the existing users in the group (right-hand side) and the list of users that can be added to the group (left-hand side).
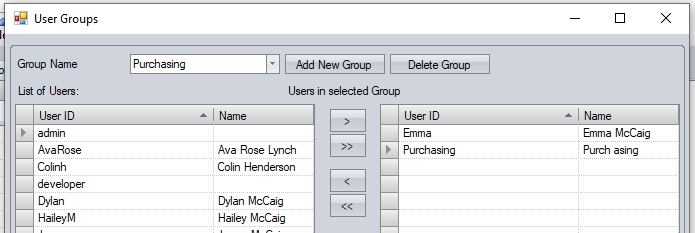
The user can make any amendments to existing groups by selecting the relevant group and adding/removing users as required using the arrows provided. Once done, the user can click ACCEPT to save any changes made to the selected group.
The user can also create new groups of users using the ADD NEW GROUP option. When selected, the user will be prompted to give the group a name, before presenting them with the user selection grids to add the users as required.
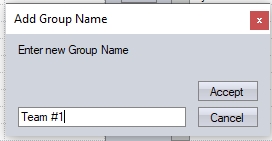
Once the user has added the users required, clicking ACCEPT will save the changes.
The user can also delete existing groups using the DELETE GROUP option. The user must first select the group they wish to delete from the drop-down list and then click the DELETE GROUP option. The user will then be prompted to confirm the deletion.
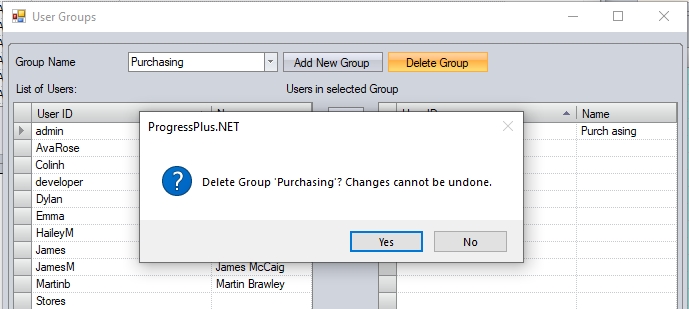
Clicking YES will delete the selected group. Clicking NO will cancel the deletion and return the user to the User Groups screen.
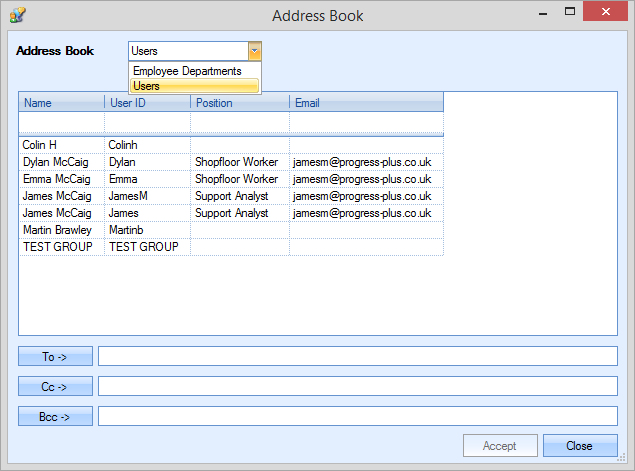
The user can select a user group when sending messages via the Message Centre via the address book options. From these, the user can change the scope of the list to USER GROUPS, and select from the list.
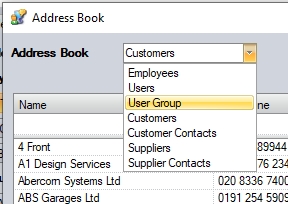

Once selected, the names will be added to the message.
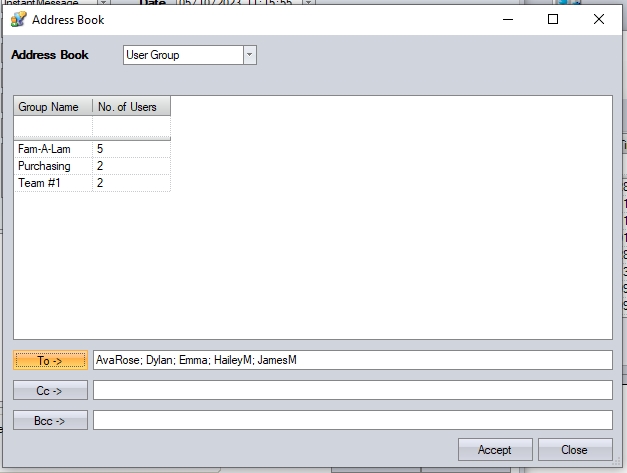
(Selection of group for message)

(Selected names pull through to message)
Use Message Centre throughout the system
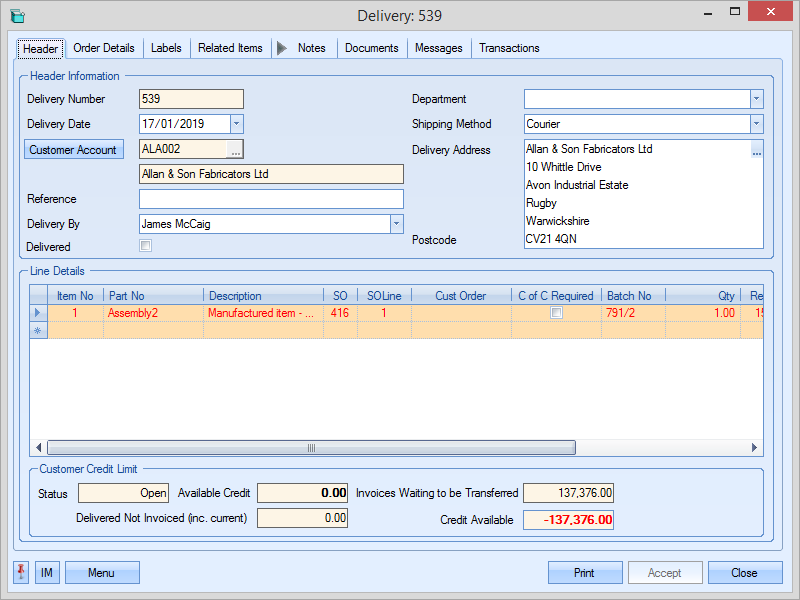
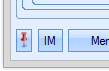
As highlighted by the Notes and Reminder options above, the user can create any of the message types above from almost any where in the system. Most items captured in the system (POs, SOs, WOs, customers, suppliers, etc.) have an IM option in the bottom left hand corner which will allow the user to create message centre items without the need to leave the screen they are currently using. The screen shot below shows an example delivery and the IM option.
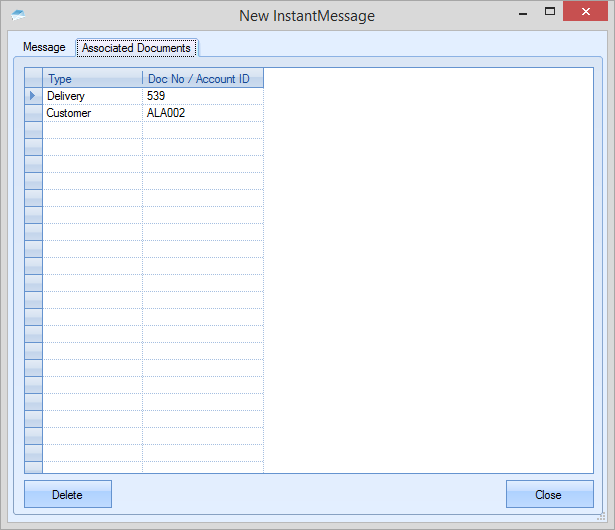
Selecting the IM option within an item will open a new IM form, from which the user can create any of the IM types available (i.e. email, instant message, reminder, etc.), but with the Associated Documents populating based on the item the user is currently in.
Deleting Messages
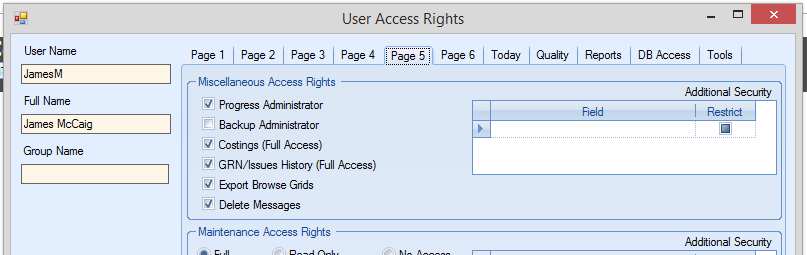
The ability to delete items from the message centre is a user access permission. This can be set on a user-by-user basis allow you to be restrictive as to who has the ability to delete message items. The user access permission that controls whether a user can do this can be found in the Miscellaneous access rights section as shown below.
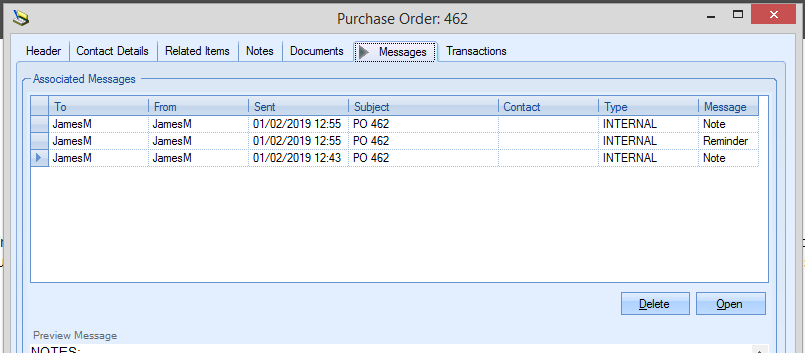
This option allows the user to select and delete message centre items from within items in Progress. The example below shows the DELETE option on a purchase order, however, a similar option will be available on any item which has a MESSAGES tab.
Selecting a message and clicking the DELETE option will ask the user to confirm the deletion.
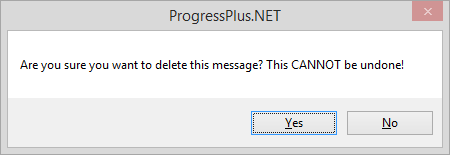
Selecting YES will completely remove the message from the system and it will be no longer visible against any of the associated items.
Link Outlook Mail
This option allows the user to see emails that have been imported from their Outlook client via the Outlook Add-In functionality. From here, the user can mark them as "linked" if they are general emails relating to the customer or supplier, or link them to specific orders, invoices, etc. so they can be viewed from within the associated order, invoice, etc. Messages tabs. This allows specific communications to be recorded against the related items within Progress Plus, allowing easy reference for all users.
***For more information on the Outlook Add-In functionality, including its installation and set up, please refer to the Outlook Add-In section of the manual.***
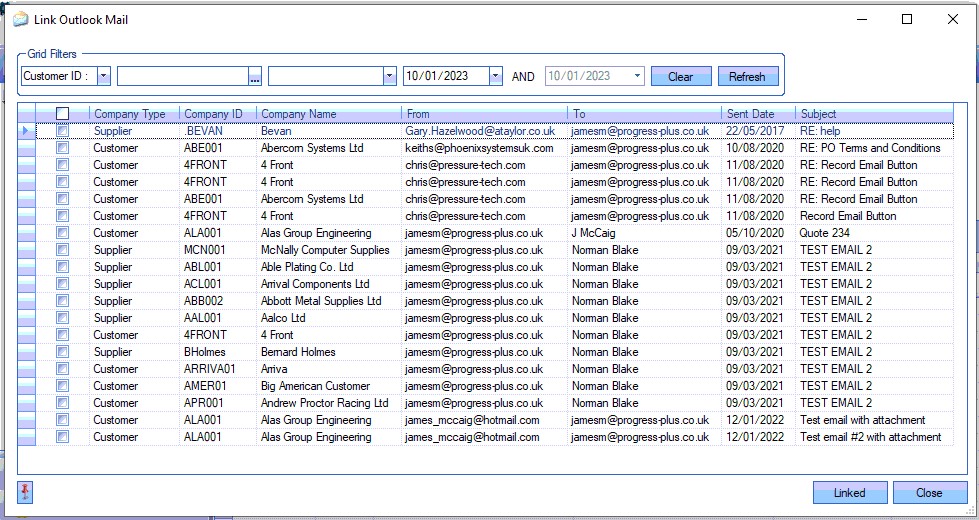
The user can filter by customer or supplier and/or on the sent date of the email using the filters at the top of the screen.
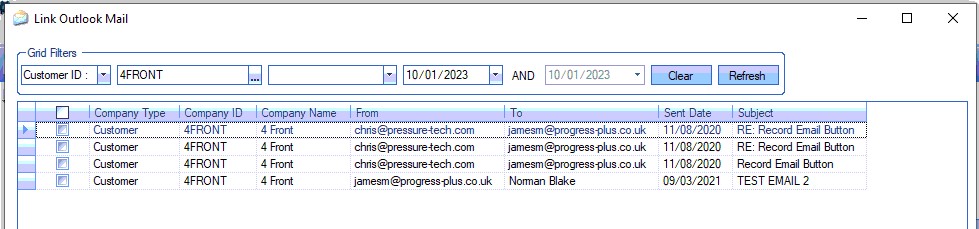
(filtering by CUSTOMER)
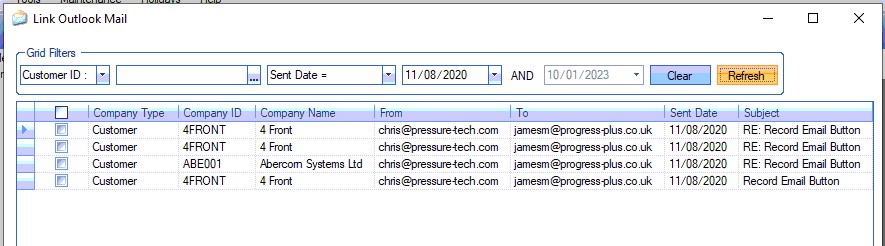
(filtering by SENT DATE)
Since the imported emails will have already been assigned to a customer or supplier, the user can mark any general emails (i.e. not related to any specific orders, invoices, etc.) as "linked" to remove them from the list. To do this, the user simply selects the emails the wish to mark as "linked" and click the LINKED option. This will retain the emails link to the associated customer or supplier and will remain available to view against their Messages tabs, but will remove it from the list of imported emails "waiting to be linked".
Linking Emails to Orders, Invoices, etc.
If the imported email is related to a specific order, invoice, etc., the user can further link the email by assigning it to the relevant order, invoice, etc. To do this, the user must open the email by double-clicking it. The user will then see the email displayed.
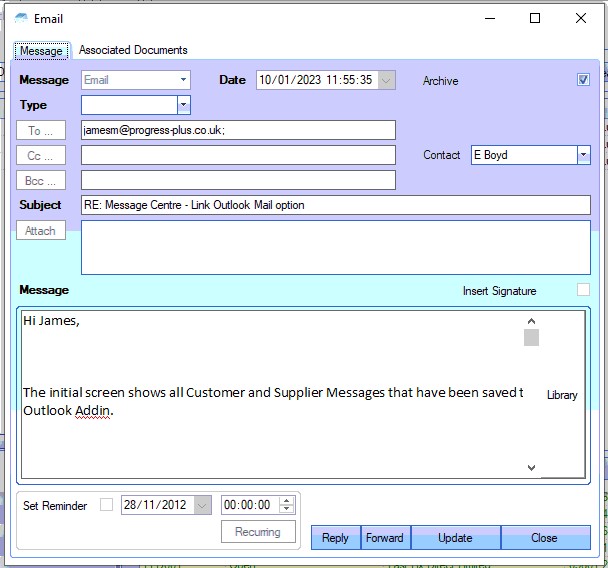
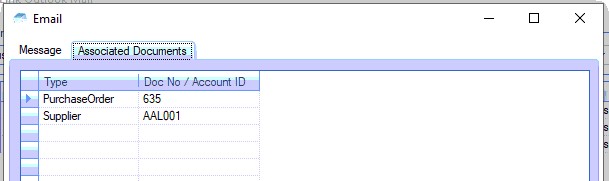
The user can see existing links via the Associated Documents tab. For newly imported emails, this will simply be the customer or supplier it was imported against.
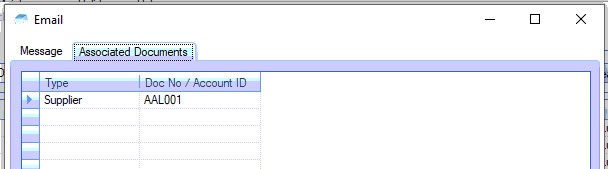
The user can link the email to orders, invoices, etc. via the LINK TO option at the bottom of the screen. Emails linked to suppliers will have supplier related options available for linking. Customer linked emails will have customer related options for linking as shown below.
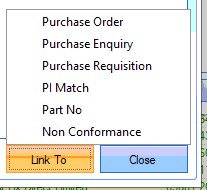
(Supplier related options)
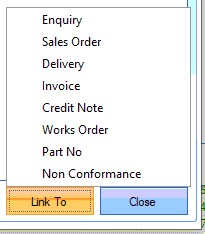
(Customer related options)
From the LINK TO menu, the user can chose the relevant option for linking the email to the required item in Progress Plus. Once selected, the system will present the user with a list of items that match the customer/supplier and the selected option. Some examples are shown below.

(Linking to a purchase order)
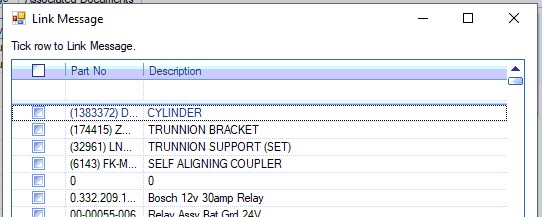
(Linking to a part number)
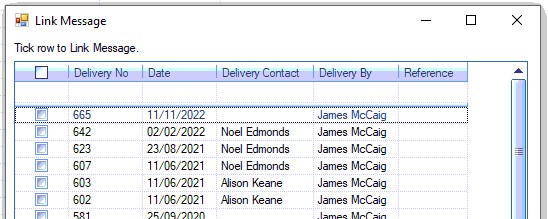
(Linking to a delivery)
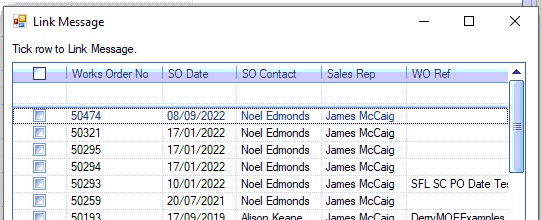
(Linking to a work order)
Once the user has selected the desired item, clicking the LINK option will link the imported email to the selected item. The user can link the email to as many different items as they wish by simply repeating the process for each related item. The email's Associated Documents will be updated with all additionally linked items.
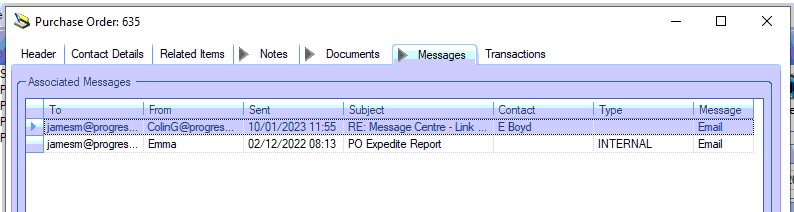
Once the email is linked to the relevant item in Progress Plus, it will also be available to view against that item's Messages tab.
Once all additional links have been made, the user can clear the imported email from the Link Outlook Mail screen by selecting it and clicking the LINKED option to remove it from the list.