LvC, or Load versus Capacity, aims to show the user the details of the loadings per work centre on a week-by-week basis. On selecting this option a screen similar to the following will be displayed.

The user can select how they wish the LvC data to be calculated and displayed using the options at the top of the screen.
Using the FINITE capacity option will calculate the LvC based on the WOs scheduled on the SFL screen. Using the INFINITE capacity option will calculate the LvC based simply on the WO Planned Start Date (regardless if any other WO ops are scheduled for this date).
The user can also specify how the data is presented; as a percentage or decimal value and can also be grouped by Cell or Location if this is set up against the work centres.
Once the desired options have been selected, the user can generate the LvC data by clicking the Calculate option at the top of the screen. The LvC screen will be populated as follows:
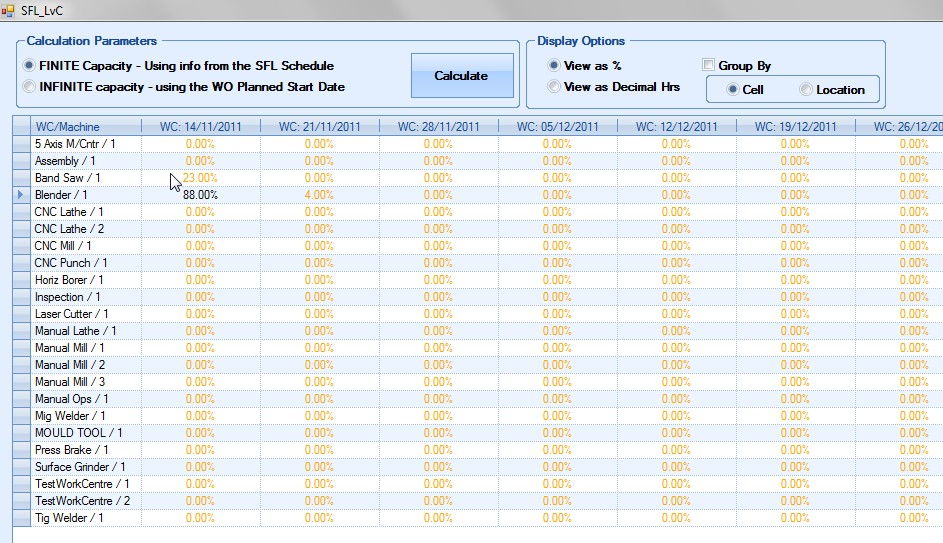
Displayed in the left hand column of this grid is a list of all the available work centres. Across the top is a list of the dates of the first day for the current week and the next eleven weeks. In the body of the grid the corresponding percentage loaded is displayed for the work centre / week beginning date. Any percentage greater than 100% tells the user that that work centre is overloaded for that specific week.
Light brown text indicates the value for that cell is between 0% and 50%.
Black text indicates the value for that cell is between 50% and 100%.
Red text indicates the value of that cell is over 100%, meaning it is overloaded.
Selecting any of the cells will result in the details being displayed at the bottom as follows:

The MENU option offers the user the following additional options:
Export
User can export either top or bottom half of the LvC screen to an Excel spreadsheet for further analysis or calculation.
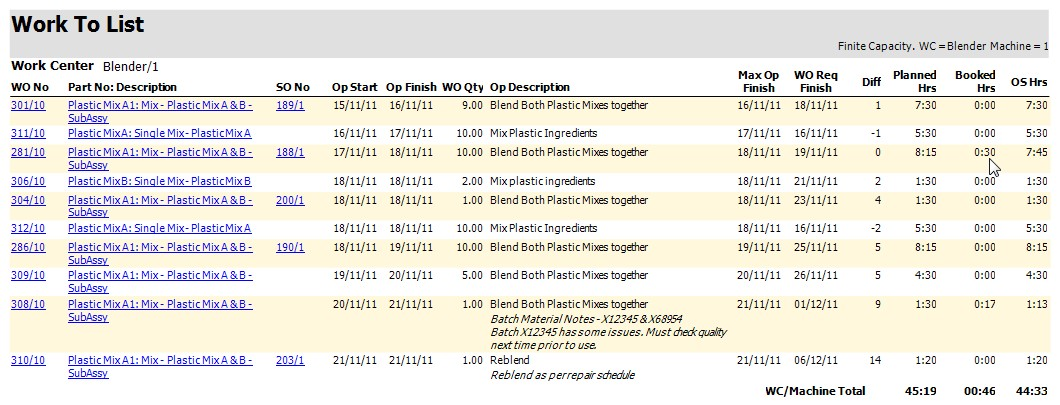
Print Work to List
Generates a report similar to the following for the selected work centre.
Print Graph
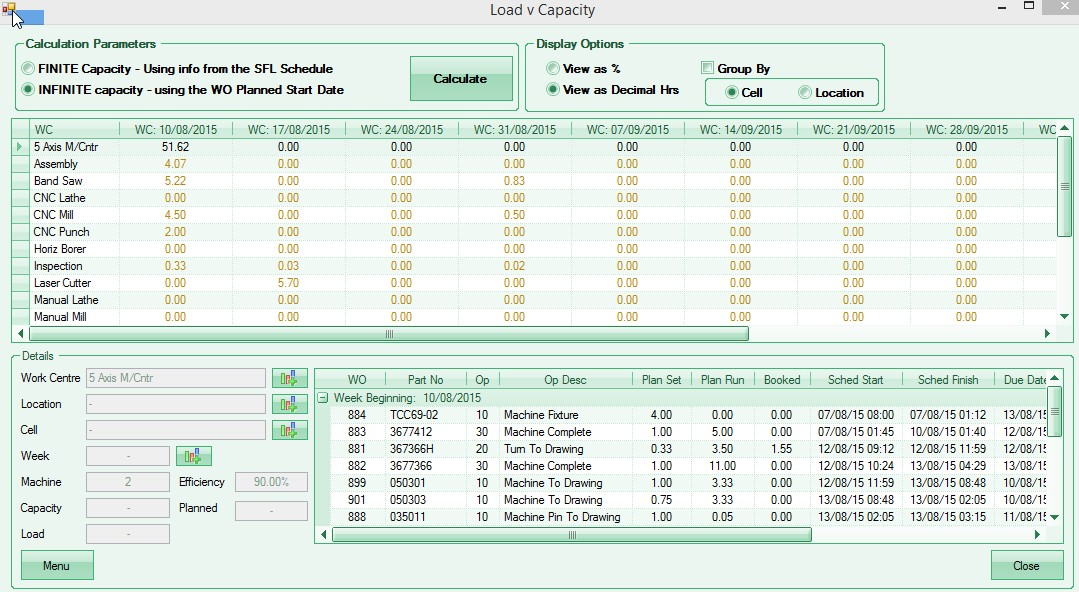
The overall work centre totals are displayed to the left. This shows the number of machines, efficiency, total hours available as well as the total planned hours and the percentage capacity. If the Planned Hrs/Mins exceeds the Capacity Hrs then this work centre is overloaded for the selected week.
All the scheduled WOs for the selected week are displayed to the right. Information shown on this grid includes works order and operation number and description, planned operation time and actual time booked against this operation, works order start date and due finish date, any works order priority chosen as well as the total outstanding hours.
The user can, if desired, access the WO record directly from the WOs listed by selecting in the WO number and clicking on the little search box that appears as shown:
![]()
On clicking, the WO record will be displayed to the user. From here the user can access all aspects of the WO, including the Routings screen.
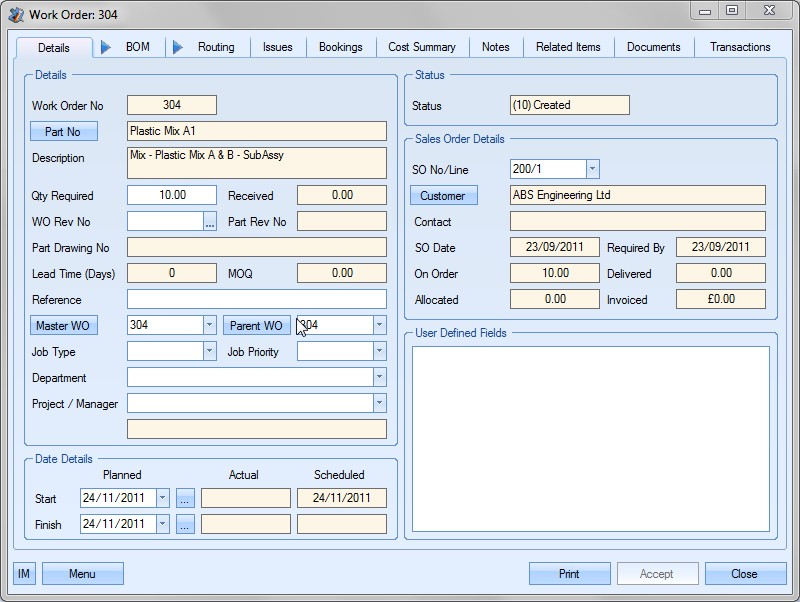
From here the user can add and/or amend operations and other works order information in the manner described in the Works Order manual. Information such as Scheduled Start and Scheduled Finish dates can also be amended on the Job Details screen.
Once the required WO record is displayed on the screen the user can amend it as required. Certain information, however, cannot be changed on a works order.
| Fields which cannot be amended: | Fields which can be amended: |
| Works Order No | Qty Required (not below qty received) |
| Part No. | WO Rev. No. |
| Description* | Reference |
| Qty Received | Master WO |
| Part Rev No* | Parent WO |
| Part Drawing No | Job Type |
| Lead Time* | Job Priority |
| MOQ* | Department |
| Actual Start | Project/Manager |
| Actual Finish | Planned Start |
| Scheduled Start | Planned Finish |
| Scheduled Finish | SO No\Line |
| Customer | Current Status*** |
| Contact** |
| SO Date** |
Required By**
On Order**
Delivered
Allocated
Invoiced
*Cannot be amended from this screen but can be amended within the Inventory Details form
**Cannot be amended from this screen but can be amended within the SO form
***Current Status can only be amended by Completing, Cancelling, Putting On Hold or adjusting qty.
There are number of status for a works order:
| (10) Created | the works order has been created but no work has yet been done |
| (20) WIP | material issues and/or labour bookings have been done for this works order |
| (30) Total Qty Received | the Qty Received is equal to, or greater than the Total Required |
| (40) On Hold | Clicking on the Hold button will mark this order as being On Hold. Any shop floor loading (SFL) for the associated operations for this order will be removed. The user can release an On Hold works order by clicking on the Release button. Any shop floor loading data will be regenerated. |
| (50) Completed | this order has been marked as Complete |
| (60) Cancelled | this order has been marked as Cancelled |
On the BOM form the user may not delete any BOM item that has had material issued to the works order for it. The details of any issues can be viewed in the Material Issues screen. For more details on maintaining BOM information please refer to the Works Order manual.
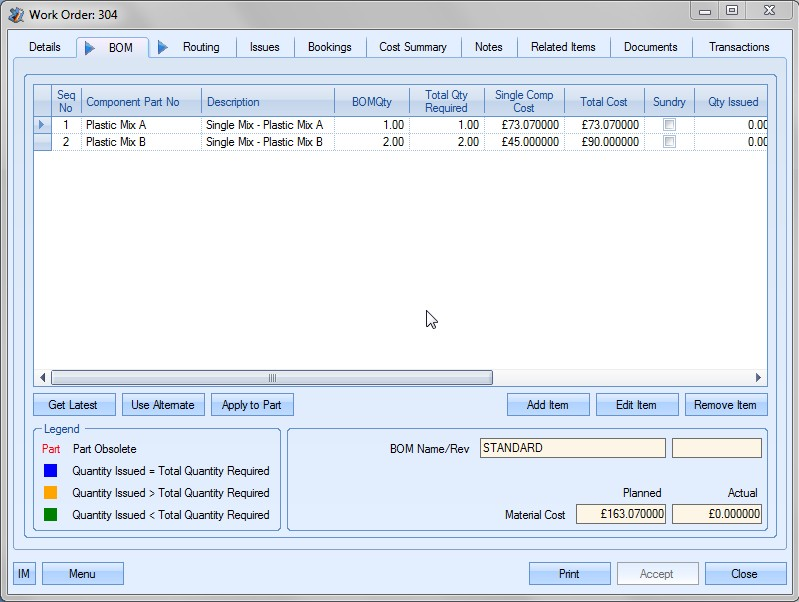
On the Routing form the user may not delete any operation that has had time logged against it. The details of any time logged can be viewed in the Labour Bookings screen.
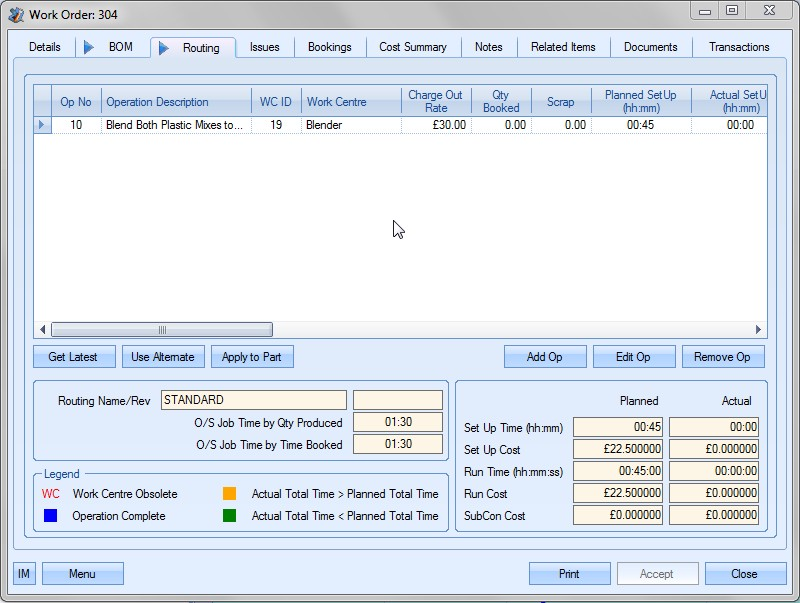
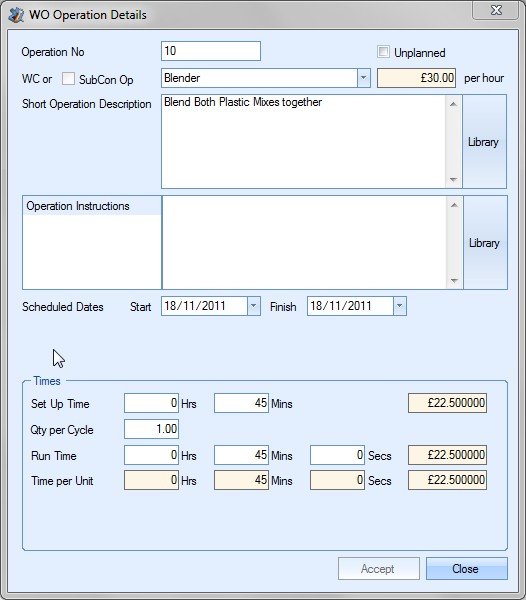
By choosing the Edit Op option, the user can, if desired, amend individual operation information including the Scheduled Start and Finish Dates for that operation. Any changes made to these dates will be reflected in the SFL system. Work Centre, Planned times, operation description etc can all be amended by the user.
The user may also choose to add a new operation to this works order. To do this the user must choose the Add Operation button on the Routings form. Please refer to the Works Order manual for more information regarding adding, amending and deleting operations.
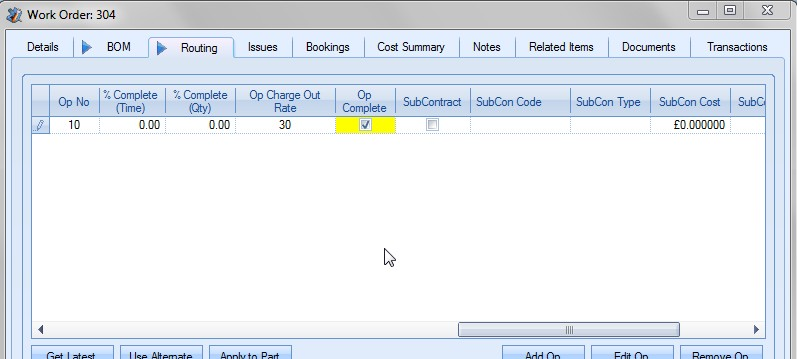
The user can also, if required, mark an operation as complete from the Routings form. In order to do this the user must click onto the Routings form. Then they must scroll right through this form until the Op Complete (in yellow) column is displayed. By clicking onto the required operation this operation will now be marked as complete. No more time may be entered against this operation. Any shop floor loading for this operation will be removed. To reactivate this operation the user can simply untick the Op Complete option. NOTE: Where a works order has been marked as complete this option will not be available.
The user cannot amend information contained in the Material Issues, Labour Bookings, Cost Summary, Related Items, Transactions screens. Notes and documents can be amended as required.
Clicking the Accept button will save any changes that the user has made and update the relevant works order history / requirements. Should the user have changed either the Scheduled Start or Scheduled Finish date for the works order a message box similar to the following will be displayed.
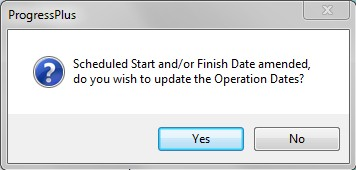
Clicking Yes to this option will replace the operation dates used by the SFL system with the updated information. The user will then be returned to the L-v-C screen.
If any changes have been made to the WO Scheduled Start or Finish dates and FINITE capacity is being used on the LvC screen, the SFL screen will need to be refreshed before the changes will be reflected in the LvC screen. To do this, the SFL screen needs to be cleared and the WOs reloaded.