These options relate to the inventory parts side of the system and cover everything from searching for parts to BOMs, routings and pricing options.

Default Fields to Search
This option permits the administrator to determine in what manner inventory part searches are performed by default via the Inventory Search as shown in the next screen. The system will search by default the following fields.
| Part No | The part number as held within Inventory |
| Description | The part description as held within Inventory |
| Drawing No. | The drawing number of the item as held within Inventory |
| Addition Ref | Any additional reference entered against this part within Inventory |
| Alternative Part Numbers | Any alternative part numbers (such as customers’ or suppliers’ unique part numbers) entered against this part within Inventory |
| Notes | Any notes entered against this part within Inventory |
| User Defined Fields | Any information held within user defined fields entered against this part within Inventory |
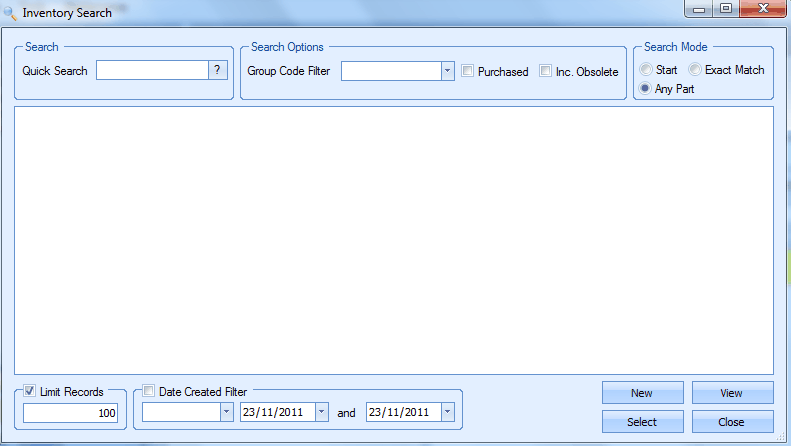
The administrator may choose to widen the Inventory Search to include 2 more criteria by default if desired.
| Include Obsolete | This option permits the user to include in any search items marked as obsolete |
| Purchased Only | This option limits any inventory search to items marked as mainly purchased only |
It is uncommon to have these options to be included in the default Inventory Search but these options can be chosen on a search by search basis when in the main system.
Default Search Mode
The option determines how the inventory search is performed.
| Start of Field | This option will returns items that start with the criteria selected |
| Exact Match | This option will only return items that meet the specific criteria selected |
| Any Part Of The Field | This option will return items that meet the selected criteria in any part of the search. |
Using the search mode of Any Part Of The Field will ensure the greatest search range available. This may however result in longer searches dependent on what the user is searching for. Any search performed is not case sensitive.
New Part Number Options
These options allow the system to be configured in how new part numbers are dealt with.
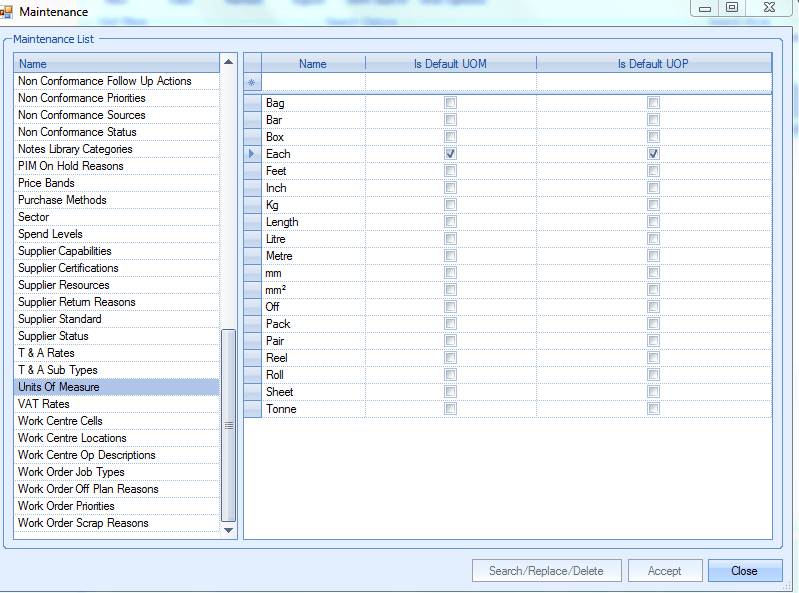
Use Default UoM/UoP
This facility when activated and used in conjunction with the Units Of Measure entered via the Maintenance section of progress plus allows the user to choose a default unit of measure (UOM) and a default unit of purchase (UOP) that can be applied to any new inventory parts being created. In the following example “Each” has been determined as the default measurement for both UOM and UOP.
On creating a new inventory item the Unit of Measure and the Unit of Purchase fields have been populated with the default UOM/UOP of “Each” though this can be amended as required by the user.
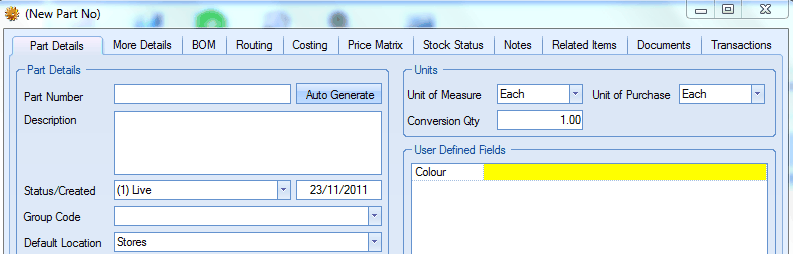
Please refer to the Inventory section of the manual for more information on units of measure.
Default Location Required
This option will force any new parts to have a default location specified, i.e. the user must complete this field or they will not be able to save the part number.
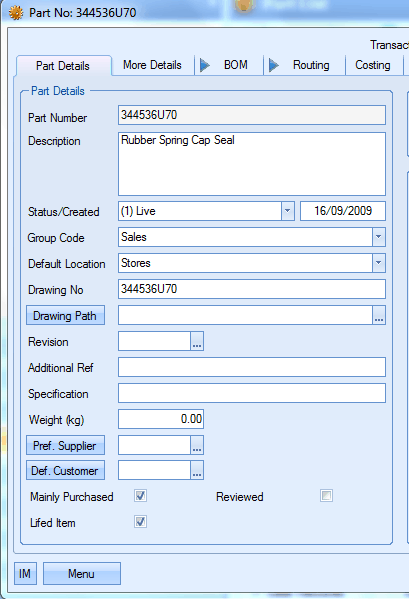
Lifed Item Option Available
This option can be used to help control the stock items with a shelf life / expiry date such as paints, adhesives, rubber seals etc. Items that have a set life span are marked as a Lifed Item when creating the part in Inventory.
On receipting this part into stock e.g. from a PO Receipt (purchase order) the user will be required to choose an Expiry Date from the calendar lookup before the receipt can be saved.

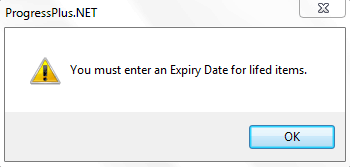
If the user should fail to enter an Expiry Date when receipting a Lifed Item a message similar to the following will be displayed. The user must then choose the appropriate date to continue.
If the user should try to enter an Expiry Date in the past a message similar to the following will be displayed.
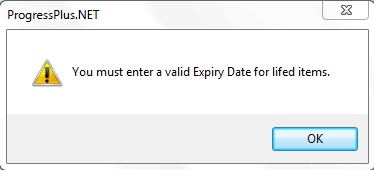
The user must now enter a valid Expiry Date to continue with the receipt.
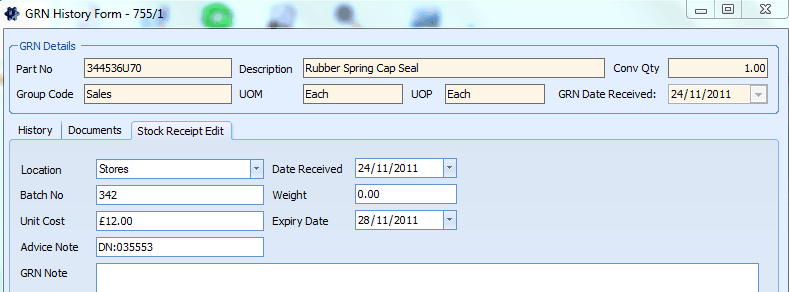
An Expiry Date that needs amended after the receipt can be adjusted via the Inventory section. After accessing the item and clicking onto the Stock Status tab the user (assuming he or she has permission) can click onto the Active stock and amend the details via the GRN History Form
Please refer to the Inventory section of the manual for more details on amending part information.
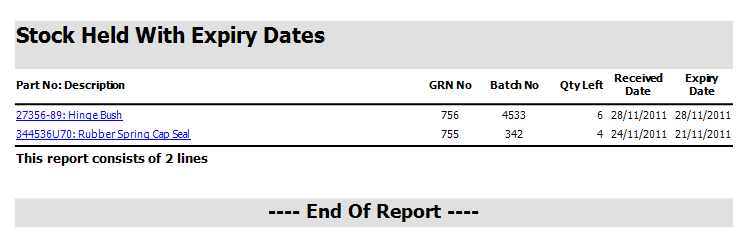
The user is able to view a list of Parts Due to Expire with a certain number of days from the Today screen in the main program. Items that have passed their expiry date will be displayed in red.

The user can also print off a report if desired from Reports – Inventory displaying all stock with the relevant expiry dates.
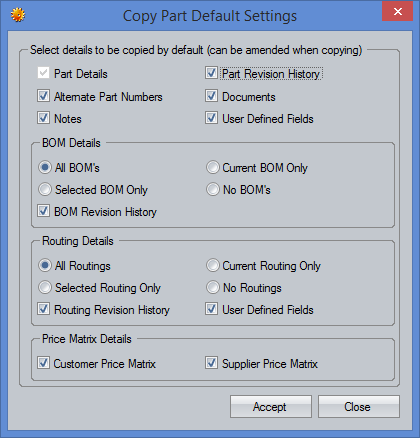
Copy Part Default Settings
This allows the user to configure the defaults for which information is copied between parts if the user decides to copy details from an existing part number. The screen shot below shows the options available.
Price Matrix Options
The options relate to the use of the price matrix price lists and how the different discounts are applied to the prices.
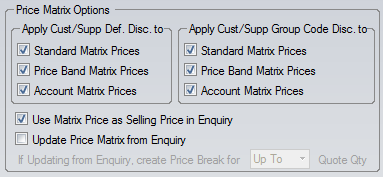
Apply Cust/Supp Def. Disc. to
This set of options dictate which price matrices have the customer or supplier default discounts applied. The user can select standard matrices, price band matrices or customer/supplier account matrices by ticking the appropriate options.
Apply Cust/Supp Group Code Disc to
This set of options dictate which price matrices have the customer or supplier group code discounts applied. The user can select standard matrices, price band matrices or customer/supplier account matrices by ticking the appropriate options.
Use Matrix Price as Selling Price in Enquiry
This option will use a price matrix price for the selling price on an enquiry if one exists for the enquiring customer. Leaving this unticked will ignore any matrix prices when raising an enquiry.
Update Price Matrix from Enquiry
This option when enabled will create / update a Customer Price Matrix for an item within Inventory based on figures saved against the Selling Price (Matrix) field in the Enquiry Sales Prices form for a specific quantity when entering a new enquiry onto the system. The Customer Price Matrix can then be used for subsequent sales orders or other customer enquiries.

In the previous example the user has entered a quotation for a customer and has saved a selling price against 3 different quantities – 6, 10 & 15. With the Update Price Matrix from Enquiry option activated a Customer Price Matrix will be created for this item (Part No. 040202) within the Inventory section.
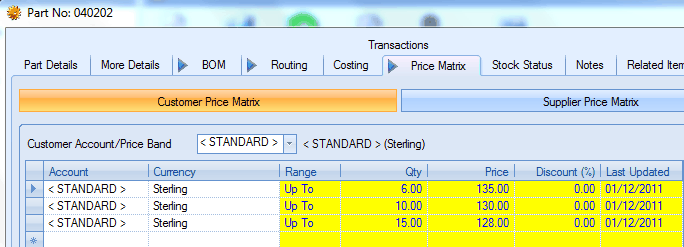
The above example displays the Customer Price Matrix created for Part No.040202 from the information entered into the Enquiry Sales Prices screen when creating the enquiry.
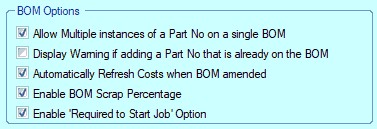
BOM Options
These options allow the user to auto-refresh BOM costs, add the same part multiple times to the same BOM, warn when this happens, allow users to record a scrap percentage against the BOM items and, finally, mark a BOM items as required for the WO to be started. These are covered in more detail in the relevant inventory BOM section of the manual.
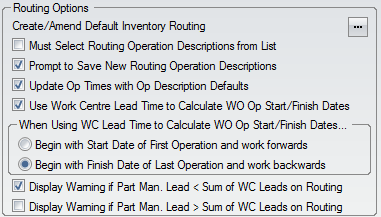
Routing Options
These options relate to the routings set up against parts. The user can set up a default set of routing operations as well as trigger updates to lead times based on the operation lead times.
Create / Amend Default Inventory Routing
This option permits the administrator to create and / or amend a routing that can be applied to parts within the Inventory section of the system. This facility may be useful to users where the majority of the items that they manufactured tend to go through the same processes / routing.
This default routing can be applied to new or existing parts though the operations and any times entered can be amended by the user on a routing by routing basis if necessary. For more information on this topic please refer to the Inventory manual.
On choosing this option a screen similar to the following will be displayed. The user can then proceed to Add New Operation as required.
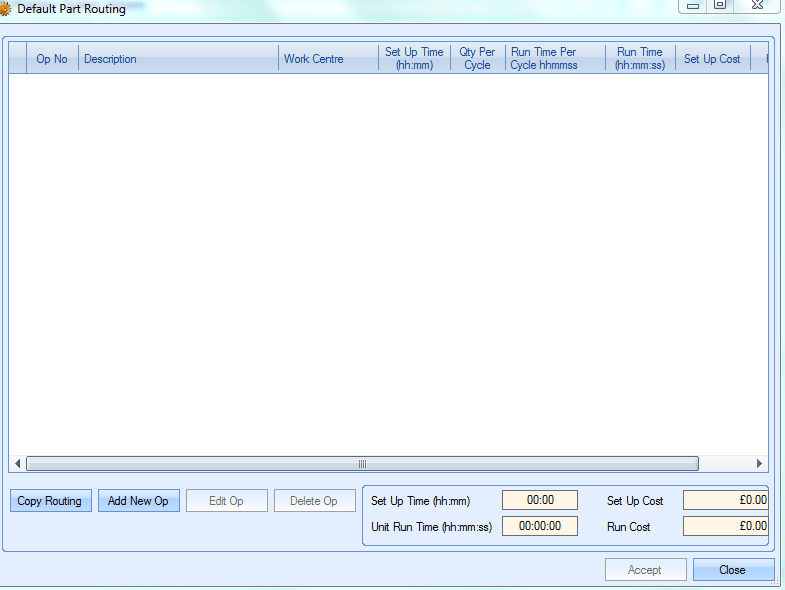
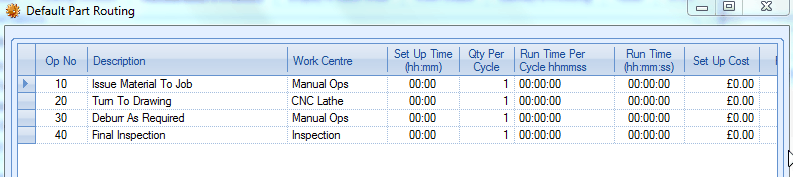
A default part routing tends in many cases not to contain any planned times as though the processes required to manufacture the majority of parts are very similar the time to carry out the operation can vary from part to part.
The user can amend this routing at a later date as required.
There is also the ability to copy a previously created routing into this form and save / amend it as necessary. This facility is accessed by choosing the Copy Routing button.
After the Default Part Routing has been saved it can be applied to items within the main progress plus system via the Use Default button on the Routing form.
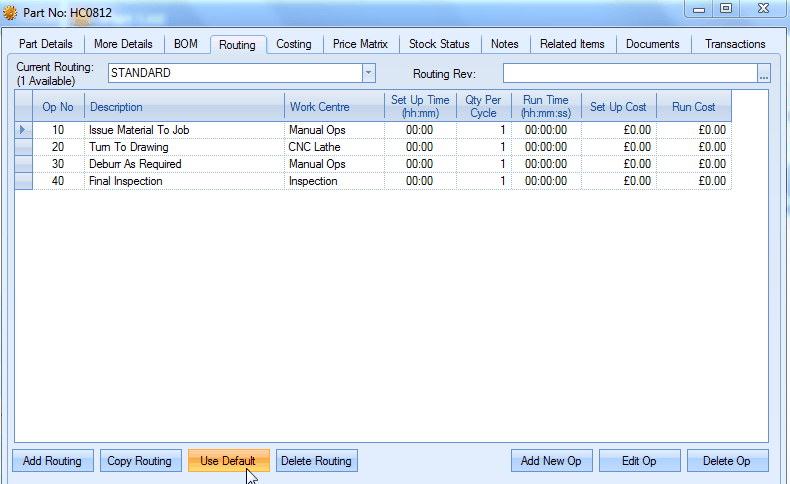
For more information on creating and amending routings please refer to the Inventory manual.
Must Select Routing Operation Descriptions from List
This option forces any new routing op descriptions to be selected from a pre-defined list. The list is populated via the Maintenance > List Maintenance section of Progress. This option allows control over what information is being recorded against the operations and ensures you don't end up with 10 different op descriptions for the same thing.
Prompt to Save New Routing Operation Descriptions
If the user is allowed to enter new operation descriptions when creating routing entries, then the system can prompt the user to ask if the new descriptions is to be saved to the existing list of op descriptions.
Update Op Times with Op Description Defaults
As users create part routings within progress plus details of the operation description will be populated into the Work Centre Op Descriptions form within the Maintenance section. Users can also create operations for specific work centres directly into this form if desired along with details of expected set up and run time for the operation.
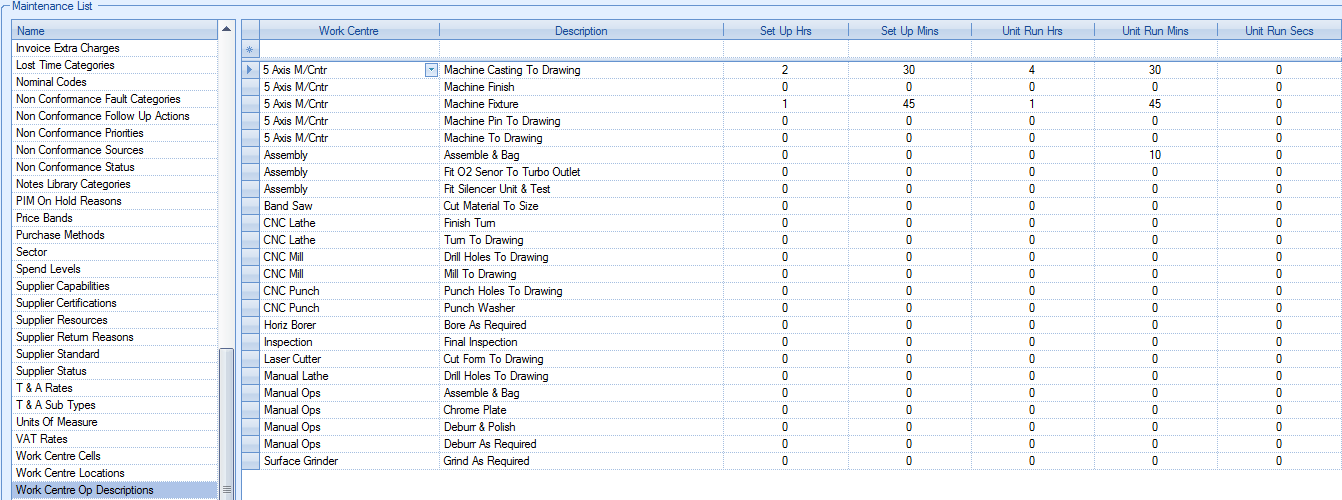
The Update Op Times With Op Description Defaults facility permits the user to have the system populate a new routing fields for a part with the set up and run times for a specific works order operation. This option may be useful for users who have operations that the planned time is always the same e.g. a final inspection operation takes 15 minutes for each job or the store person is always allowed 30 minutes to kit a job.
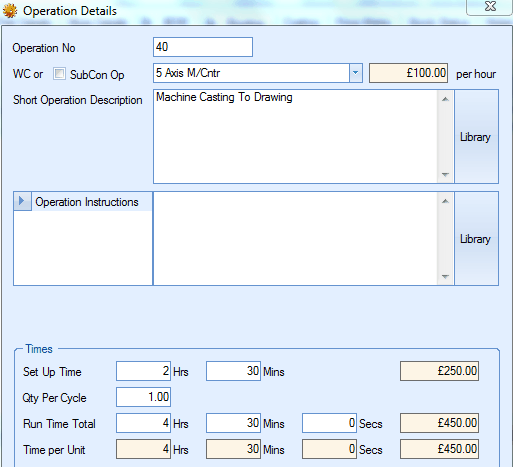
In the above example there is an operation that is performed on the 5 Axis M/Cntr work centre. The description of this operation is “Machine Casting To Drawing” and this operation always requires a setup time of 2 hours 30 minutes and the planned run time for this task is 4 hours 30 minutes per item.
With the Update Op Times With Op Description Defaults activated if the user was to create a routing that required this operation then the system would populate the time fields with the entered default planned times.
The user can however amend these Times on a routing by routing basis if necessary. For more information on this topic please refer to the Inventory manual.
Use Work Centre Lead Time to Calculate WO Op Start/Finish Dates
This option will calculate WO operation start and finish dates based on the work centre lead time. This is typically used when the Shop Floor Loading (SFL) section of Progress is not going to be used for planning the WOs. This option will allow the system to calculate dates for each operation based on the lead times. If the plan is to use the Shop Floor Loading section for planning your work orders, then this can be left unticked.

The options above allow the user to specify whether the dates are calculated from the start date of the first operation and work forwards or from the finish date of the last operation and work backwards. The system can also highlight where the combined work centre lead time is greater than the manufacturing lead time set against the part.
Display Warning If Part Man. Lead < Sum of WC Leads on Routing/Display Warning If Part Man. Lead > Sum of WC Leads on Routing
These options can be used to highlight differences in the manufacturing lead time of a part and the sum of the routing op lead times. These options highlight whether the manufactured lead time is less than or greater than the sum of the routing op lead times. This will also give the user the ability to update the part's manufacturing lead time when there is a difference between them too.
Use Material Weight as Default Weight on Subcon Cost By Weight Ops
By default, any subcontract operations added to a part's routing which are costed by weight will pick up the part's recorded weight. If the administrator would rather have the system use the Material Weight, then this option will set that as the default. This option will also prompt the user to update existing subcon operations if the weight value is amended against the part as shown below.
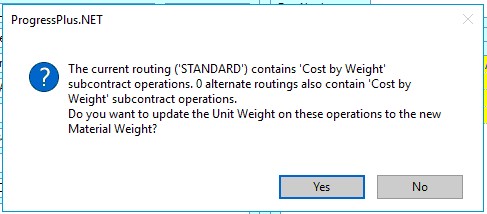
Clicking YES at the prompt will proceed to update all COST BY WEIGHT weight values. Clicking NO will not update the subcon operations with the new weight.
Lead Times – Include Weekends
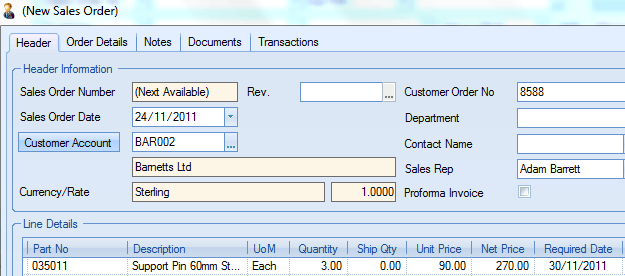
Users can if desired enter lead times against an inventory part indicating the normal number of days usually taken to sell, buy or manufacture an item. These lead times, entered into the More Details section of a part in Inventory are used when creating Sales Orders (Sales) Works Orders (Manufacturing) and Purchase Orders (Purchasing) as shown in the figure below.
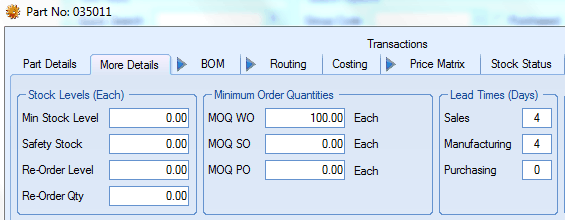
Without the Lead Times – Include Weekends option being activated if the user was to enter a sales order for Part No.035011 as shown above, with a Sales lead time of 4 days the system would automatically populate the Required Date on the Sales Order. In the following example with a Sales Order Date of 24/11/2011 the system has suggested a Required Date of 30/11/2011. The system has suggested this date as it taking into consideration the fact that the 4 days lead time would span a weekend (4 days + 2 days weekend = 6 days). The system will also take into consideration any Factory Holidays as entered within the Maintenance section when suggesting a date. This Required Date can be amended at user’s discretion.
With the Lead Times – Include Weekends option activated if the user was to enter a sales order for Part No. 0305011 as above, the Required Date suggested would be different from the previous example as it is now including the weekend within the 4 days lead time. This Required Date can be amended at user’s discretion.

Lead Times – Exclude Fridays
This option allows the user to exclude Fridays from their lead time calculations. This option effectively reduces the working week to Mon-Thu. and allows them to exclude Fridays from their working week.
Stock Location can be Member of Multiple Families
This option allows individual stock locations to be members of multiple stock location families. This is particularly useful when different location families are set up for different purposes, all sharing similar stock locations. If this is left un-ticked, a single stock location can only be part of a single stock location family.
Parallel Operations
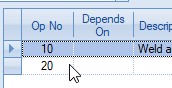
This option allows routing operations to be set up as dependent on other operations. This can be used to allow multiple operations to run side-by-side, instead of sequentially.
If this option is ticked, the part and WO routing tabs will have an additional column added to their Routing grid. This column will show the dependent operations of the operation.
For information on setting up dependent operations on parts or WOs, please refer to the Inventory Routing or WO Routing sections of the manual.
Import Inventory All Path
This option allows the user to specify an default import folder from which spreadsheets of inventory data (i.e. part details, BOMs, routings, etc.) can be import from. This folder is specifically used for the Inventory All import option. For more information on this, please refer to the Tools > Import/Export section of the manual.
