Installation Guide
Company Progress Details
The following is a list of details to be recorded for future reference when installing and configuring Progress.
Shared Progress Folder:
Progress Server:
Logon Method:
Client Library:
Security Database Name:
Data Database Name:
Program Installation
Progress Plus can be installed on any suitable PC by running the required setup files. These files are provided by Berkeley Myles and are typically kept in a shared network folder called PROGRESS which is held on the main Progress server. This folder is set up to be shared with all network users and should be accessible directly from any PC on the network using windows explorer.
Open Windows Explorer on the client.
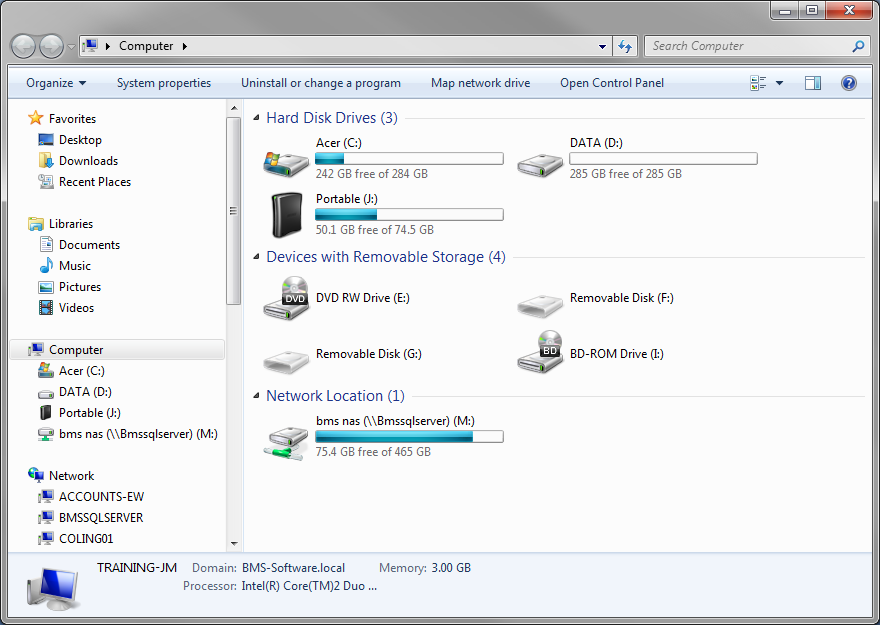
At the top, the current location is shown. In this example it says Computer.
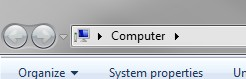
Use the DELETE key to remove this, leaving it blank.
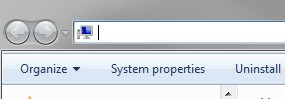
Enter the full path to the shared Progress folder on the network (as recorded in the company details at the start of the document). Press ENTER once entered.
This will present the contents of the shared Progress folder. This folder contains all the installation files, support files and folders where backup files will be saved. Typically there are two installation files for the system; the main installation file and the latest layout update. A .EXE and a .MSI version of both files will be provided, as well as installation files for installing on shared PCs or on a terminal server type set up.
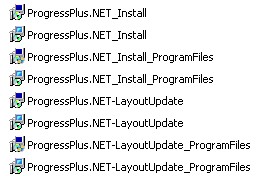
The main installation file must be installed first. This is typically named ProgressPlus.NET_Install. Double-clicking on this file will start the installation.
If installing on a shared computer or on a terminal server type system, the ProgressPlus.NET_Install_ProgramFiles file should be run to ensure its installed for ALL users of the computer.
Follow the on-screen instructions.
Once the main installation is complete, any layout updates present will need to be installed. The layout update file is typically named ProgressPlus.NET-LayoutUpdate. Double-clicking on this file will start the installation of the update. As per the main installation file, if Progress is being installed on a shared or terminal server type computer, then the user should run the ProgressPlus.NET-LayoutUpdate_ProgramFiles version of the update.
Once the installation of all updates is complete, both Progress and Progress support icons will be present on the desktop of the PC.

Next, the connection parameters need to be set up. These provide the Progress client details of the databases and server where the data is held. To set this information up, double-click on the new Progress icon on the PC’s desktop. This will present the user with the following screen.
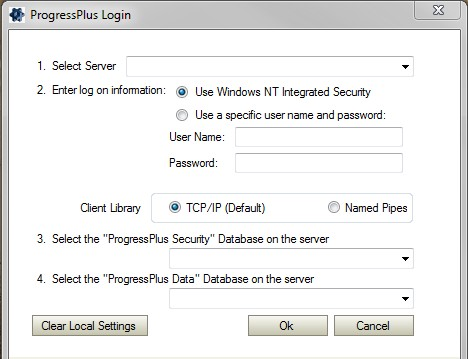
The user can select the server from the drop-down list. This should be the server specified in the company details at the start of this document.
![]()
Next, the method of log on must be specified. This will depend on how the server access has been set up internally or by the company who looks after the IT requirements.
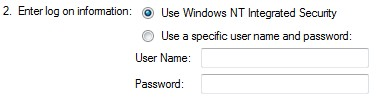
If the network users’ profiles have been granted access to the server, then the USE WINDOWS NT INTEGRATED SECURITY will probably be the option to select. If network user profiles are restricted in their access to servers, then the USE A SPECIFIC USER NAME AND PASSWORD option should be used. This uses a generic Progress database username and password that will allow the user to connect to the database, even if their network access is limited.

The Client Library options refer to how the client PCs communicate with the main Progress database. Typically TCP/IP is used (the default option) but, although faster, this is known to be a little more erratic than the NAMED PIPES option, which is slower.
![]()
The NAMED PIPES option should only be used if there are any issues with the TCP/IP connection.
Next, the security database file needs to be selected. Typically, this is named PROGRESSDOTNET_SEC or something similar.
![]()
If the previous connection options have been set up correctly, the user will be able to select the security database file from the drop down list.
Finally, the data database files needs to be selected. Again, this is typically named PROGRESSDOTNET_DATA, DOTNETDATA_LIVE or something similar.
![]()
Once all the details have been entered, clicking the OK option will present the standard login screen.
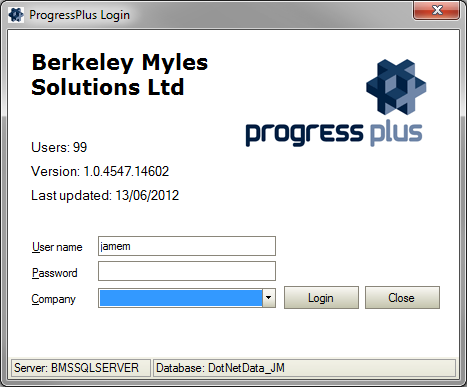
Assuming the user has already been set up, they simply need to enter their user name and password and click the LOGIN option to log into Progress.
Installation Issues
On occasion, if the client user doesn't have sufficient permissions, installation of some of the system files required by Progress fails and needs the Visual C++ installer run manually as a local administrator.
The Visual C++ Installer can be found here .
Clicking the DOWNLOAD option will prompt the user to select from several files.
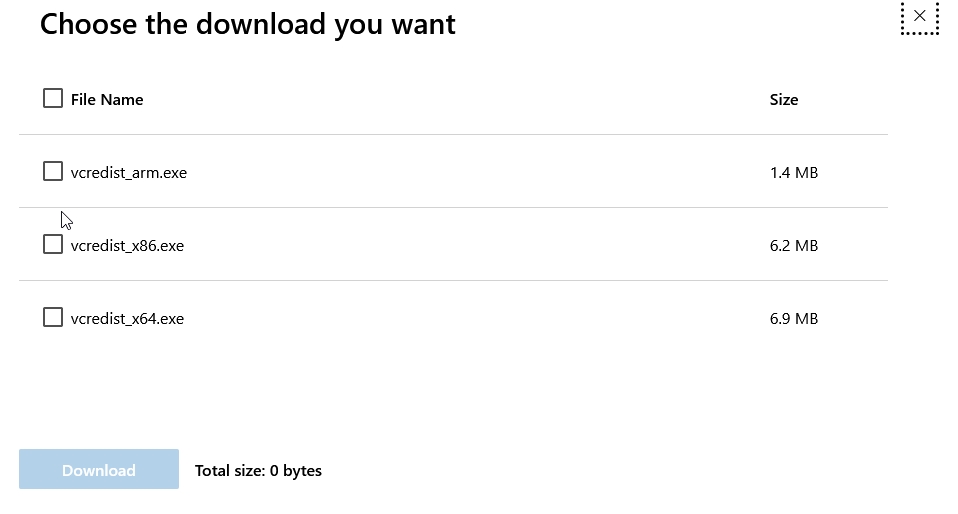
The user should select the X86 file listed and then click DOWNLOAD.

Download the file to the client, install as an administrator, and then re-run Progress Plus.
If problems persist, please don't hesitate to get in touch and one of the Progress Plus Support team will take a look.