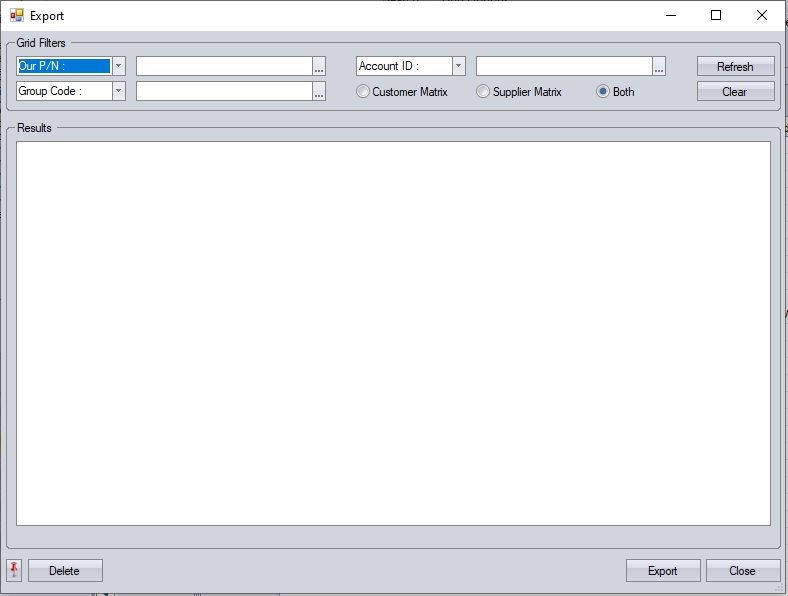
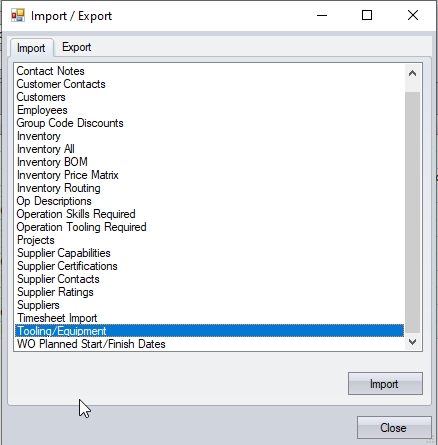
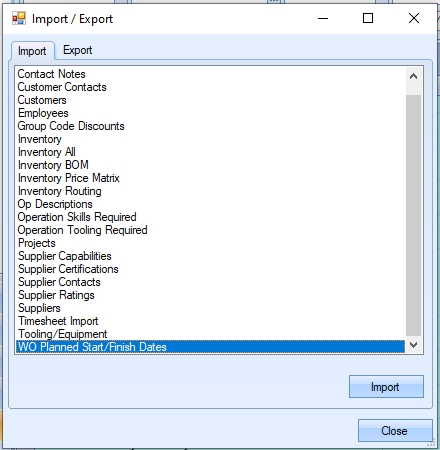
The Import/Export Data tool allows the user to import or export data from or to Excel. This allows large amounts of data to be transferred quickly and easily. When the user selects this, the items available to be imported are displayed. These are shown below.
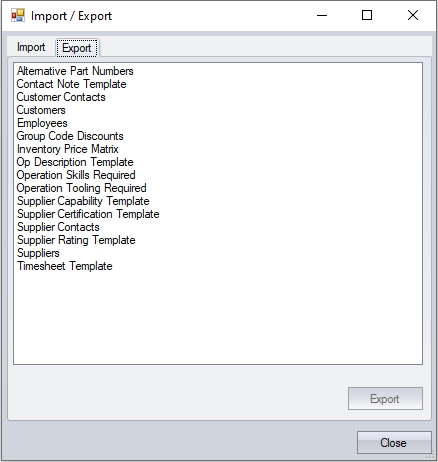
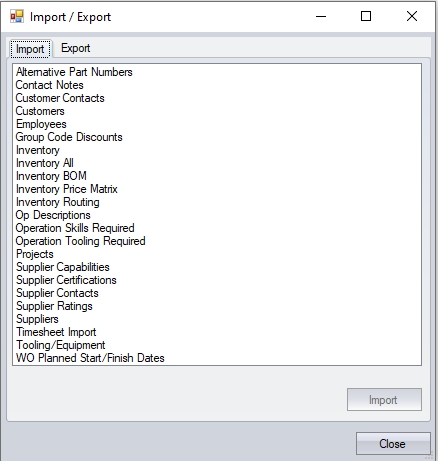
(Import and export options within Progress)
The user can select the relevant import or export process from the lists above, clicking IMPORT or EXPORT to proceed. In most cases, the IMPORT option will prompt the user to select their import file, while the EXPORT option will prompt the user to select the information required and prompt the user to create a spreadsheet with the requested data when done.
NOTE: All of the import processes use a fixed-format import file. This means that the import templates requires ALL columns to be present in the spreadsheet. Deleting of any columns, regardless of whether populated and/or being imported, can affect the import process. The only exception to this is the Inventory import, which does allow the user to select the information to be imported, which is shown below.
Exporting Inventory, BOMs and Routings
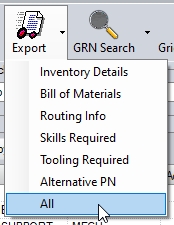
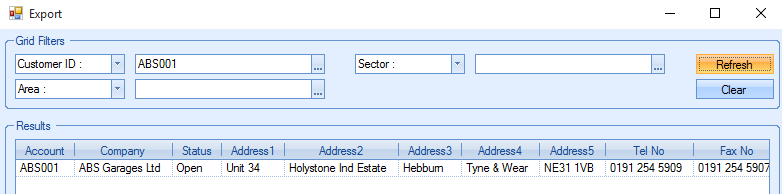
The same process is followed for every type of export with the exception of Inventory, Bills of Materials and Routings. When exporting Inventory, Bills of Material and Routings the user must go to Inventory > Parts List. The part list can then be filtered by using the Quick Search and Search Options to display which parts are to be exported.

The REFRESH button is used to display all parts according to the search.
The user can export the inventory information for all parts displayed by selecting the EXPORT > ALL option. This will allow the user to save one Excel spreadsheet containing multiple sheets with different information; Inventory Details, Bill of Materials and Routing Info, etc.
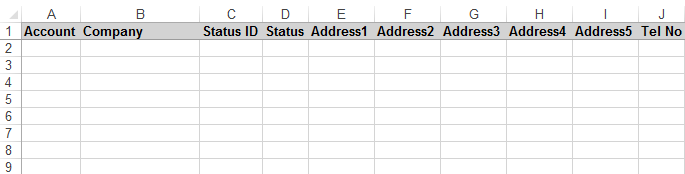
![]()
(Sheets in spreadsheet when ALL option selected)
If the user wants to export these sheets in individual spreadsheets, this can be done by selecting the relevant option via the Export button and selecting the one they wish to export.
When importing inventory details into Progress, the user must use the Tools > Import/Export Data > Import options.
Importing Inventory (All)
If the user has exported all the inventory data (inventory, BOMs, routings, etc.), and made changes to all areas of the parts, they can import all the sheets of the spreadsheet in one go. This is done using the Inventory All option in the Import tab.
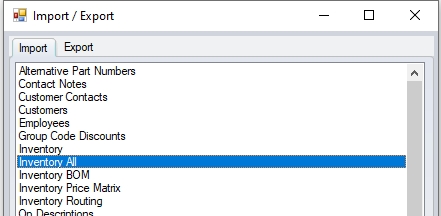
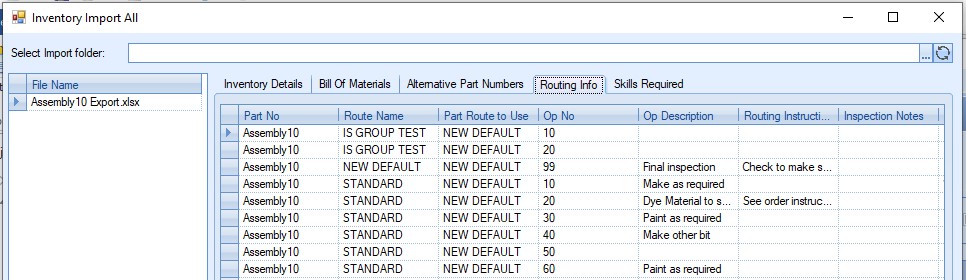
Selecting this option will present the user with the following screen.
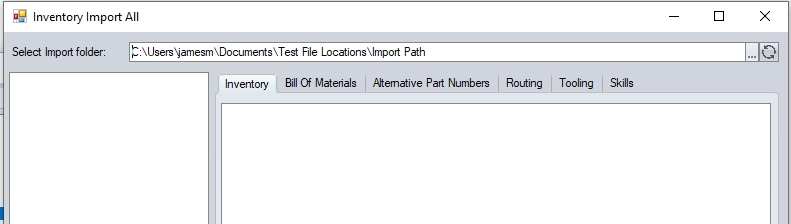
If the file is not located in the specified folder, the user can search for it using the search and refresh buttons shown below.
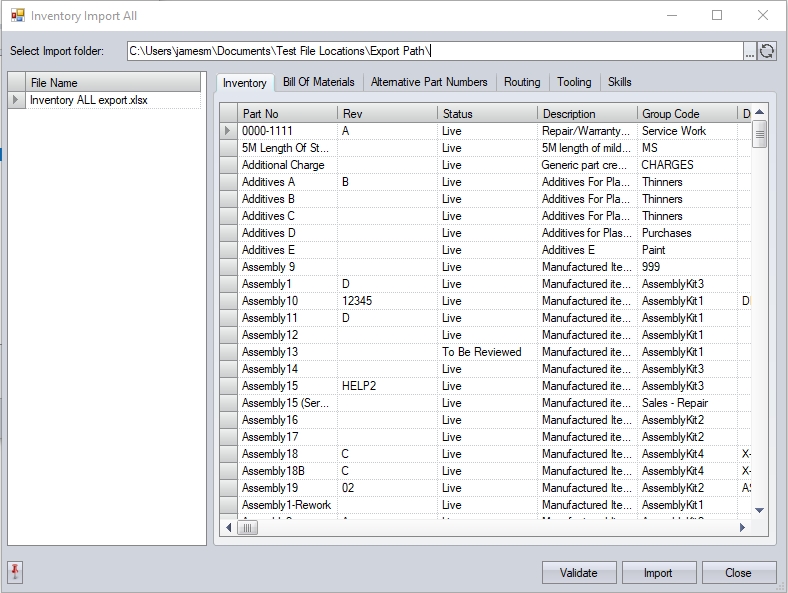
![]()
Once the user selects the file location, the available file(s) will be shown on the left hand side, with the individual elements shown on the grid to the right.
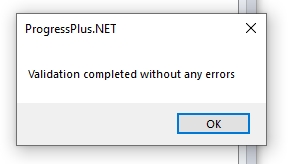
The user can validate the contents of the spreadsheet using the VALIDATE option at the bottom of the screen. This will run through the contents of the spreadsheet and highlight any issues with the data, allowing the user to check and correct any issues prior to import. When clicked, the screen will indicate its progress as it does its validation. This same validation will be done when the user imports, so this allows them to ensure any issues are identified prior to import.
![]()
If there are any errors in the data, the system will highlight this to the user by displaying an error report, which lists the issues and where the issue occurred (i.e. BOM, routing, etc.)

Any issues highlighted will need to be addressed prior to importing the data. The user can amend the spreadsheet as required, or add any missing info to the system, and then retry. Once any issues have been address, or if the data is already good to go, the system will highlight that no errors were found during the validation.
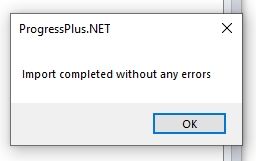
Once ready, the user can import the spreadsheet using the IMPORT option at the bottom of the screen. This will start the import process, again repeating the validation process to ensure all is ok, before updating the data in the system.
![]()
If there are any errors (i.e. if the user hasn't validated the data first, the user will be presented with the same error report generated by the validation process.
Once completed, the user will get confirmation that the import has been successful.
The user can then close the screens to return to the main system.
Importing Inventory
The user can import Inventory using the template created in the steps above. The following steps are then taken to import the spreadsheet. The spreadsheet is opened in Excel and all rows, except row 1, are selected and their contents cleared, creating a blank template.

If the user just wants to amend details of Inventory, the spreadsheet can just be edited, not deleted. The Excel file is saved as the template for importing new Inventory. Information for new Inventory is entered into the suitable lines. Once the inventory information is entered, the spreadsheet is saved and closed.

NOTE: Group Codes, Locations, Unit of Measures and Unit of Purchases must already be created in the List Maintenance section of Progress.
Within the Tools menu in Progress, the Import/Export Data option is selected before the user selects the INVENTORY import option. The following screen is displayed.
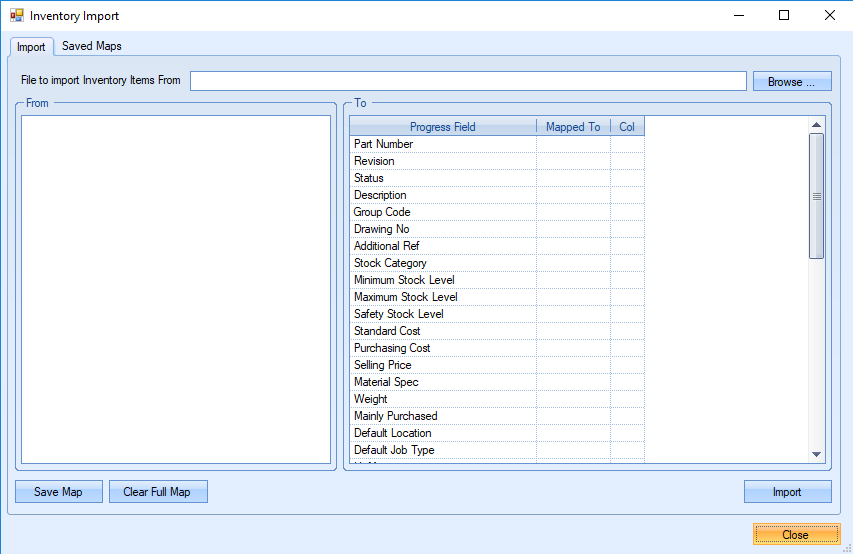
The user must have a suitable template as discussed in the example above. Once populated, this Excel file can be selected by clicking on the Browse command and adding the file. The user must manually map columns to a specific field in Progress. It gives greater control over which columns are required and allows more flexibility if importing from packages with different naming sequences. Once the file has been selected, the left of the screen will populate with all the column titles of the Excel document. It will also display the column number and the first row of that column. The user can now map these columns to the appropriate Progress fields on the right. These are standard fields associated with Inventory imports and not all fields are required to be filled.
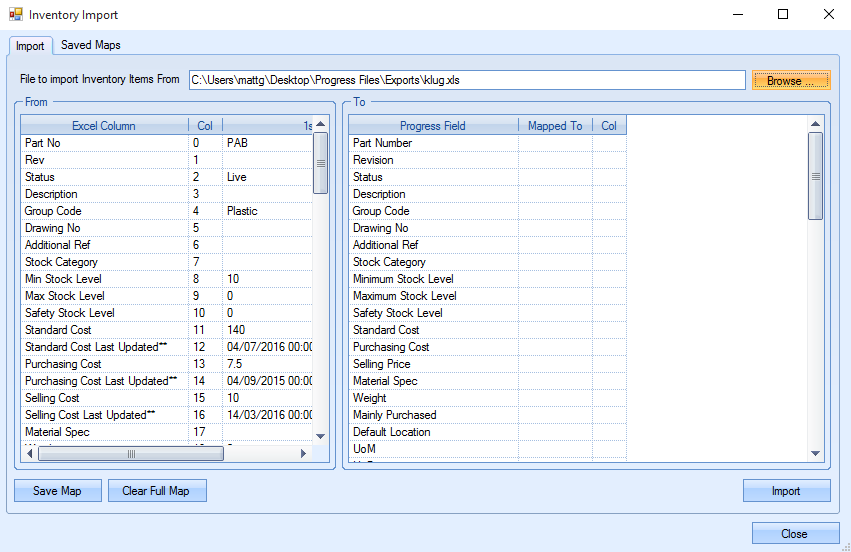
To map the Excel columns to the Progress Fields, the user can drag and drop the columns over. For example, the user would click and hold on the Part No on the left and drag over to Part Number on the right. The "Mapped To" column will display the name of the Excel column that is mapped to it. The "Col" Column will display the associated Excel column number.
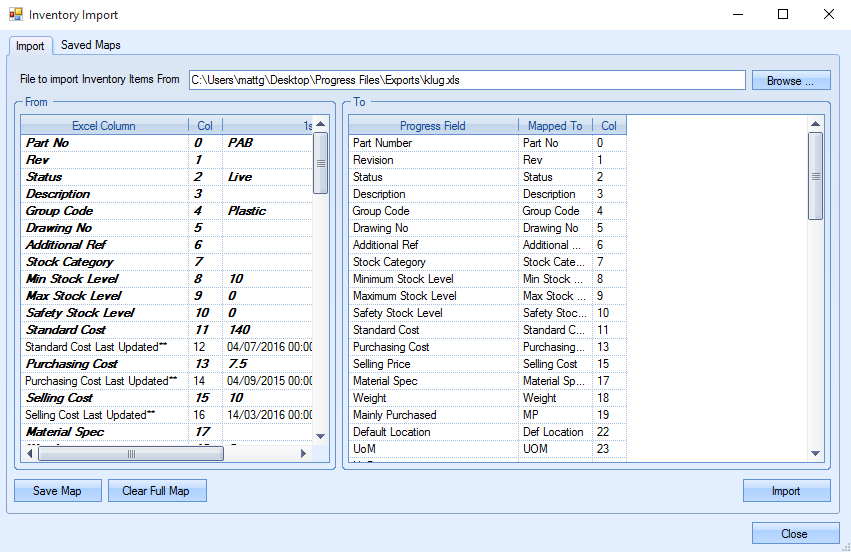
The user is only required to map the columns that are being updated. Once all mapping has been completed, the maps can be saved using the Save Map command. This allows the user to use the same Excel spreadsheet if importing more Inventory without needing to re-map. All saved maps are accessed from the Saved Maps tab.

The user can select the map required and use to LOAD MAP command. The fields with maps created will display where it is mapped to and the Excel column it is referencing. When completed, the user can click IMPORT which will begin the import of the data.
Importing Inventory BOMs
The user can import a bill of materials for an assembly using the template created from the Inventory BOM Export section. The following steps are then taken to import the spreadsheet.
The template is opened in Excel. If the user just wants to amend details of existing BOMs, the spreadsheet can just be edited, not deleted. If the user is wanting to use the spreadsheet as a blank template, all rows except row 1, are selected and their contents cleared, creating a blank template.

If the user just wants to amend details of Inventory, the spreadsheet can just be edited, not deleted. The Excel file is saved as the template for importing new BOMs. Information for new BOMs is entered into the suitable lines. Not all information is required but the following columns are mandatory:
| Master Part Number | The top level part. This is the item which is manufactured from the child part numbers listed. |
| BOM Name | The BOM name. You can have multiple BOMs against a single part so this allows you to specify the name of the BOM you are importing. If this is the only BOM, it is typically named STANDARD. Any BOMs already on a part will be overwritten if the same name is used in the import. |
| Part BOM to Use | Allows the user to set the default BOM for the part being imported. If the part has only one BOM this will match the BOM NAME column. If the part has multiple BOMs, this would be the BOM NAME of the one to be set as default. |
| Child Part No | The component part number on the BOM of the Master Part No. |
| Seq No | The numerical sequence that can be used to indicate the sequence that the component parts are used in. |
| FI | This option indicates whether the BOM item is "Free Issue" or not. This field should be set (T)rue or (F)alse. |
| Qty | The BOM quantity of the child part number. This is the quantity which is required to make one of the Master Part No. |
| Scrap % | The scrap percentage of the child part. This will affect the total BOM qty required for that child part. E.g. if this is set to 50%, the total BOM qty for that part will be 50% greater. This will only be available if the SCRAP system option is switched on. |
| Sundry | This field is either (T)rue or (F)alse and indicates whether the child part number is a sundry item or not. Sundry items are parts which have a fixed quantity regardless of how many are being made. |
| Round Qty | This option indicates whether the BOM item is to be rounded for costing purposes, and is either (T)rue or (F)alse. |
| Required To Start Job | This option indicates whether the BOM item needs to be issued before the job can start, and is either (T)rue or (F)alse. |
The BOM Notes column is optional and the other columns are only required when creating child parts from the BOM import.

The user can create child parts that are not already in Progress using the BOM import. To do this, they must populate the remaining fields with the relevant information. These fields are all prefixed "Child", including any inventory user defined fields that exist. The user must note that the group codes, UOMs, UOPs and stock locations must already exist in Progress before the spreadsheet is imported.

(child part details for part creation)

(child part UDFs for part creation)
NOTE: The child fields are only picked up when creating new "child" parts (i.e. the part doesn't already exist). The import cannot be used to amend the existing child part details.
Within the Tools menu in Progress, the Import/Export option is selected before the user selects the INVENTORY BOM import option. When prompted, the user can now select the Excel file containing the BOM information. Assuming all the information is suitable and there are no gaps within the template, the Inventory BOMs will be imported into Progress.
Importing Inventory Routing
The user can import a routing for a manufactured part using the template created from the Inventory Routing Export. The following steps are then taken to import the spreadsheet.
The template is opened in Excel. If the user just wants to amend details of existing routings, the spreadsheet can just be edited, not deleted. If the user is wanting to use the spreadsheet as a blank template, all rows except row 1, are selected and their contents cleared, creating a blank template.

The Excel file is saved as the template for importing new routings. Information for new routings is entered into the suitable lines.

If the user is adding a subcon operation, the SUB CONTRACT field must be set to “T” (i.e. True) and a valid SUBCON CODE added. The subcon code must already exist in the Maintenance > Sub-Contract Codes section of Progress. Once the spreadsheet is fully populated, it is saved and then closed.
To import, the Import/Export Data option is selected from the Tools menu. In the Import tab, the Inventory Routing is highlighted and the Import button selected. The user can now select the Excel file containing the routing information. Assuming all the information is valid and there are no gaps within the template, the inventory routings will be imported into Progress.
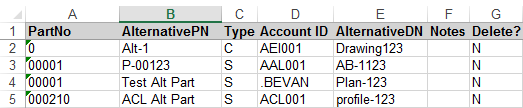
Exporting/Importing Alternative Part Numbers
The users can export alternative part numbers to Excel by following these steps.
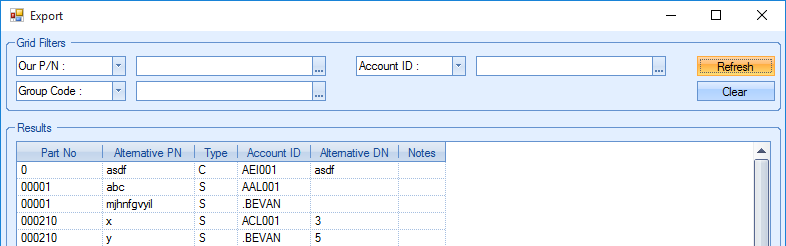
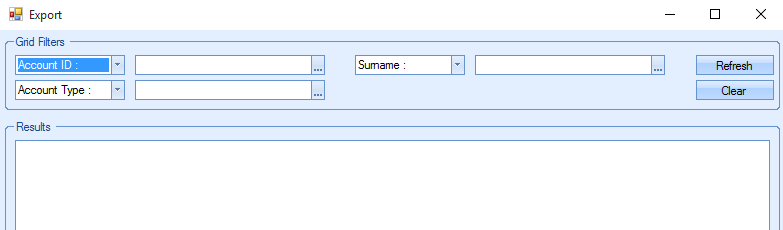
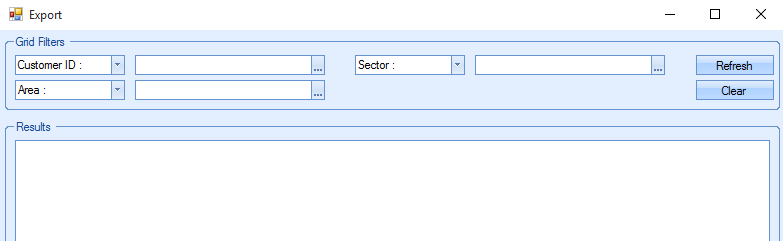
Select Tools > Import/Export Data. When the Import/Export window appears, select the Export tab at the top and then select the Alternative Part Numbers option. Click the Export option. This presents the user with the following screen.

From here the user can use the grid filters at the top of the screen to pick and choose the specific part numbers they want to export. However, if the user requires all alternative part numbers, simply clicking the Refresh command will populate the screen. It will only display part with alternate part numbers already entered.
Once the list is generated, simply click Export at the bottom to create an Excel spreadsheet with all the alternative part number information from the system.

The information displayed contains the following:
| Part No | The main Part Number. |
| Alternative PN | An alternative part number for the part number above. |
| Type | C (Customer) or S (Supplier). This displays if the alternative part number is for a customer or supplier. |
| Account ID | The customer or supplier account ID. |
| Alternative DN | The alternative drawing number associated with the alternative part number. |
| Notes | Any notes associated with the alternative part number. |
| Delete? | Y (Yes) or N (No). Do you want to delete the alternative part number from the part? This is automatically populated as N when exported. |
Once all changes are made, the user can import alternative part numbers using the template created from the steps above. The following steps are then taken to import the spreadsheet. The template is opened in Excel and all rows, except row 1, are selected and their contents cleared, creating a blank template.

If the user just wants to amend details of alternative part numbers, the spreadsheet can just be edited, not deleted. The Excel file is saved as the template for importing new alternative part numbers. Information for new alternative part numbers is entered into the suitable lines. Not all information is required but it is advisable to enter as much as possible.
The columns use the following titles:
| Part No | The main Part Number. |
| Alternative PN | An alternative part number for the part number above. |
| Type | C (Customer) or S (Supplier). This displays if the alternative part number is for a customer or supplier. |
| Account ID | The customer or supplier account ID. |
| Alternative DN | The alternative drawing number associated with the alternative part number. |
| Notes | Any notes associated with the alternative part number. |
| Delete? | Y (Yes) or N (No). Do you want to delete the alternative part number from the part? This is automatically populated as N when exported. |
Within the Tools menu in Progress, the Import/Export option is selected. In the Import tab, Alternative Part Numbers is highlighted and the Import button selected. The user can now select the Excel file containing the information on Alternate Part Numbers. Assuming all the information is suitable and there are no gaps within the template, the Alternate Part Numbers will be imported into Progress.
In addition to importing the different part related information separately, Progress also has an option to import ALL part details (i.e. part, BOM, routing, etc.) all in one go. This option is listed in the IMPORT options as Inventory All.

Selecting this option, will present the user with the following screen.
The user can use the field at the top to select the import folder/file. By default, the system will check the predefined import folder specified in the Admin settings for the data spreadsheet, however the user can select any folder they wish.
When a file is selected, the various tabs of the screen are filled with the relevant info from the spreadsheet. This allows the user to see what's being imported.
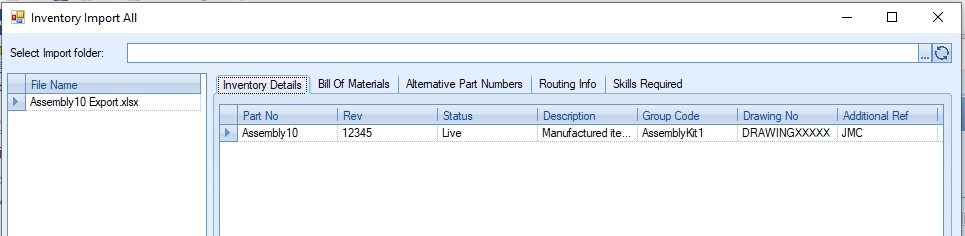
(Inventory details)
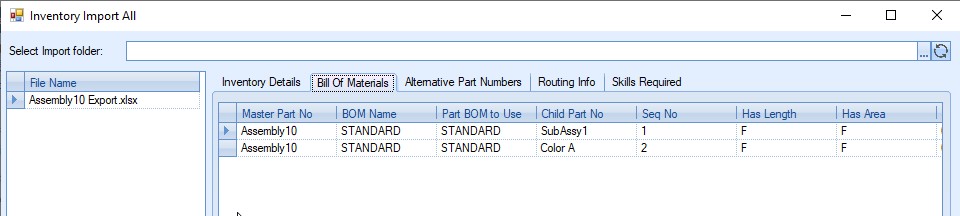
(BOM details)
(Routing details)
Once the details have been imported, the user can verify the data using the VALIDATE option at the bottom of the screen. This process will check the data for import and ensure there are no issues with the values/data. Once the data has been checked, the IMPORT option will pull the data into the system. If there are any issues with the details, the system will generate an error report highlighting where the issue lies.
Exporting/Importing Contact Notes
The user can create notes or reminders that are linked to a customer contact or supplier contact. To do this using an import, the user can export the Contact Note Template, populate the spreadsheet and then import the resulting file. To export the Contact Notes Template the following steps are followed.
Select Tools > Import/Export Data. When the Import/Export window appears, select the Export tab at the top and then select the Contact Notes Template option. Click the Export option. This presents the user with the following screen.
From here the user can use the grid filters at the top of the screen to pick and choose the specific Contacts they want to export. However, if the user requires all Contacts, simply clicking the Refresh command will populate the screen.
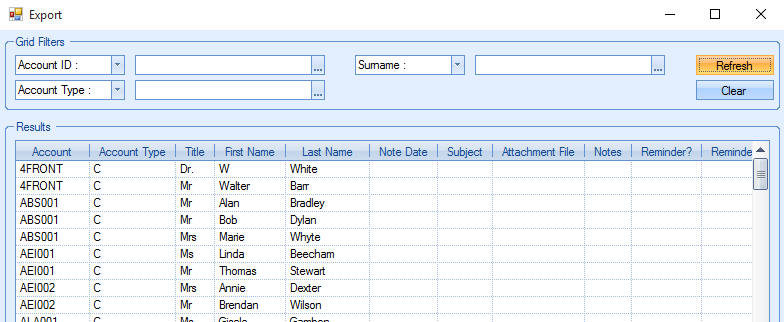
Once the list is generated, simply click Export at the bottom to create an Excel spreadsheet with the Contact information.

Once the changes have been made, the user can import Contact Notes using the template created in the steps above. The following steps are then taken to import the spreadsheet.
The template is opened in Excel and all rows, except row 1, are selected and their contents cleared, creating a blank template.

The template is opened in Excel and the following additional information added.
| Note Date | The creation date of the note. If this is not populated, it will automatically be set to today’s date. If the user is creating a reminder, the reminder date will always be today’s date, no matter what is put in this field. If the user is creating a Note, the Note Date field will be populated with whatever is in this field. |
| Subject | The subject of the note or reminder. |
| Attachment File | A file can be attached to the note or reminder. |
| Notes | The main body of the note or reminder. |
| Reminder? | “TRUE” or “FALSE” must be input into this field. This allows the user to select weather this is a reminder or not. If “TRUE” is inputted, a reminder will be created with that contact linked to that reminder. If “FALSE” is input, a note will be created with the contact linked to it. |
| Reminder Date | The date that the reminder will appear. |
| Reminder Time | The time that the reminder will appear. |

Once populated, this spreadsheet is saved.
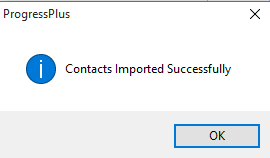
Within the Tools menu in Progress, the Import/Export Data option is selected. In the Import tab, Contact Notes is highlighted and the Import button selected. The user can now select the Excel file containing the Contact Note information. Assuming all the information is suitable and there are no gaps within the template, the Contact Notes will be imported into Progress.
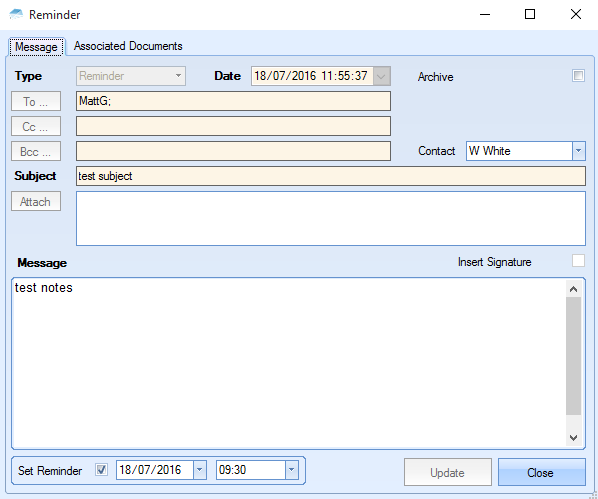
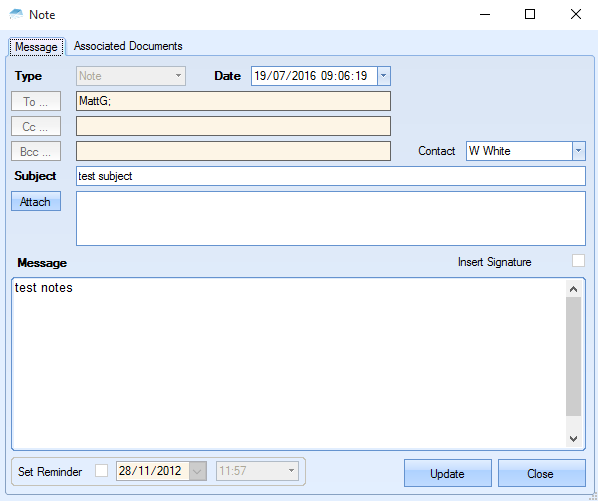
If the user has imported a reminder, the following will appear in the Message Centre – Reminders tab.
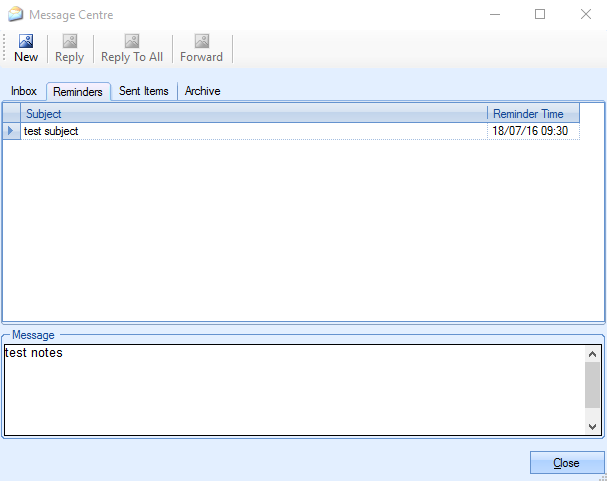
The user can open this reminder to view the note and contact linked to it.
If a reminder was not created, a note will appear in the Sent Items tab.
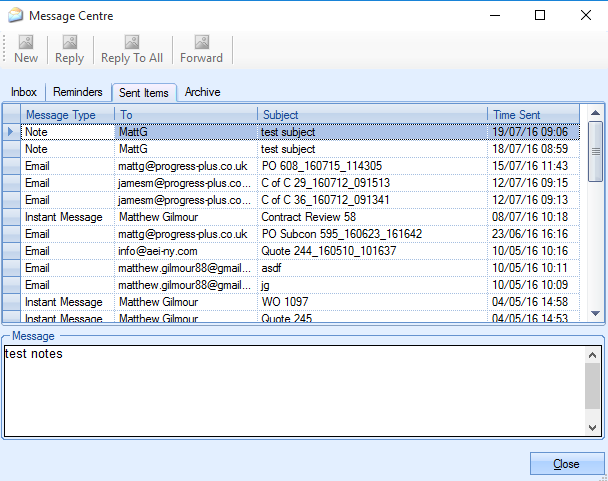
The user can open this note to view the details and the contact it is linked to.
Exporting/Importing Customers
The users can export a list of customers to Excel by following these steps.
Select Tools > Import/Export Data. When the Import/Export window appears, select the Export tab at the top and then select the Customers option. Click the Export option. This presents the user with the following screen.
From here the user can use the grid filters at the top of the screen to pick and choose the specific customers they want to export. However, if the user requires all customers, simply clicking the Refresh command will populate the screen.
Once the list is generated, simply click Export at the bottom to create an Excel spreadsheet with all the customer information from the system.

Once any changes have been made, the user can import customers using the template created from the steps above. The following steps are then taken to import the spreadsheet.
The template is opened in Excel and all rows, except row 1, are selected and their contents cleared, creating a blank template.
If the user just wants to amend details of customers, the spreadsheet can just be edited, not deleted. The Excel file is saved as the template for importing new customers. Information for new customers is entered into the suitable lines. Not all information is required but it is advisable to enter as much as possible.
Within the Tools menu in Progress, the Import/Export Data option is selected. In the Import tab, Customers is highlighted and the Import button selected. The user can now select the Excel file containing the customers' information. Assuming all the information is suitable and there are no gaps within the template, the customers will be imported into Progress.
Exporting/Importing Customer Contacts
The user can export customer contacts into a spreadsheet to display all details for contacts. This spreadsheet can then be amended and imported to edit the contacts within Progress. The user can export a list of customer contacts to Excel by following these steps.
Select Tools > Import/Export Data. When the Import/Export window appears, select the Export tab at the top and then select the Customer Contacts option. The filter can be used to show the required contacts.

If the user wants to display details of all Customer Contacts within Progress, the filters can be left blank and the Refresh button selected.
![]()
In this example the contacts are filtered by one customer. The Refresh button is selected and a list of all contacts matching the filters is displayed.
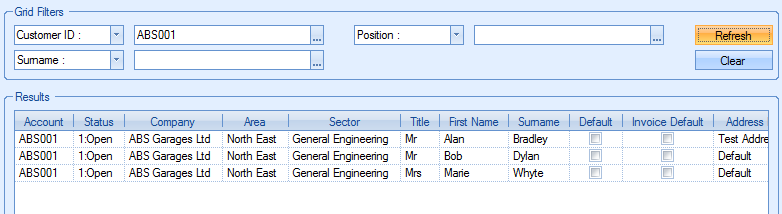
When the user is happy with the contacts displayed, the Export button can be used to Export this information to Excel. The user can then print, edit or add Contacts to the Excel spreadsheet.

The user can add or amend details of contacts for each customer using the Customer Contacts import. Using the Excel spreadsheet created from the Customer Contacts export, the user can enter details such as the company, contact title, first name, last name and address for that contact.
Any answers to Contact Questions set in the List Maintenance can also be entered here.
The user must fill in the Excel spreadsheet accordingly. Contacts can be marked as Default Contact and Invoice Default Contact for that customer by typing “TRUE” in the appropriate column. “FALSE” can be input if it is not the default contact.
The address name for that contact can also be typed and each line of the address can be input in the columns named Address1, Address2, etc. The columns on the right of this spreadsheet will display Contact Questions that have been set up in the List Maintenance. These can include questions such as Children, Football Team or Plays Golf? Answers to these questions can be entered here and more information can be found in the list maintenance section of this manual. When the user is happy that the information is correct, the spreadsheet can be saved and then imported. The steps below explain how to do this.
Select Tools > Import/Export Data. When the Import/Export window appears, select the Import tab at the top and then select the Customer Contacts option. The Import button is selected and the user will be prompted to locate the correct file. When located, the Open button is selected and the contacts will be imported. Users must note that the file must not be open when importing. The following message will appear once the import has been successfully completed.
Importing/Exporting Group Code Discounts
The user can do a mass upload and export of group code discounts. This is useful if there are a lot of changes being made to the pricing and discounts as the changes can be made in Excel after exporting the existing data before reimporting the amended data. The steps below detail how to do this.
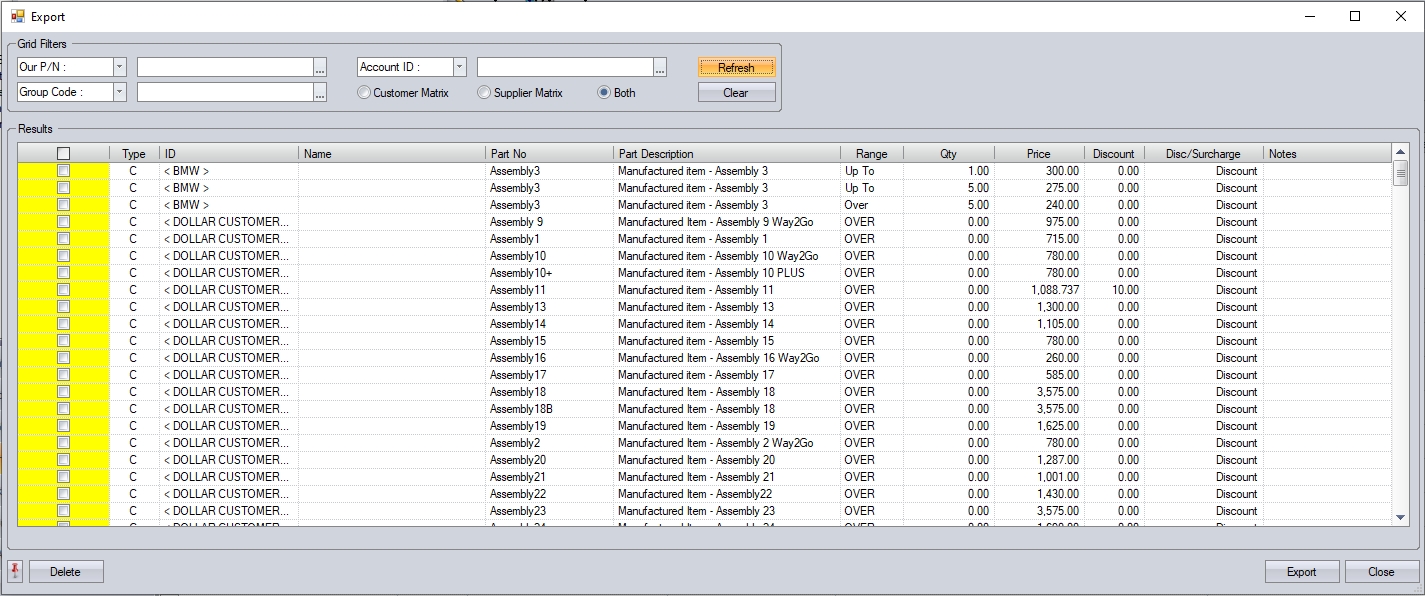
Select Tools > Import/Export Data. When the Import/Export window appears, select the Export tab at the top and then select the Group Code Discounts option. Click the Export option. This presents the user with the following screen.
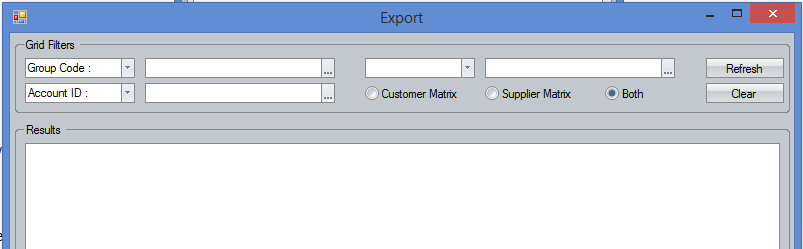
From here the user can use the grid filters at the top of the screen to pick and choose the specific group code discounts they want to export. However, if the user requires all group code discounts, simply clicking the Refresh command will populate the screen.
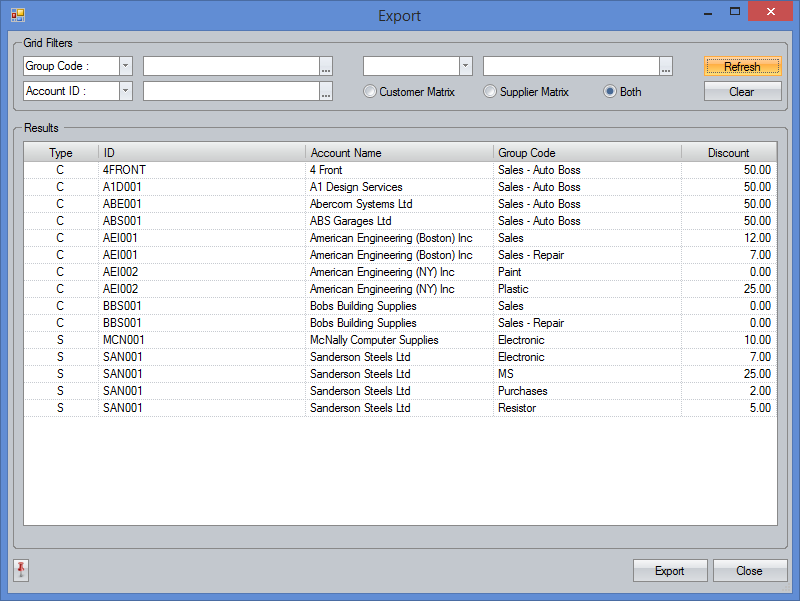
The user can also select to display just the customer matrices, supplier matrices or both by selecting the appropriate toggle. This will default to show both.
![]()
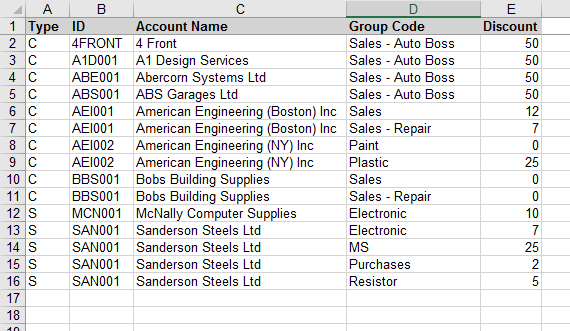
Once the list is generated, simply click Export at the bottom to create an Excel spreadsheet with the group code discounts information.
Once the spreadsheet has been updated, the user can import the amended details using the IMPORT option for group code discounts. The steps below detail how to do this.
Select Tools > Import/Export Data. When the Import/Export window appears, select the Import tab at the top and then select the Group Code Discounts option. The Import button is selected and the user will be prompted to locate the correct file. When located, the Open button is selected and the group code discounts will be imported. Users must note that the file must not be open when importing. The system will confirm once the import is complete.
Exporting/Importing Inventory Price Matrices
The user can export inventory price matrices to Excel which can then be edited and imported back into Progress.
Exporting Price Matrices
Select Tools > Import/Export Data. When the Import/Export window appears, select the Export tab at the top and then select the Inventory Price Matrix option. Click the Export option. This presents the user with the following screen.
From here the user can use the grid filters at the top of the screen to pick and choose the specific price matrices they want to export. However, if the user requires all matrices, simply clicking the REFRESH option will populate the screen.
The user can also select to export just customer matrices, supplier matrices or both by selecting the appropriate toggle. This will default to show both.
![]()
Once the list is generated, simply click EXPORT at the bottom to create an Excel spreadsheet with the price matrix information.

Deleting Price Matrices
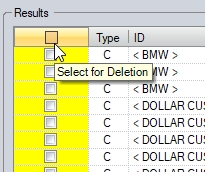
In addition to exporting the data from this screen to a spreadsheet, the user can also mass delete price matrix records from here too. To do this, they simply use the tick box highlighted in yellow, and the DELETE option at the bottom of the screen.
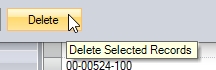
The system will prompt the user for confirmation of the deletion, before removing the selecting price matrix entries.
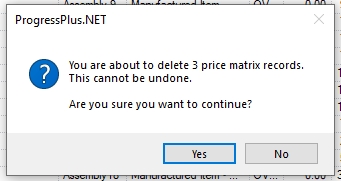
(Deletion prompt when deleting price
Importing Price Matrices
The user can import inventory price matrices using the template created from the export process. The following steps are then taken to import the spreadsheet.
The template is opened in Excel and all rows, except row 1, are selected and their contents cleared, creating a blank template.

If the user just wants to amend details of matrices, the spreadsheet can just be edited, not deleted. The Excel file is saved as the template for importing new price matrices. Information for new price matrices is entered into the suitable lines.

Within the Tools menu in Progress, the Import/Export Data option is selected. In the Import tab, the INVENTORY PRICE MATRIX option is highlighted, and the IMPORT button selected. The user can now select the Excel file containing the price matrix information. Assuming all the information is suitable and there are no gaps within the template, the price matrices will be imported into Progress.
Exporting/Importing Suppliers
The users can export a list of suppliers to Excel by following these steps.
Select Tools > Import/Export Data. When the Import/Export Data window appears, select the Export tab at the top and then select the Suppliers option. Click the EXPORT option. This presents the user with the following screen.
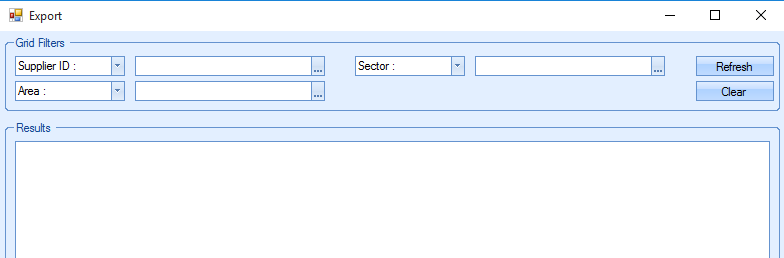
From here the user can use the grid filters at the top of the screen to pick and choose the specific suppliers they want to export. However, if the user requires all suppliers, simply clicking the REFRESH command will populate the screen.
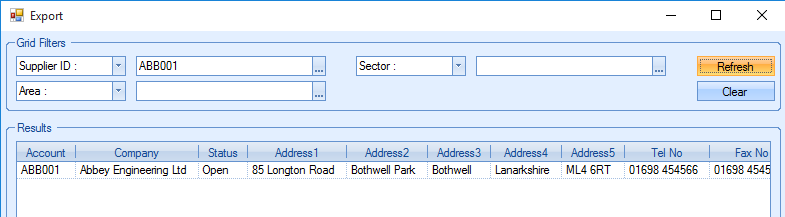
Once the list is generated, simply click EXPORT at the bottom to create an Excel spreadsheet with all the supplier information from the system.

The user can import suppliers from the template created in the steps above. The following steps are then taken to import the spreadsheet.
The template is opened in Excel and all rows, except row 1, are selected and their contents cleared, creating a blank template.

If the user just wants to amend details of suppliers, the spreadsheet can just be edited, not deleted.
The Excel file is saved as the template for importing new suppliers.
Information for new suppliers is entered into the suitable lines. Not all information is required but it is advisable to enter as much as possible.

Within the Tools menu in Progress, the Import/Export Data option is selected. In the Import tab, Suppliers is highlighted and the Import button selected. The user can now select the Excel file containing the customers' information. Assuming all the information is suitable and there are no gaps within the template, the suppliers will be imported into Progress.
Exporting/Importing Supplier Contacts
The user can export supplier contacts into Excel which can then be amended and imported back into Progress. To export the Supplier Contacts the following steps are followed.
Select Tools > Import/Export Data. When the Import/Export window appears, select the Export tab at the top and then select the Supplier Contacts option. The Export button must then be selected. The filter can be used to show the required contacts.

If the user wants to display details of all Supplier Contacts within Progress, the filters can be left blank and the Refresh button selected.
![]()
In this example the contacts are filtered by one supplier. The Refresh button is selected and a list of all contacts matching the filters is displayed.
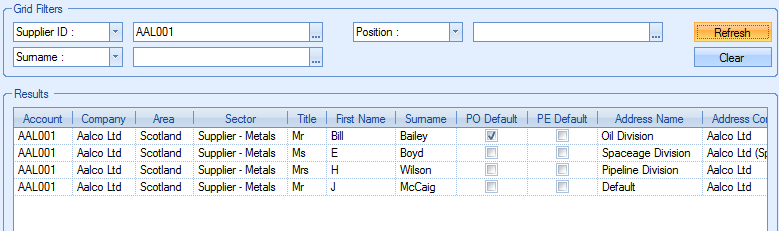
When the user is happy with the contacts displayed, the Export button can be used to export this information to Excel. The user can then print, edit or add Contacts to the Excel spreadsheet.

The user can add or amend details of contacts for each supplier using the Supplier Contacts import. Using the Excel spreadsheet created from the Supplier Contacts export, the user can enter details such as the company, contact title, first name, last name and address for that contact. Any answers to Contact Questions set in the List Maintenance can also be entered here.
The user must fill in the Excel spreadsheet accordingly. Contacts can be marked as PO Default and PE Default for that customer by typing “TRUE” in the appropriate column. “FALSE” can be input if it is not the default contact. The address name for that contact can also be typed and each line of the address can be input in the columns named Address1, Address2 etc. The columns on the right of this spreadsheet will display Contact Questions that have been set up in the List Maintenance. These can include questions such as Children, Football Team or Plays Golf? Answers to these questions can be entered here and more information can be found in the list maintenance section of this manual.
When the user is happy that the information is correct, the spreadsheet can be saved and then imported.
Select Tools > Import/Export Data. When the Import/Export window appears, select the Import tab at the top and then select the Supplier Contacts option. The Import button is selected and the user will be prompted to locate the correct file. When located, the Open button is selected and the contacts will be imported. Users must note that the file must not be open when importing. The following message will appear once the import has been successfully completed.

Exporting/Importing Supplier Capacities/Ratings/Certifications
These options allow the user to generate the import template for each of these categories to allow importing of new data, and also export out existing data for amendment. Each option has its own template format as shown below.
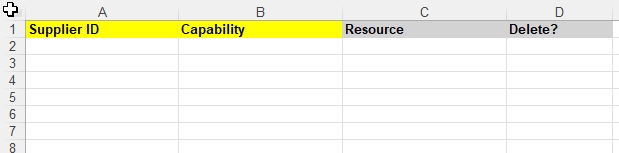
(supplier capabilities template)
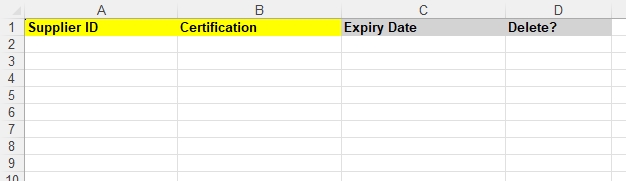
(supplier certification template)
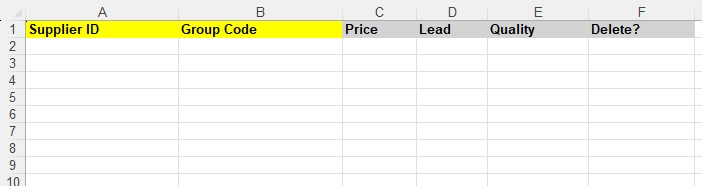
(supplier rating template)
The export options allow the user to export out existing supplier details for amendment, or can be used to generate a blank template for the user to import the relevant information against the supplier records. The user will be prompted upon export to say whether they want to export the existing data.
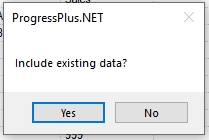
Selecting YES will export the existing details out to the spreadsheet. Selecting NO will generate a blank template only.
All three imports are based on the supplier ID. The rest of the information must be valid (i.e. existing group codes, certifications, dates, etc.) to ensure successful import.
Each template also has a DELETE? column which can be used by the user to delete existing details as part of the import process. This field is a simply TRUE/FALSE field. If the details are simply deleted from the spreadsheet, the system will ignore them in the import and retain them in the system. If the user marks the DELETE? value as TRUE, the item will be deleted from the supplier in the system.
When importing the templates, the user simply selects the appropriate import option and selects the file when prompted. The system will proceed to import the contents of the spreadsheets against the supplier records. Any import issues will be highlighted to the user.
Exporting/Importing Employees
NOTE: Existing records cannot be exported for change - the import is only for adding new records.
A list of employee details can be exported to and imported from an Excel spreadsheet. The user can use the export option to generate a blank template to allow the user to import new employee details into Progress. To generate the export import template, the following steps are followed.
Select Tools > Import/Export Data. When the Import/Export window appears, select the Export tab at the top and then select the Employees option. Click the Export option. This presents the user with the following screen.
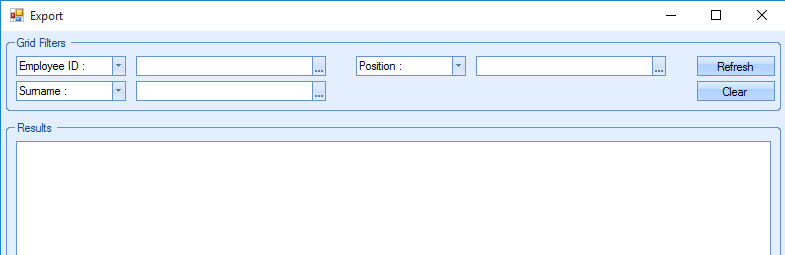
From here the user can use the grid filters at the top of the screen to pick and choose the specific employees they want to export. However, if the user requires all employees, simply clicking the Refresh command will populate the screen.
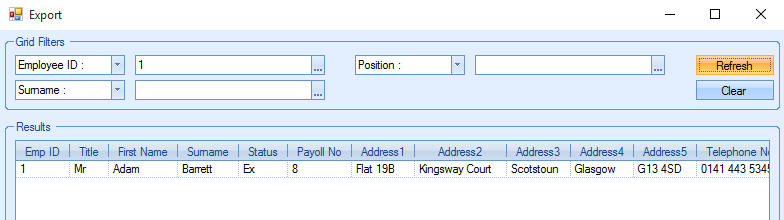
Once the list is generated, simply click Export at the bottom to create an Excel spreadsheet with all the employee information from the system.

The importing of employees to Progress is only available for creation of new employees. All new employee details would be added to the spreadsheet as required, but with the EMPLOYEE ID field left blank - Progress will assign this ID to each employee as part of the import process.
Following the steps below will allow new employees to be imported from the Excel spreadsheet above.
Select Tools > Import/Export Data. When the Import/Export window appears, select the Import tab at the top and then select the Employees option. The Import button is selected and the user will be prompted to locate the correct file. When located, the Open button is selected and the employees will be imported. Users must note that the file must not be open when importing. The following message will appear once the import has been successfully completed.
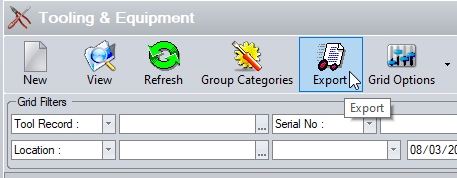
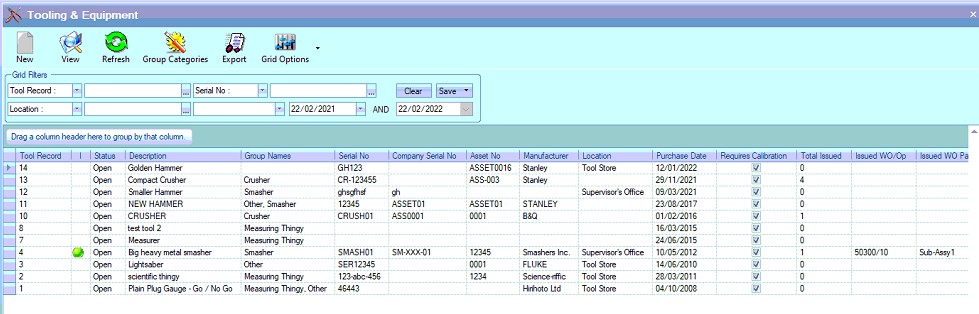
Exporting/Importing Tooling & Equipment Details
If the system has the Quality module activated, then there are import/export options available for the Tooling & Equipment records. These allows the user to export their current list of tools for amendments, as well as allow them to create new tooling records via the import option (i.e. create tools that do not already exist in Progress).
To export out the list of existing tooling, or to simply create the template required for importing tools, the user can use the EXPORT option on the main Tooling & Equipment screen.
This option will generate the export spreadsheet with a list of the existing tooling shown on the main Tooling & Equipment screen for amendment, and/or be used to create new tooling records. An example export spreadsheet is shown below.

Once the details have been export, the user can make the amendments required to the existing records and/or add the new tooling details to import into Progress.
Importing/creating new tooling records requires a minimum amount of information, so the user doesn't have to fill in ALL the columns in the spreadsheet. Some of the columns will have system -generated values too. These will be calculated by the system when the new details are import. Below is a list of the fields required to be completed by the user to create a new tooling record.
| Tool Record | This will be populated for existing tool records when exported. For new tool records to be created, this should be left blank. The system will then assign an ID when the record is created. |
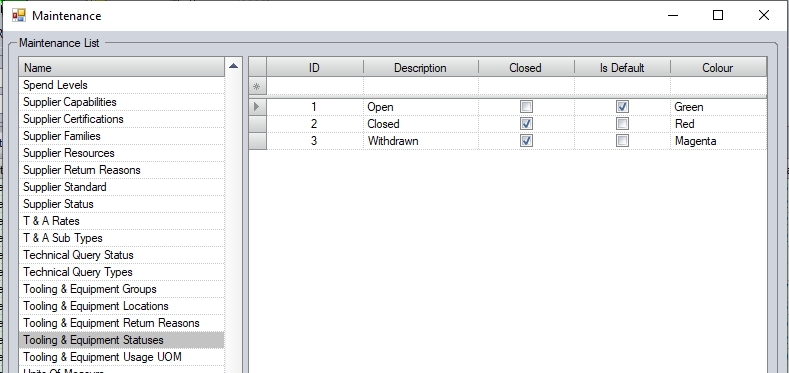
| Tool Status ID | This ID represents the status to be assigned to the new tool record. The ID represents the status as set up in the Maintenance > List Maintenance section of Progress, under the Tooling & Equipment Statuses category. |
| Description | This is the description of the tool. |
| Requires Calibration | This field indicates whether the tooling requires to be calibration, and is a TRUE/FALSE value. If the tool doesn't require calibration, then the three fields below are not required (Last Calibration Date, Period Type and Period Length). |
| Last Calibration Date | This field allows the user to record when the tool was last calibrated. This should be entered in a DD/MM/YYYY format and will be used to calculate when the next calibration date is due based on the calibration period of the tool. |
| Period Type | This is the calibration period type and indicates what the calibration period is (i.e. days, months, years, etc.). The options available are as follows: |
| 1 - Day(s) 2 - Month(s) 3 - Quarter(s) 4 - Year(s) |
| Period Length | This is the numerical value that's used with the period type above (i.e. 6 Months, 1 Years, 50 Days, etc.) |
The other tool-specific information (i.e. Tool Group, Serial No, Asset No, etc.) can all be populated if known and will be recorded against the tool record when its created, but is not required to create the tool initially.
Once all the details have been added to the spreadsheet, or any changes to existing tooling records has been made, the user can save the spreadsheet and then import the details.
To import the tooling details, the user must select Tools > Import/Export Data. When the Import/Export window appears, select the Import tab at the top and then select the Tooling & Equipment option.
The Import button must then be selected. The system will then prompt the user to select the file to be imported.
Selecting the import file will start the import process, updating existing tools with amendments made, and creating new tool records for tools that don't already exist. If there are any issues with the import, the system will generate an error report at the end indicating the issues. These will need to be corrected, before the user can retry the import.
Once imported, the user will be able to view the new (and amended) tooling records in the Tooling & Equipment section of Progress.
Exporting/Importing Op Descriptions
NOTE: Existing records cannot be exported for change - the import is only for adding new records.
The user can import new Op Descriptions for use against their work order routing operations. These are imported from a template file which can be generated from the Export tab within the Export/Import section of Progress.
To generate the template file for import, the user can follow the steps below.
Select Tools > Import/Export Data. When the Import/Export window appears, select the Export tab at the top and then select the Op Description Template option. The Export button must then be selected. The system will then prompt the user to create an Excel file for the template.
This spreadsheet created will provide the user with the necessary template for importing Op Description details into Progress.

The user can now complete the information in the spreadsheet that's to be imported.
| WC Name | This is the work centre that the description and times are associated with. This must be a valid work centre in the system. |
| Op Description | This is the descriptive text associated with the operation. |
| Setup Hrs | This is the number of complete hours associated with the set up of this operation |
| Setup Mins | This is the number of complete hours associated with the set up of this operation |
| Run Hrs | This is the number of complete hours associated with the run time of this operation |
| Run Mins | This is the number of complete minutes associated with the set up of this operation |
| Run Secs | This is the number of complete seconds associated with the set up of this operation |
When the user is happy that the information is correct, the spreadsheet can be saved and then imported.
Select Tools > Import/Export Data. When the Import/Export window appears, select the Import tab at the top and then select the Op Descriptions option. The Import button is selected and the user will be prompted to locate the correct file. When located, the Open button is selected and the details will be imported. Users must note that the file must not be open when importing. The system will confirm completion of import once done.
Exporting/Importing Timesheets
NOTE: Existing timesheet records cannot be exported for change - the import is only for adding new records.
The user can use this option to import multiple timesheets from a spreadsheet. To generate the timesheet import template, the following steps are followed.
Select Tools > Import/Export Data. When the Import/Export window appears, select the Export tab at the top and then select the Timesheet Template option. The Export button must then be selected. The system will then prompt the user to create an Excel file for the template.
This spreadsheet created will provide the user with the necessary template for importing calibration details into Progress.

The user can now complete the information within the spreadsheet prior to import. The contents of the spreadsheet are as follows:
| Employee ID | This is the ID of the employee in question. This must be a valid employee ID. |
| TS Type | This is the type of timesheet being imported. The options are BOOKED, SETUP, LOST, REWORK, LOADING and UNPLANNED. |
| TS Date | This is the date of the timesheet. |
| WO No | This is the work order number the timesheet is associated with. This is not required for LOST timesheets. |
| Op No | This is the work order operation number the timesheet is associated with. This is not required for LOST timesheets. |
| WC ID | This is the ID of the work centre involved in the timesheet. This must be a valid work centre ID. |
| Start Time (Hrs) | This is the hour value of the start time when the employee started the time period. For example, if they started at 11:15am, this would be set to 11. |
| Start Time (Mins) | This is the minute value of the start time when the employee started the time period. For example, if they started at 11:15am, this would be set to 15. |
| Finish Time (Hrs) | This is the hour value of the finish time when the employee finished the time period. For example, if they finished at 14:37am, this would be set to 14. |
| Finish Time (Mins) | This is the minute value of the finish time when the employee finished the time period. For example, if they finished at 14:37am, this would be set to 37. |
| Total Time (Hrs) | This is the total complete hours recorded by the employee. |
| Total Time (Mins) | This is the total complete minutes recorded by the employee. |
| Quantity | This is the number of units processed by the employee within the timesheet period. |
| Op Complete | This is a TRUE/FALSE value and indicates whether the work order operation is now complete. |
| Lost Time ID | This is the unique ID of the LOST TIME category assigned. This is only used on LOST timesheets. |
| Scrap Reason ID | This is the unique ID for the scrap reason if any scrap is being recorded. |
| Scrap Qty | This is the quantity of scrapped units against this work order operation. |
Once the user has completed the information in the spreadsheet, they can now import the details into Progress. The steps below explain how to do this.
Select Tools > Import/Export Data. When the Import/Export window appears, select the Import tab at the top and then select the Timesheets option. The Import button is selected and the user will be prompted to locate the correct file. When located, the Open button is selected and the details will be imported. Users must note that the file must not be open when importing. The system will confirm completion of import once done.
The timesheet information imported will now be recorded in the Labour > Timesheets section of Progress and also against each of the work orders listed in the import file.
Importing Projects
The user can use this option to import multiple projects from a spreadsheet. To generate the projects import template, the following steps are followed.
Select Maintenance > Projects. This will then present the user with the following screen which is the main Project Details screen.
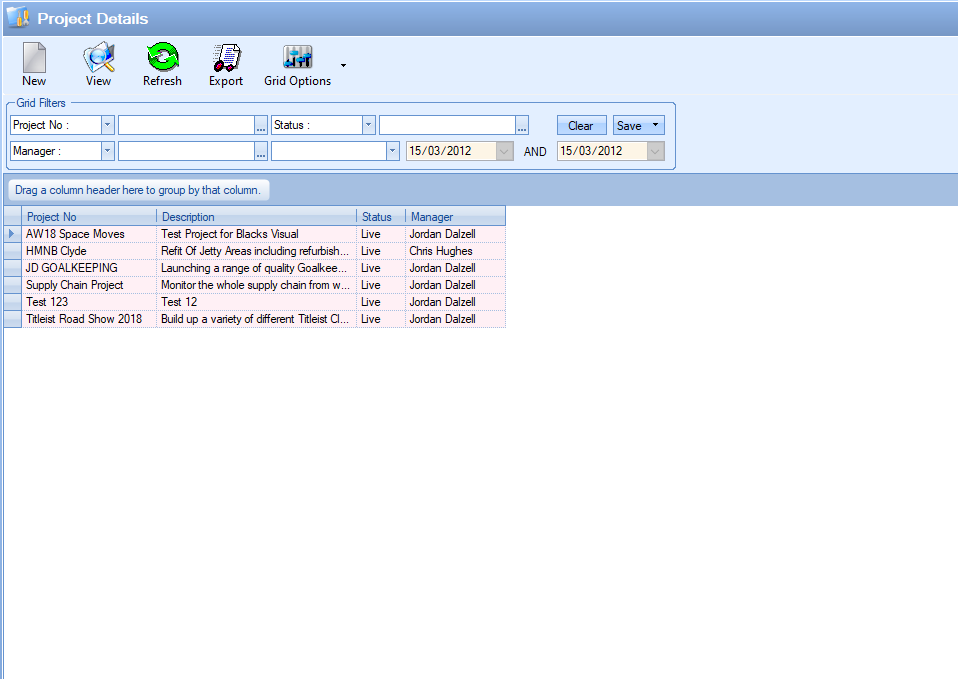
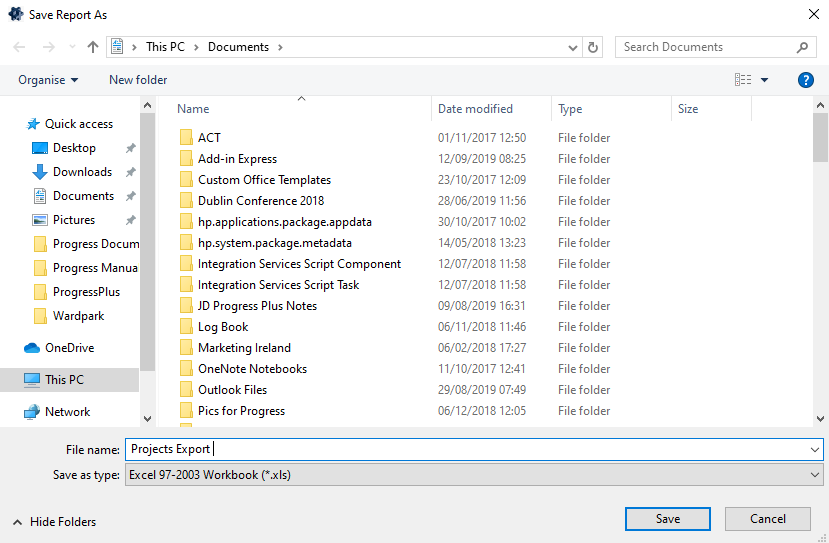
By default this screen will be empty as there won't be any projects in the system. The Export button must then be selected. The system will then prompt the user to create an Excel file for the template. If there is already projects displayed on the screen then the user can filter this down using the grid filters and just export 1 project to get the template.
This spreadsheet created will provide the user with the necessary template for importing project details into Progress. The columns that are marked in yellow are the mandatory ones that must be filled in . The other fields are optional and can be filled in if the user has that information.
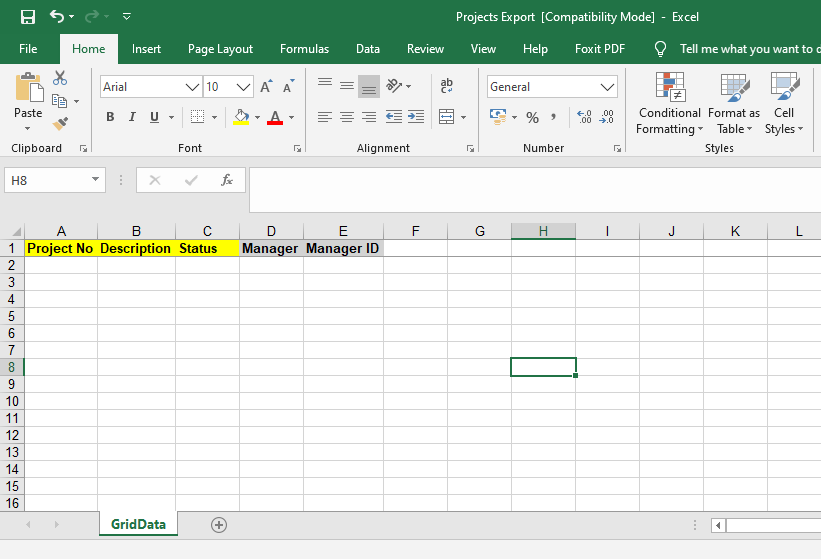
The user can now complete the information within the spreadsheet prior to import. The contents of the spreadsheet are as follows:
| Project No | This is the name of the project. |
| Description | This is the description of the project and will allow the user to add more detail behind the project. |
| Status | This is the status of the project whether it be Live, Cancelled or Completed. |
| Manager | This is the project manager name. |
| Manager ID | This the ID of the project manager. |
Once the user has completed the information in the spreadsheet, they can now import the details into Progress. The steps below explain how to do this.
Select Tools > Import/Export Data. When the Import/Export window appears, select the Import tab at the top and then select the Projects option. The Import button is selected and the user will be prompted to locate the correct file. When located, the Open button is selected and the details will be imported. Users must note that the file must not be open when importing. The system will confirm completion of import once done. The Projects that have been imported will now be visible on the main Project Details screen.
Exporting/Importing WO Planned Dates
This process allows the user to export out the work order planned start and finish dates and import amended dates. This process will update the work order and its associated operation dates based on how the operations dates are calculated and also whether the operations are loaded into the Shop Floor Loading (SFL) schedule.
The export of the work order dates is done from the main Work Order screen using the Export option. The exported information will be based on the contents of the main Work Order grid.
NOTE: This option is only available if the system option has been enabled. The system option can be found in the Work Orders section of the system options (Admin > Options > Work Orders).
![]()
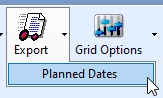
This option will create a spreadsheet of information based on the work orders listed on the main screen. The user can apply any filters they wish to identify the work orders they need to export. Once the work orders have been selected, clicking the Planned Dates export option will prompt the user to save a spreadsheet with the details.
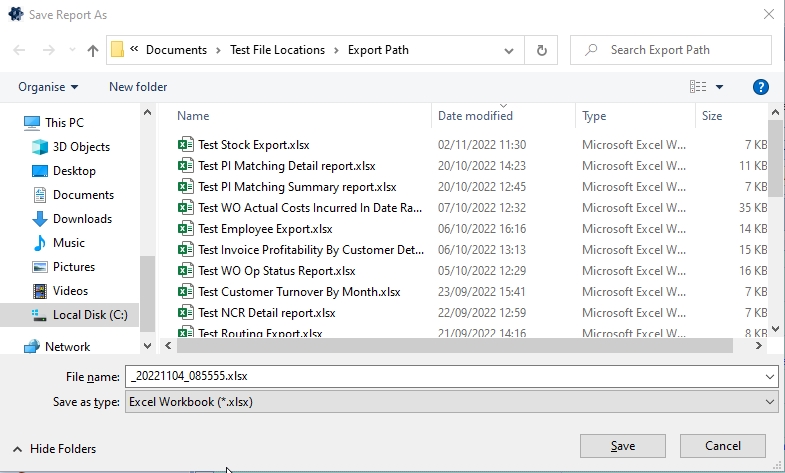
Once saved, the spreadsheet should appear (example below).

NOTE: The highlighted columns are the main pieces of information on this spreadsheet. Part No, Description, Status, etc. are all included just for reference and cannot be amended and re-imported to update the system.
Once the user has amended the Planned Start Date and/or Planned Finish Date of any work orders in the spreadsheet, they can import the new details to Progress to update the planned work order dates and the associated operation dates. The highlighted work order below has had its dates amended

The option to import the new details can be found in the Tools menu (Tools > Import/Export Data > Import).
Clicking the IMPORT option when selected will prompt the user for the import file.
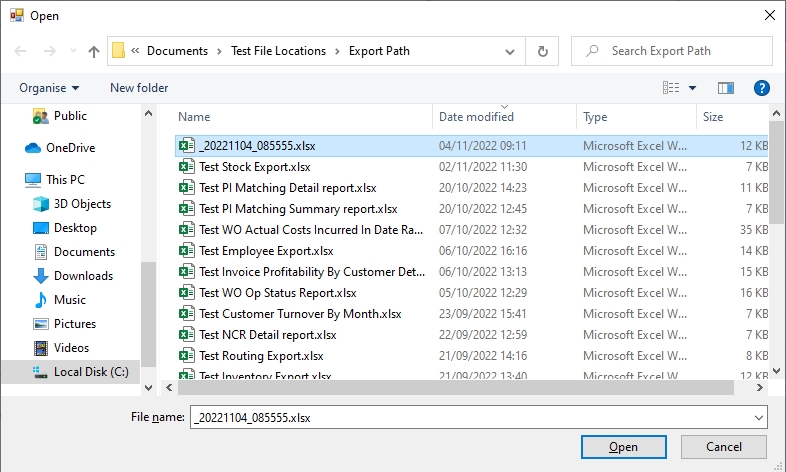
The user can select the file and click OPEN to start the import. Upon completion of the import, the system will present the user with a report on the import's success.
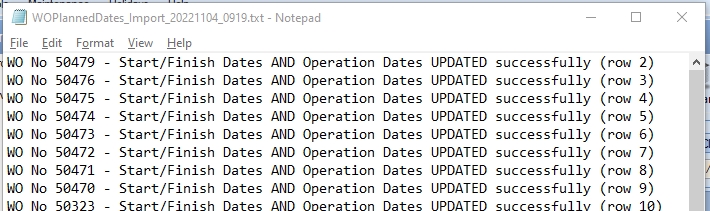
If the work order planned dates and the associated operation dates are successfully updated, the report will show this as:
WO No xxxx – Start/Finished Dates AND Operation Dates UPDATED successfully (row xxx)
If the work order status is COMPLETED or CANCELLED, neither the work order nor the operation dates will be updated. This will be shown on the report as:
WO No xxxx – Status is Completed/Cancelled – NO CHANGES MADE (row xxx)
If the work order is currently loaded into the shop floor loading schedule, only the work order planned dates will be update. Operation dates will not be updated. This will be shown on the report as:
WO No xxxx – Start/Finish Dates UPDATED, but WO is Scheduled, so operation dates NOT updated (row xxx)
Once the import is done, the updated work orders and operations should reflect the new dates. Looking at the example from above, you can see the new planned dates and operation dates.
For more information on this process and how the work order operation dates are calculated, please refer to the Work Order section of the manual.
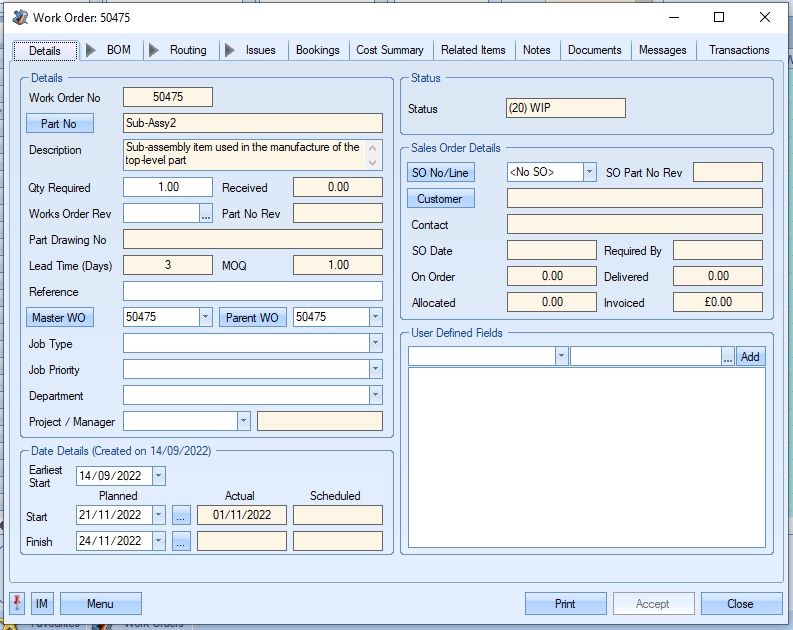
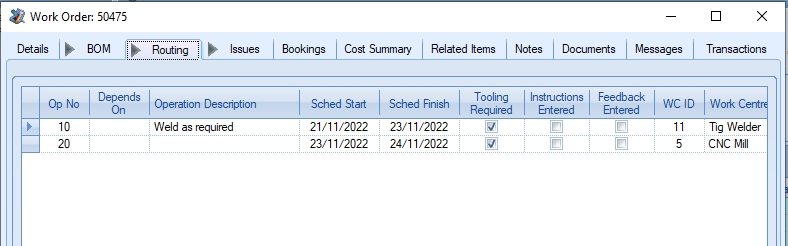
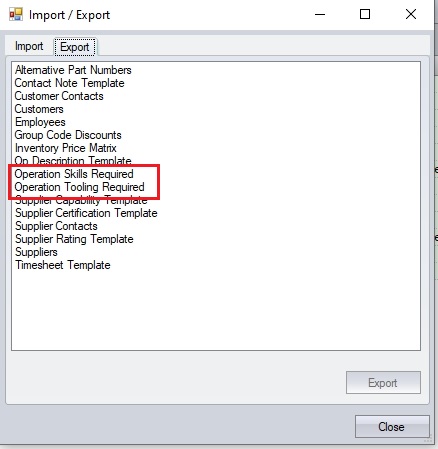
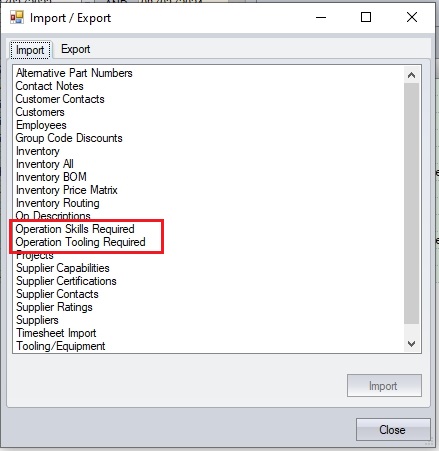
Exporting/Importing Operation Skills/Tooling
These options allow the user to export out any existing skill and tooling details from their part routing operations for amendment and/or import. Each has its own export and import options, with the export option providing the template required for importing each set of details.
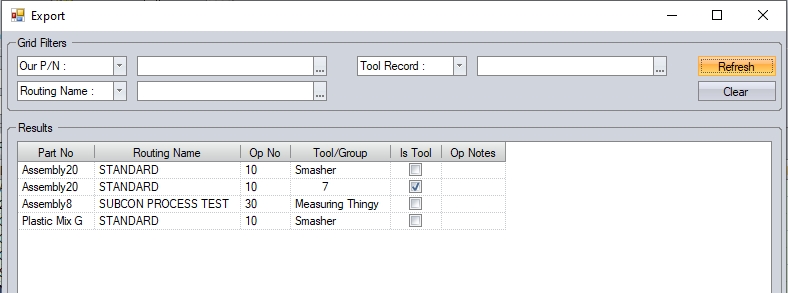
The user can export out their current operation skills and tooling details via the Tools > Import/Export Data > Export screen, using the Operation Skills Required and Operation Tooling Required options respectively.
The user can select the required export option before clicking the EXPORT option to go to the next stage. The user will then be presented with a screen similar to the following where they can filter for specific details for export, or simply hit REFRESH to see all records.
(Exporting Operation Tooling Details)
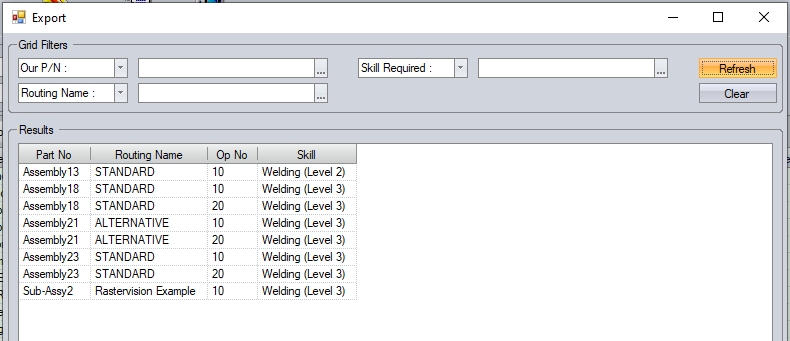
(Exporting Operation Skills Details)
Once the relevant details are displayed in the grid, the user can click the EXPORT option at the bottom of the screen to generate the export spreadsheets.
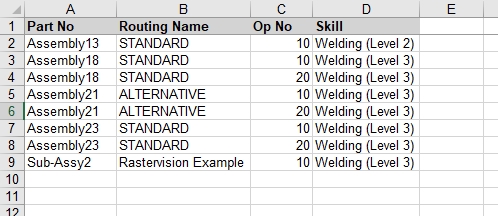
(Operation Skills template)
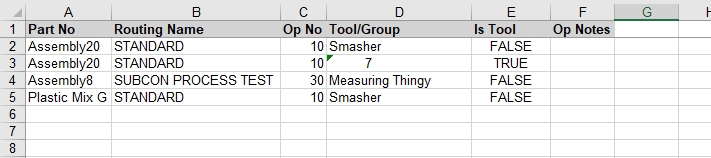
(Operation Tooling template)
The user can amend the existing details as required, or can use the template to import new skills and tooling details to routing operations. The user must complete all the fields in the templates to create new skills and tooling records against the routing operations, and can only import new details against existing routing operations on manufactured parts.
Once the spreadsheet is ready for importing, the user can do the import via the Tools > Import/Export Data > Import screen, using the Operation Skills Required or Operation Tooling Required options respectively.
Once the option is selected, the user will be prompted to select the spreadsheet to be imported. Once selected, the import process will be done. If there are any issues with the import details, the system will highlight this to the user at the end of the import. Once the import is complete, any changes or new skills/tooling records will be visible on the routing operations affected.