NOTE: This functionality needs to be activated by Progress Plus. Please contact to discuss/arrange.
Progress Plus is able to use face recognition for clocking in/out employees using a camera attached to the clocking client.
Setting Up Face Recognition
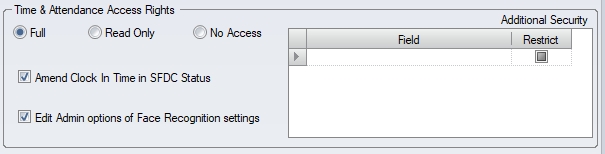
Once the functionality has been activated, it has to be setup against each employee. This requires the user who is setting it up to have "admin" permissions for the functionality. This is set in the user permissions section of the system settings, under the Time & Attendance access rights.
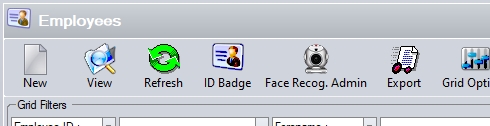
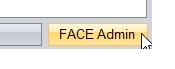
Users with this permission will have access to the Face Admin section of Progress where the images of employees can be captured and/or amended. Authorized users can access the Face Admin section from within the employee section of the main Progress Plus system or via the facial recognition clocking client.
(Face Admin - main system)
(Face Admin - Clocking client)
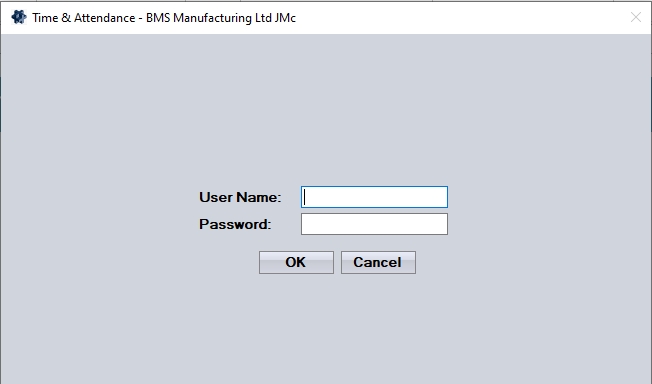
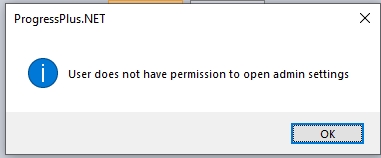
Accessing the Face Admin section from within the clocking client will prompt the user to enter their Progress user ID to ensure they are authorised to access this section.
If the user is not authorised to access the Face Admin section, the system will inform them.
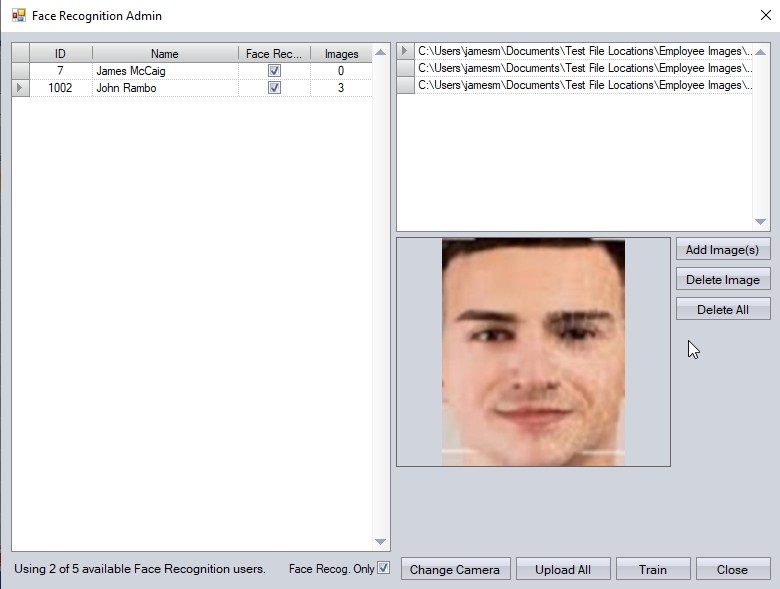
Once the user has accessed the Face Admin section, they should be presented with the following screen. From this screen, the user can maintain the camera settings, add/delete images against employees, activate/disable the face recognition against employees, train the camera for use with the face recognition process and also upload employee new images using the options on screen.
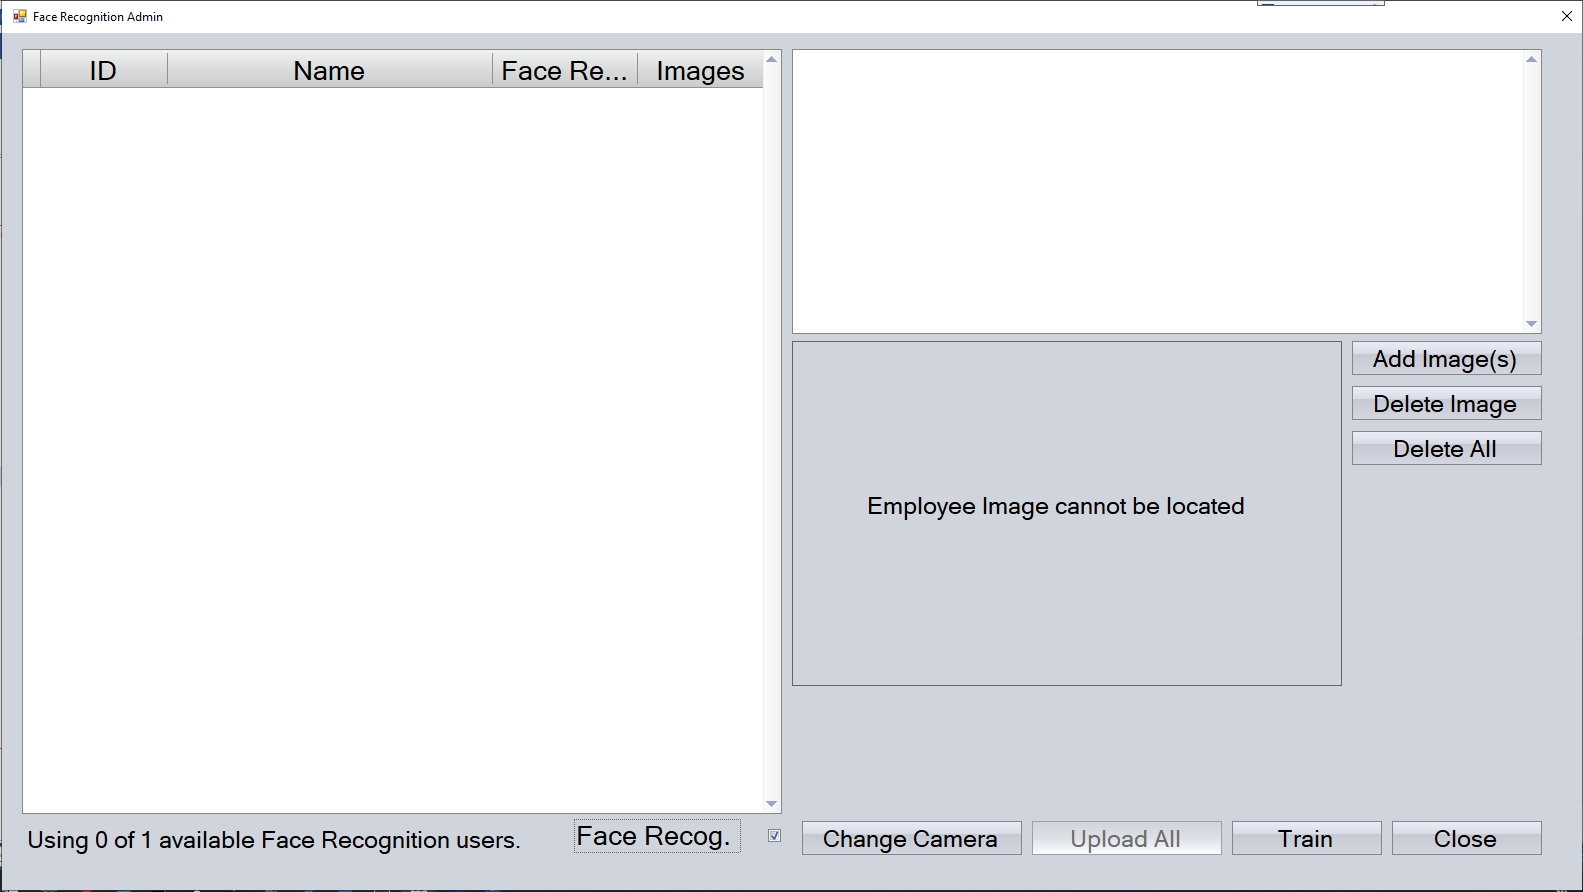
If any employees have already had the face recognition switched on, they will be displayed on the grid. By default, the system shows all employees who its activated for.
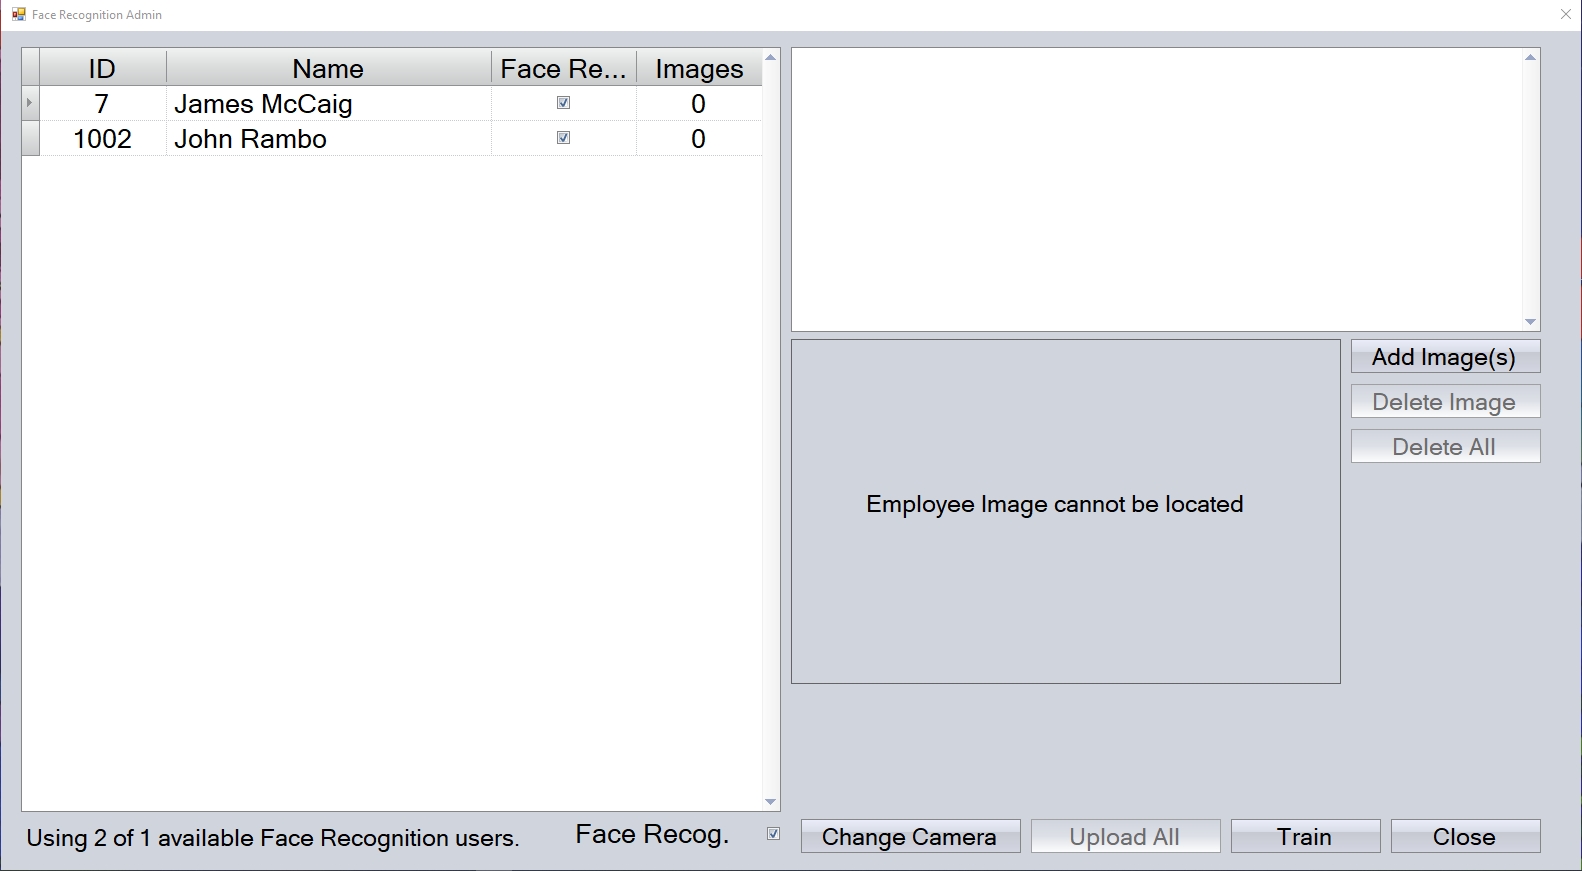
The user can view the full list of employees by unticking the FACE RECOG. option at the bottom of the screen.
![]()
(FACE RECOG. option unticked - full list of employees)
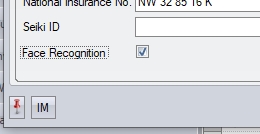
The user can switch on/off the face recognition against employees by ticking the FACE RECOG. option against the employees. This will activate it for the employee. This can also be done within the employee record itself using the FACE RECOGNITION option.
Setting/Changing Camera Settings
This option allows the user to set/amend the camera settings used by the face recognition functionality. Selecting this option will preset the user with the following screen, from which they can set/amend the camera settings.
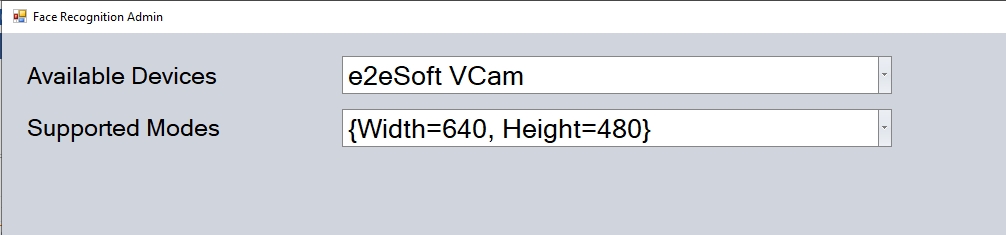
Once any changes are made, the user can return to the main admin screen by clicking the CLOSE option. Once the employees and camera device have been set up, the user can proceed to capture the image(s) of the employee(s).
Adding Employee Images
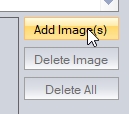
The user can add images against employees from this screen by highlighting the employee and clicking the ADD IMAGE(S) option on the right-hand side.
The user will then be presented with the image capture screen.
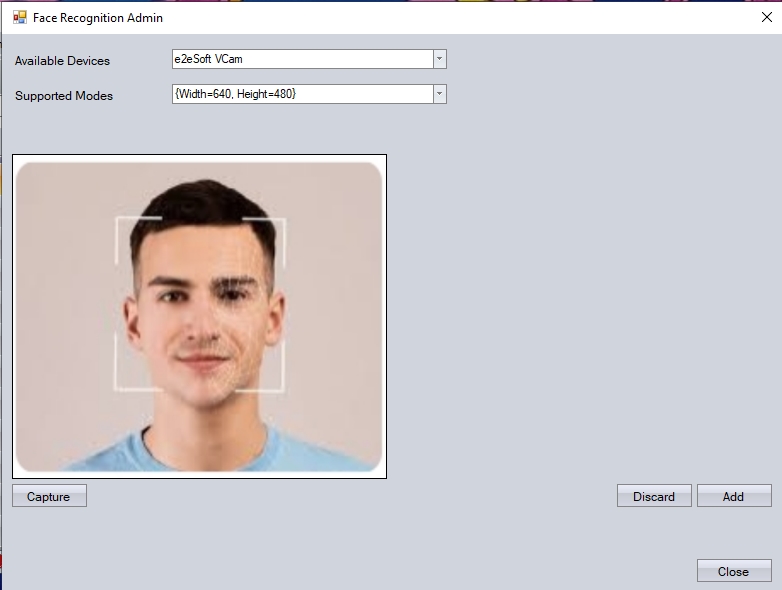
With the employee in position, the user can capture the employee image by clicking the CAPTURE option. This will display a captured image from the camera device on the right-hand side of the screen.
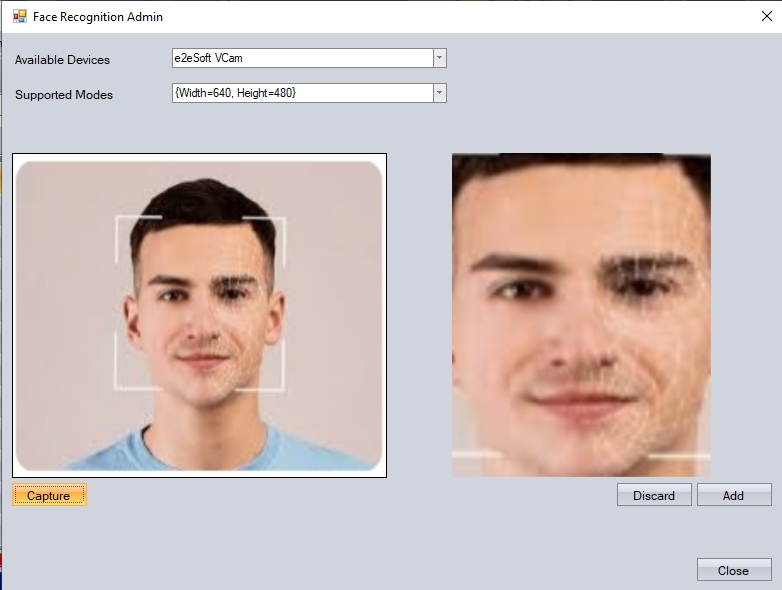
If the image is of poor quality, or needs to be retaken, the user can click the DISCARD option to remove the captured image. They can then retake the image again, using the CAPTURE option.
Once the user is happy with the image taken, they can click the ADD option to record the image against the employee. The number of current images captured for the employee is shown against the ADD option, with the number in brackets. Employees can have a maximum of 9 images loaded against them for the face recognition functionality.
![]()
Once the user is happy that sufficient images have been captured, they can return to the main Face Admin screen by clicking CLOSE. The screen will now show all images recorded against an employee, with the number of images shown against the employee name and the file paths of each shown in the top-right corner of the screen.
The user can repeat the process above for all other employees that need to be set up.
Deleting Employee Images
The user can delete individual employee images or all images recorded against a single employee using the DELETE IMAGE and DELETE ALL options respectively. The user can delete individual images by selecting the employee, the image from the employee's list of images and then clicking DELETE IMAGE. THis will remove the image from the employee and update the details to reflect the change.
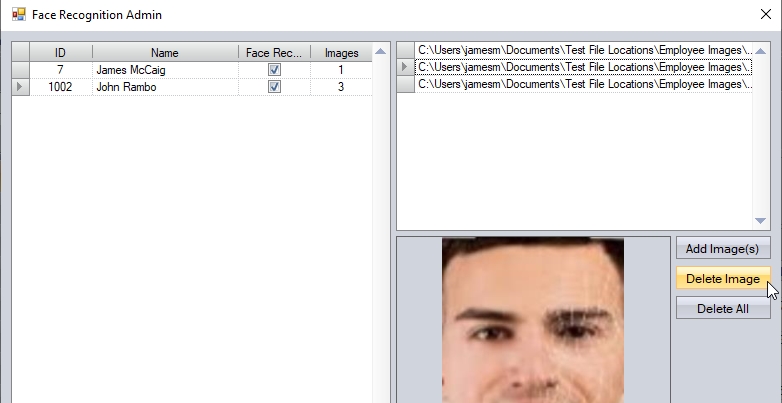
(Before image deletion)
(After image deletion)
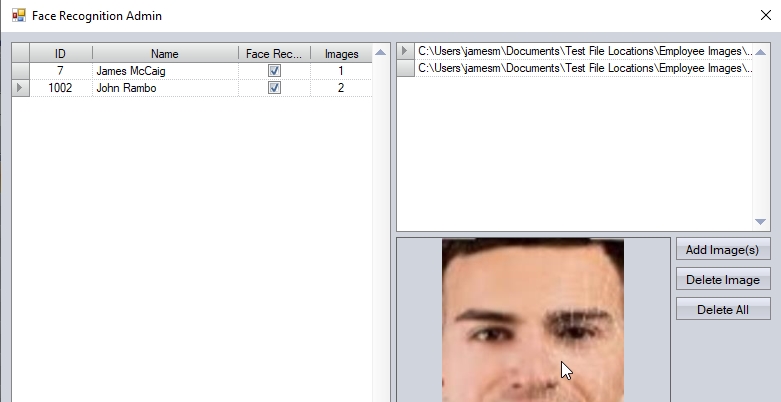
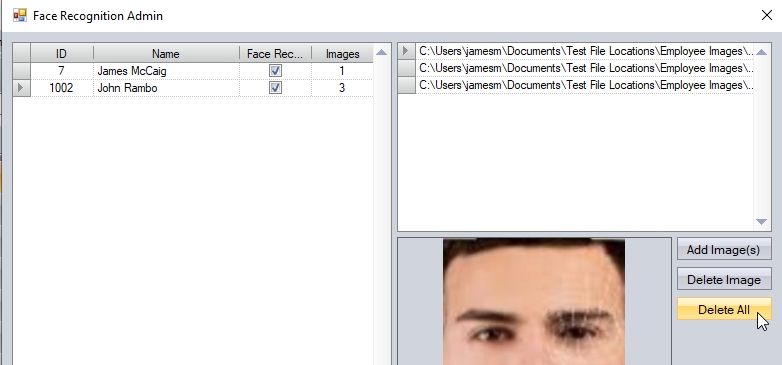
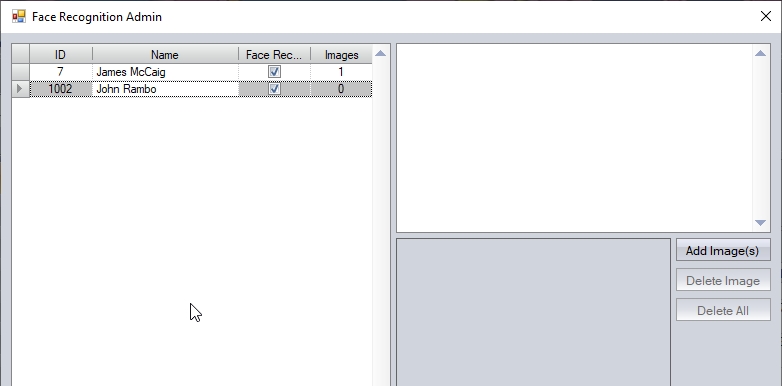
If the user wishes to delete all the images against an employee, they can do so by highlighting the employee and clicking the DELETE ALL option. This will remove all stored images from the employee and update the details accordingly.
(Before deletion)
(After deletion)
Uploading Images
Once the user has captured the images against the employee(s), they need to be uploaded for use. This can be done using the UPLOAD ALL option on the main screen.
![]()
Clicking this option will upload all new images against employees to the facial recognition software.
Training the Face Recognition Process
Once the user has uploaded employee images, they need to process these so they work with the face recognition process. The user can do this using the TRAIN option on the main screen.
![]()
Clicking this option will present the user with the following information.
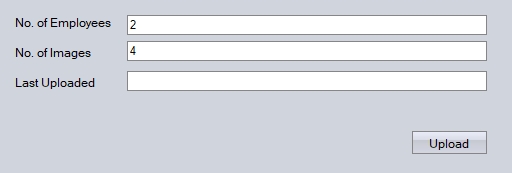
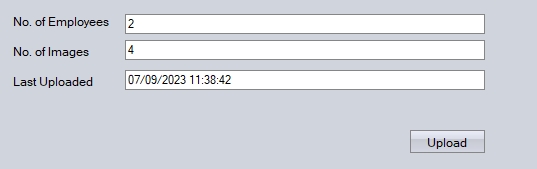
This screen shows the user the number of face recognition employees currently set up, the total number of images imported and the date/time of the last upload. The first time this is done, the Last Uploaded field will be blank. Clicking the UPLOAD option will upload the employee images to the face recognition functionality for use in identifying the employee. Once complete, the screen will be updated to reflect the last UPLOAD date/time.
Once complete, the user can return to the main Face Admin screen by clicking the CLOSE option.
Once all users have been configured, and their images uploaded, they will now be able to use the face recognition process for clocking in.
Starting the Face Recognition/Clocking Client
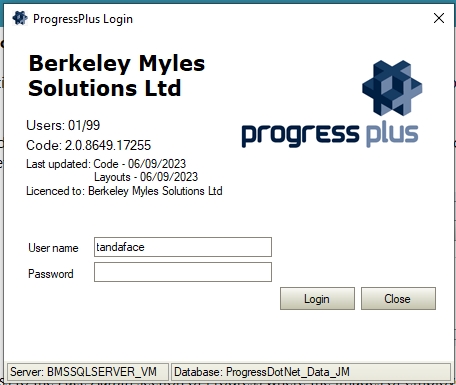
The face recognition clocking client can be initiated by logging into Progress as "TANDAFACE" (no password). This login is only valid if the face recognition functionality has been activated by Progress Plus.
If the face recognition clocking client is different to the client used to set up the employees, or if its the first time the client is logged into, the user will be prompted to select the camera device and settings.

The user now will eventually be presented with the face recognition clocking screen. This is the main screen used by the employees to clock in/out.
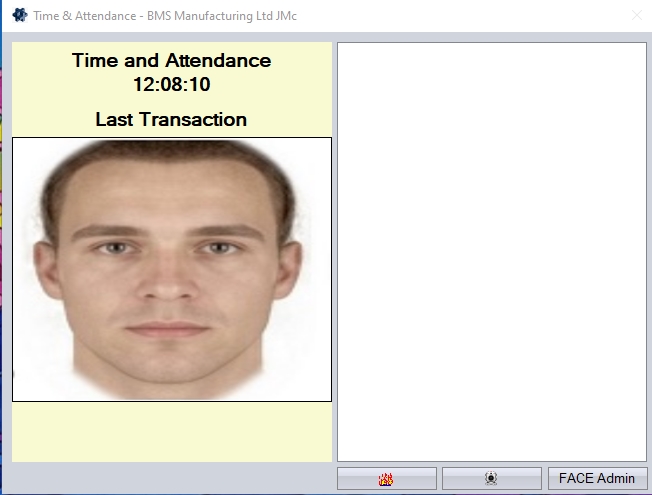
The user can clock in/out of the system by standing in front of the camera device and clicking the camera icon at the bottom of the screen.
![]()
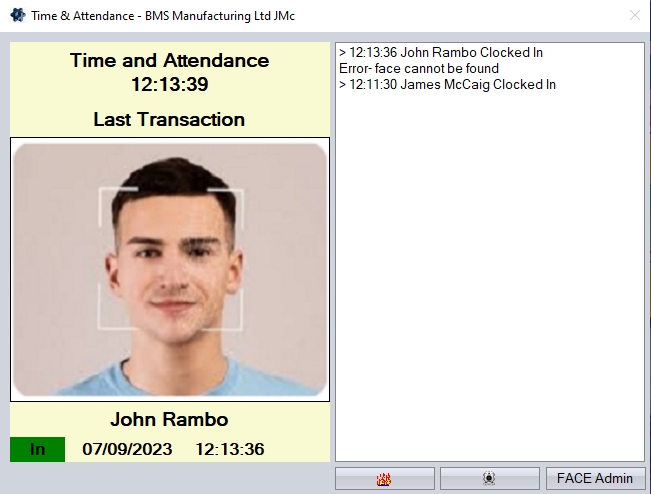
When clicked, the system will process the camera image against the employee saved images to identify the employee. If successful, the employee will be clocked in/out as required.
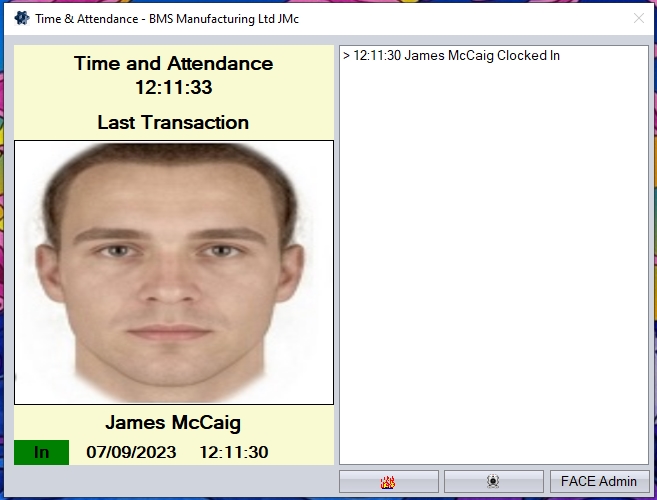
(Successful clock in via face recognition)
If the employee is not valid for facial recognition, or if no images have been uploaded for verification, the system will highlight this on screen.
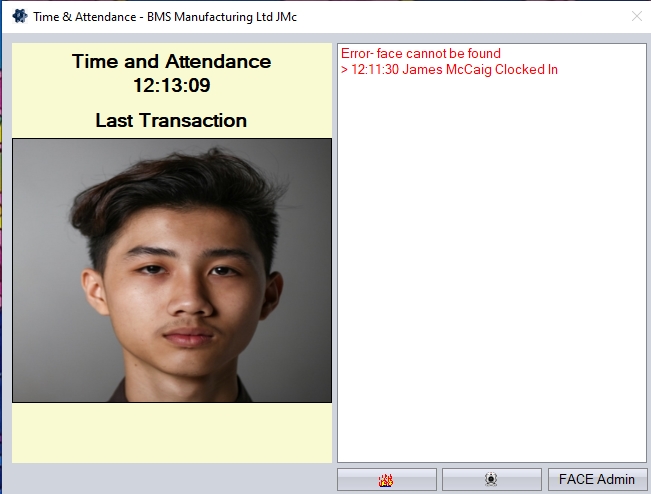
(Unsuccessful clock in via face recognition)
Once the system detects a valid employee via the camera device, it will proceed to clock them in/out as required.
(Successful clock in via face recognition)
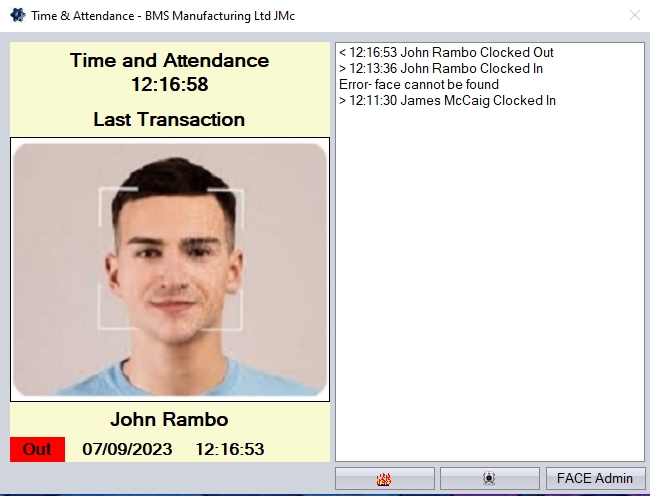
(Successful clock out via face recognition)