Whether the user is creating a part number from an enquiry or via the Inventory > Parts List screen, the following screen will be displayed.
NOTE: The part number is the unique identifier of a part in Progress, and cannot be edited once it has been saved. If a part is created in error, the part should have its status marked as OBSOLETE (or a similar obsolete-type status) and a new unique part number created.
Part Details
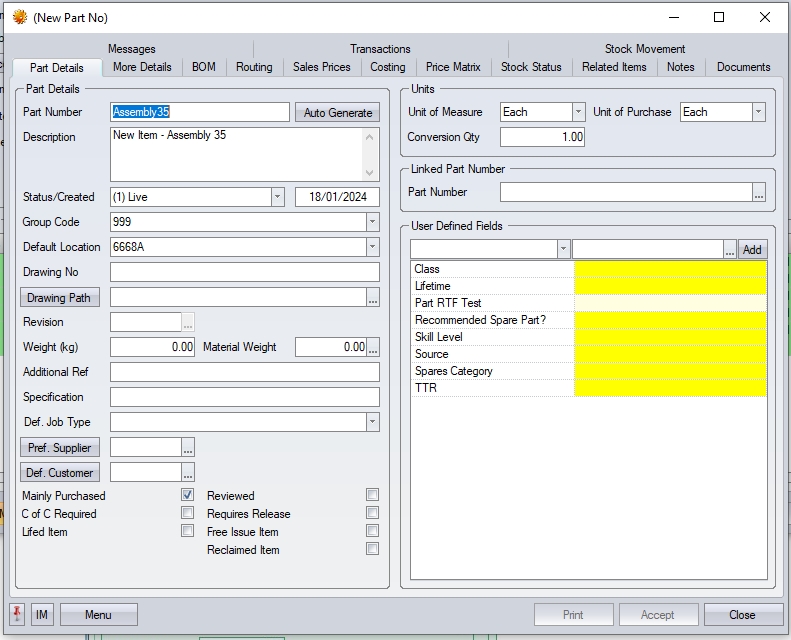
Not all fields displayed on this form are essential for the part to be created/enquiry to continue. The key fields that require information are as follows:
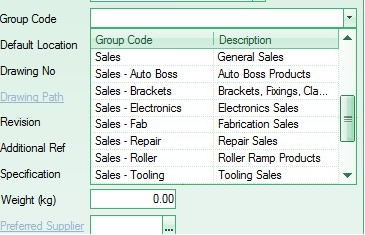
| Group Code | The user can select a Group Code from the drop-down list. This field is mandatory. New Group Codes must be entered into the Maintenance > List Maintenance > Group Codes section before they can be selected against a part. |
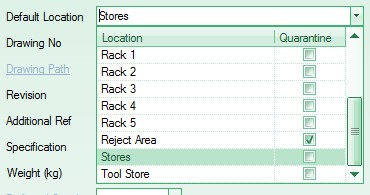
| Default Location | This option relates to the stock location where this part is normally stored. If a default stock location is set up, this will be assigned, however the user can select any stock location from the drop-down list. New locations must be entered into the Maintenance > List Maintenance > Inventory Stock Locations section before they can be selected against a part. |
| Mainly Purchased | This flag indicates whether the part is bought from a supplier (option ticked) or not (option unticked). For manufactured parts, this should be left unticked. |
| UOM | This option relates to the unit of measure that the part is stocked in. If a default UOM is set up, this will be assigned, however the user can select any UOM from the drop-down list. New units of measure must be entered into the Maintenance > List Maintenance > Units of Measure section before they can be selected against a part. For manufactured parts this is normally Each or Ea. |
| UOP | This option relates to the unit of purchase that the part is bought in. If a default UOP is set up, this will be assigned, however the user can select any UOP from the drop-down list. New units of purchase must be entered into the Maintenance > List Maintenance > Units of Measure section before they can be selected against a part. For manufactured parts this is normally Each or Ea. |
| Conversion Qty | This field is the UOM to UOP conversion factor i.e. how many of the Unit Of Measure (UOM) are in the Unit Of Purchase (UOP). This field will default to 1.00 as the most commonly used UOM / UOP for manufactured items is Each / Each though the user can amend this. |
| If the item being created is a part that is to be purchased (i.e. ticked as Mainly Purchased on the Part Details form) then the user may have to change the CONVERSION QTY value e.g. |
| A bolt is bought in a box of 20 from a supplier UOP = Box |
| The bolt is sold on or used in individually basis UOM = Each |
| The Conversion Qty = 20 so there are 20 bolts in a box |
The other fields are not essential but may be completed if required. To proceed further, the user will have to save the part number at this stage. Clicking ACCEPT will save the part in Progress.
More Details
There are no fields contained in the More Details tab that are essential when entering a new enquiry. The information on this form relates to a number of different areas such as maintaining stock levels, re order quantities, alternative part numbers, lead times and nominal information.
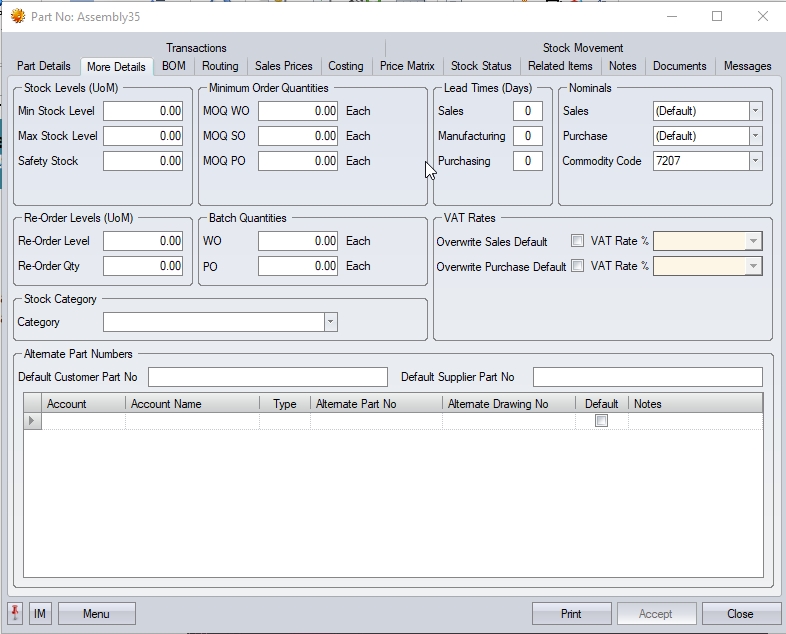
| Lead Times | This section allows the user to set various lead times associated with the part. These values are recorded in full days and represents the the number of complete days it takes. These figures are used in the system when calculating dates for items such as POs (Purchasing lead time), WOs (Manufacturing lead time) and SOs (Sales lead time). If the system is configured to consider weekends as "working days", then these numbers will include these days (i.e. 1 week = 7 days). If not, then the values entered will be the number of working days (i.e. 1 week = 5 days). |
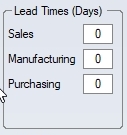
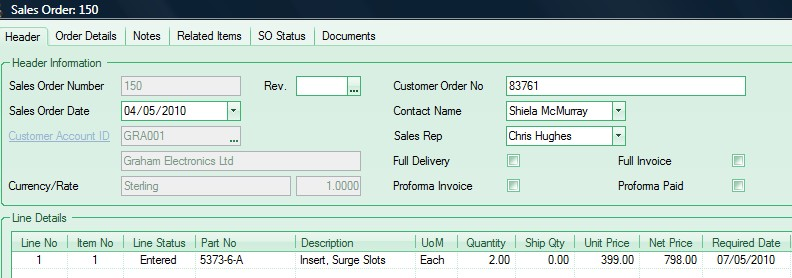
| The SALES lead time is the number of days to despatch this item to a customer. If a lead time is entered into this field, the system will use this information when entering a sales order and automatically add it onto to today’s date to give a minimum sales order required date (i.e. the earliest date you can commit to). |
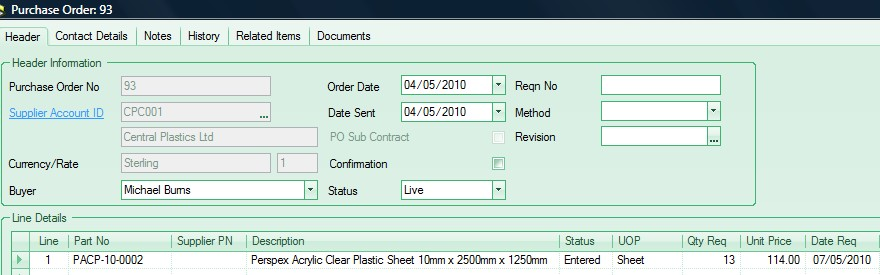
| The PURCHASING lead time is the number of days required to buy and recive an item from a supplier. If a lead time is entered into this field the system will use this information when entering a purchase order and automatically add it onto to today’s date to give a minimum purchase order required date (i.e the earliest you can receive it). |
| e.g. Purchasing Lead Time = 3 days. If a purchase order is entered for this part and the date is 4th May the Date Req on the Purchase Order would default to the 7th May. |
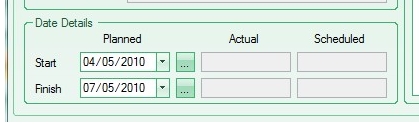
| The MANUFACTURING lead time is the number of days to manufacture this item. If a lead time is entered into this field the system will use this information when creating works orders and automatically subtract it from the Works Order Planned Finish Date to give a Works Order Planned Start Date (though this can be amended by the user). |
| e.g. Manufacturing Lead Time = 3 days. If a works order is entered for this part and the required finish date is 7th May the Works Order Planned Start Date would default to the 4th May. |
Again, the user can complete any other part details on this screen if they are known, but none of them are mandatory.
The user can now proceed (if required) to the BOM (Bill Of Materials) tab of the part to enter details of the components required for the manufacture of the finished part.