The bill of materials (BOM) is a list of the component parts required to make the part. This can consist of either/both sub-assembly items (i.e. lower level assemblies which have their own BOM and routing) and also purchased parts (i.e. raw material from suppliers). This screen is where the user specifies the parts required, and their quantities.
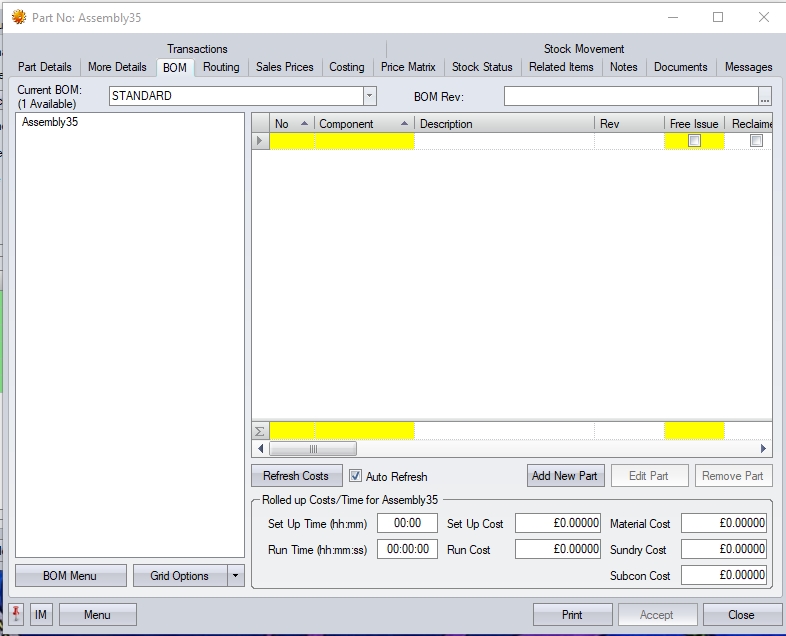
On clicking the BOM tab a form similar to the following will be displayed. The user can then choose to select existing components via the search facility to be added onto the bill of materials or alternatively enter a new item.
Adding an Existing Item to a BOM
In the COMPONENT field, the user can type in the part number of the material required, or use the Inventory Search look-up facility to search for the required part number.
![]()
The user can type as much of the part number or description as is known to narrow down the search criteria. Clicking on the look-up box will display the Inventory Search screen, filtered based on what the user has entered. If the user has entered no search details, they will be presented with a full list of parts that exist in Progress to select from.
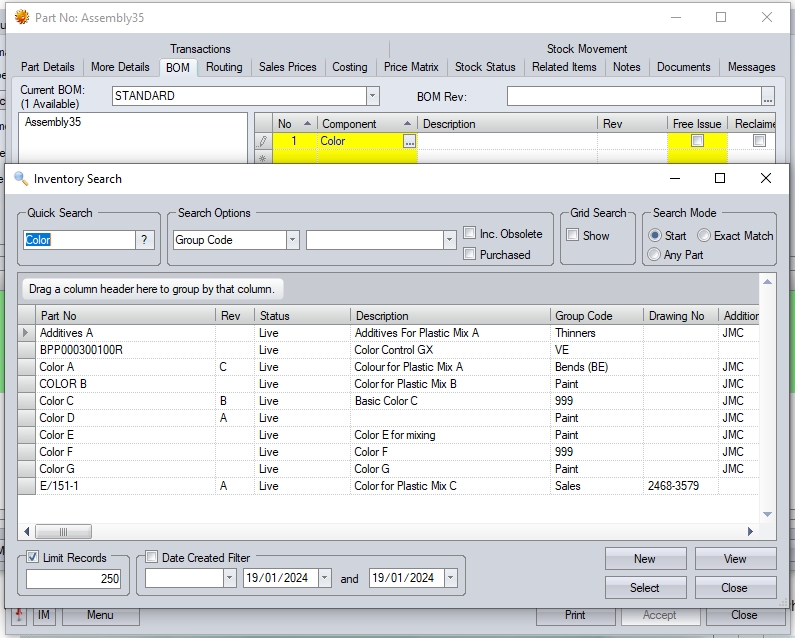
The user can then click on the required item and press the SELECT button to add it onto the current BOM, or change the search criteria in the QUICK SEARCH field to find a different item.
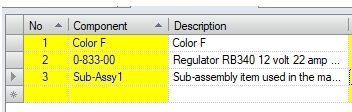
After selecting the required part, the user must specify the quantity of this part required to produce 1 unit of the manufactured part. This is the BOM quantity and should be recorded in the QTY field. The No field is the BOM sequence number. This is a sequential number that will be incremented with each part added to the BOM. The user can amend this if preferred to something more suitable.
When the user selects a purchased part (i.e. Mainly Purchased (MP) = "True") to be added to the BOM, Progress will populate the part's UOM and costs based on the part's associated costs. The UNIT column will be the cost per the the selected part's UOM and will be based on the costs of the part (i.e. purchasing cost, supplier price matrix, etc.). The FULL value is calculated based on the UNIT value and the BOM quantity specified. If the part's cost is based on a supplier price matrix, this will be indicated in the MATRIX PRICE column.

If the user selects a sub-assembly part for the BOM (i.e. Mainly Purchased (MP) = "False"), then the UNIT and FULL values will be zero, however, any associated labour costs for the part will be shown in the SET and RUN columns, and will represent the total setup cost and run cost based on the sub-assembly part's labour costs and the BOM quantity entered.

In addition to this, the user also has some additional options for the BOM items that can be used.
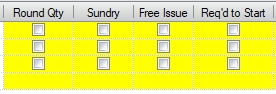
The ROUND QTY option allows the user to round the part's cost up to the part's UOP value. For example, the finished product requires a small quantity of an expensive material e.g. 50mm, but the material is only available in 2m lengths, so a full length of material would need to be purchased to get just what they need. For this scenario, the user would enter a quantity of 50mm into the BOM via the QTY field and tick the ROUND QTY option. This will cost the component part based on purchasing the full length of material. The system can now quote the customer based on the full cost for the material (plus any mark-ups) but would state on works orders / job cards only to use 50mm. Any remaining stock of the purchased part would simply go to stock.
The SUNDRY option allows the user to set a "one-off" quantity/cost for a part on the BOM. Ticking this option will take the BOM quantity entered as a fixed quantity regardless of how many finished units are to be made. For example, ten finished units fit in a single box, so you can add the "box" to the BOM, mark it as a SUNDRY item, and set the BOM quantity to 1. When a work order is raised, the total quantity required of the SUNDRY item(s) will just be the BOM quantity and will not be multiplied by the WO quantity.
The FREE ISSUE option allows the user to specify whether the part will be supplied by the customer. Ticking the FREE ISSUE option will not consider the part as having a requirement as the assumption is the customer will supply it. These parts will not be included in the part's demand. If the part marked as FREE ISSUE is a sub-assembly part, then no lower level BOM items will have a requirement either.
The REQD TO START option indicates the selected BOM part must be issued to the job before work can commence. Ticking this option indicates the component part, regardless of whether its a manufactured sub-assembly, free issued by the customer or a purchased part, is required before any work can start on the job.
The user also has a BOM NOTES field that can be used for specific part-related notes that may be useful come assembly.
Adding a New Item to a BOM
If the component part required for the BOM doesn't already exist in Progress, the user can create it from the BOM tab by clicking on the ADD NEW PART option. This will create a new part number in Progress and add it to their BOM once they have created it.
Clicking on the ADD NEW PART option will open a new, blank part record for the user to complete.
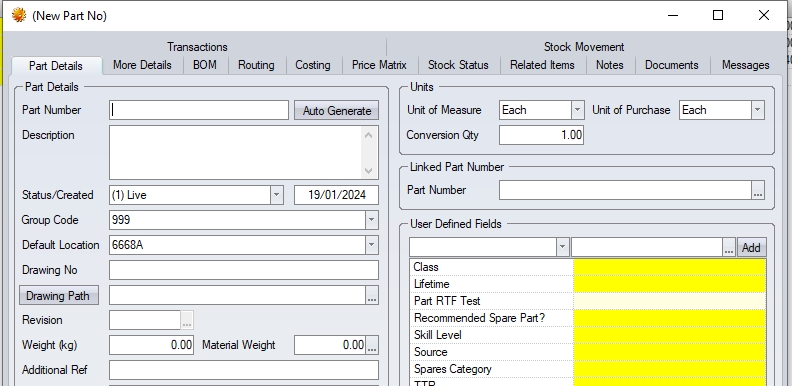
As mentioned in the previous section, Entering Part Details, not all fields on this form are essential for a new inventory item to be created, however, the fields below should be considered the minimum required.
Part Number
Description
Group Code
Mainly Purchased
UOM (Unit of Measure)
UOP (Unit of Purchase)
Conversion Qty
If the part is a purchased item, and the associated cost is known, this should be added to the part's PURCHASING COST field under the Costing tab. Alternatively, if the supplier has provided a pricing structure/price breaks based on quantity ordered, this should be set up in the part's supplier price matrix, which can be found in the Price Matrix tab.
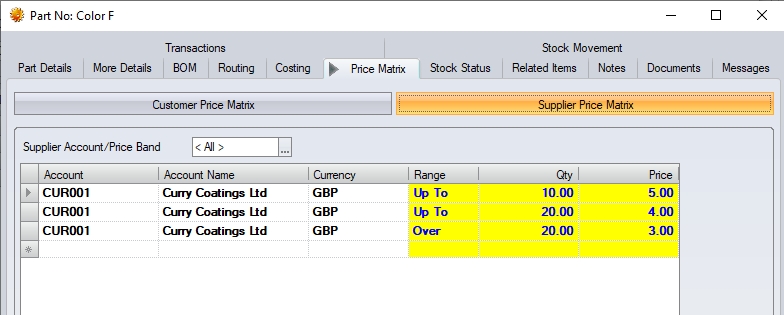
(Example supplier price matrix)
Once the new part is set up with its details, the user can click ACCEPT to save the part into Progress, where it will then be available to add to the assembly BOM. For any additional new parts, the user will repeat the above process until all parts have been created and added to the assembly BOM.
Once the user has completed the BOM details, they will have a screen similar to the following.

The user can now move onto the Routing tab of the part to specify how they turn the BOM items into the finished assembly.