This section allows the recording of tooling, including any calibration set up and the issue for and return from production's use. The main screen shows all tooling and equipment recorded in Progress, along with details of its last and next calibration (if applicable) and their issue status. The main Tooling & Equipment screen is where all tooling is recorded and where they can be accessed by the users.
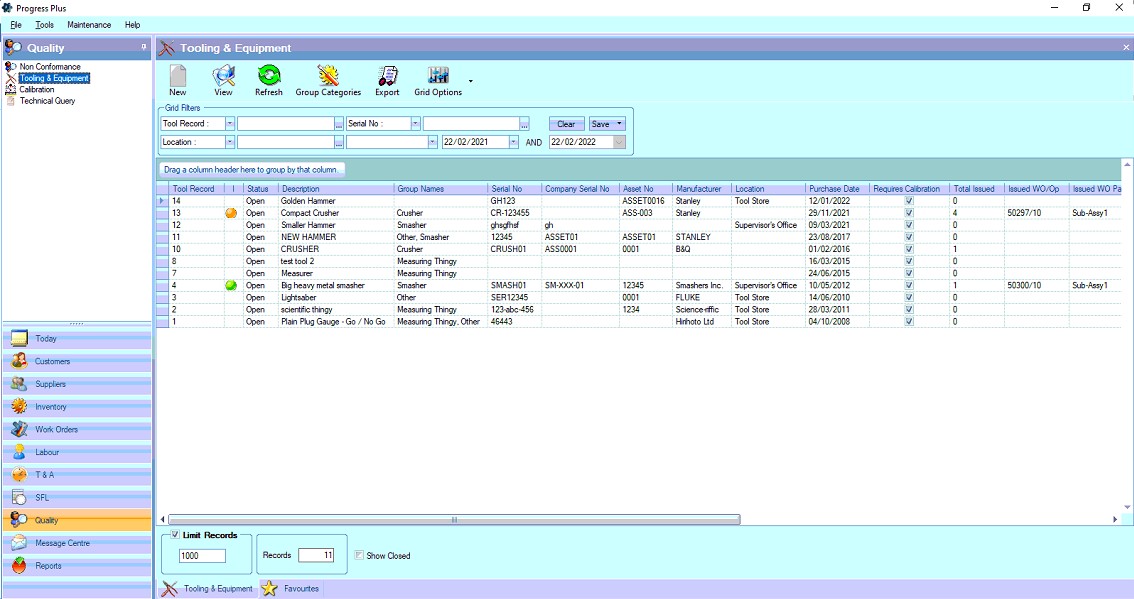
If the system is configured to use color coding for the tooling/equipment statuses, then this will be visible here. The screen shot below shows an example of this. For more information on the statuses and setting the colour coding, please refer to the List Maintenance section of the manual
From this screen, the user has the ability to add (New), view and edit (View) all tooling records as required, as well as assign the tooling to groups (Group Categories).
Like most sections within Progress, the user has Grid Filters at the top of the screen which they can use to find the information they are looking for, including filters for associated dates too, current issue status and any calibration status.

Setting any filters requires the user to click REFRESH to apply them. The screen will then update to show all tooling which match the filter criteria. The user also has an option to show/hide obsolete/inactive tooling. By default, these do not appear in the list, but can be included by ticking the SHOW CLOSED option at the bottom of the screen. This will ensure any inactive tooling items are also included in any on-screen results.
![]()
Group Categories
Tooling items can be grouped together, and can be part of multiple groups. This allows the user to create sets of tooling that can be assigned to production activities if more than one item can be used.
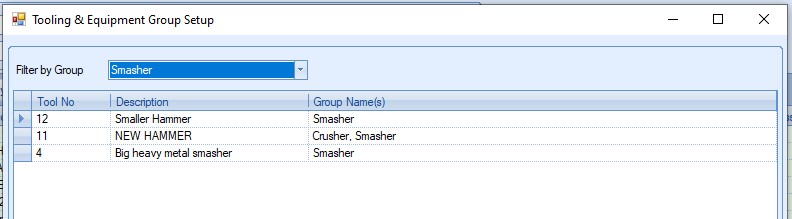
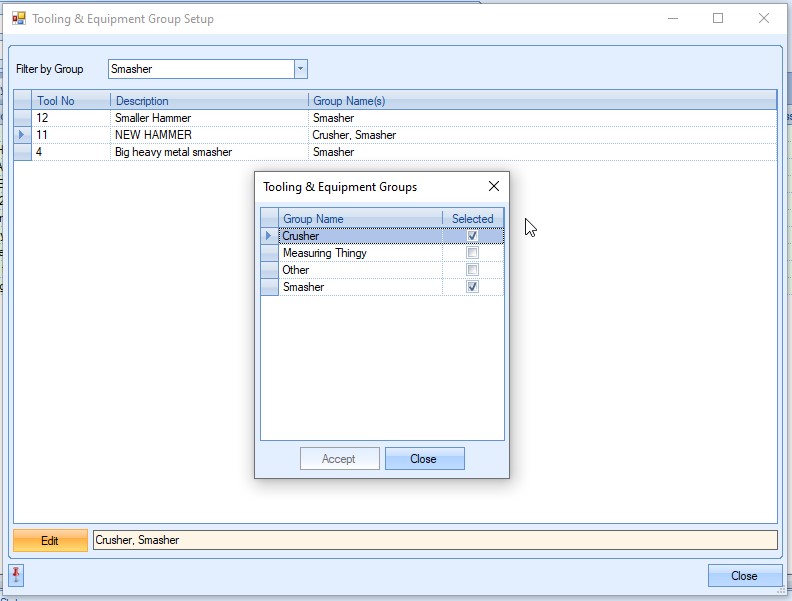
Once the tool has been added to Progress, the user can assign the tool to groups using the Group Categories option. Clicking this option presents the user with the following screen.
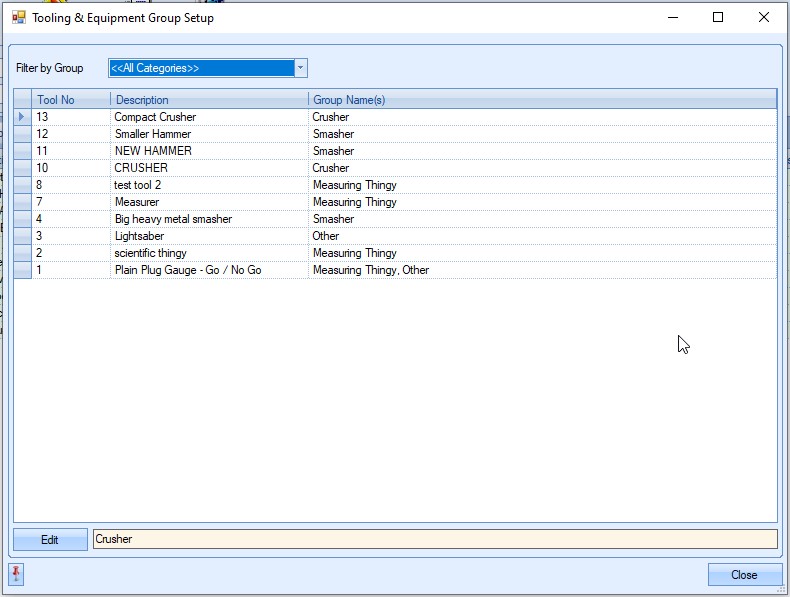
By default, the screen opens showing all the tools for all groups, indicated by the <<All Categories>> option set in the drop-down list, however, the user can select any existing group to find the item they are looking for by selecting from the list.
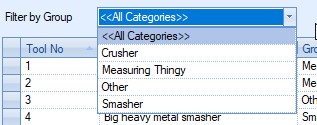
Once selected, the screen will refresh to show all tooling records for the selected group.

Once the user has identified the tool they are looking for, they can edit the tools group(s) by highlighting the tool and clicking the EDIT option. This presents the user with a list of groups for that tooling.
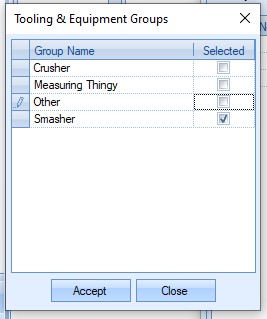
From here, the user can edit the groups associated with the selected tool by ticking and/or un-ticking the boxes as required. If the tool is a member of multiple groups, the user should tick all groups that apply. Once done, clicking ACCEPT will save the changes. This will return the user to the main Group Categories screen and update the tooling based on the changes made.

The tooling groups can also be edited within the tool record as well. More on this can be found in the New Tooling & Equipment Records section below.
If new tooling groups are required, or if existing tooling needs to be amended, this can be done via the List Maintenance > Tooling & Equipment Groups category.
For more information on adding information to the List Maintenance section, please refer to the relevant section of the manual.
Exporting Tooling Details
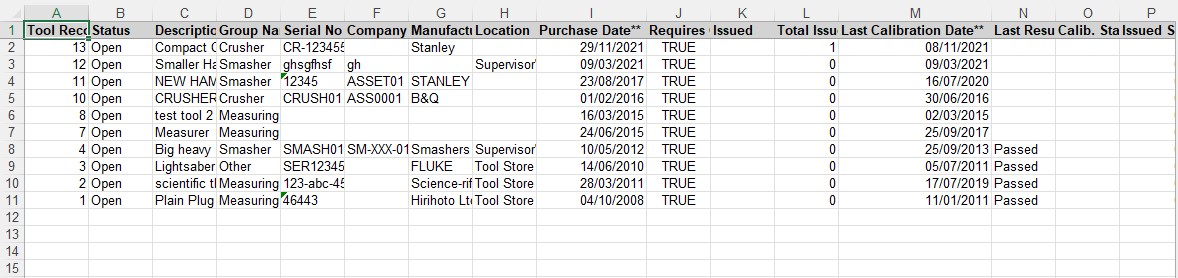
The user also has the ability to export out the tooling detail to a spreadsheet if required. This can be done using the Export option at the top of the main screen.

The EXPORT option will generate a spreadsheet of all the information displayed in the main Tooling & Equipment screen. If filters have been applied to this screen, then the filtered information will be exported. Once the user specifies a file name, the spreadsheet will be created and opened for the user to view. An example spreadsheet is shown below.
New Tooling & Equipment Records
The user can create new Tooling & Equipment (T&E) records by clicking on the NEW option at the top of the screen. This presents the user with a blank T&E window as shown below.
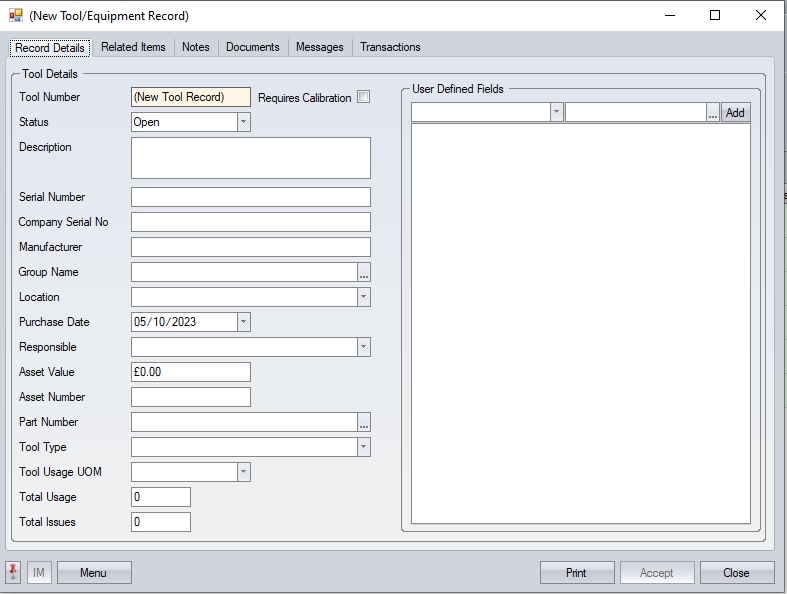
The Record Details tab contains most of the item's information, with any user-defined fields set up shown on the right hand side.
Tool Number This is a unique number assigned by the system when the user clicks ACCEPT.
| Status | This is the items current status. by default, Progress provides an open and closed status, but additional statuses can be added for use via the List Maintenance section of Progress, in the Tooling & Equipment Statuses category. |
| Description | This is the text description of the item. |
| Serial Number | This is the item's serial number. |
| Company Serial No | This is the company's serial number. |
| Manufacturer | This field allows the user to record the manufacturer of the item. |
| Group Name | This allows the user to add the item to an existing group of toolings/equipment. NOTE: An item can only be assigned to a group once its been added to the system, so this should be done after the item has been assigned a Tool Number. The list of groups is maintained in the List Maintenance section, under the Tooling & Equipment Groups category. |
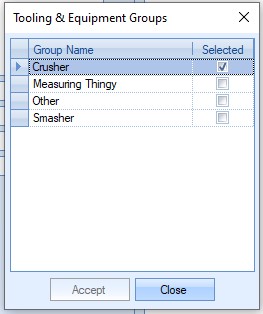
An item can be assigned to multiple groups. The user simply ticks all the groups the tool is associated with before clicking ACCEPT to add the item to the group(s). This is the same as clicking the Group Categories option at the top of the main Browse screen.
This option allows the user to view the tooling associated with the different categories as well as amend the groupings for the selected tool.

The drop-down list allows the user to select a specific category of tooling while the EDIT option allows the user to amend the group categories for the selected tooling.
Selecting a specific tool and clicking EDIT will present the user with a list of tooling groups that the tool can be a member of. From here the user can add or remove groups as required.
One finished, the user can click ACCEPT to save any changes made.
| Location | This allows the user to assign the item to a specific tooling location. The drop-down list of locations is maintained in the List Maintenance section, under the Tooling & Equipment Locations category. |
| Purchase Date | This allows the user to specify when the item was purchased. |
| Responsible | This allows the user to specify an employee who is responsible for this item. |
| Asset Value | This allows the user to enter a value for the item. |
| Asset Number | This allows the user to record an internal asset number for the item. |
| Part Number | If the item has been set up with a Progress part number, this can be selected in this field. |
| Tool Type | This allows the user to assign a tool type from the drop-down list. The drop-down list of locations is maintained in the List Maintenance section, under the Calibration Tool Types category. |
| Tool Usage UOM | This allows the user to set the unit of measure used for the tool usage (i.e. hours, per unit, etc.) The drop-down list of locations is maintained in the List Maintenance section, under the Tooling & Equipment Usage UOM category. |
| Total Usage | This shows the user the total number of "uses" of the tool (i.e. the number of time its been used while issued) based on the usage recorded against the return of the tool from Production. Once the tool has been created, this field will start to reflect any recorded usage, in total but also since last calibration. This is simply the total usage recorded since the date of the last calibration. |
![]()
| Total Issues | This shows the user the total number of issues made of this item to production for use (i.e. how many times the tool has been issued for use). Once the tool has been created, this field will start to reflect any recorded usage, in total but also since last calibration. This is simply the number of issues made since the date of the last calibration. |
![]()
| Requires Calibration | This option indicates whether the item requires periodic calibration. Once the item is assigned a tool number, the system will display an additional Calibration tab in the tool record which allows the user to set up the calibration details of the item. |
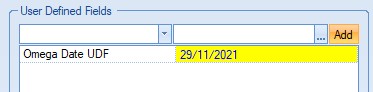
| User Defined Fields | If any user defined fields (UDFs) have been set up in Progress for use against the tooling items, these will be available for completion in the grid on the right hand side. |
Once all the details have been added, the user can click ACCEPT to save the item and assign it a Tool Number.
Calibration Set Up
Where an item requires periodic calibration, the user can set up the period and calibration details in the Calibration tab of the tool record. This tab appears once the tool has been created and assigned a tool number and the tool itself is marked as Requires Calibration.
The initial Calibration tab is shown below. The user can enter the details and specify the calibration period here, along with the calibration test details, which are used to record the results when a calibration is carried out.
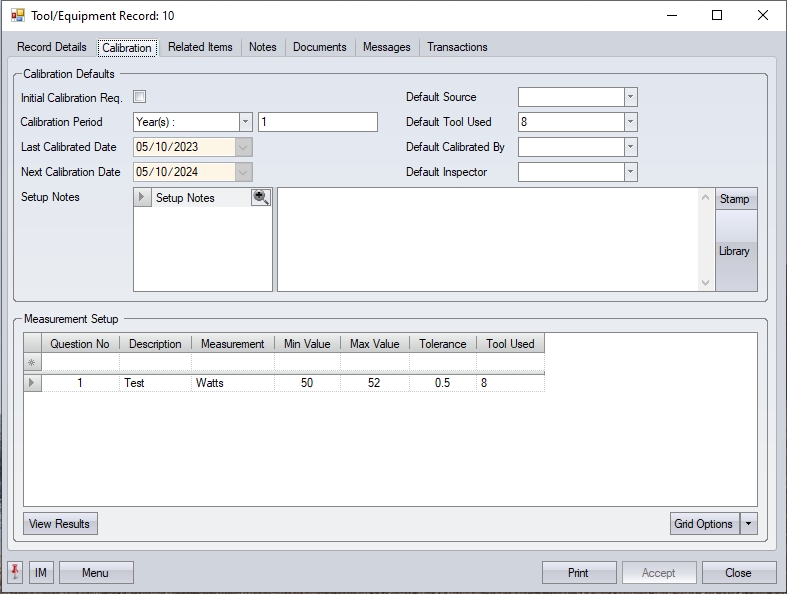
| Initial Calibration Req. | When new calibrated T&E records are created, the assumption is that the tool is ready for use, but often the tool will require calibration before it can be used. This option allows the user to record the tool in the system, but mark it as requiring an initial calibration. With this option ticked, the tool will not be available for use until the initial calibration is carried out. |
| Once a successful calibration has been carried out, this option will be unticked automatically, the LAST and NEXT calibration dates will be calculated accordingly based on the tool's calibration date and period, and the tool will become available for use/issue. |
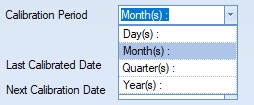
| Calibration Period | The user can set the period of calibration using these fields. The drop-down list allows the user to specify the time frame (i.e. days, month, etc.) with the second field being the numerical value. |
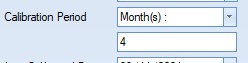
| This information is used to calculate the next calibration date of the item. |
| Last Calibrated Date | This allows the user to specify when the last calibration was done. This can only be set if the tool is set up as a calibrated item and no test results exist. |
| Next Calibration Date | This is the date of the next calibration, based on the last calibration date and the specified calibration period. |
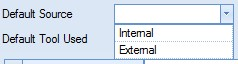
| Default Source | This field allows the user to specify the default calibration source. The user can specify the source by selecting from the drop-down list. |
| The user can change or add more suitable sources by amending the list of sources available via the List Maintenance > Calibration Sources screen as shown below. |

| For more information on maintaining lists in Progress, please refer to the List Maintenance section of this manual. |
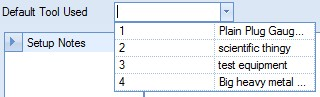
| Default Tool Used | This field allows the user to specify the default calibration tool used. The user can select the default tool from the list of existing tools already in the system. |
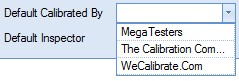
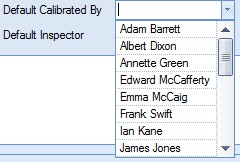
| Default Calibrated By | This field allows the user to specify the default employee or external company who will be carrying out the calibration testing. If the DEFAULT SOURCE field is set to a value which is marked as “Is External” in the List Maintenance screen, the user can choose from a list of external names as the default. |
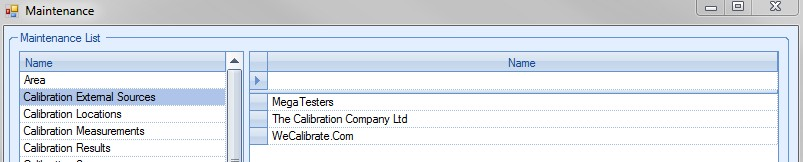
| The user can change or add more suitable external calibration companies by amending the list of sources available via the List Maintenance > Calibration External Sources screen as shown below. |
| If the DEFAULT SOURCE field is set to a value which is not marked as “Is External” in the List Maintenance screen, the user can choose an employee from the drop-down list. |
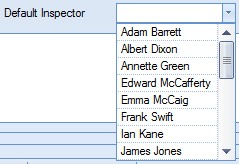
| Default Inspector | This field allows the user to specify the default inspector for the calibrated tool. The user can select an employee from the drop-down list. |
| Setup Notes | This field allows the user to specify any additional set up notes that are needed. |

| The user also has the option of adding notes from the Notes Library using the Library option. |
Measurement Setup This section allows the user to define the tests required for the calibration of the tool.
Question No field allows the user to sequence the tests listed.
Description field allows the user to describe or name the test.
Measurement allows the user to specify the scale of measurement for the test by selecting a scale from the drop-down list.
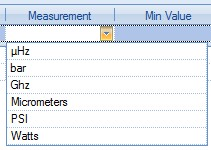
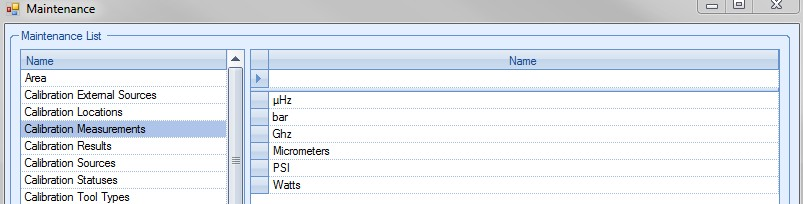
The user can change or add more suitable external calibration measurements by amending the list of sources available via the List Maintenance > Calibration Measurements screen as shown below.
Min. Value field allows the user to specify a lowest value for the calibration result to adhere to.
Max. Value field allows the user to specify a highest value for the calibration result to adhere to.
Tolerance field allows the user to record a tolerance value for the test.
Tool Used allows the user to specify a specific tool to be used for carrying out the test.
Once the user has entered all the calibration set up details, clicking ACCEPT will save the details.
The user can also view existing calibration results from here by clicking the VIEW RESULTS option at the bottom of the screen. This will present the user with the tool's previous calibration results.
![]()

Related Items
This screen shows all the associated information relating to the tool. From here, the user can see outstanding work orders, previous work orders, a list of tool issue transactions and a list of any Technical Queries that the tool has been associated with.
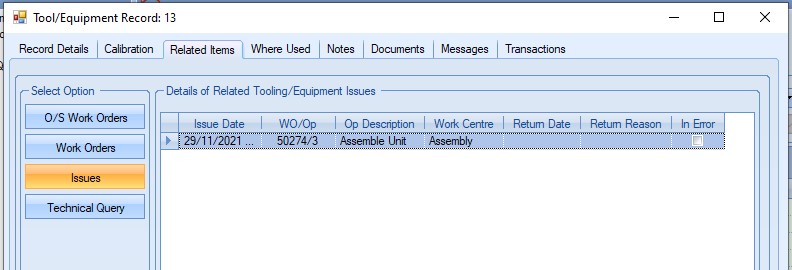
(Tooling Issues)
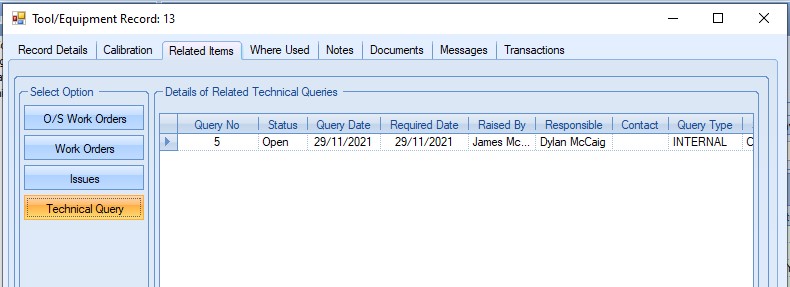
(Technical Queries)
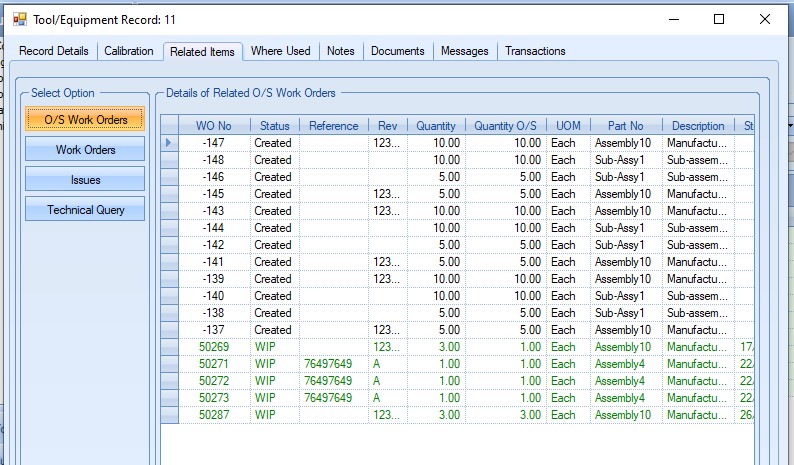
(O/S Work Orders)
Where Used
This tab shows all Progress part numbers that the tooling is associated with. From here the user can link the tooling record with manufactured items which can help identify the tooling required for manufacture.
NOTE: This functionality must be switched on in the Miscellaneous > Quality system options and is only for companies who prefer to link their tooling via a part number.
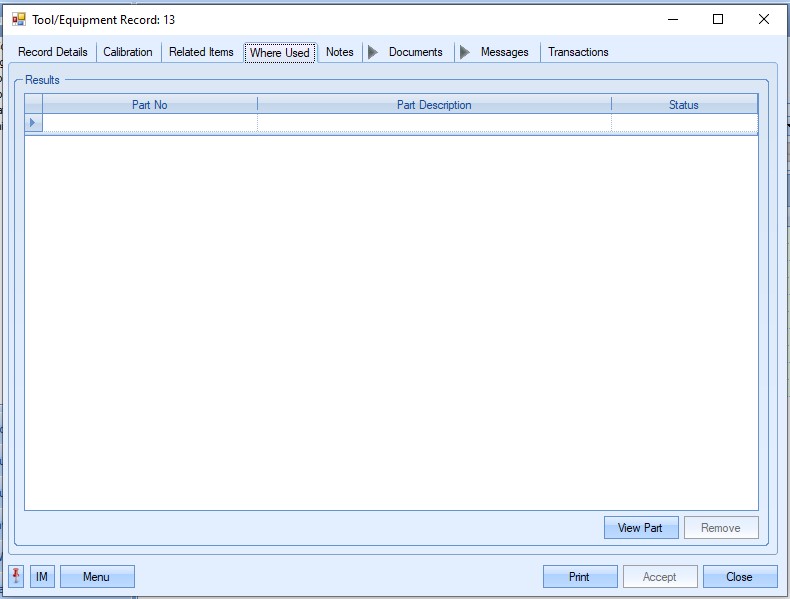
From here the user can select manufactured part numbers that the tooling is used with.
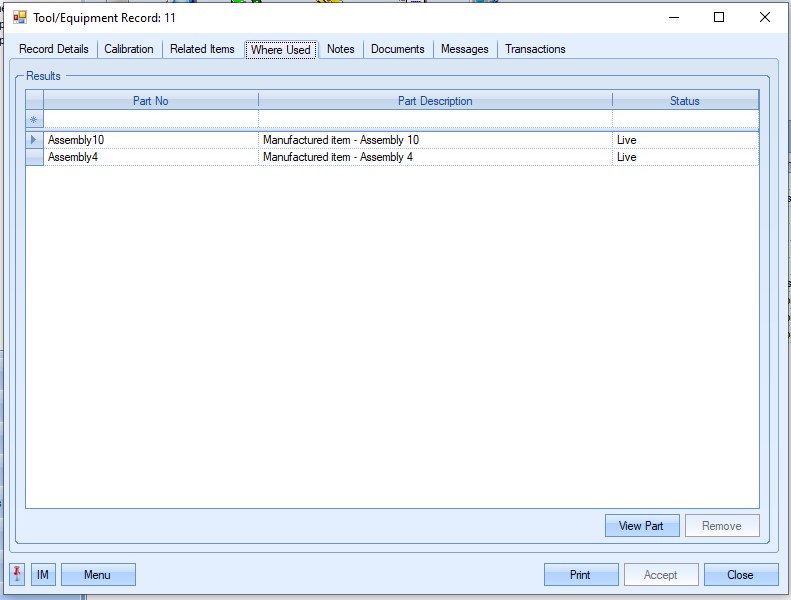
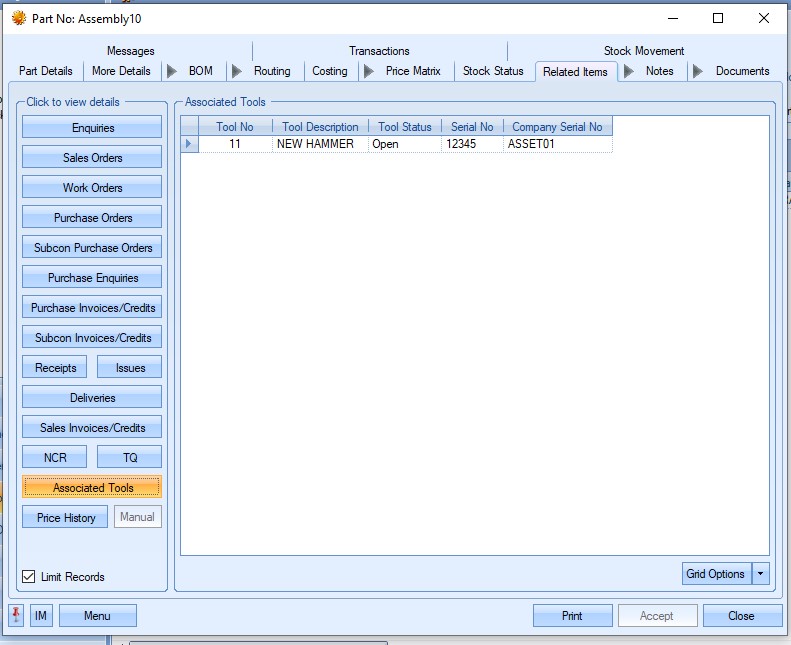
The user can view any part listed against the tool by highlighted the part number and clicking the View Part option. This will open the part record for the user to view. Similarly, from a part number, the user can see any associated tooling linked to the part number via the part's Related Items > Associated Tools.
The user can remove any part listed against the tooling by highlighting the item required and clicking the REMOVE option. This will delete the part from the tool record and refresh the grid.
If any changes have been made, the user can click ACCEPT to update the tool record.
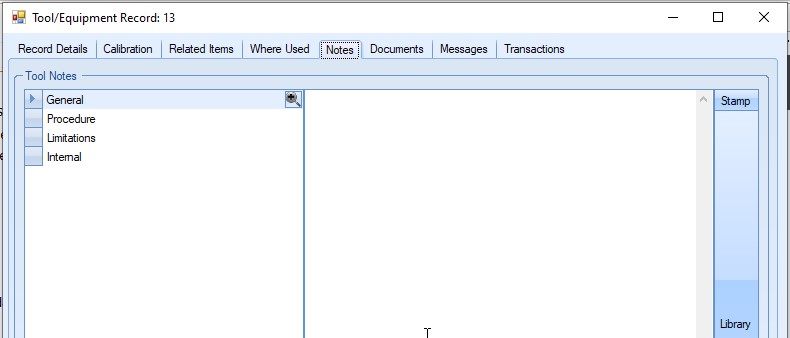
Notes
This screen allows the user to record notes against specific categories for the tool/item.
Once the user has added any notes, they can click ACCEPT to save the changes.
Documents
Like most Documents screens throughout the system, this section allows the user to link documents, folders and web addresses as well as capture images via the device's camera (where possible). Ideally, all linked items should be in a shared location so that other users can access them.
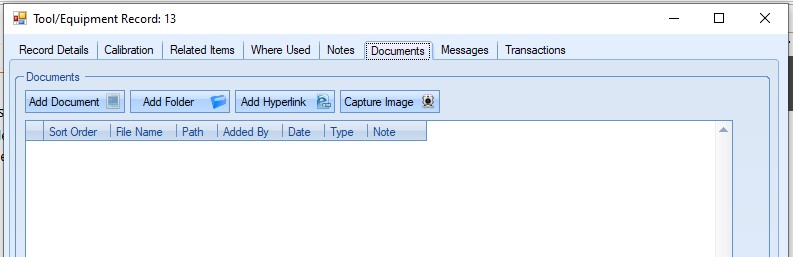
Clicking on any of the options will prompt the user to select a file, folder, enter a hyperlink or capture an image using the device. Once added, all items will be listed in the grid.
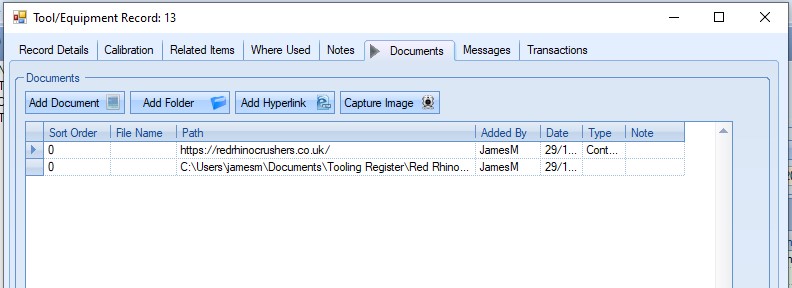
Users can view any attached documents by double-clicking them to open. Attachments can also be removed by highlighting the item and clicking the X option to remove the item.
If any changes are made, clicking ACCEPT will save the changes.
Messages
This screen shows all messages relating to the tool. These messages can be internal messages between employees or emails to external contacts.
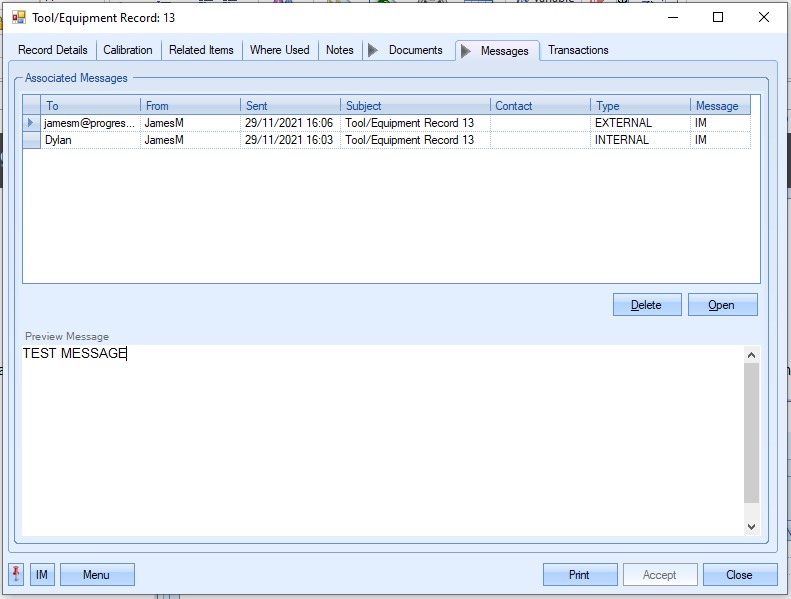
Users can view the messages listed here by double-clicking on them.
Transactions
This screen shows a list of all transactions that have occurred with the tool. This screen is useful for seeing whats happened and by who.
