This option allows the user to carry out stock check tasks against their inventory parts. The ability to view and amend on screen is complimented by the ability to export stock quantities out to Excel, amend and then re-import them. An expansion of the previous export/import process, this retains the ability to do mass updates via the import process but also allows the details to be viewed and amended on screen if using a tablet or other portable device.
Selecting this option presents the user with the following screen.
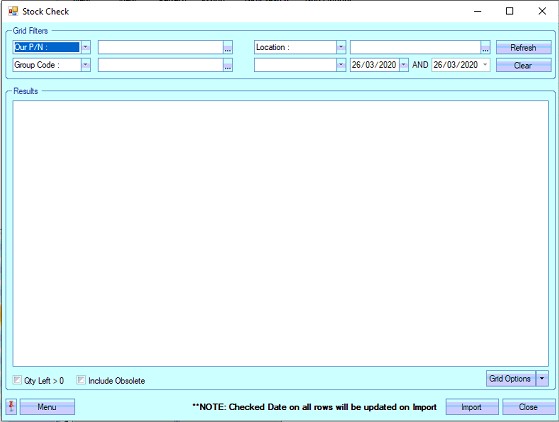
The user has the usual range of filter options at the top of the screen to allow them to isolate specific parts, locations, stock categories, group codes, and dates, amongst other filters.
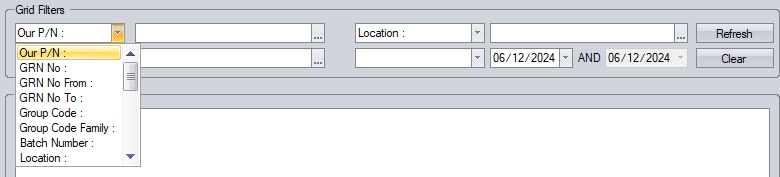
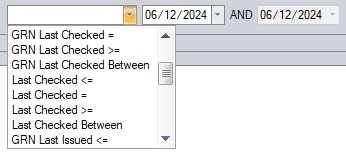
(Examples of filter options)
The user also has options to include obsolete parts and also an option to only show parts which have existing stock quantities.
![]()
If the offcuts functionality is activated in Progress, there are additional filters available isolating HAS LENGTH or HAS AREA stock. These are available just below the grid.
![]()
Selecting either (or both) of these options will display only HAS AREA and/or HAS LENGTH parts in the grid.

(HAS LENGTH filter applied)

(HAS AREA filter applied)
Once the user has selected any filters, or if none are required, pressing the REFRESH option updates the grid with the stock that match the criteria set by the user.
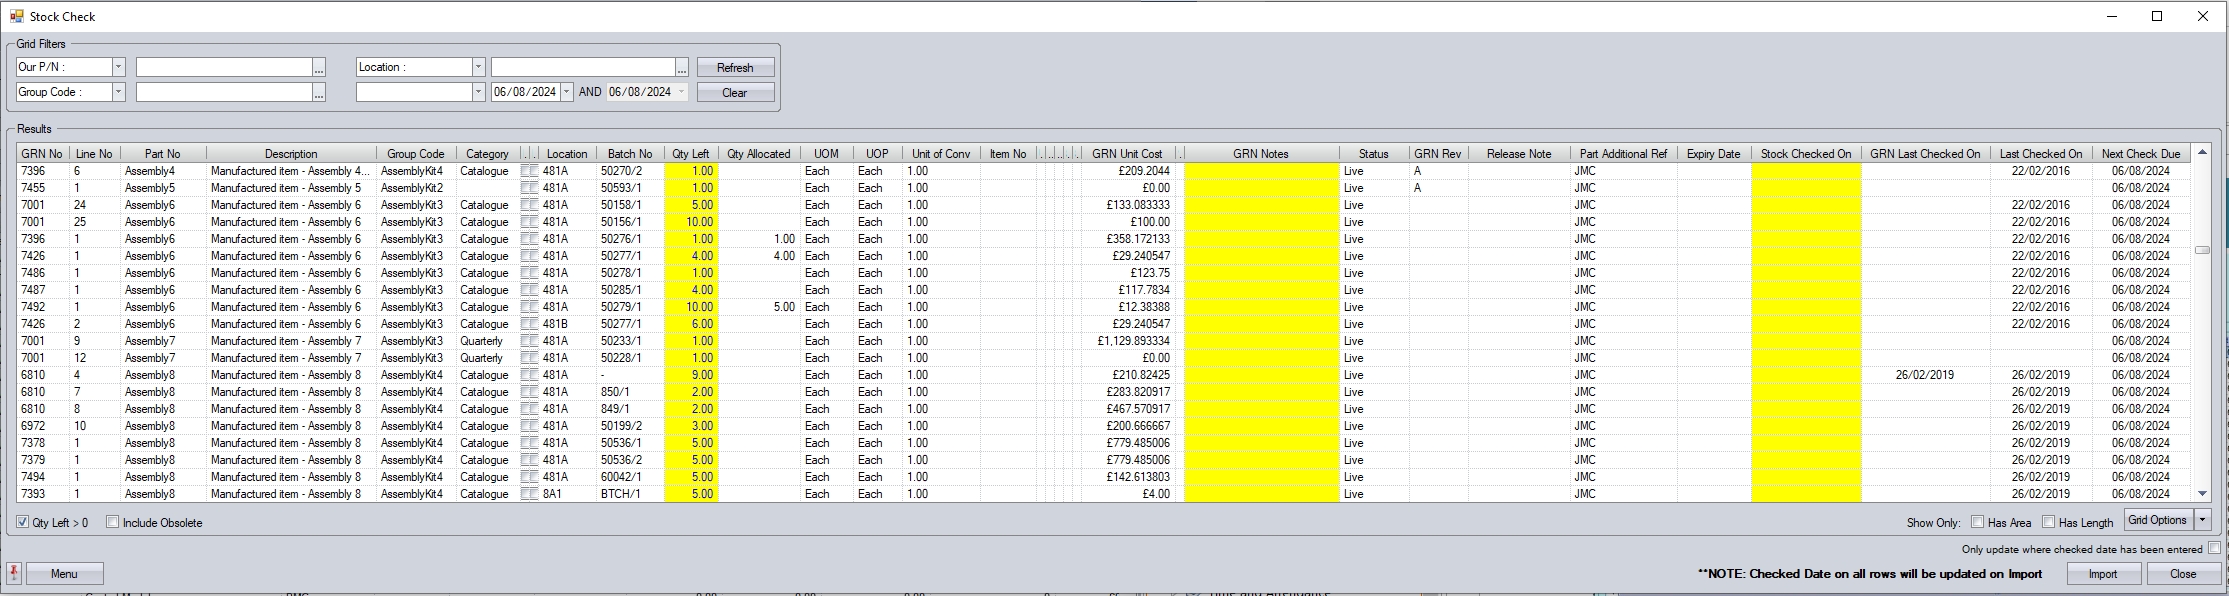
The grid will also highlight any stock allocated to sales orders. This stock is "locked" against the sales order is allocated against.
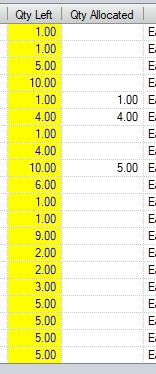
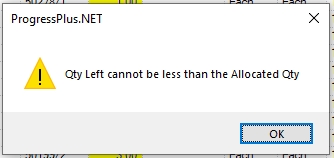
If the user attempts to reduce the stock quantity to less than the quantity allocated, the system will stop them and display a warning.
If the user wishes to amend the stock quantity for these GRNs, the stock allocation against the sales order must be released/reduced accordingly first before the stock can be adjusted.
Applying Changes Directly
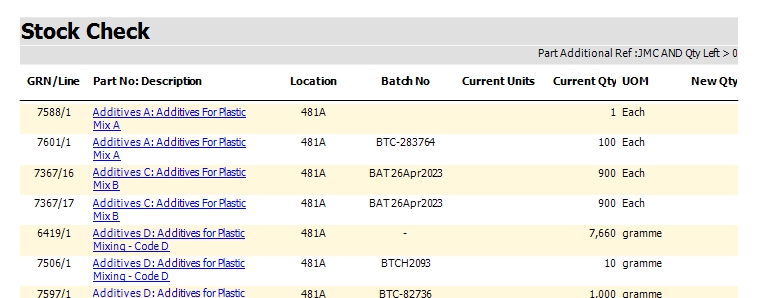
From here, the user can simply amend all the details highlighted in yellow on the screen. This includes the stock location of the batch, the quantity remaining in stock of the batch and also any GRN notes they wish to add.
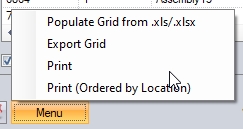
For those who don't have a portable device or tablet, a report can be generated from the screen above that can be given to employees to fill in manually. This report can then be used to update the information on the screen manually. To generate the report, the user should use the Menu option shown below. A sample of the report is also shown below.
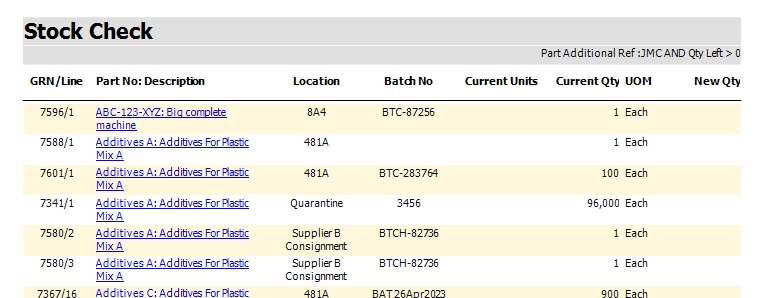
(Print example)
(Print (Ordered By Location) example)
Applying Changes Via Export/Import
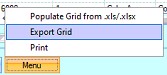
Alternatively, the user can export the on-screen data out to an Excel spreadsheet for offline editing. To do this, the user should select the MENU option shown below.
This option will generate the stock import template file with all the relevant information. This spreadsheet is in a fixed format and requires all columns and column headings to remain as exported to ensure successful import back into the system. The user can now carry out the stock check offline, updating the spreadsheet with any changes. A sample export file is shown below.

(The column headings highlighted in yellow are those which can be edited for import)
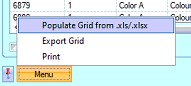
Once the spreadsheet has been amended, the user can reimport the contents using the Menu option shown below.
The user will be prompted to select the stock spreadsheet to be imported. Once selected, Progress will read in the stock information and update the grid accordingly. The user also still has the ability to make further amendments once the data has been imported. If there are any issues reading the stock spreadsheet into the system, suitable error reports will be generated to highlight any errors.
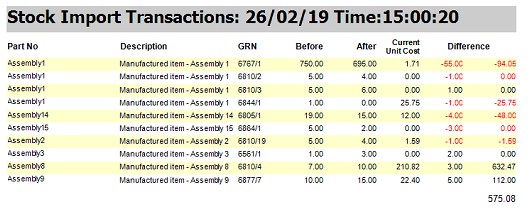
Once the user is happy that all amendments have been made, the updated stock details can be committed to the system by pressing the IMPORT option. The system will ask the user to confirm this action with an on screen prompt. The system will proceed to update the stock batches accordingly before generating a stock import transaction report (example shown below) which details the changes.
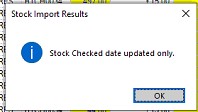
If no changes were made to the stock quantities, the system will update the STOCK CHECKED DATE to the date specified or default it to the current date and inform the user.
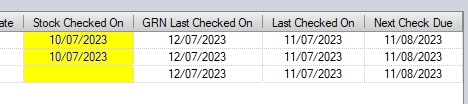
Stock Checked Date
The STOCK CHECKED DATE column, if left blank, will default to the current date upon import, however, the user can set this date to another date more in-line with when the stock was checked if they so desire. The user also has the ability to only update stock records if the STOCK CHECKED ON field is populated. The option for this is available at the bottom of the screen (shown below). Ticking this will only update the GRNs that have a date specified; all other records will be ignored.
![]()
(with the option unticked)

(before import...)

(after import...)
![]()
(with the option ticked)
(before...)
(after...)