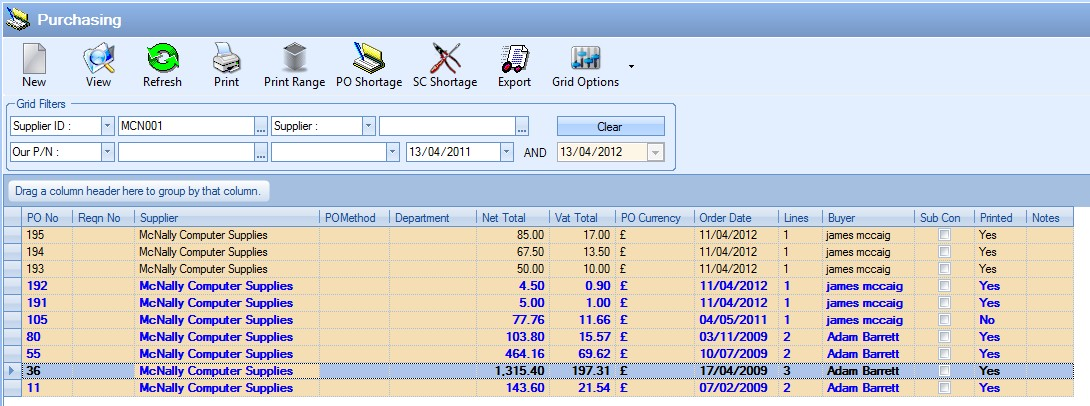
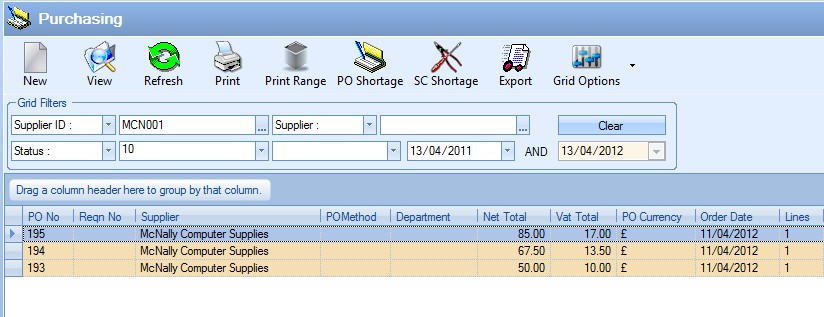
This section allows the user to create and view purchase orders for suppliers of physical material and services. When the user selects the Purchasing option within the Suppliers section of Progress, they are presented with a screen similar to that shown below.
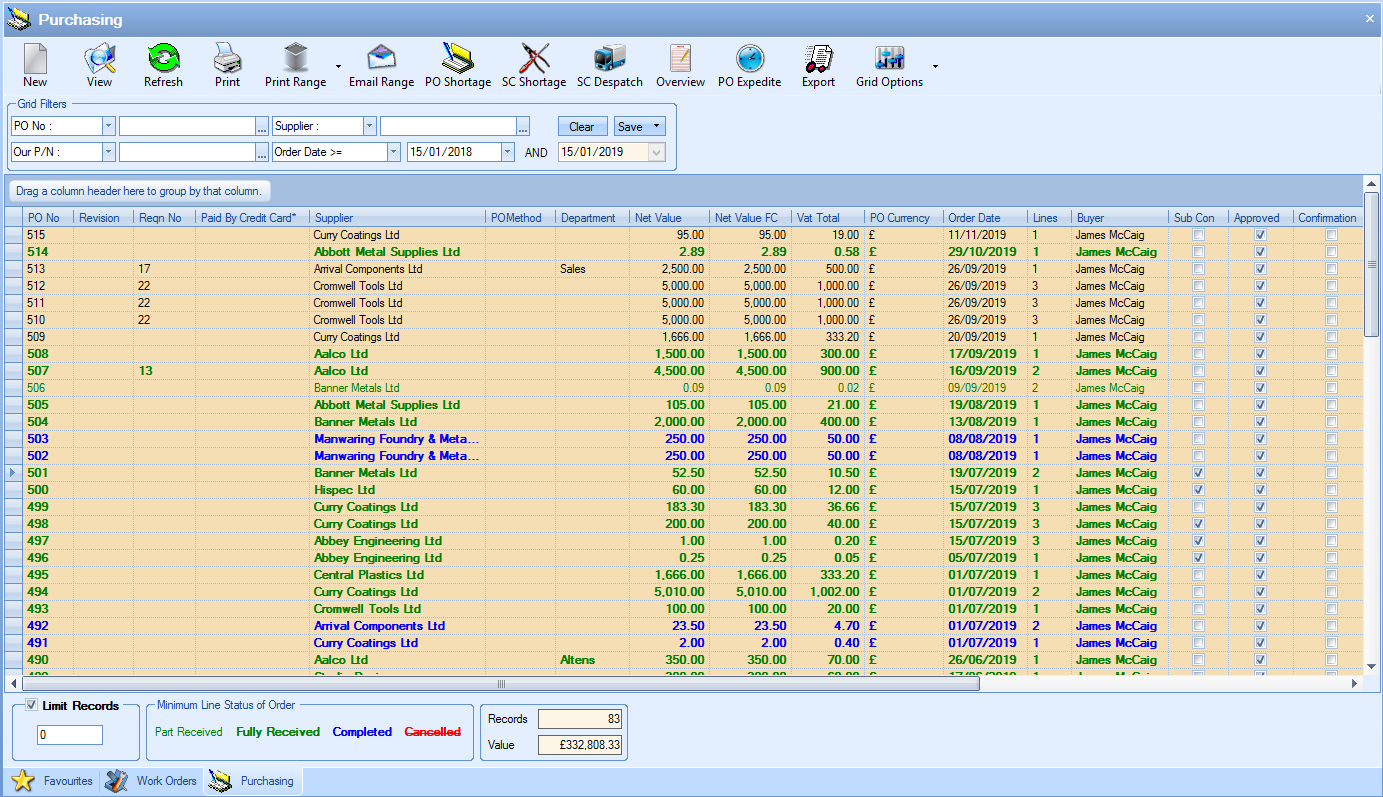
All existing purchase orders are listed in the main screen. The user can filter for specific purchase orders using the filters at the top of the screen.

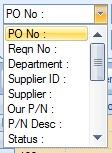
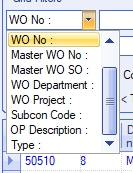
The user can select which pieces of information they wish to filter on using the drop-down lists to select the required field.
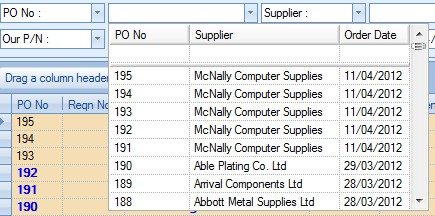
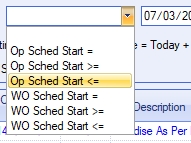
The user can then use the associated drop-down list to select the required values for the filters as shown in the next screen.
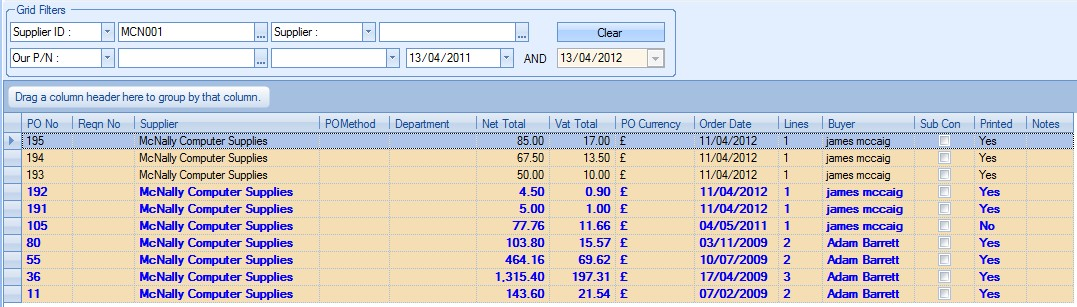
Once the user has selected the required filter, they can see the results by clicking the REFRESH option at the top of the screen. This will reduce the listed purchase orders to only the orders that meet the selected filter criteria.
View
The user can view the details of any the purchase orders by double-clicking on the required order or highlighting the order in the grid and clicking the VIEW option at the top of the screen. Either method will open the selected purchase order and display a screen similar to the following.
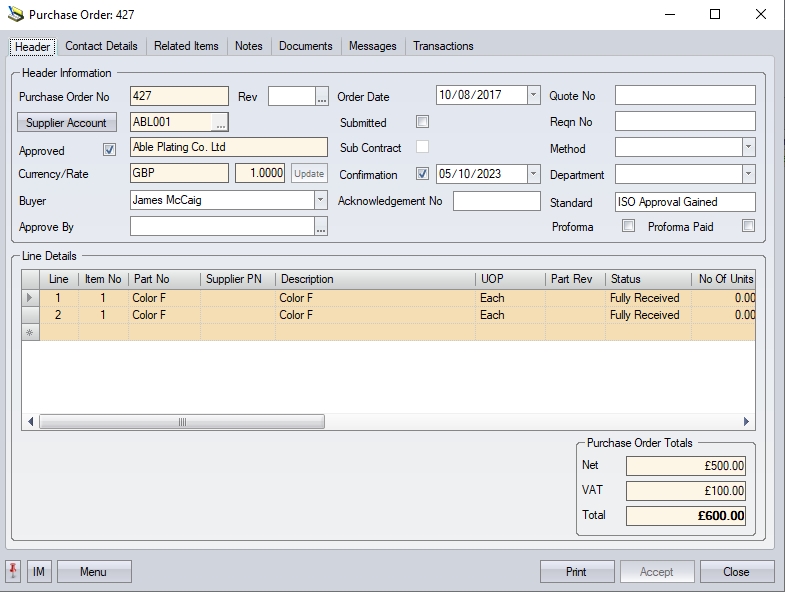
From here, the user can view and amend (if permitted) the purchase order as required.
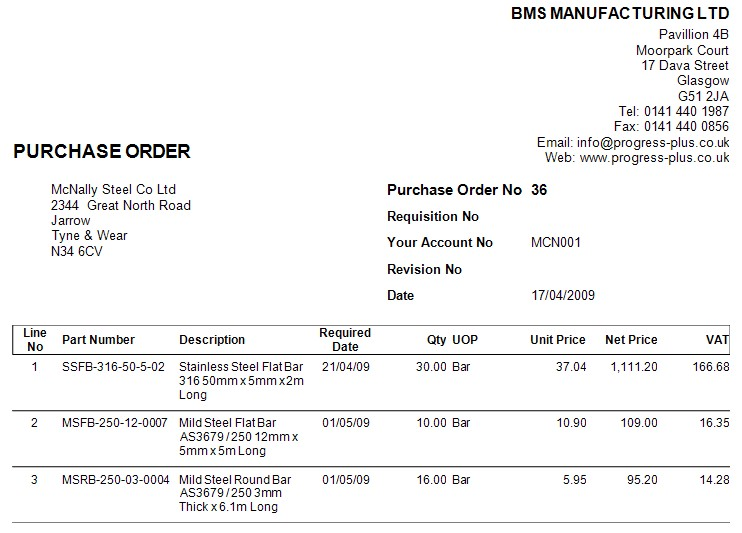
This option allows the user to print the selected purchase order directly from the Purchasing screen. The user simply has to highlight the required order and then click the PRINT option at the top of the screen to generate the purchase order document. The example below shows the selected purchase order and the resulting purchase order document.
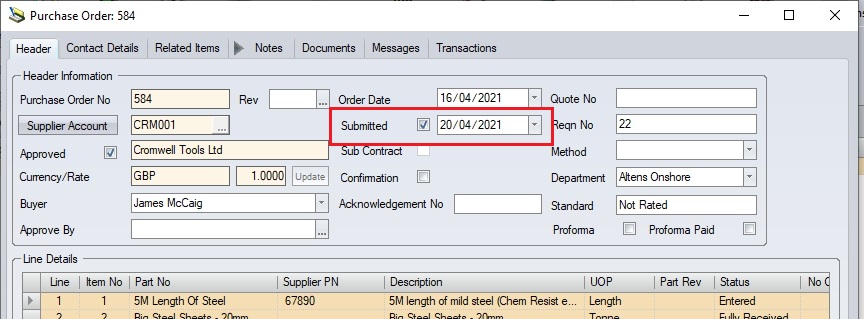
Purchase orders can be marked as "submitted" to the supplier using the SUBMITTED option on the PO header section. This indicates the PO has been sent to the supplier with the date set to reflect when it was sent. When manually ticked by the user within the purchase order, the current date will default, however, a more suitable date can be selected from the drop-down calendar.
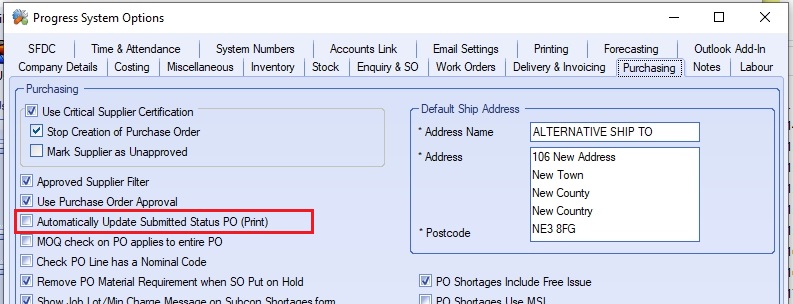
The system can also be configured to automatically mark the purchase order as "submitted" when it is printed. This can be found in the the system settings, under the Admin > Options > Purchasing section.
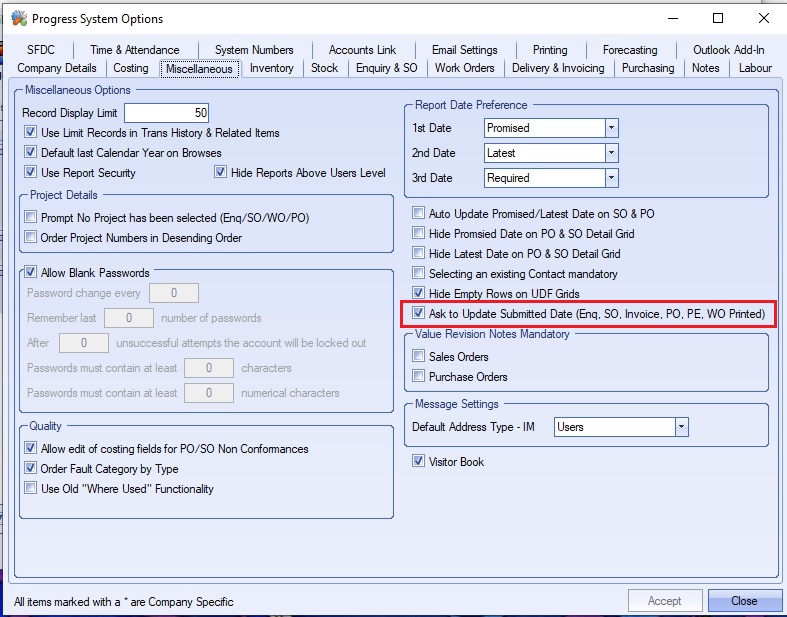
Alternatively, if the user would prefer to be asked if they wish to to update the SUBMITTED flag when printing, the system can be configured to do this too, via the option highlighted below. This can be found in the Admin > Options > Miscellaneous section of the system settings.
Print Range
This option allows the user to print a range of purchase orders directly from the Purchasing screen. The user can use the grid filters at the top of the screen to select the required range.
Once the required range has been selected, the user can click the PRINT RANGE option to generate the selected range of purchase order documents. The user will be prompted to confirm the print before the documents are generated.

If the user clicks YES to the prompt, the purchase order documents will be sent to the printer. If they click NO, they will be returned to the Purchasing screen.
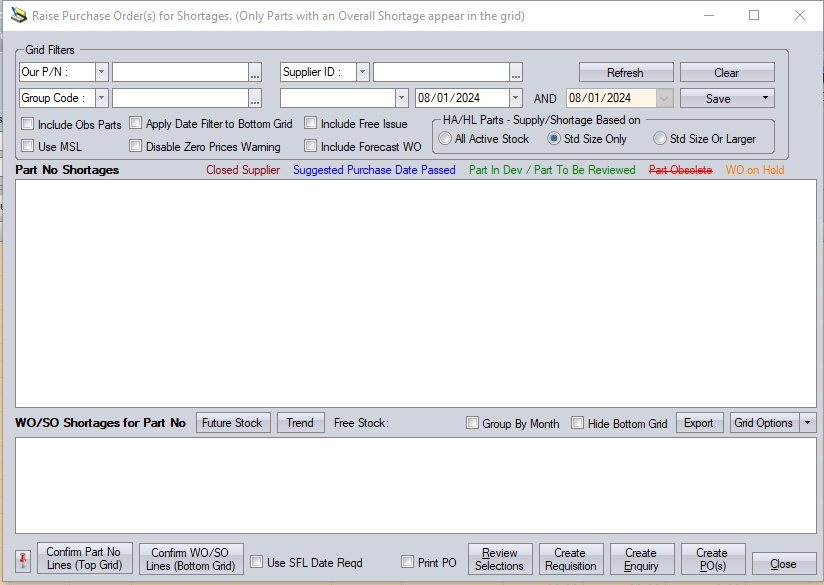
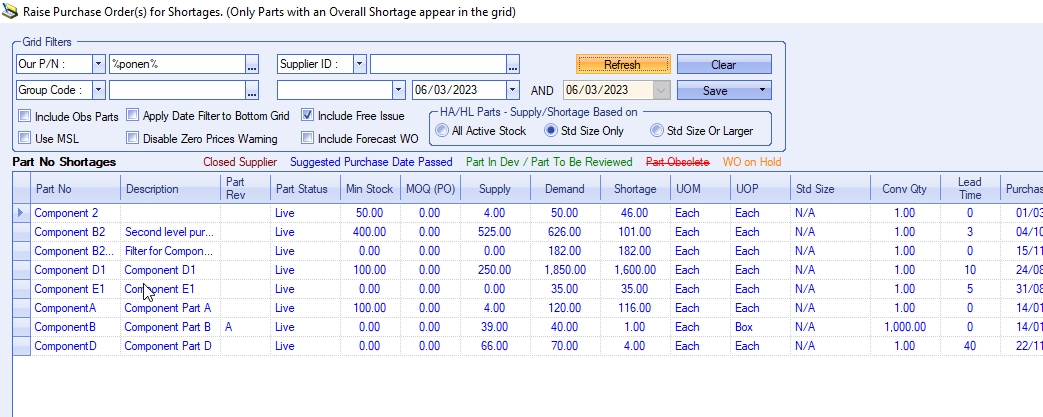
This option displays a list of purchased parts that currently have an overall shortage (i.e. Supply < Demand). This could be due to works order or sales order shortages or items that have fallen below their minimum stock level. This is the same screen accessed via the Today > To Do > Items to Be Purchased option from the Today screen. On choosing this option a screen similar to the following will be displayed.
To view all part shortages, the user can simply click the REFRESH option to see the full list of parts with a shortage. The user can also use the grid filters at the top of the screen to filter the information displayed, including by related dates.

The user has a number of filter options available, most of which can be selected from the drop-down menus.

The user can also use the % wildcard to search for parts. An example is shown below.
Adding the % after text will find anything that starts with the text entered (i.e. ABCD% will look for anything that starts ABCD)
Adding the % before the text will find anything that ends with the text entered (i.e. %ABCD will look for anything that ends ABCD)
Adding the % before AND after will find anything that contains the text entered (i.e. %ABCD% will look for anything that contains ABCD)
In addition to the filters options above, the user can also filter by a number of date-related options. These can be selected from the date filter drop-down menu.
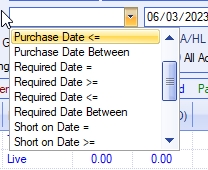
The available date options are as follows:
| Purchase Date | This option will show only parts where the Purchase Date meets the filter applied. For the top-half of the screen, this will be all items that have a overall PURCHASE DATE that meets the date filter. For the bottom-half of the screen, this will be all individual requirements that have a PURCHASE DATE that meets the date filter. |
| NOTE: This filter will not recalculate the part's SUPPLY and DEMAND values based on the date specified. |
| Required Date | This option will show only parts where the Date Req'd meets the filter applied. For the top-half of the screen, this will be all items that have a overall DATE REQ'D that meets the date filter. For the bottom-half of the screen, this will be all individual requirements that have a DATE REQ'D that meets the date filter. |
| NOTE: This filter will not recalculate the part's SUPPLY and DEMAND values based on the date specified. |
| Short On Date | This option will show only parts where the part has an overall shortage based on the date. For the top-half of the screen, this will be all items that have a shortage on the date specified. For the bottom-half, this will be a list of requirements that are behind the shortage on the specified date. |
| NOTE: Using this date filter will recalculate the part(s) SUPPLY and DEMAND values based on the date specified. |
| Date Goes Negative | This option will show only parts where the Date Stock Goes Negative meets the filter applied. For the top-half of the screen, this will be all items that have a overall DATE STOCK GOES NEGATIVE that meets the date filter. This filter is only applied to the top-half of the screen. |
| NOTE: This filter will not recalculate the part's SUPPLY and DEMAND values based on the date specified. |
If the user chooses to use any of the date filters, they can set them and then click REFRESH to apply them to the results.
In addition to the grid filter options highlighted above, there are a number of additional options available that can be used.
![]()
Include Ob Parts
This option allows the user to include any obsolete parts in the list of parts with shortages. Ticking this option will include any part which has an inventory status set as "obsolete".
Apply Date Filter to Bottom Grid
This option allows the user to apply any date filters applied to the bottom-half of the screen. If this option is unticked, then the bottom-half of the screen will show the full list of demand driving the shortage of the selected part. If the option is ticked, the bottom-half of the screen will have the same date filter applied, showing only the items that meet the date filter applied.

(Part with a overall shortage and a DATE REQ'D that meets the applied date filter)
(With the Apply Date FIlter To Bottom Grid option unticked, ALL individual requirements are listed, including those outwith the applied date filter)

(With the Apply Date FIlter To Bottom Grid option ticked, the individual requirements are also filtered, showing only those that meet the date filter applied)
Include Free Issue
This option is for including free issue stock in the SUPPLY figure of the parts listed. If this option is unticked, then the SUPPLY figure calculated for each part will not include any free issue stock that's in stock. Ticking this option will include any free issue stock of the part in the SUPPLY figure calculated.
Use MSL
This option allows the user to calculate the DATE STOCK GOES NEGATIVE date based on when the stock drops below the minimum stock level (MSL) quantity of the part, instead of when stock reaches zero.
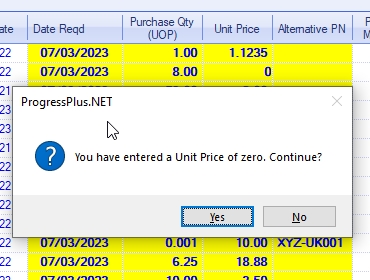
Disable Zero Prices Warning
This option stops the warning message appearing to highlight that a zero UNIT PRICE has been entered. If this option is ticked, the system will highlight the zero unit price to the user. If its unticked, the warning will not be displayed.
Include Forecast WOs
This option allows the user to include any forecast work orders that have been raised via the Forecasting tool. This allows the user to consider the requirements for these work orders when looking at the purchasing requirements. Ticking this option will include forecast work orders in the parts' DEMAND calculation, and also list the individual forecast work orders in the bottom-half of the screen too.

(Include Forecast WOs option unticked - top grid)

(Include Forecast WOs option unticked - bottom grid)

(Include Forecast WOs option ticked - top grid)
(Include Forecast WOs option ticked - bottom grid)
For more information on Forecasting tool, please refer to the Tools > Forecasting section of the manual.
Has Area/Has Length - Supply/Shortage Based On
This option allows the user to dictate how the system calculates the SUPPLY/SHORTAGE value for any HA/HL parts that are set up in the system.
NOTE: This filter is only available if the HAS AREA/HAS LENGTH (HA/HL) functionality is switched on in Progress.
The user has three options available:
![]()
All Active Stock This option includes ALL stock of HA/HL parts in the supply/shortage calculations, regardless of size
Std Size Only This option will ONLY consider standard size units in stock as part of the supply
Std Size Or Larger This option will consider any stock which is standard size, or larger, as part of the supply
Based on how this option is set, the system will calculate the SUPPLY/SHORTAGE of the HA/HL parts accordingly.
Future Stock
This option can be used to see the future stock status of any selected part. Clicking this option will show you the future stock screen for the selected part. This screen shows the future time line of incoming and outgoing stock for the part, along with the associated dates.
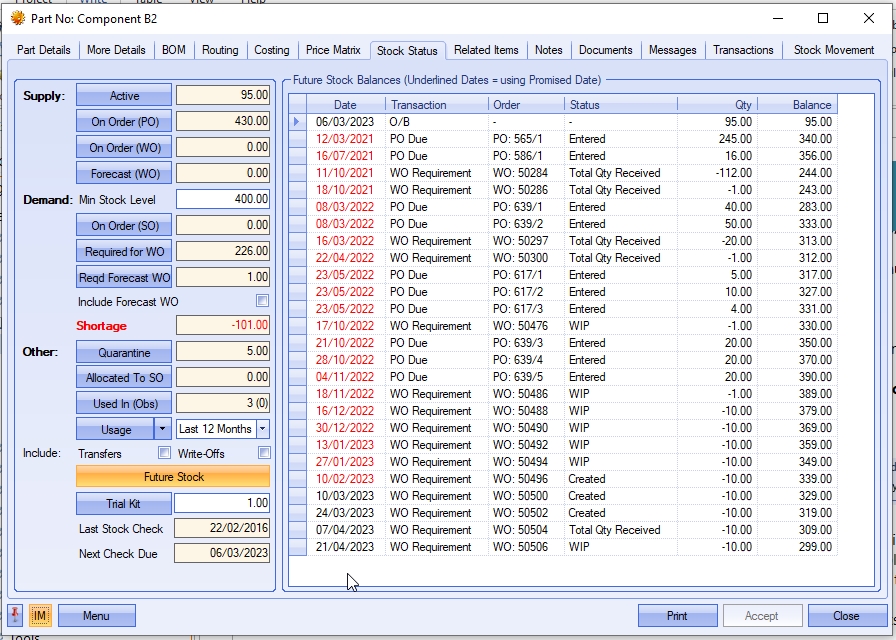
From here the user can see overdue requirements as well as a running balance of their stock, making it easy to see when they may drop below zero. The system also shows the selected part's current ACTIVE stock figure alongside this option for reference too.
![]()
This option allows the user to see the purchase history of the selected part number and is designed to see trends in purchasing generally, and also with specific suppliers. Clicking the TREND option will display the following screen.
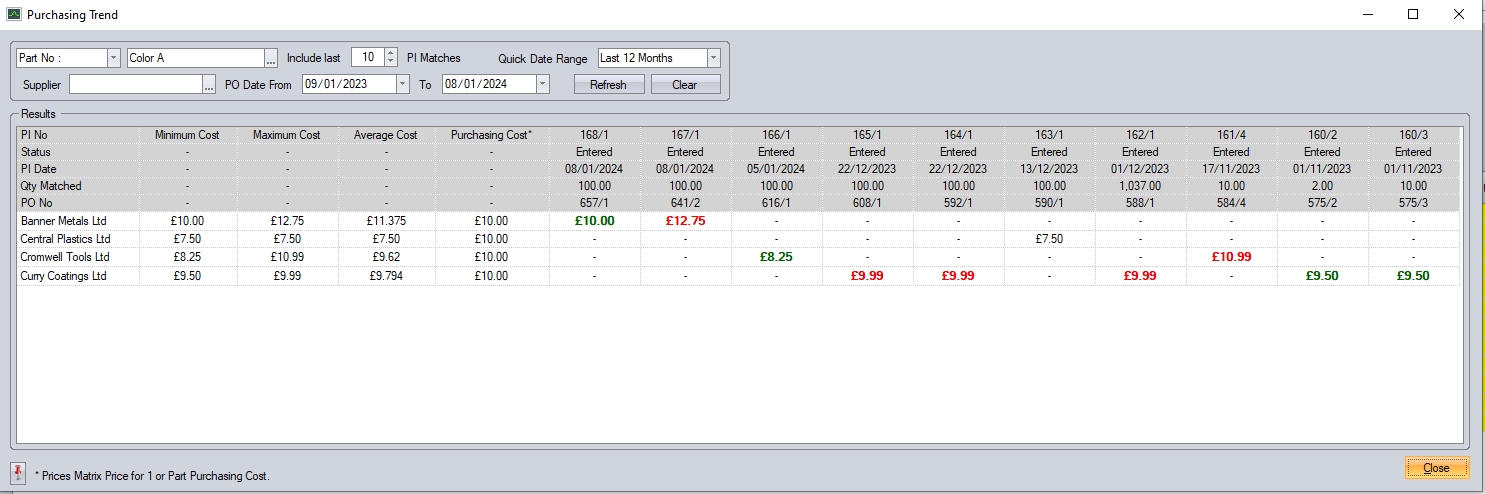
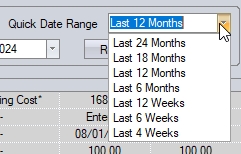
The Purchasing Trend screen displayed shows the pricing details of the last X purchase invoice for the selected part number and suppliers. The user can change the filters applied if required, allowing them to specify the number of PI matches to be included, as well as the date range they've to be taken from. If they wish to view just the details for a particular supplier, they can filter for them too.

Once the user has entered their selection criteria, clicking REFRESH option will display all the relevant details for the selected part and filters.

The first section of the screen lists the minimum, maximum, average and current purchasing cost of the selected part. If the part has been purchased across multiple suppliers, then these will reflect the maximum, minimum and average for each supplier.

The next section shown lists all the individual purchase invoices raised for the selected part. The header section of each shows the purchase invoice number, its date, the quantity matched and the associated purchase order number. Below these details shows the unit price paid on the purchase invoice. This will also be shown against the relevant supplier if multiple suppliers have been purchased from.

On a supplier-by-supplier basis, the system highlights the highest price paid in red, and the lowest in green. All other pricing is shown in black.
The user can access either the associated purchase invoice or purchase order from this screen by drilling into the associated PO or PI numbers shown in the header section. Clicking on these will open the purchase invoice or purchase order for the user to view.
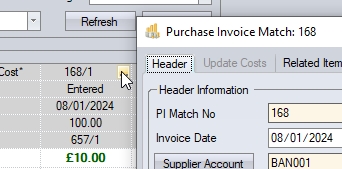
(Opening associated PI Match)
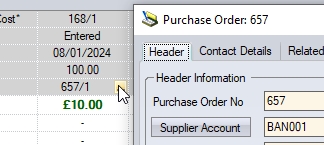
(Opening associated PO)
Once finished with, the user can click CLOSE to return to the PO Shortage screen.
Part No Shortages
The top-half of the PO Shortages screen shows a list of purchased parts (i.e. MP parts) with an overall shortage. The top-half of the screen will calculate the shortage of the part as a whole based on all supply and demand. From here the user can raise a purchase order, purchase enquiry or a purchase requisition that is not linked to any specific requirement (i.e. a general PO/PE/PR).
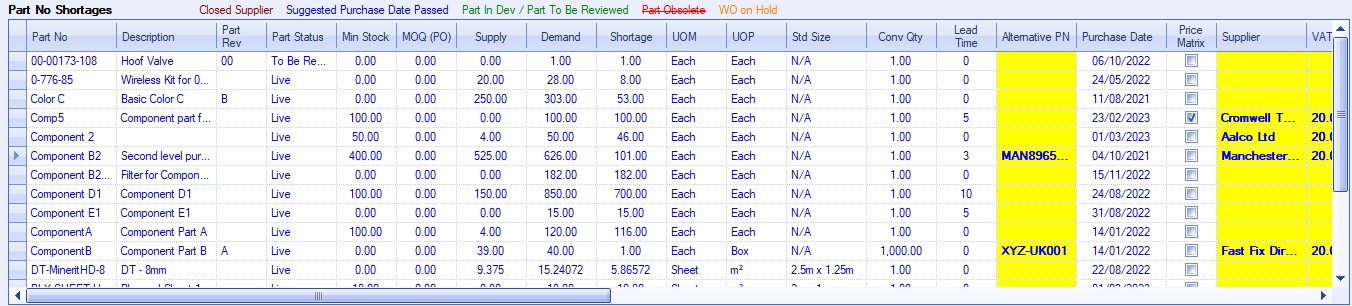
The screen presents the user will all the relevant part details, its supply and demand figures, minimum order quantity for purchase orders as well as any preferred suppliers specified. If no preferred supplier is assigned to the part number, the user must select the supplier to be used. If no preferred supplier has been entered against the part or if the user wishes to raise a purchase order for an alternative supplier, they can click on the SUPPLIER field (in yellow) and select the relevant supplier.
The standard list consists of suppliers who meet the following criteria:
•Suppliers who have an alternative part number set up against the Progress part number
•Suppliers who have a price matrix set up against the Progress part number
•Suppliers who have a group code capability that matches the group code of the Progress part number
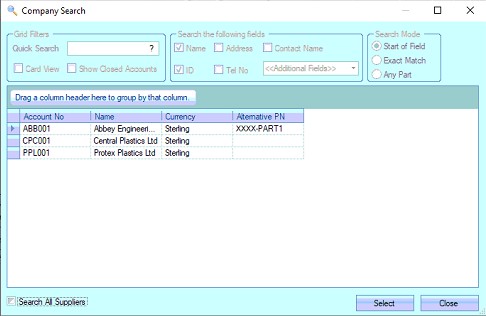
If the user is permitted to search all suppliers, they can tick the SEARCH ALL SUPPLIERS option to see the full list of suppliers in Progress to select from them.
As well as all the part-related information shown, the system also shows a number of important dates associated with each part listed. These are as follows:
| Orig Date Required | This is the original, earliest date required for the selected part and its outstanding requirements. This is based the earliest SO line required date and/or earliest planned start date of any WOs. This date will be the same as the calculated purchase order DATE REQ'D unless this is prior to today. |
| Date Stock Goes Negative | This is the date the system calculates you will have no stock to meet requirements. This is calculated based on all incoming supply and current outstanding requirements and calculates a NET figure for any given date. The first date this falls below zero is shown. If the user is using the USE MSL option, then this will show the date the stock goes below the part's minimum stock level (MSL) figure. |
| Purchase Date | This is the original latest date when the goods should have been purchased. This is based on the original earliest requirement date minus any purchasing lead time of the part. |
SFL Date Reqd This is the earliest scheduled start date of any WOs which require this MP part that are currently loaded into the shop floor loading (SFL) planning tool.
| Date Reqd | This calculated date defaults based on the information above and is the date when the system says you need the material. This is calculated on the earliest requirement, purchasing lead time and also the current date. If the lead time of the part is greater than the number of days between the current date and the earliest required date, the DATE REQ'D will default to the current date (i.e. the order needs to be placed immediately as its overdue). If the USE SFL DATE REQ'D option is ticked at the bottom of the PO Shortage screen, the DATE REQ'D date will be calculated based on the earliest SFL date required which reflects the scheduled start dates of the earliest WO requirement. |
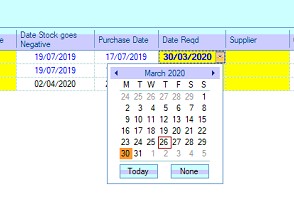
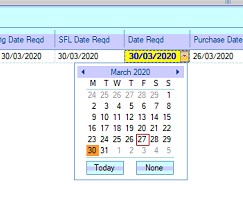
Provided with this information, the user can then choose to accept the DATE REQ'D calculated by the system, or can manually set an alternative date for the item via the DATE REQ'D field using the drop-down calendar as shown below.
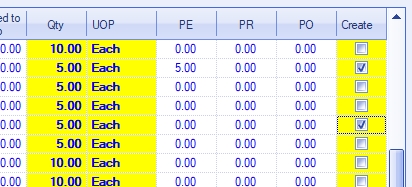
The user can also see if there are any active purchase requisitions, enquiries or orders already raised for the part. The PE, PR and PO columns on the grid highlight these, showing the total quantity raised on existing requisitions, enquiries and orders.
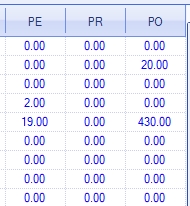
The user can drill into any of the values shown in these columns to see the details behind the value via the part's Stock Status and Related Items sections.
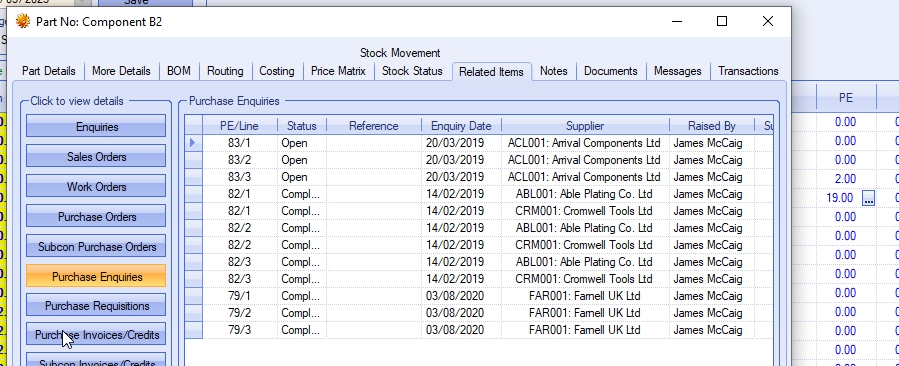
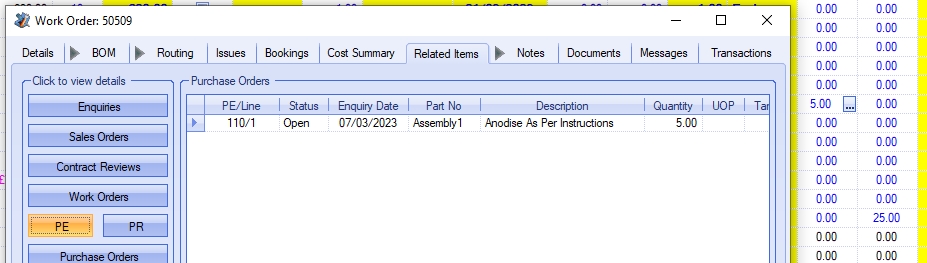
(drilling into the PE value shows the part's Related Items > Purchase Enquiries screen)
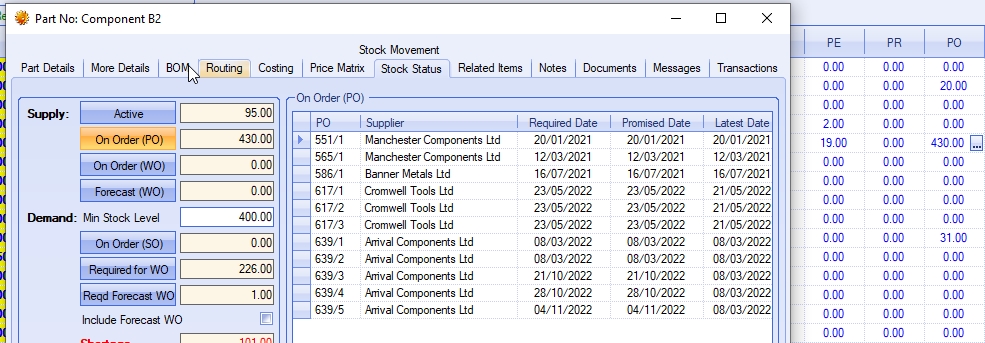
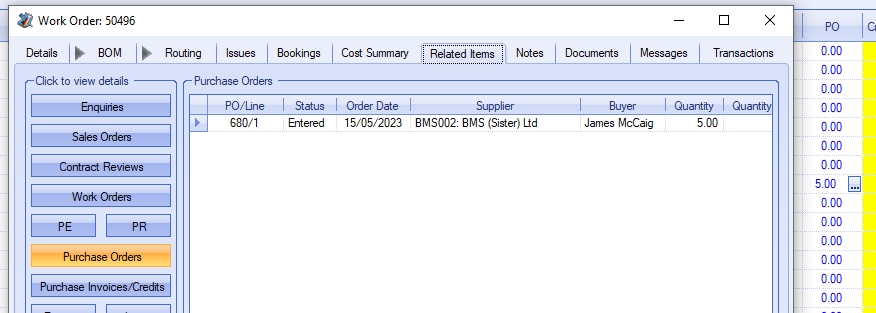
(drilling into the PO value shows the part's ON ORDER (PO) details)
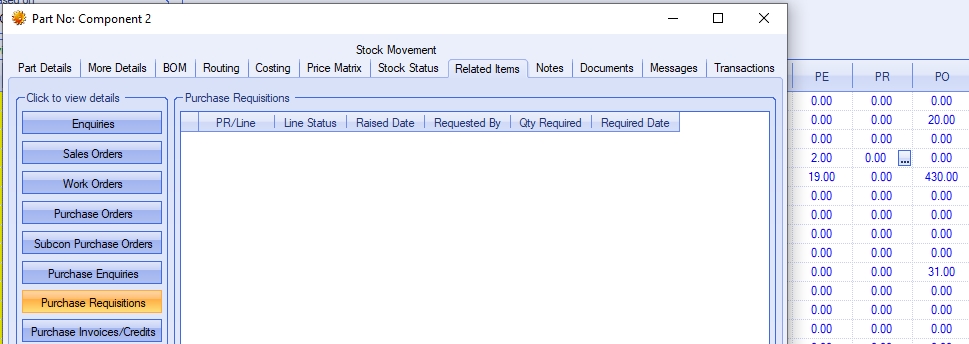
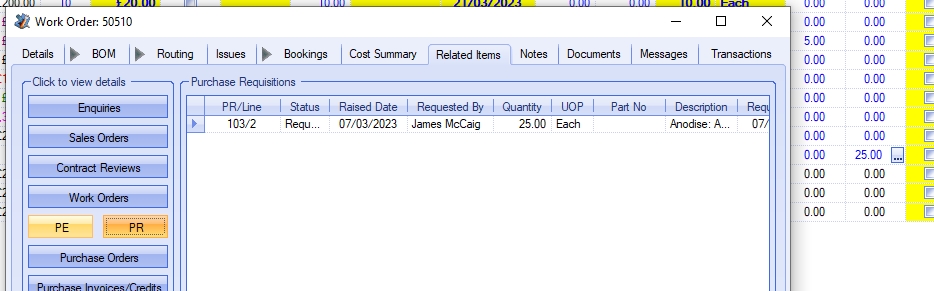
(drilling into the PR value shows the part's Related Items > Purchase Requisitions screen)
Once all the relevant details have been entered against the part(s) on the top-half of the screen, the user must select the items to be added to the "shopping list". This is done by ticking the INCLUDE ON PO option against each part listed.

Once the part(s) is ticked as INCLUDE ON PO, the user must commit the selected parts to the "shopping list". This "shopping list" is a list of all parts the user wishes to create purchase orders, purchase enquiries or purchase requisitions for. This is done by confirming the selections made using the two options available at the bottom of the PO Shortages screen.
![]()
For anything selected in the top-half of the screen, the user must use the CONFIRM PART NO LINES (TOP GRID) option. Clicking this option will add the selected items to the "shopping list" in the background. The user can repeat this as many times as they wish to ensure they add all the relevant items required to the "shopping list".
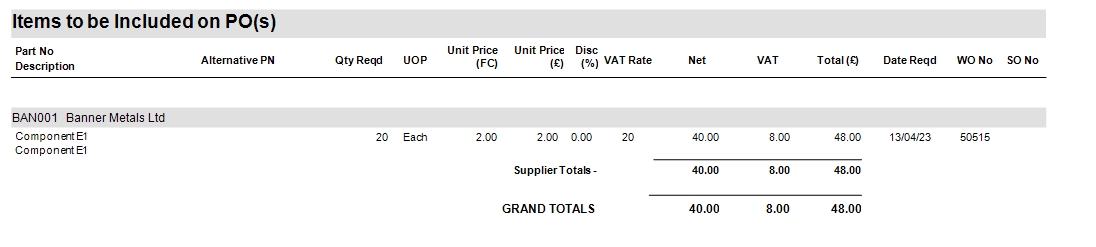
The user can choose to view the selected items (i.e. the "shopping list") by clicking on the REVIEW SELECTIONS option at the bottom of the screen. This will display a report of all the currently selected items on the "shopping list".
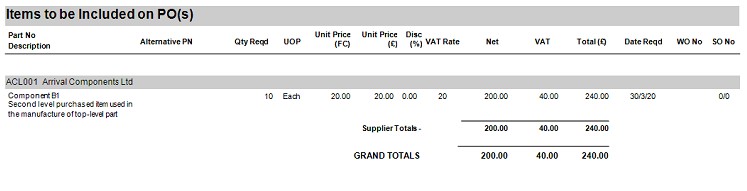
Once the user has added all the relevant parts to the "shopping list", they can then generate the required purchase orders, purchase enquiries or purchase requisitions for the selected items by clicking on the relevant option at the bottom of the screen. If the user clicks on the PRINT PO option too, any POs created will automatically be printed.
![]()
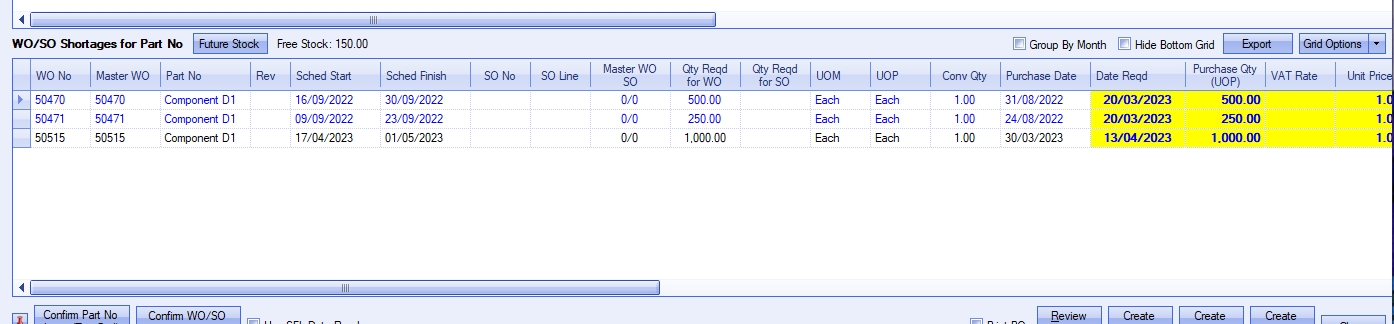
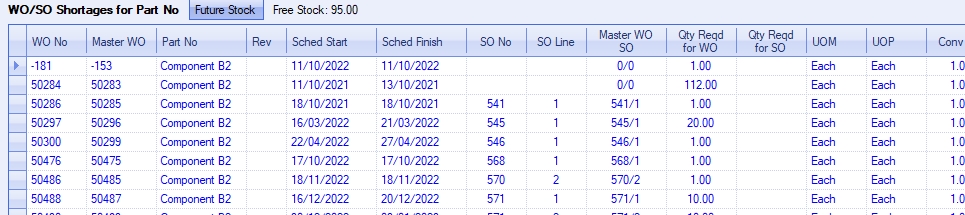
WO/SO Shortages for Selected Part No
The bottom-half of the PO Shortages screen lists all the individual requirements driving the demand for the selected part. As the user selects a part on the top-half of the screen, the individual requirements behind the demand are listed on the bottom half, whether its a sales order or a work order.

The bottom-half of the screen is for raising purchase orders, purchase enquiries or purchase requisitions against the individual requirements. The list displayed shows all work orders and sales order lines that have not yet been fulfilled by a purchase order. The individual requirements listed can be grouped in monthly buckets too using the GROUP BY MONTH option directly above the grid.

As per the top-half of the screen, the system shows all the relevant information regarding the part and the individual requirement. If a preferred supplier has been set up against the part, then the supplier will automatically be set, but the user can select another supplier if preferred using the same steps as those detailed for the top-half of the screen. The user can also enter the quantity and unit price if known too.
Each individual requirement listed also has relevant date information shown. Similar to the top-half of the screen, these dates highlight when the parts are required, when they should have been ordered. Below lists each of the dates shown, along with an explanation as to what they show.
Sched Start This is the planned start date of the associated WO. This will remain blank if the requirement is based on a SO line (i.e. direct sale of MP part).
Sched Finish This is the planned finish date of the associated WO. This will remain blank if the requirement is based on a SO line (i.e. direct sale of MP part).
| Orig Date Required | This is the original, earliest date required for the part for the outstanding requirement. This is based the associated SO line date or planned start date of the associated WO. This date will be the same as the calculated DATE REQD unless this is prior to today. |
| Purchase Date | This is the original latest date when the goods should have bee purchased. This is based on the associated SO line required date or the planned start date of the associated WO, minus anythe purchasing lead time of the part. |
SFL Date Reqd This is the scheduled start date the associated WO requiring this part based on the shop floor loading (SFL) scheduled date of the work order.
| Date Reqd | This calculated date defaults based on the information above and is the date when the system says you need the material. This is calculated using the associated required date, purchasing lead time and also the current date. If the lead time of the part is greater than the number of days between the current date and the earliest required date, the DATE REQD will default to the current date (i.e. the order needs to be placed immediately as its overdue). If the USE SFL DATE option is ticked at the bottom of the PO Shortage screen, the DATE REQD date will be calculated based on the SFL DATE REQUIRED date, which reflects the Shop Floor Loading (SFL) scheduled start date of the associated WO (i.e. when the job WO is scheduled to start). |
Provided with this information, the user can then choose to accept the DATE REQD calculated by the system or can manually set an alternative date for the item via the DATE REQD drop-down calendar as shown below.
Once all the relevant details have been entered against the part(s) on the bottom-half of the screen, the user must select the items to be added to the "shopping list". Just like the top-half of the screen, this is done by ticking the INCLUDE ON PO option against each individual requirement listed.
Once the individual requirements have been ticked as INCLUDE ON PO, the user must commit the selected requirements to the "shopping list". This "shopping list" is a list of all parts the user wishes to create purchase orders, purchase enquiries or purchase requisitions for. This is done by confirming the selections made using the two options available at the bottom of the PO Shortages screen.
![]()
For anything selected in the bottom-half of the screen, the user must use the CONFIRM PART NO LINES (BOTTOM GRID) option. Clicking this option will add the selected items to the "shopping list" in the background. The user can repeat this as many times as they wish to ensure they add all the relevant items required to the "shopping list".
Again, the user can choose to view the selected items (i.e. the "shopping list") by clicking on the REVIEW SELECTIONS option at the bottom of the screen. This will display a report of all the currently selected items on the "shopping list".
Once the user has added all the relevant parts to the "shopping list", they can then generate the required purchase orders, purchase enquiries or purchase requisitions for the selected items by clicking on the relevant option at the bottom of the screen. If the user clicks on the PRINT PO option too, any POs created will automatically be printed.
![]()
Once the system has created the purchase orders, enquiries or requisitions, the system will confirm completion. The user will then be able to go view the new items in the relevant section of Progress Plus.

This screen displays to the user a list of subcontract operations for works orders that have not yet had a subcontract purchase order raised for them. This is the same screen accessed via the To Do > Items To Be Subcontracted option from the Today screen. On choosing this option a screen similar to the following will be displayed.
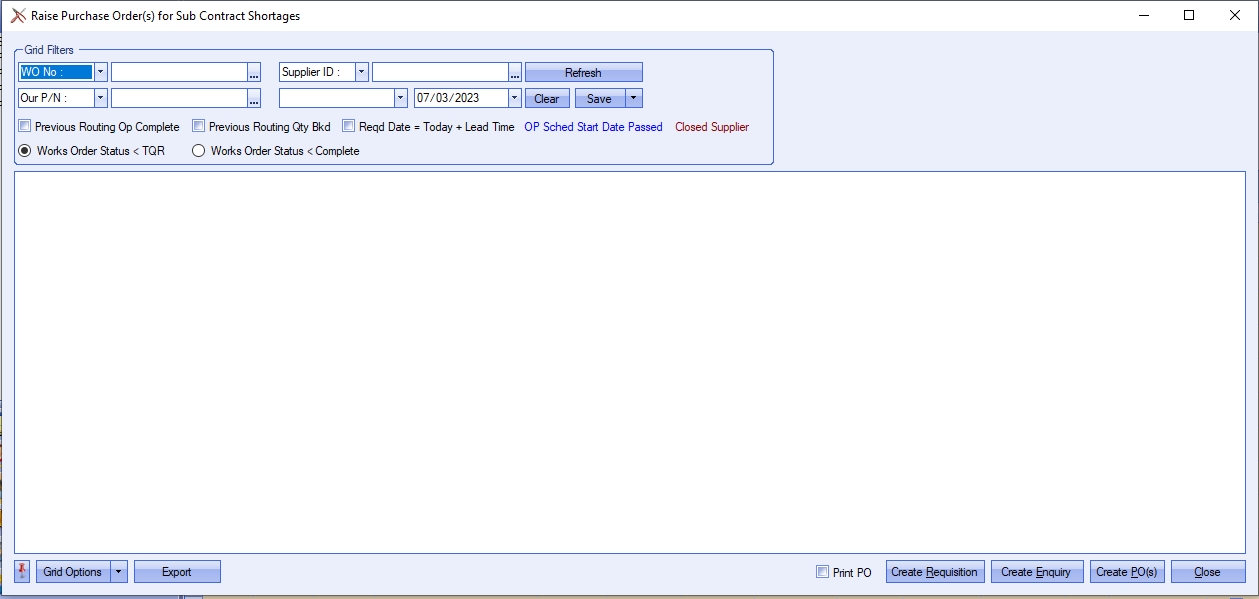
To view all subcontract shortages, the user can simply click the REFRESH option to see all shortages for all work orders. The user can also use the grid filters at the top of the screen to filter the information displayed.

The user has a number of part, work order and supplier related filters available from teh drop-down lists, as well as a couple of date filters available to help identify the subcontract items they are interested in.
The user also has additional options available for use too.

Previous Routing Op Complete This option will only show SC operations where the previous routing operation is marked as COMPLETE
Previous Routing Qty Booked This option will only show SC operations where the previous operation has a quantity booked against it
Reqd Date = Today + Lead Time This option will update the SC operations' DATE REQD based on the current date plus the SC code lead time.
Works Order Status < TQR This option will only show SC operations where the work order status is less then TOTAL QTY RECEIVED (TQR) (i.e. WO has o/s qty)
Works Order Status < Complete This option will only show SC operations where the work order status is less than COMPLETE (i.e. WO has not been closed off)
These options will default based on the user's permissions in the Admin section of Progress, although they can be changed, if required, on this screen. For more information user permissions, please refer to the Administrator Functions > Access section of the manual.
Once any of the options or filters have been applied, the user must click REFRESH to update the grid accordingly. This will then show a list of subcontract operations that meet the selected criteria.
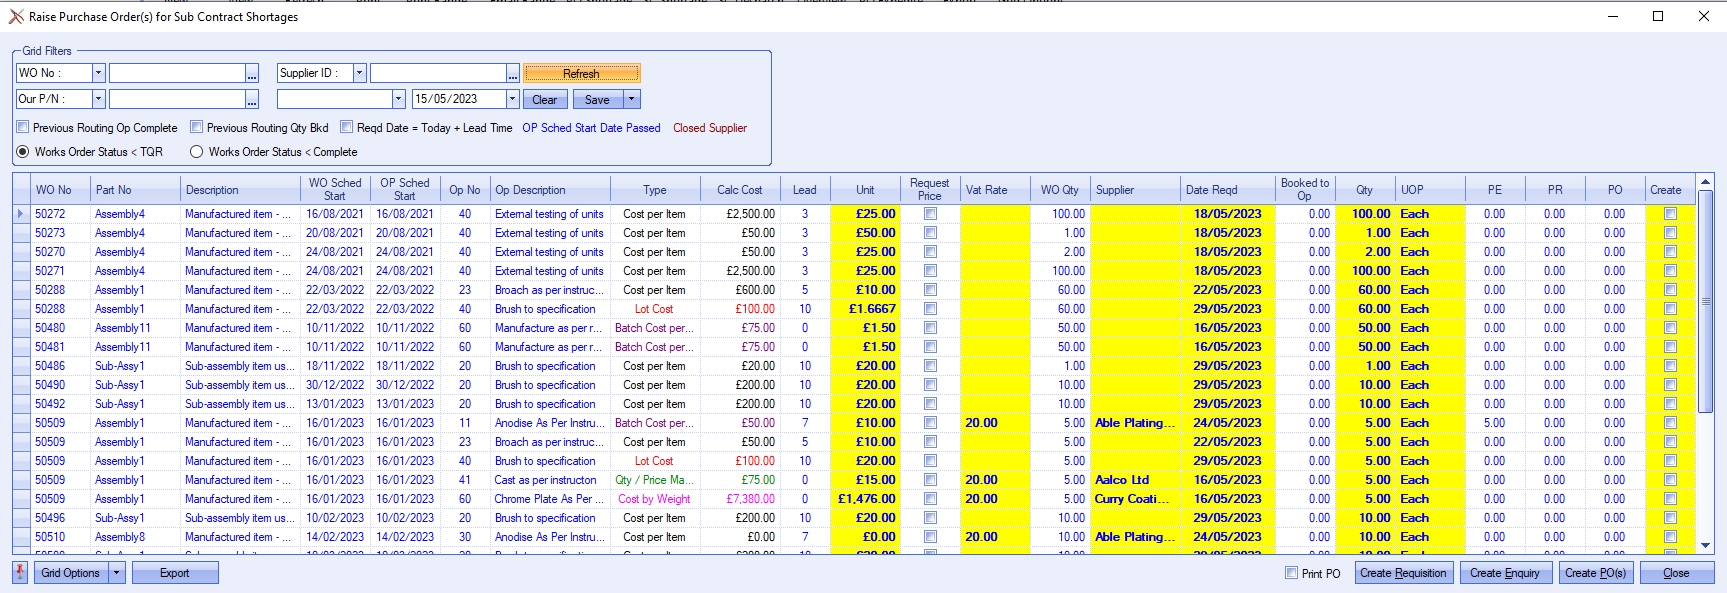
When using this screen, any shortages listed will show any preferred supplier that has been set up against the routing for this part. If no preferred supplier has been entered against the part or if the user wishes to raise a purchase order for an alternative subcontractor, clicking on the SUPPLIER field will produce a list of available suppliers from which the user can select from.
The screen will also display any expected cost as previously entered against the routing entry for this part in the UNIT field. This can be amended by the user if required. The QTY field will default to any outstanding shortage for this subcontract operation though, again, the user can amend this information if required.
The DATE REQD will default based on the work orders' OP SCHED START date plus the subcontract lead time (i.e. sched start + lead time). If this date is in the past (i.e. before current date), then the DATE REQD will be set as the current date PLUS the subcontract lead time (i.e. Today + lead time). If the REQD DATE = TODAY + LEAD TIME option is ticked at the top of the screen, all DATE REQD values will be calculated based on the current date plus the subcontract lead time (i.e. Today + lead time).
The user also has visibility of any existing purchase orders, purchase enquiries and/or purchase requisitions that may exist for the subcontract code in the PO, PE and PR columns on the grid.
The user can drill into any of the figures shown to see the details behind it. Drilling into the PO, PE or PR value will display the work order's Related Items and the associated purchase orders, enquiries or requisitions screens respectively.
(Drilling into a PO value)
(drilling into a PR value)
(drilling into a PE value)
When all relevant information has been entered, the user must click on the CREATE tick box to include it in any action they make.
After selecting the items they are interested in, the user can use the options at the bottom of the screen to create a subcontract purchase requisition, purchase enquiry or purchase order using the relevant option.
![]()
Selecting any of these options will produce a requisition, enquiry or order for the subcontract shortage. If the user chooses to create purchase orders from the screen, clicking the PRINT PO option will automatically print any purchase orders created. The system will then confirm creation of the requisition, enquiry or order based on the user's selection.
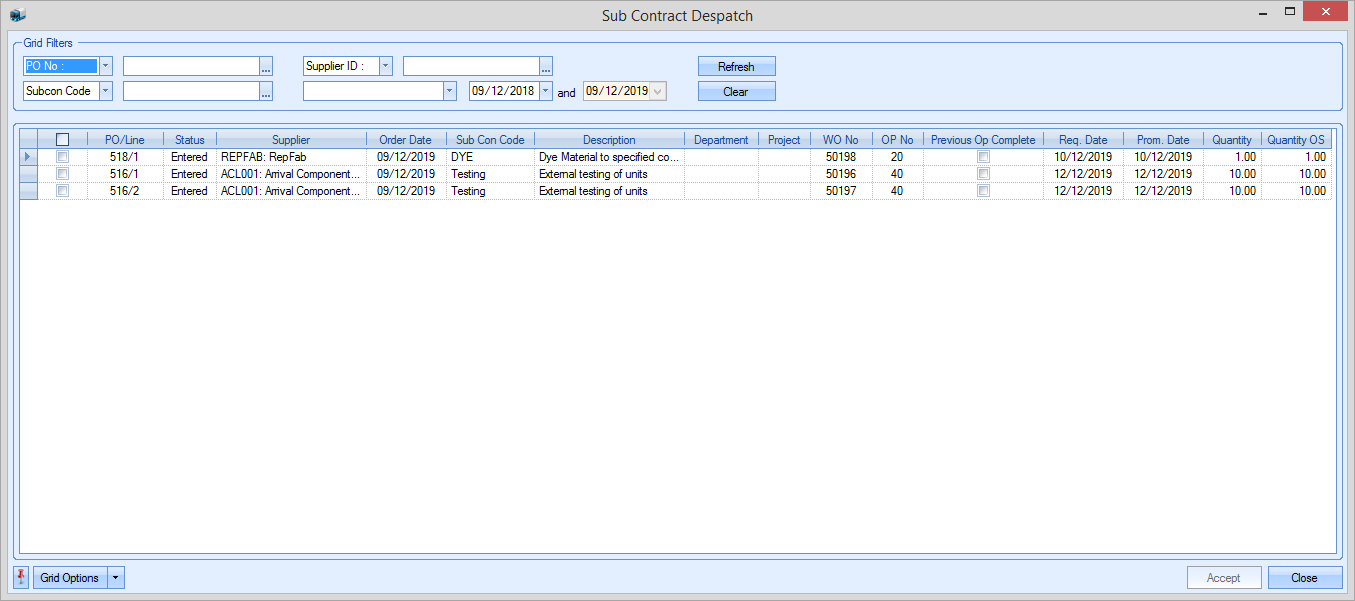
SC Despatch
This screen provides the user with method of updating the despatch status of subcon POs. This can be done individually on a PO line itself, however, this allows the user to update multiple POs at once as well as generate the subcon despatch note paperwork for each of them. By default, Progress Plus will generate all subcon despatch notes for the FULL quantity required.
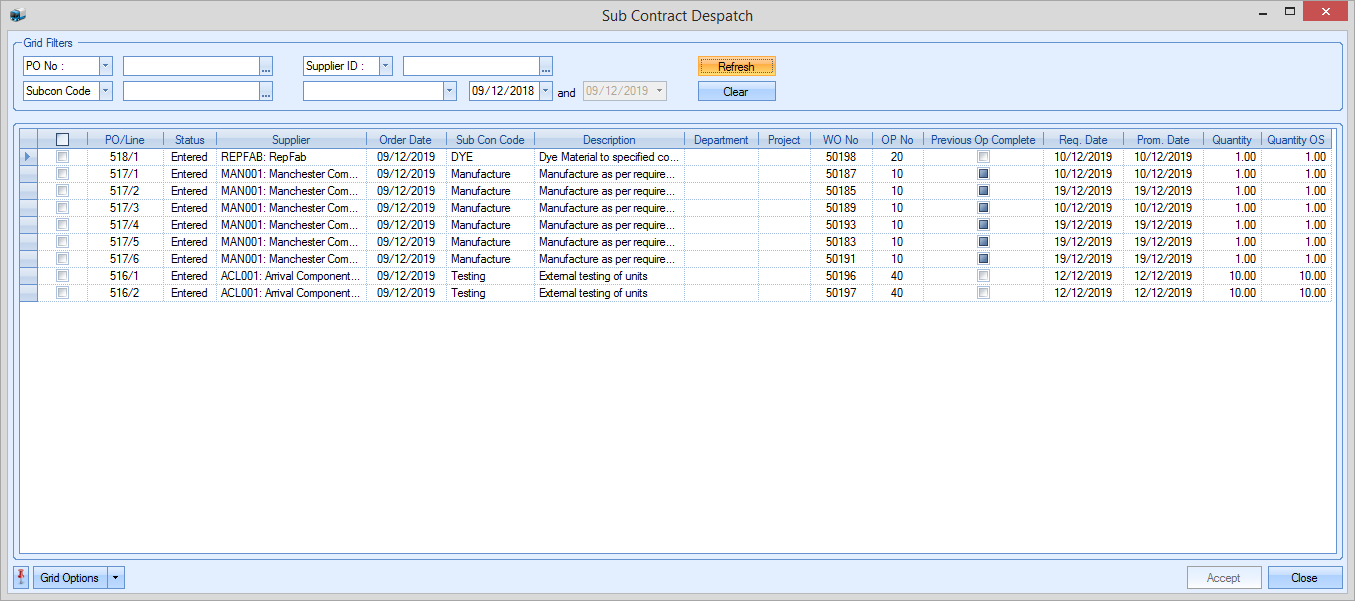
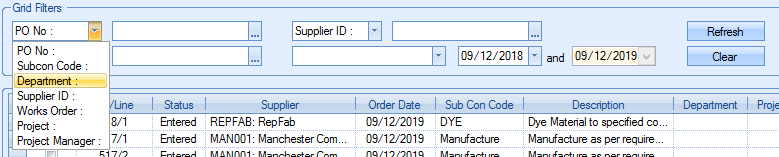
Like most screens within Progress, the user has a selection of filters available to them for isolating the POs they are interested in. The Grid Filters at the top of this screen provide filters for WOs, suppliers and subcon code amongst others as well as a selection of date filters too.
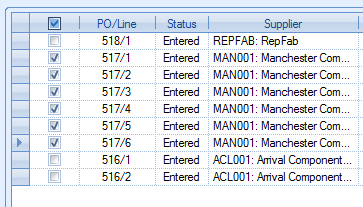
Once the user has selected the PO lines they are interested in, they can mark them as despatched by ticking the box at the start of each line as shown below.
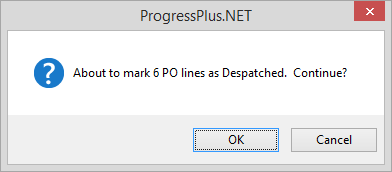
Once the user has made their selection, they can click ACCEPT to update the selected PO lines. The system will prompt to confirm before asking if the user wants the despatch notes printed.
If the user selects to print the despatch notes, those will be printed automatically and the SC Despatch screen refreshed to remove any items previous updated.
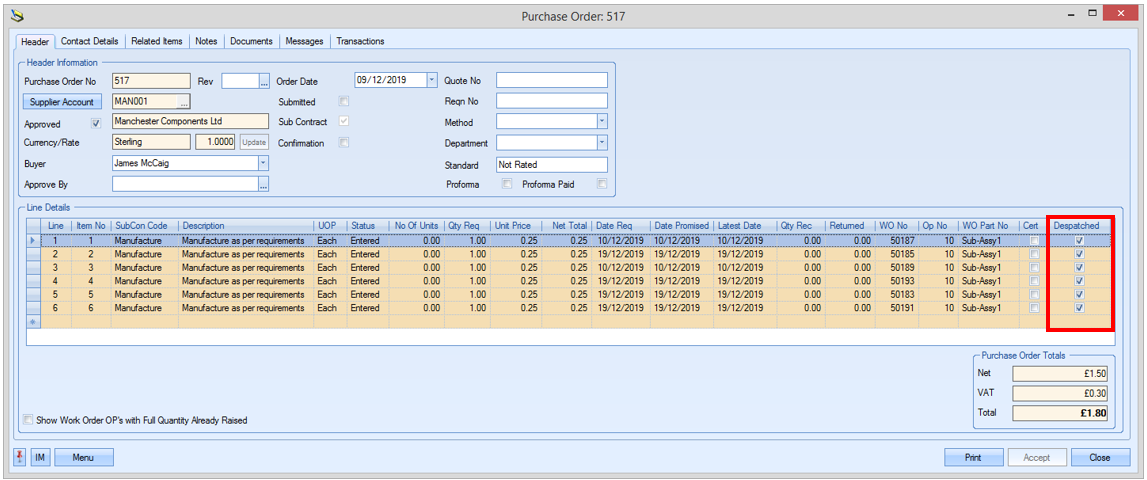
The PO lines themselves will be updated to reflect the despatch and will show the DESPATCHED field as ticked.
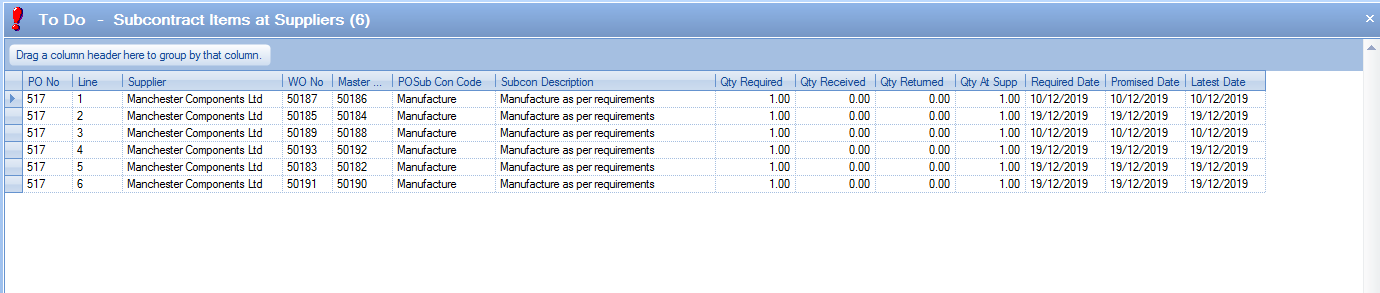
The Subcontract Items At Suppliers report allows the user to see what's currently with subcontractors. This report can be found in the Purchasing reports section.
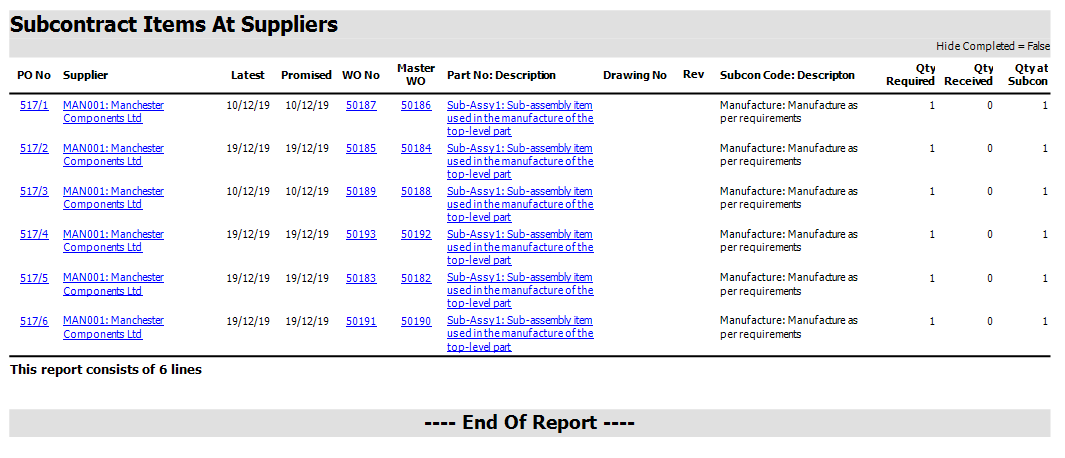
Items currently at suppliers can also be monitored via the Today screen using the Subcontract Items At Suppliers screen.
Partial SC Despatches
NOTE: This functionality needs to be switched on by Progress Plus, and also requires an amendment to the subcontract despatch note layout to accommodate this. Please contact Progress Plus for further information.
If Progress Plus is configured to allow partial subcon despatches, then the SC Despatch screen will appear slightly different. The user will have all the same filters available as the standard despatch screen, but there are some additional options for defaulting the despatch quantity and date.
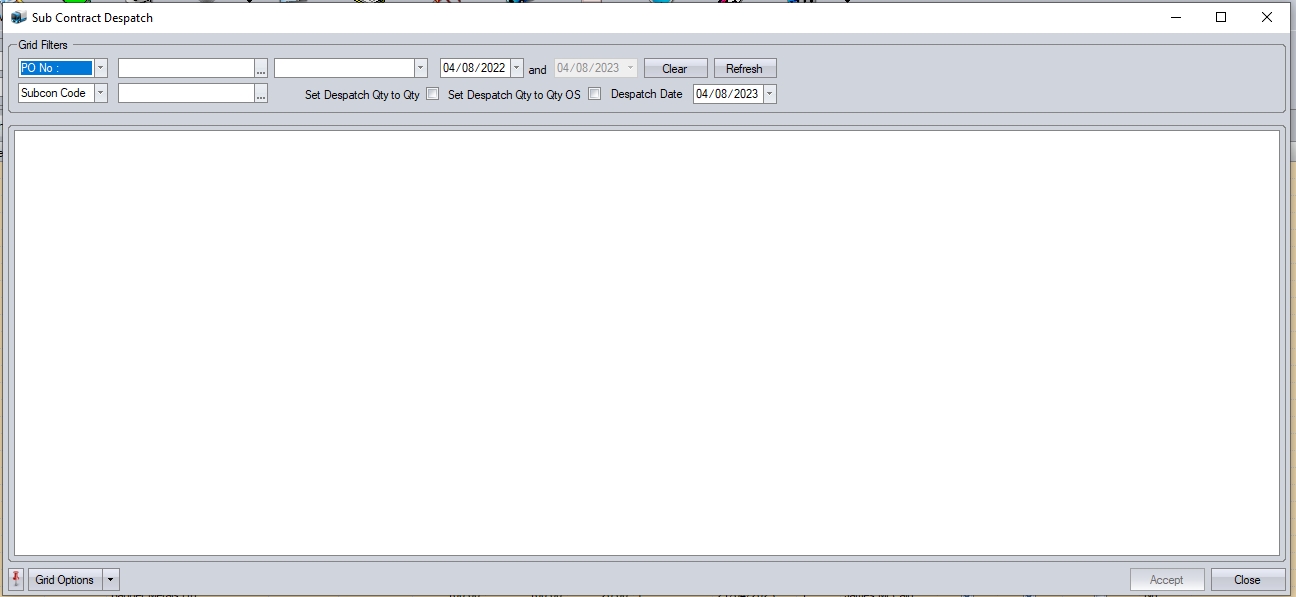
![]()
Set Despatch Qty to Qty This option will default the Despatch Qty to the total quantity
Set Despatch Qty to Qty OS This option will default the Despatch Qty to the OS quantity
Despatch Date This option allows the user to set the default despatch date against the items being despatched.
With any filters applied, and any of the additional options set, clicking REFRESH will present the user with a list of current subcon POs awaiting despatch.
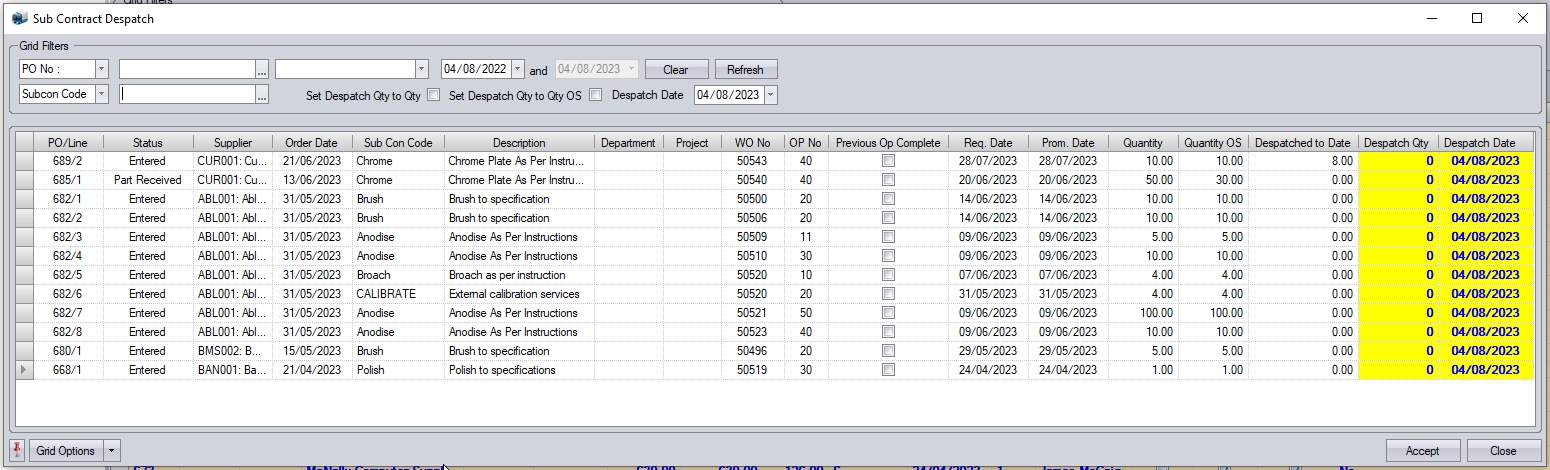
Once presented with the list, the user can select the items and quantities to be despatched. Once selected, clicking the ACCEPT option will record the despatches, and prompt the user to print the despatch notes generated.
Clicking YES will print the subcon despatch notes on the specified (or default) printer. Clicking NO will update the despatch quantities on the subcon POs only.
Partial subcon despatches also provide a new Related Items option on subcon POs. This allows the user to see the various despatch notes that have been generated for the subcon items. The user can view and reprint these from within the subcon PO's Related Items screen.
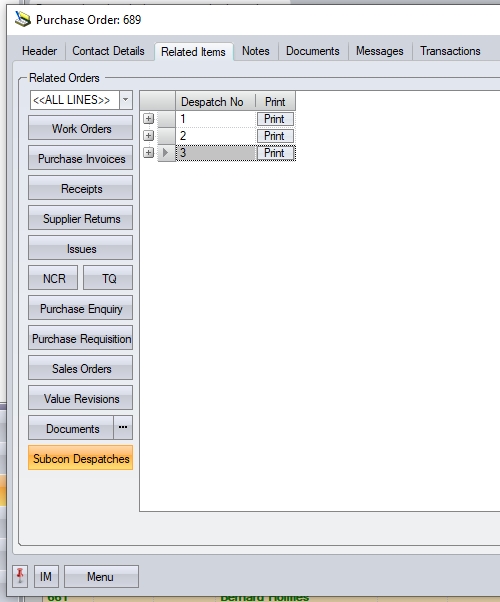
(Summary SC Despatch details)
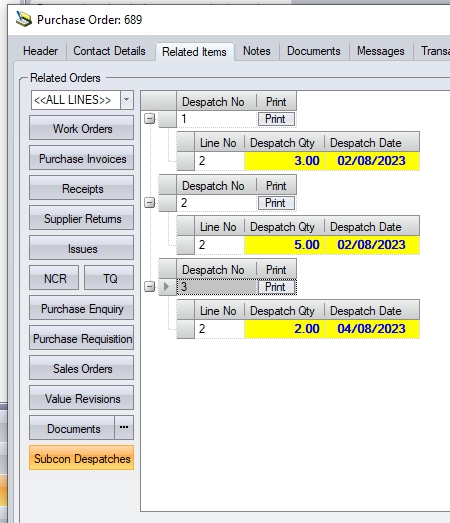
(Expanded SC Despatch Details)
The summary view shows the number of despatches made against the subcon POs. Expanding this shows the specific lines and quantities despatched on each. The user can reprint the associated despatch note using the PRINT option against each one listed.
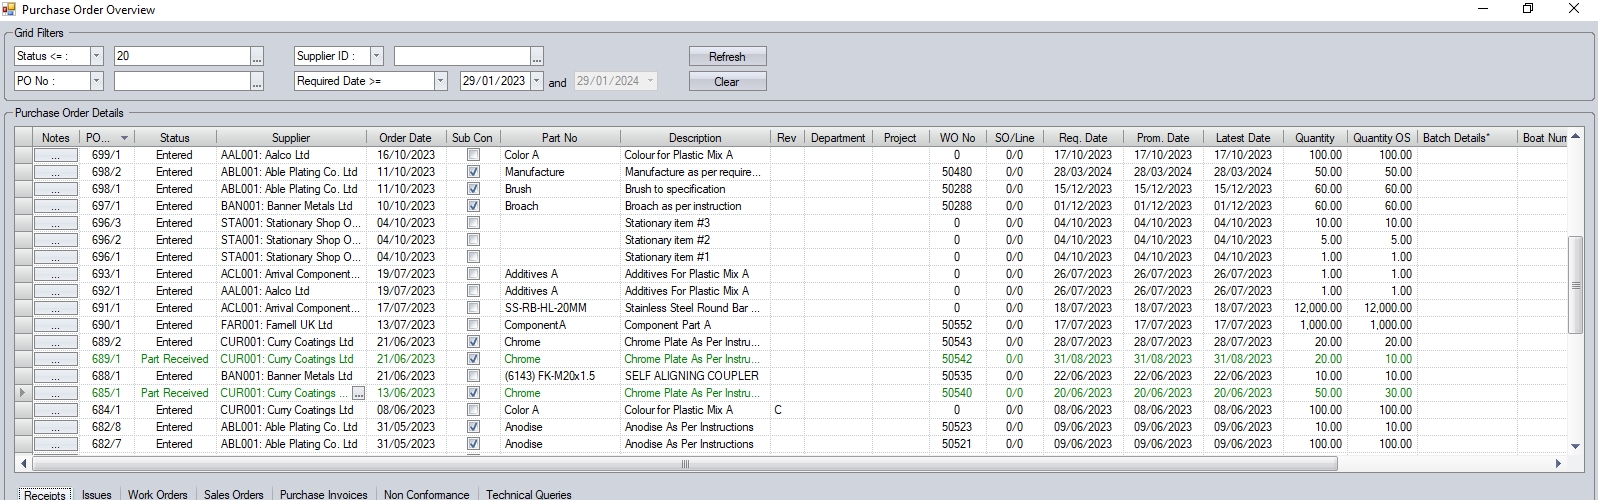
PO Overview
This option allows the user to see each incomplete PO along with associated information regarding receipts, issues and purchase invoices along with any WO information that the PO may be associated with. This screen also gives the user quick access to all notes fields to allow further notes/comments to be added to the POs.
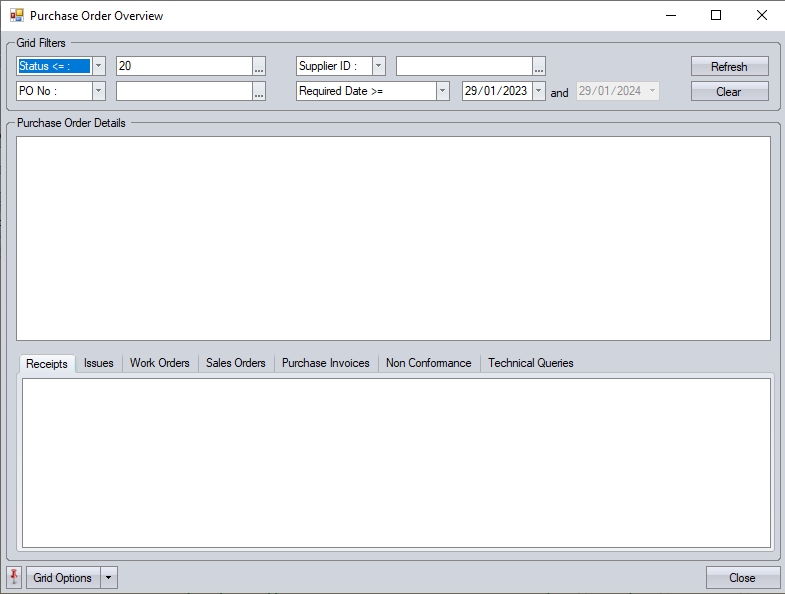
The grid filters at the top of the screen will default to show all incomplete POs (i.e. LINE STATUS = ENTERED or PART RECEIVED) and also where the REQUIRED DATE is greater than the current date, however, the user can apply any of the filters available as required to identify the PO(s) they are interested in, including by any purchase order user-defined fields (UDFs) set up against the purchase orders and purchase order lines. Once the filters have been applied, the user simply clicks ACCEPT to show the POs that meet the selected criteria.
The user can highlight any of the PO lines listed and the system will show the associated RECEIPTS, ISSUES, PURCHASE INVOICES, NON CONFORMANCES, TECHNICAL QUERIES and/or WOs in the relevant sections below. The user can drill into any of the listed items in the sections below to get any additional info they may need without leaving this screen. Some examples are shown below.
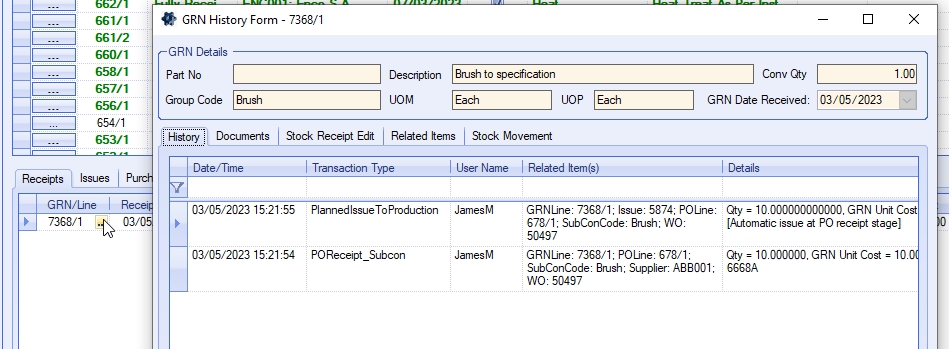
(Drilling into GRN No )
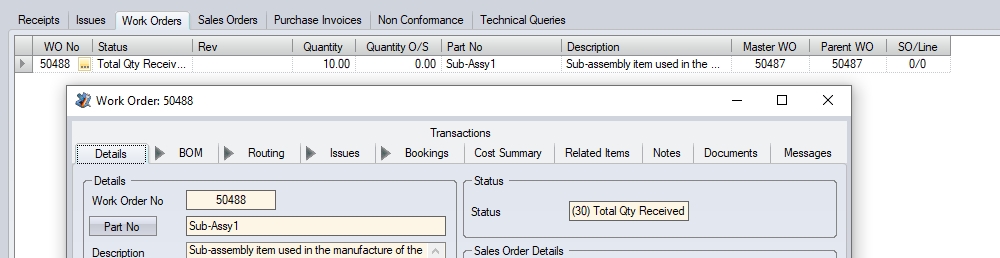
(Drilling into Work Order)
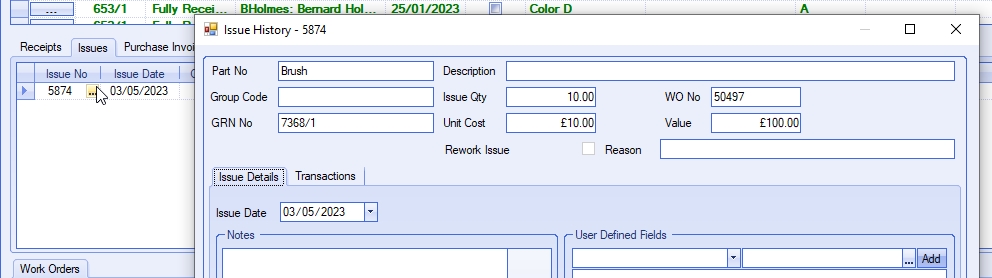
(Drilling into Issue No)
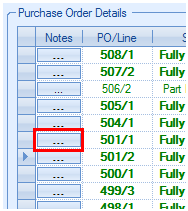
If the user wishes to edit any of the purchase order notes, they can drill into the PO line using the button highlighted below. This presents them with a form that has all the notes fields available for review and/or edit.
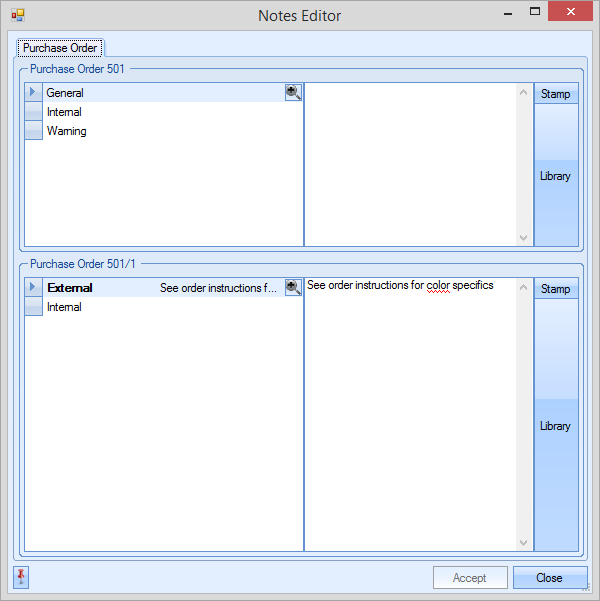
If the user amends any of the notes fields in the form above, clicking ACCEPT will save the changes to the PO.
PO Expedite
The PO Expedite screen can be used to send an email(s) to multiple contacts regarding outstanding purchase orders and can be helpful to follow up multiple outstanding purchase orders across multiple suppliers..
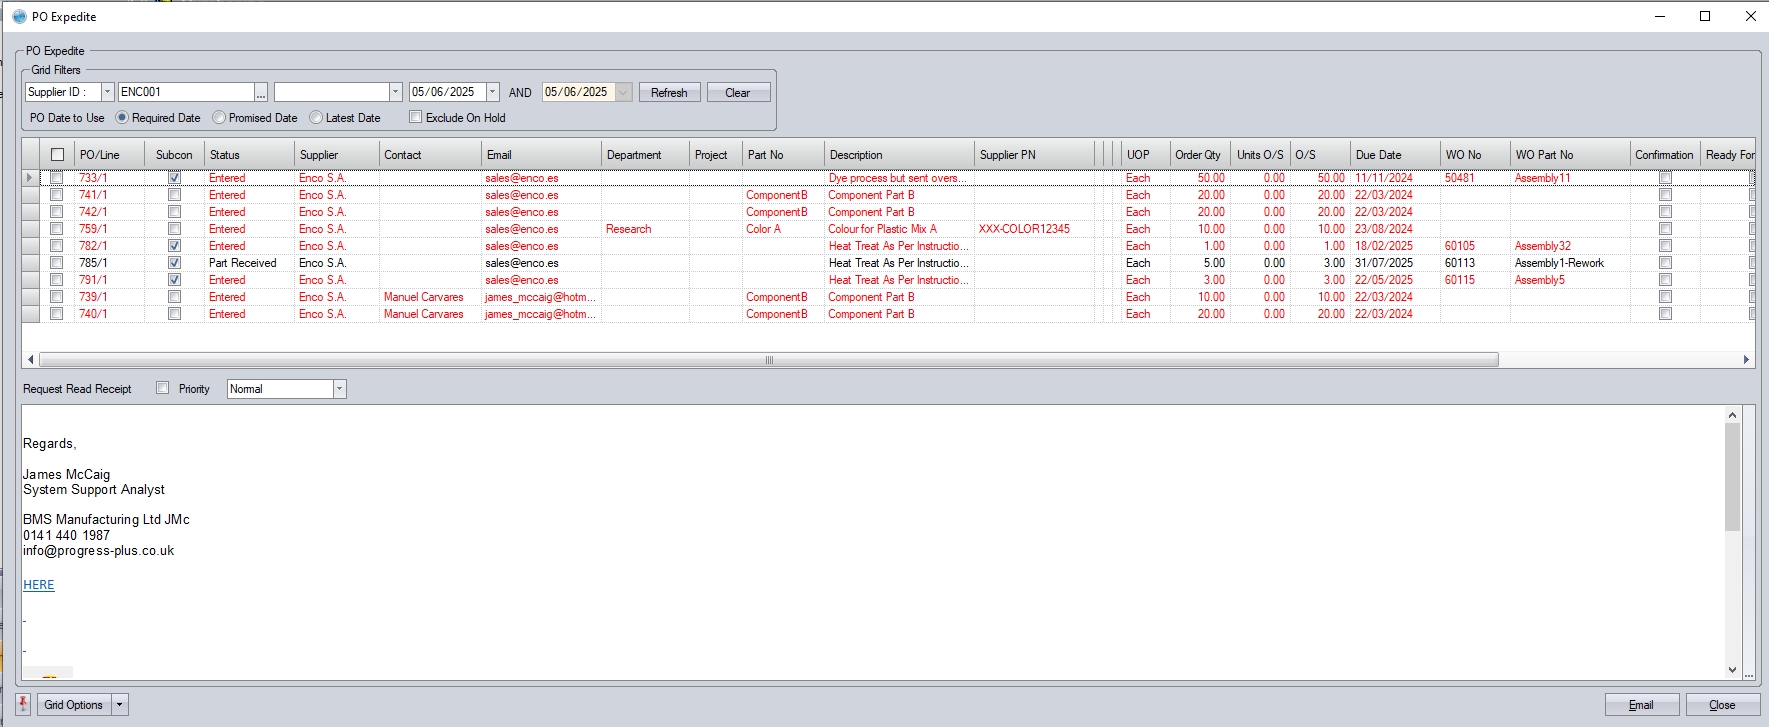
The screen will display all PO lines with a status of Entered or Part Received. Any purchase orders that are overdue will be highlighted in red. The filters at the top of the screen allow the user to search and display all PO lines based on the search criteria entered, including options for the date to use, and also to exclude orders on hold.

The listed orders will show the email address of the main contact for each supplier. If there is no email address linked to the supplier, the column will be blank. The user can select which lines they would like to enquire about by using the tick boxes.

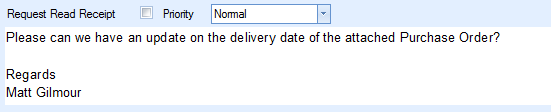
Once selected, the user can set if a read receipt is required and the priority of the email. A message can be added in the email body field requesting updates on the expected deliveries.
The user must confirm that they wish to email the selected range.
A confirmation of the emails sent will be displayed.

Each email will contain the text in the main body of the email, and a PDF attachment with the expedited orders.
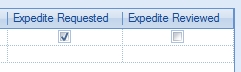
If the system is configured to use the supplier portal module, the purchase order(s) will be uploaded to the portal for the supplier to respond to. The order line itself will also have the EXPEDITE REQUESTED option ticked to indicate that its been chased up.
Export
The Export option allows the user to export the current list of purchase orders to an Excel spreadsheet for further analysis. This option can be used in conjunction with the filters available at the top of the screen or can be used with the full list of purchase orders if required. Clicking the Export option will prompt the user to create an Excel file.
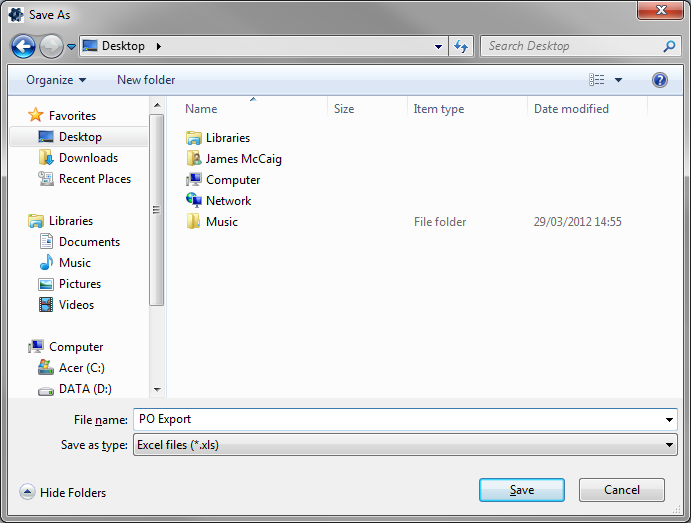
The user can specify the name required and where the exported file is saved. Clicking SAVE will generate the file. Once created, the user can open the file in Excel.

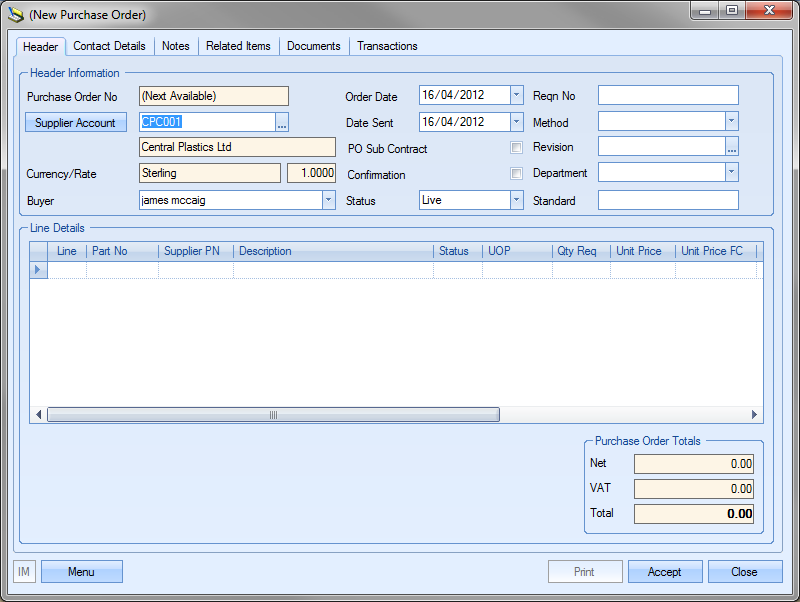
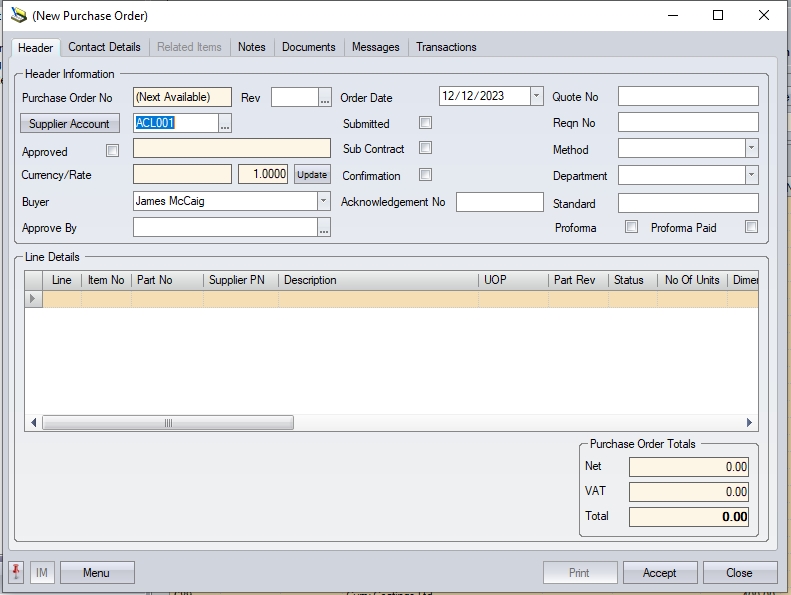
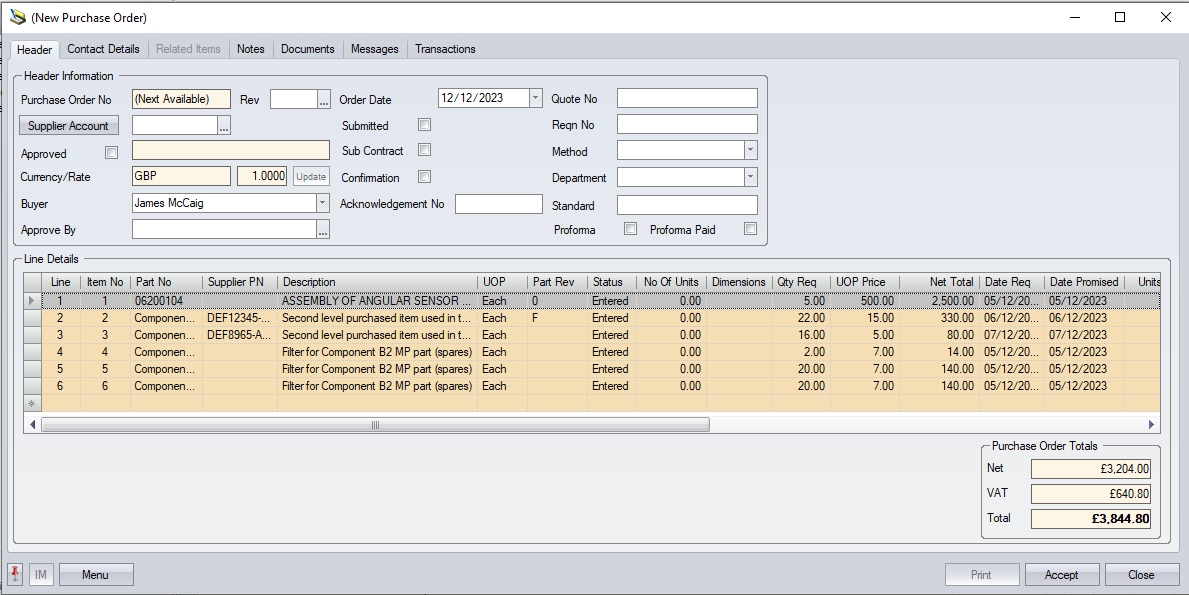
The user can create purchase orders by clicking on the NEW option at the top of the Purchasing screen. This will present the user with the new purchase order window.
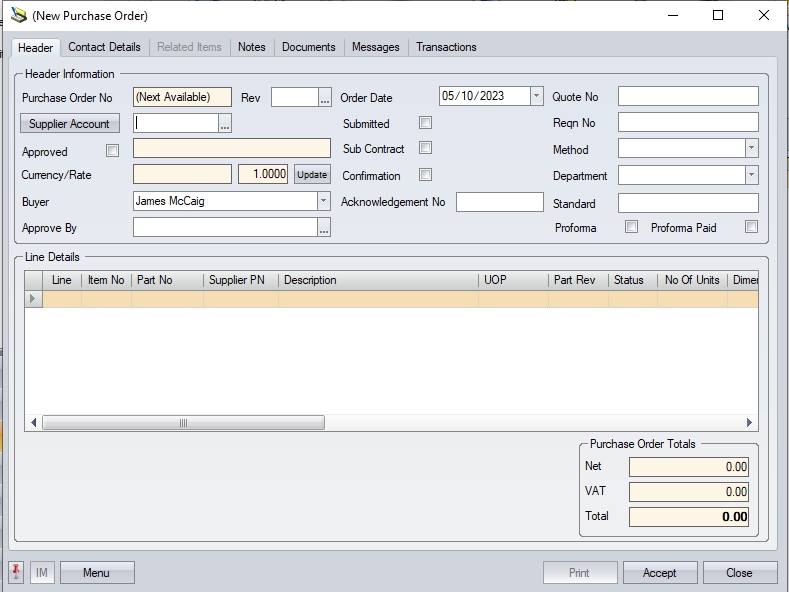
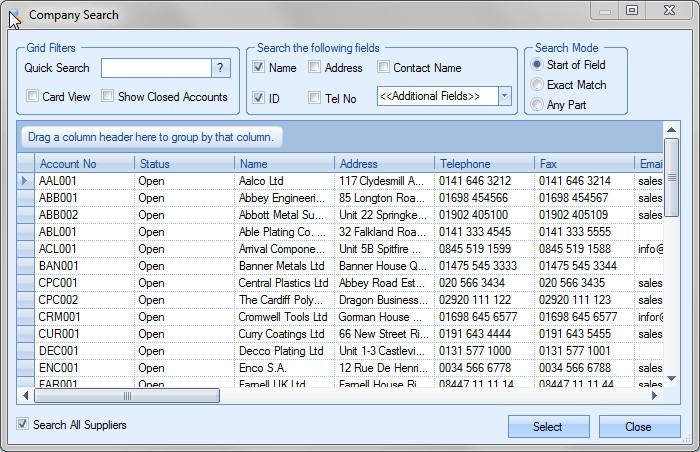
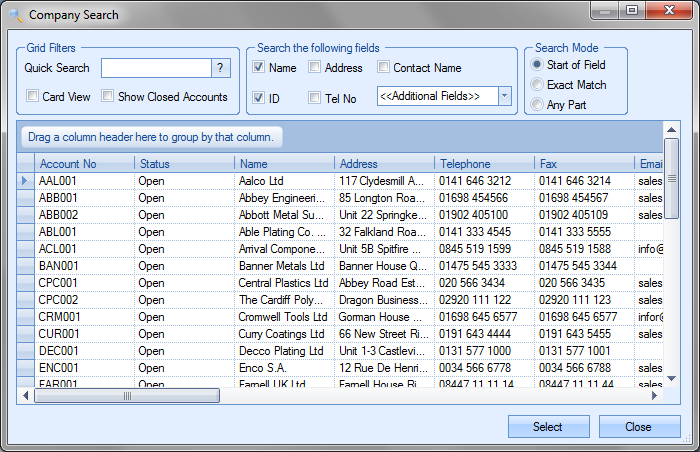
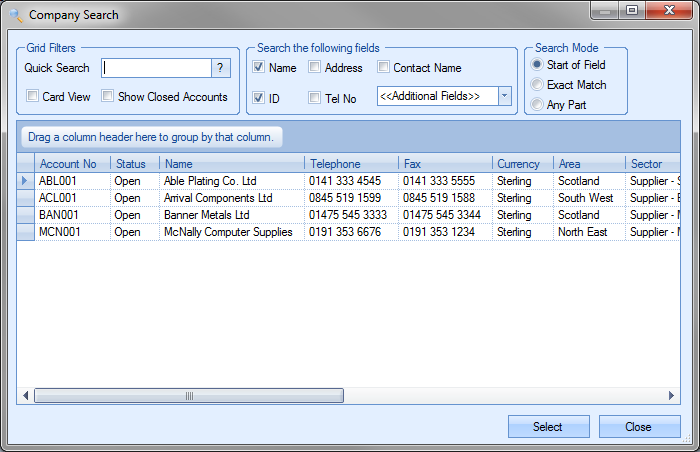
From here, the user can start to enter the necessary details for the new purchase order. Progress will allocate the next available purchase order number once the user creates the purchase order. This is assigned when the user clicks the ACCEPT option. The user must select the supplier using the SUPPLIER ACCOUNT field at the top left of the form. The user can click on the search box,![]() , to display the supplier search window. The user can then highlight the supplier and click select to choose the customer required and return to the new purchase order window.
, to display the supplier search window. The user can then highlight the supplier and click select to choose the customer required and return to the new purchase order window.
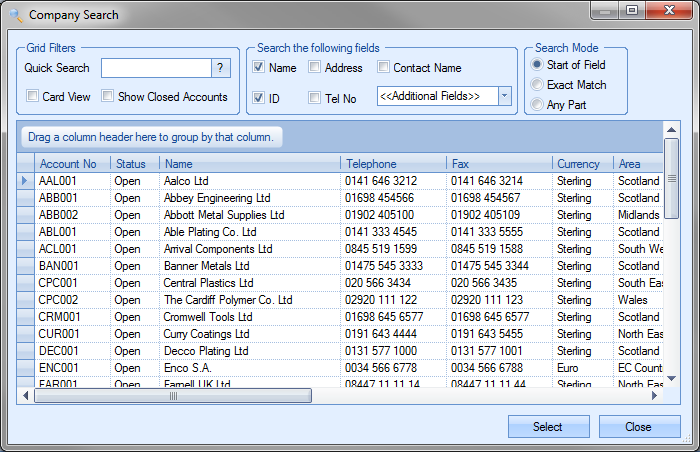
If the system option is set to only use approved suppliers, the list of suppliers presented will only be of approved suppliers.
![]()
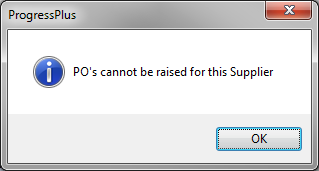
If the user tries to enter a supplier which is not approved, the user will be informed of this.
Once a valid supplier has been selected, the purchase order will be updated with the supplier’s details.
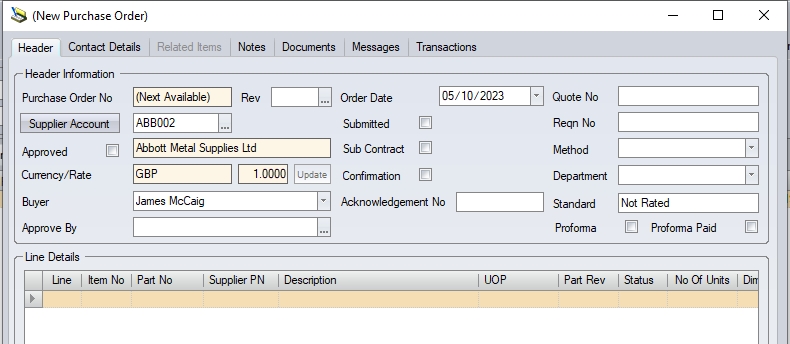
The other information is as follows:
Approved This tick box indicates whether the PO has been approved. This is only relevant if the system is configured to use the PO approval process.
| Buyer | The Buyer field will default to the user creating the purchase order. The user can change this if required from the list of names in the drop-down list. |
| Approved By | This option allows the user to set a specific employee to approve the PO. This would be highlighted on the specified employee's Today > To Do > PO For YOUR Approval screen. When selecting an approver, the approver list will only be employees with a higher PO approval limit, however, an option to show all employees is available if required. |
| Order Date | The purchase order date defaults to the current date, but can be amended if required. |
| Submitted | This date defaults to the current date but can be amended by the user to mark when the PO is printed/emailed to the supplier. A system option determines whether this is automatically ticked and updated with the current date when the PO is printed, otherwise its a manual process. |
| Sub Contract | Flag to indicate whether the purchase order is for standard purchased items or is for subcontract operations. Depending on whether this is ticked or not, the detail grid below will change between the grid for standard purchase items and the grid for subcontracted operations. |
| Confirmation | Flag to indicate whether a confirmation has been received for the purchase order created from the supplier. Once ticked, the current date will be stamped on the header although the user can set this to any date they wish. |
Acknowledgement No This field allows the user to record an acknowledgment number/reference from the supplier once the PO has been sent to and confirmed by the supplier.
| Quote No | This field allows the user to record an enquiry number against the PO. If the PO has been generated from an existing enquiry, this field will be populated by the original enquiry number. |
| Reqn No | This field allows the user to record a requisition number against the purchase order. If the PO has been created from a purchase requisition, this field will be automatically populated with the requisition number in question. |
| Method | This allows the user to specify how the purchase order was sent to the supplier. The drop-down list is maintained through the List Maintenance screen. For more information on list maintenance, see the List Maintenance section of this manual. |
| Revision | This allows the user to specify a revision number against the PO. To add a revision, the user must click the |

| The user can then add a revision, date and note regarding the revision being created. Once created, the user can select a revision by highlighting and clicking the Transfer option. This will pull the revision number through to the purchase order. |
| Department | This allows the user to specify a department for the PO to be associated with. The user can select the department from the drop-down list. The drop-down list is maintained through the List Maintenance screen. For more information on list maintenance, see the List Maintenance section of this manual. |
| Standard | This field is populated based on the standard set against the supplier in the supplier record. For more information on supplier standards, see the supplier section of this manual. |
Once all the main information is entered for the purchase order record, the user can now start to enter the details of the parts being purchased. The user can enter the details of the first item into the first blank line shown then repeat for any subsequent parts.
 |
| Line No | This is the purchase order line number. This is set by Progress. |
| Part No | This is the Progress part number to be purchased. The user can enter the part number if known or click on the |
| Note: If the part selected exists on an open purchase enquiry for the selected supplier, the system can highlight. This allows the user to link the PO line to the associated purchase enquiry if the order is being raised manually as a result of the enquiry. This check is a system option, so can be on or off. The option can be found in the Purchasing section of the system options. For more information on the system options, please refer to the relevant section of the manual. |
| Supplier PN | This is the supplier part number equivalent to the Progress part number. If the default supplier part number has been set up against the inventory record of the Progress part, it will be displayed here. |
In addition to this, Progress also has functionality that allows the user to select a supplier part number to be used for the order. Where a supplier has multiple supplier part numbers for the same item, these can also be set up against the Progress part number.
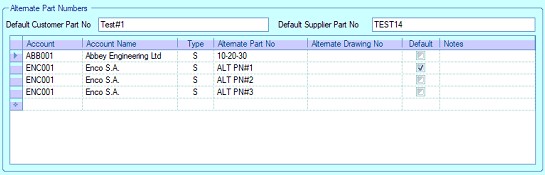
When the PO line is created, the user can select the preferred supplier part number from the drop-down list provided.

Once selected, the user can proceed with the rest of the information required for the line. For more information on supplier part numbers, please refer to the inventory section of this manual. To switch on the functionality to allow selection of the supplier part numbers, please contact Progress.
| Description | This is the description of the Progress part entered by the user. This is the description held in the inventory record. The user can also use the description field to enter details of any parts they are ordering on the purchase order where the part does not exist in Progress. Examples of this are may be for services or items where stock control is not important. |
| Status | This is the status of the purchase order line. Defaults to ENTERED status upon creation. The status of the line changes to indicate the status of the order depending where it is in the process of being completed. The statuses displayed are as follows: |
| ENTERED: Default status of new order line. Indicates order has been raised on system, but no other action has been taken. |
| ON HOLD: This status places the PO line on hold. PO line cannot be receipted at this status. |
| PART RECEIVED: Indicates that the purchase order quantity has been partially received. |
| FULLY RECEIVED: Indicates that the quantity ordered has been fully received. |
| COMPLETE: Indicates the order line has been received and marked as complete. Completion is done after the purchase invoice has been created. |
| CANCELLED: Indicates purchase order line has been cancelled. |
| UOP | This is the selected part’s unit of purchase (UOP). If the item being purchased is a non-inventory item, the user should set this to EACH. |
| Qty Req | This is the quantity on order. |
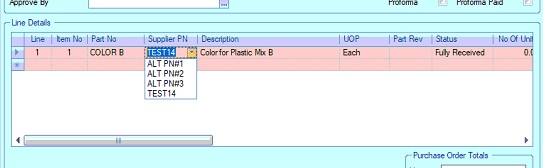
| Unit Price | This is the purchase price for the part. This will default to the purchase price of the part entered on the order line. If a supplier price matrix is set up, then the price from this will default based on the supplier on the purchase order, the part selected and the quantity being ordered. If the user amends the quantity, and the new quantity falls into a different price matrix price bracket, the system will update the price and highlight this to the user. |
| Net Total | This is a calculated field and is the total NET value of the purchase order line. Calculated as: |
| NET Price = Quantity* Unit Price |
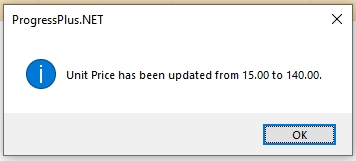
| Date Req | This is the date the items are required to be delivered by. Setting this initially will set the PROMISED DATE and LATEST DATE to the same date. If the user sets this to a date which is a factory holiday in Progress (i.e. when they are closed for business), the system will warn the user accordingly. |
| Date Promised | This is the date that the items have been promised by. Changing this date will automatically update the LATEST DATE to the same date. If the user sets this to a date which is a factory holiday in Progress (i.e. when they are closed for business), the system will warn the user accordingly. |
| Latest Date | This is the latest date received from the supplier regarding the items delivery. This is used to capture any subsequent changes to dates beyond the Date Req and Date Promised dates. If the user sets this to a date which is a factory holiday in Progress (i.e. when they are closed for business), the system will warn the user accordingly. |
| Qty Rec | This is a calculated value and is the total quantity received against the purchase order line. |
| Returned | This is a calculated value and is the total quantity returned to the supplier against this purchase order line. |
| WO No | This is the work order the items are being ordered specifically for. When the purchase order is raised using the bottom half of the Items To Be Purchased screen, the work order number will be automatically populated. The work order number can also be manually added via this screen. |
| Cert | This tick box indicates where a supplier certificate of conformity (CoC) is required upon receipt of goods. |
| Requires Release | This tick box indicates whether the item will be placed on temporary hold once booked into stock. The flag is set based on the part number default setting for REQUIRES RELEASE. User can tick or un-tick depending on the requirements of this part and order. For more information on the Requires Release functionality, please refer to the Parts List section of this manual. |
As lines are added to the purchase order, the purchase order totals are updated to reflect the total values of the purchase order.
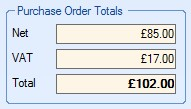
NET Total
The NET figure will show the total value of the purchase order created. If a discount has been applied to any of the order lines, the NET figure will have an asterisk (*) shown against it to highlight this.
![]()
![]()
VAT Total
When a purchase order is created, the individual lines will default to the VAT rate specified against the supplier. However, if the order contains a mix of VAT rates across the different line items, the system will highlight this by showing an asterisk (*) against the VAT total figure shown at the bottom right corner of the sales order.
![]()
![]()
Purchase Order Contact Details
This section of the purchase order shows the contact information for the supplier.
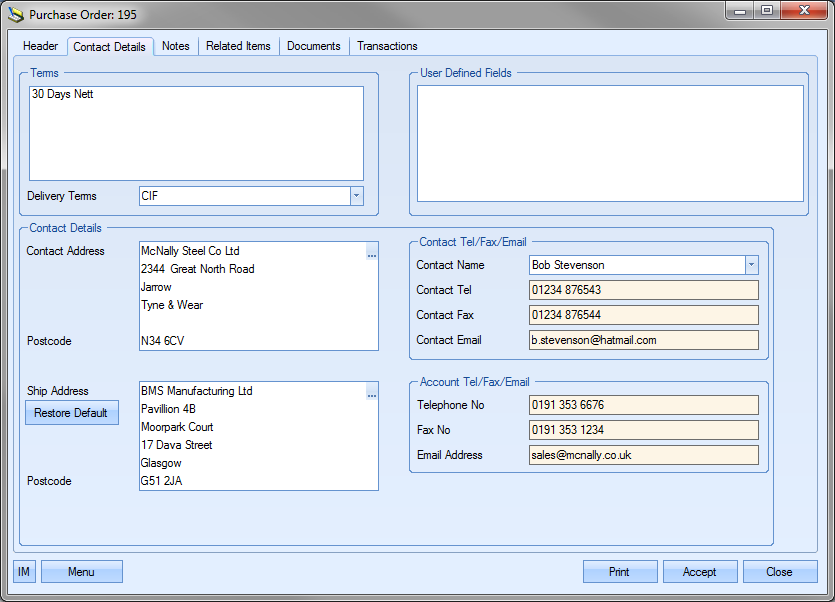
| Terms | This is the supplier specified terms. If the supplier has terms already set up, this will be displayed here on the purchase order. If no terms are specified against the supplier, this will be blank. The user can manually add terms to this section manually if required. |
| Delivery Terms | This is the supplier’s delivery terms. Again, if this is specified against the supplier record, this will be pulled through and displayed here on the purchase order. If the supplier has no delivery terms set up, this field will be blank. Again the user has the option to add/amend the delivery terms by selecting an entry from the drop-down list. |
| Contact Address | This is the default supplier’s address. If an alternative address has been set up for the supplier and marked as the default PO address, then this will be displayed here. If no alternative default address has been set up for the supplier, this will be the main address of the supplier. The user also has the option of manually choosing an alternative address or manually adding an address if required. |
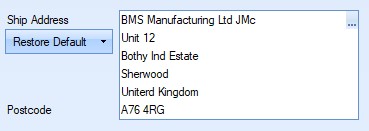
| Ship Address | This is the default ship address. If an alternative address has been set up against the supplier and set as the default PO Ship address, then this will appear here. If no alternative default address has been set up for the supplier, then this will be main address of the user’s company. The user also has the option of manually choosing an alternative address or manually adding an address if required. If an alternative has been selected or manually entered, the user can click the Restore Default option to revert back to the default ship address or the main company address. |
In addition to the default options, the user also has the ability to select one of any additional company addresses that have been set up in the List Maintenance section of Progress. The user can set up other ship to addresses for use in this section as follows.
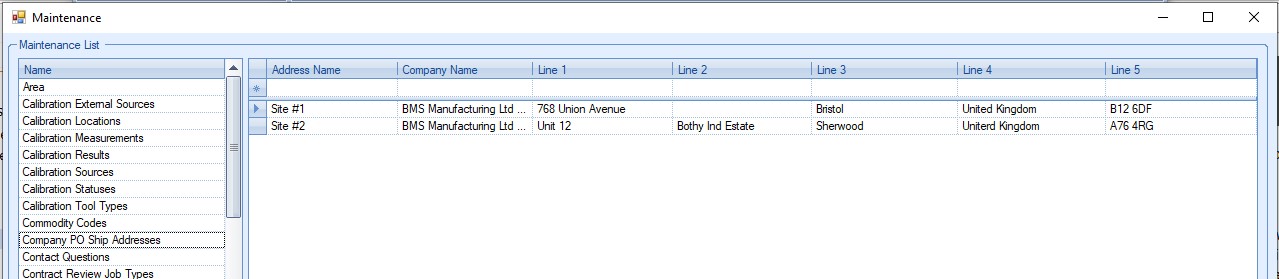
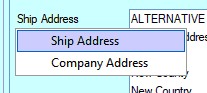
Once the additional addresses have been set up, the user can select any of these by clicking the BUILD option against the Ship Address.

This presents the user with the Address Selector screen, from which they can select the address type they wish to use.
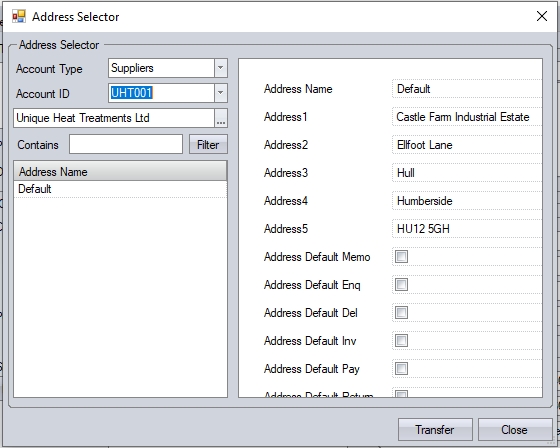
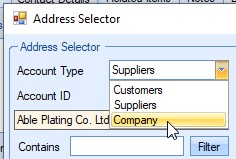
The user can change the Account Type field to "Company", which will then allow them top select any of the addresses set up in List Maintenance.
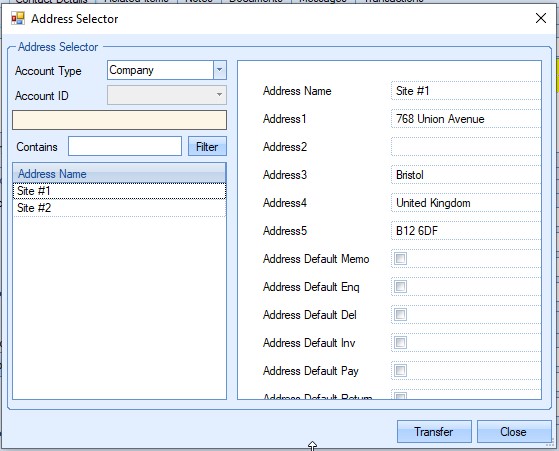
Once selected, the user can click TRANSFER to pull the selected address through to the purchase order.
| Contact Tel/Fax/Email | This shows the default contact for the supplier. If no default contact has been set up against the supplier, then this will be blank. If more than one contact exists against the supplier, the user can select alternative contact names if required. This also determines the contact telephone and fax numbers as well as the email address. The appropriate details will be shown depending on the contact chosen. |
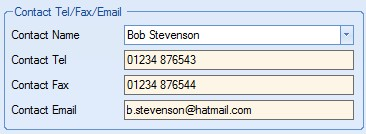 |
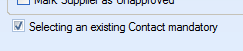
NOTE: Selection of the contact can be restricted to valid supplier contacts using a one of the system options in the Admin section of Progress. This option makes it mandatory to select only from the existing contact list for the supplier. The option to switch this on is shown below and is accessible in the Miscellaneous system options.
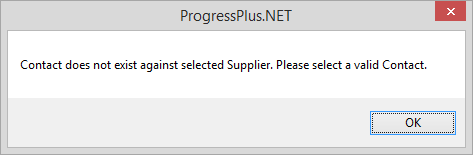
| Trying to enter a contact name which doesn't already exist against the supplier results in the following warning appearing. |
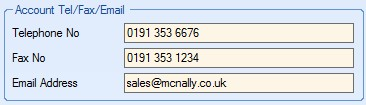
| Account Tel/Fax/Email | This is the suppliers main contact information recorded against the supplier. |
Any changes made on this section of the purchase order can be saved by clicking the ACCEPT option.
Purchase Order Notes
This section allows the user to record notes against the purchase order if required. This is also where any supplier specific notes for purchase orders will be displayed when pulled through from the supplier notes section.
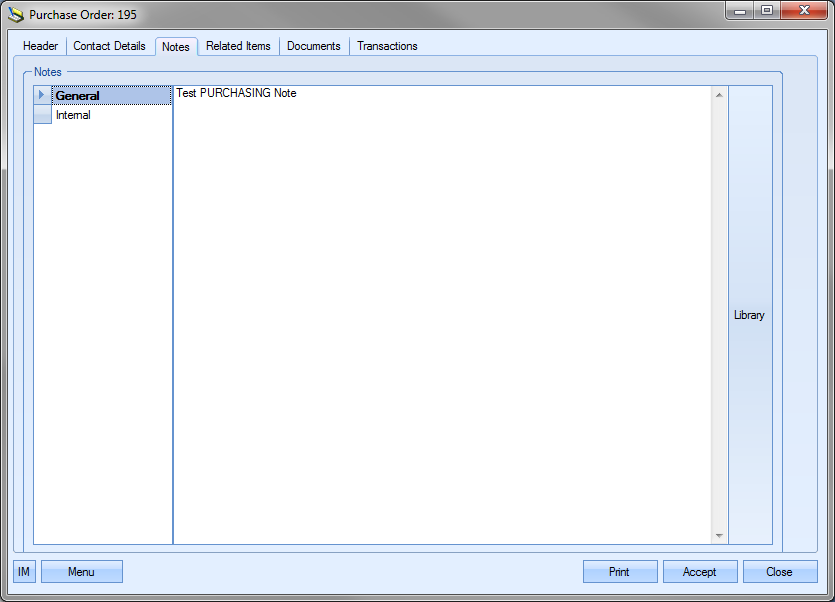
For more information on the supplier notes, please refer to the supplier section of this manual.
Purchase Order Related Items
This section shows all the related items with regards the selected purchase order line.
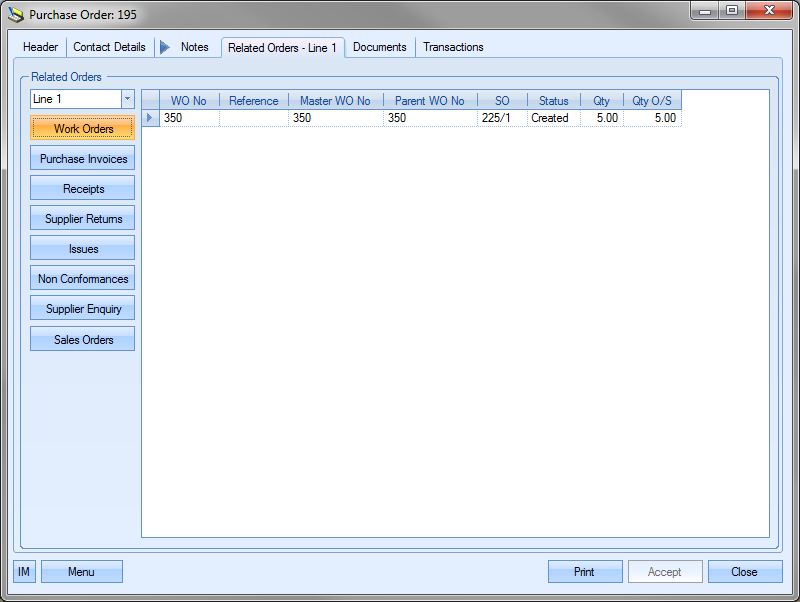
The user can click on any of the items listed on the left hand side of the window to see the details of any item that is linked to the selected purchase order line. The user can also change which purchase order line they are looking at by selecting the purchase order line required from the drop-down list at the top.
Any items listed in the grids can be accessed for further investigation by clicking on the ![]() option presented when the user clicks on the record. For example, if the user wanted to investigate the work order listed above, they can click on the
option presented when the user clicks on the record. For example, if the user wanted to investigate the work order listed above, they can click on the ![]() option to open the work order in question.
option to open the work order in question.
This will result in the specific work order screen being displayed for the user.
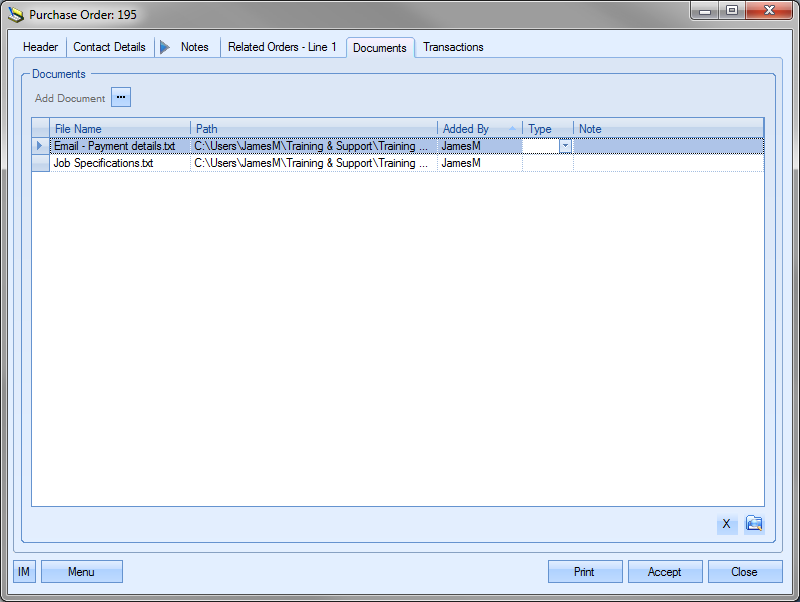
Purchase Order Documents
This section of the purchase order allows the user to attach documents if required. These may relate to material specifications of the material being ordered for example or maybe an email of correspondence between the user and the supplier.
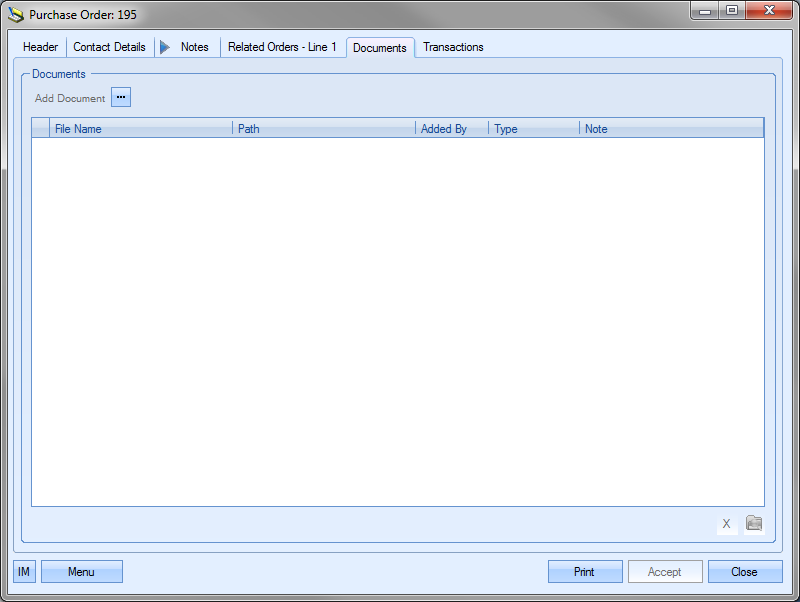
To record documents in Progress, the user simply clicks on the Add Document option to select the file required.
![]()
This will open a standard Windows explorer window to allow the user to search for the file to be attached.
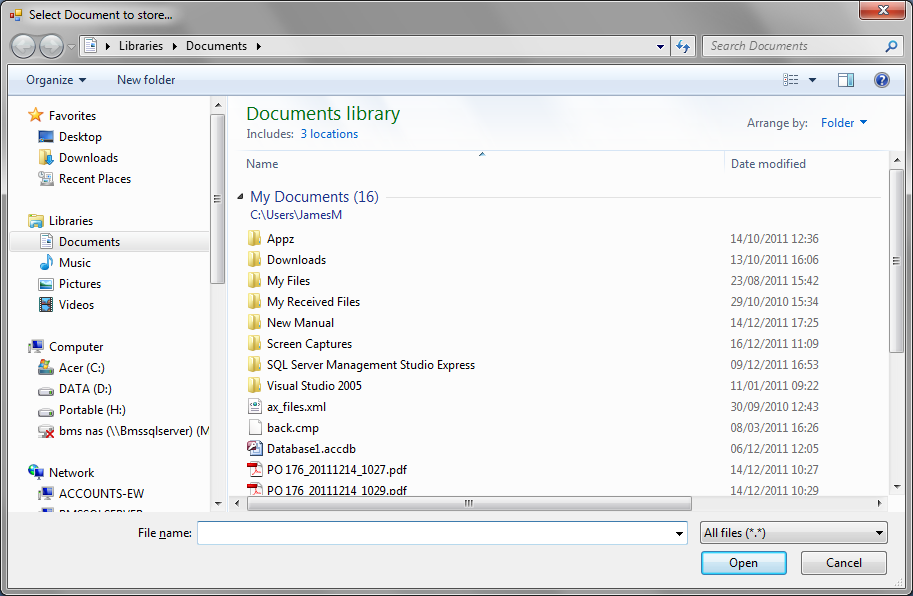
Once the user has selected the file required, Progress will return the user to the documents screen and list the selected file.
NOTE: To allow access for other users to the files added to the purchase order record, the user must ensure that these files are held in a folder accessible by all users. Typically a shared network folder would be created for this purpose.
Once the file(s) have been added, the user can specify a file type or comment associated with the document. The Type can be chosen from the drop-down list.
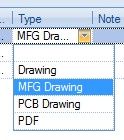
This drop-down list can be populated from the List Maintenance section of Progress in the Document Types list as shown in the screen below.

For more information on maintaining lists and the List Maintenance section of Progress, please refer to the List Maintenance section of this manual.
A note for the document can be added directly to the Note field as shown.
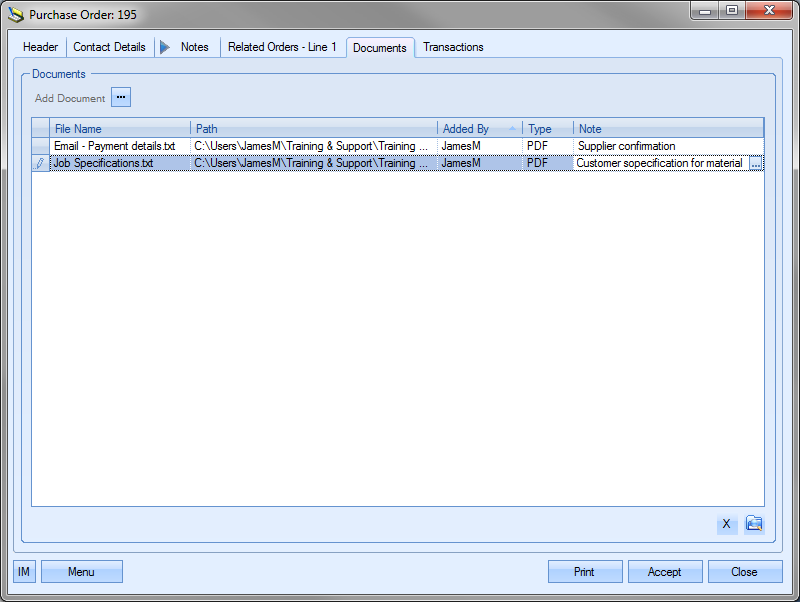
Once all documents and details have been added, the user can save the changes by clicking on the ACCEPT option.
Purchase Order Messages
This section shows all associated messages and emails relating to the purchase order.
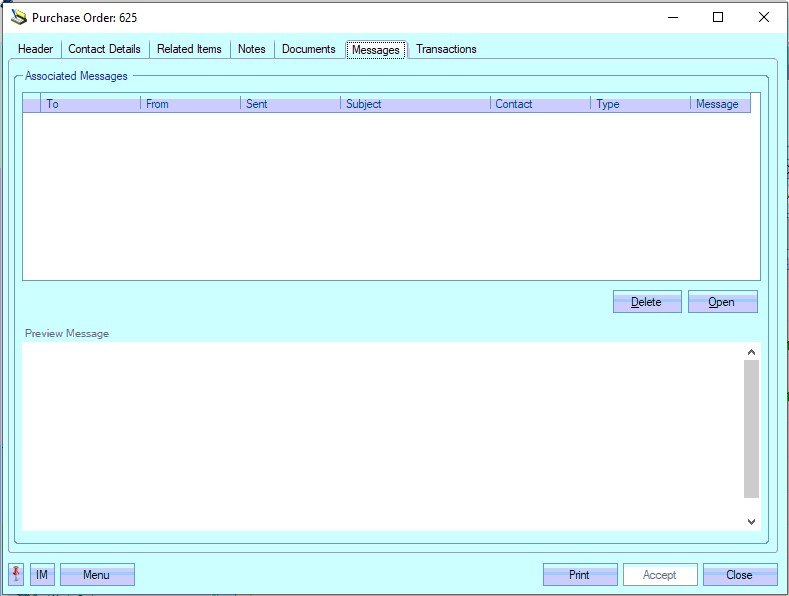
Any communication relating to the purchase order (i.e. emails, instant messages, etc.) will all be listed here for the user to view.
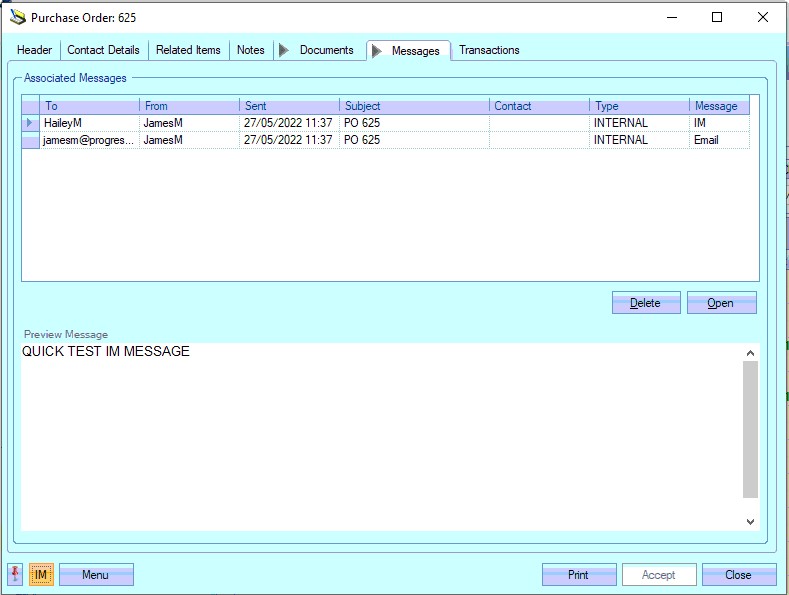
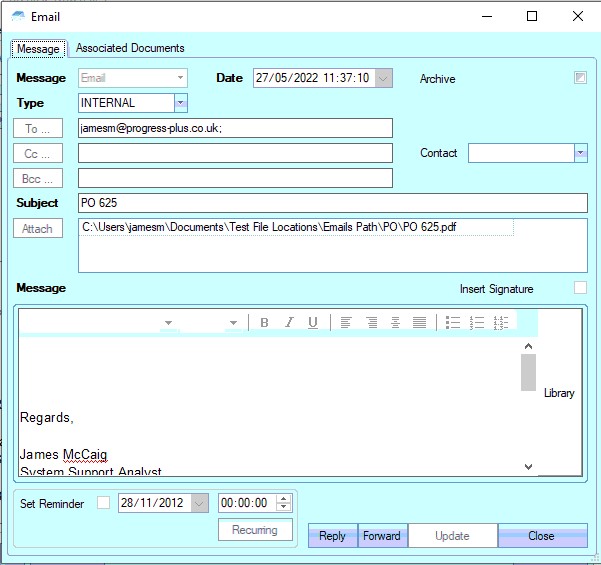
The user can open any of the items listed on this screen but either double-clicking on the listed item or by highlighting and clicking OPEN. The selected item will then be displayed for the user to view.
The user also has the ability remove messages recorded, if permitted. Permission to delete messages is set up against the user permissions. For more information on user permissions, please refer to the Administrator Functions > Access section of the manual. If the user has permission to remove messages, then the DELETE option will be available.
Messages can be deleted by simply highlighting the item and clicking the DELETE option. The user will be prompted to confirm the deletion.
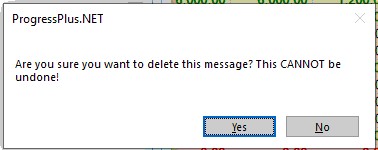
Clicking YES will delete the selected message, and the screen will be updated.
Purchase Order Transactions
This section of the purchase order shows a complete list of transactions made in Progress by the users that relate to this purchase order.
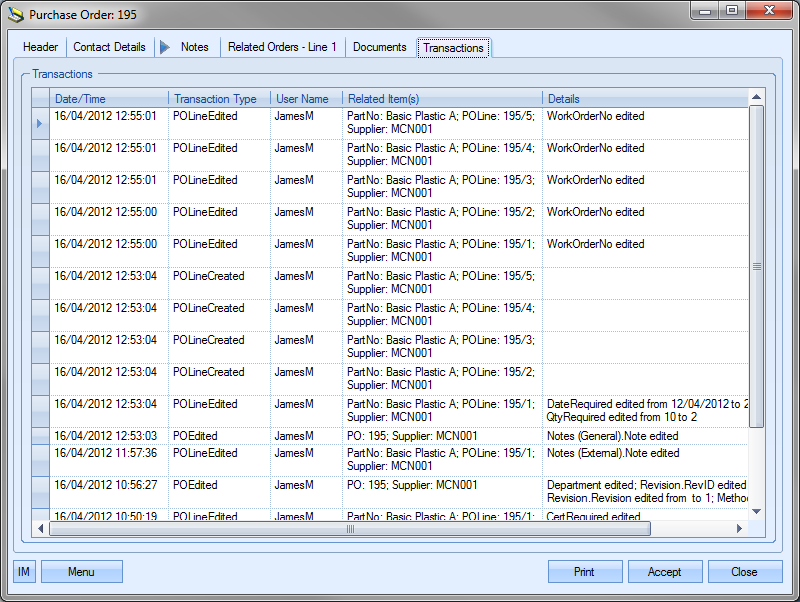
The user can see what transactions have occurred as well as details on the changes made. This is often very useful when trying to find out why something has changed unexpectedly or if the user needs to find out who made a particular change.
| Date/Time | The date and time that the transaction occurred. |
| Transaction Type | This field names the type of transaction recorded. This references both the area of Progress and the action, i.e. SupplierEdited – change made to a supplier, PurchaseInvoiceCreated – new PI created, etc. |
| User Name | User who made the transaction. |
| Related Item(s) | Reference information on the exact record that was amended, i.e. Purchase order number, Supplier, Non Conformance, etc |
| Details | Brief explanation of edited information. |
Once all the details have been entered for the purchase order, the user can print off the purchase order for sending to the supplier by clicking on the Print option. This will produce a document similar to the following.
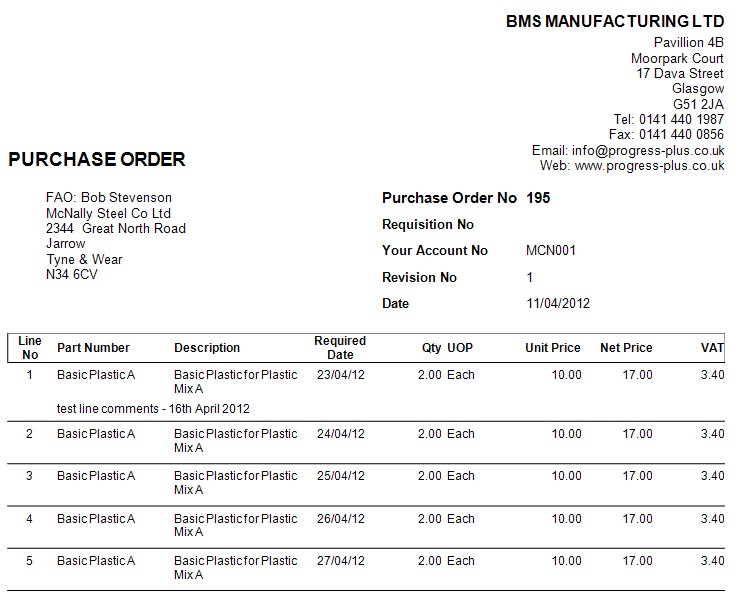
The user can email this purchase order direct to the supplier or print off and post or fax to the supplier as required to place the order.
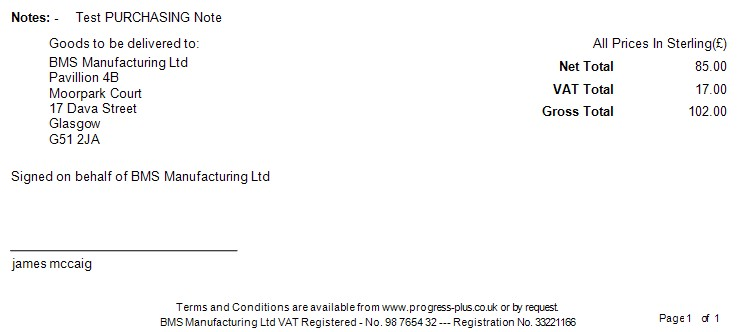
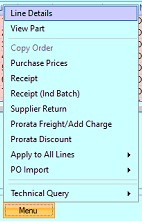
Purchase Order Menu Options
Additional options for the purchase order are available from the Menu option.
Purchase Line Details
Further information can be added or amended for a purchase order line by accessing the purchase order line details. This can be done in two ways; double-clicking the purchase order line or by selecting the Line Details option from the Menu option at the bottom of the PO.
Either method will present the user with the following screen.
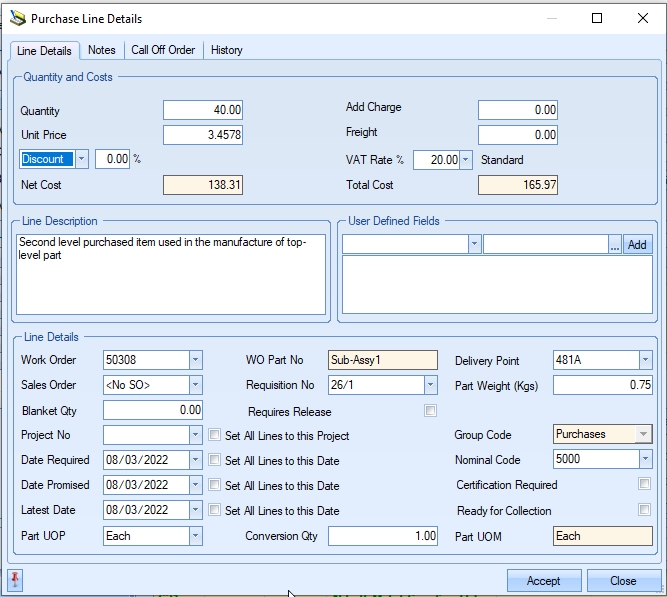
The Quantity and Costs section at the top shows the quantity on order previously entered, the unit price as well as any discounts or surcharges applied, and additional/freight charges to be included with this order line. Any changes to this information here will refresh the main purchase order screen and the totals shown once the user clicks ACCEPT to save the changes.
If any user defined fields have been created for use against the purchase order line, they will be shown in the appropriate section on this screen.
The line details section of the above screen shows any links to work orders, sales orders or projects as well as the following information.
| Work Order | Work order that the purchase order line has been raised specifically for. The WO Part No field displays the associated WO part number once a WO is selected. |
| Sales Order | Sales order that the purchase order line has been raised specifically for. |
| Blanket Qty | This allows a blanket PO quantity to be recorded against the item. For more information on how this works and its effect, please refer to the Blanket PO section below. |
| Project No | If the purchase order line has to be marked as part of a particular project set up in Progress, then the user can select the project number from the drop-down list here. If the project is changed and purchase invoices have already been raised against the PO line, then the system will give the user the option to update the PROJECT value on the associated purchase invoices to ensure they all match. |
| Date Required | This is the date that the order items need to be delivered by. This will default to the system calculated date based on work order start dates and the purchasing lead time set up against the part in question. The user can amend this if required by selecting the required date from the drop-down calendar. |
| Date Promised | This is the date promised by the supplier for delivery of the goods. This defaults to the same date as the Date Required field, but can be changed independently if the supplier has responded with as different date for delivery. |
| Latest Date | This is the latest date recorded against the PO line for delivery from the supplier. This defaults to the same date as the Date Required field, but can be changed independently if the supplier has responded with as different date for delivery. This field allows you to retain the original Required Date, and subsequent Promised Date and still record any subsequent changes to the dates. |
| Part UOP | This field is the PO line unit of purchase (UOP). This will default based on the part's UOP from the inventory record when the PO is raised but can be amended on the PO if its different on the current PO. Also visible is the part's unit of measure (UOM) which is the unit that the item is stocked in. |
| Requisition No | This is the associated purchase requisition number. The user can select from the list of available purchase requisitions however, if PO is created from conversion of a purchase requisition, then this will be automatically populated with the associated requisition number. |
| Conversion Qty | This is the conversion factor between how the items are being purchased (UOP) and how they are stocked (UOM). When calculating the end stock figure, this is the number that the UOP is multiplied by to get the stock total being received. |
| Delivery Point | This is the part number’s default location as set in the inventory record. This can be changed to any valid stock location. |
| Weight (Kgs) | This is the single unit weight of the purchase order line part as set in the inventory record of the part. |
| Group Code | This is the group code set against the part’s inventory record. This will also be used to determine the nominal code is the part has no specific nominal code set up against it. |
| Nominal Code | This is the part nominal code as set against the part’s inventory record. If the part does not have a specific nominal specified, this will remain blank. |
| Certification Required | Tick box indicating whether the certificate of conformity (CoC) is required for this line. This is the same tick box as the one shown against the purchase order line. |
| Set All Lines... | The user also has the following options available in this section. |
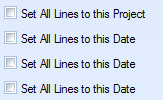
| These options allow the user to update all other purchase order lines with the same information as the current line details. This is useful if you have a purchase order for many items for the same project which have the same dates. Simply ticking any or all of these options and clicking the Accept option will update all other purchase order lines to reflect the same dates and/or project number. |
| Notes | The user also has some text fields where notes and comments can be added for reference. Text added to the External notes field will be displayed on the purchase order print against the appropriate purchase order line. |

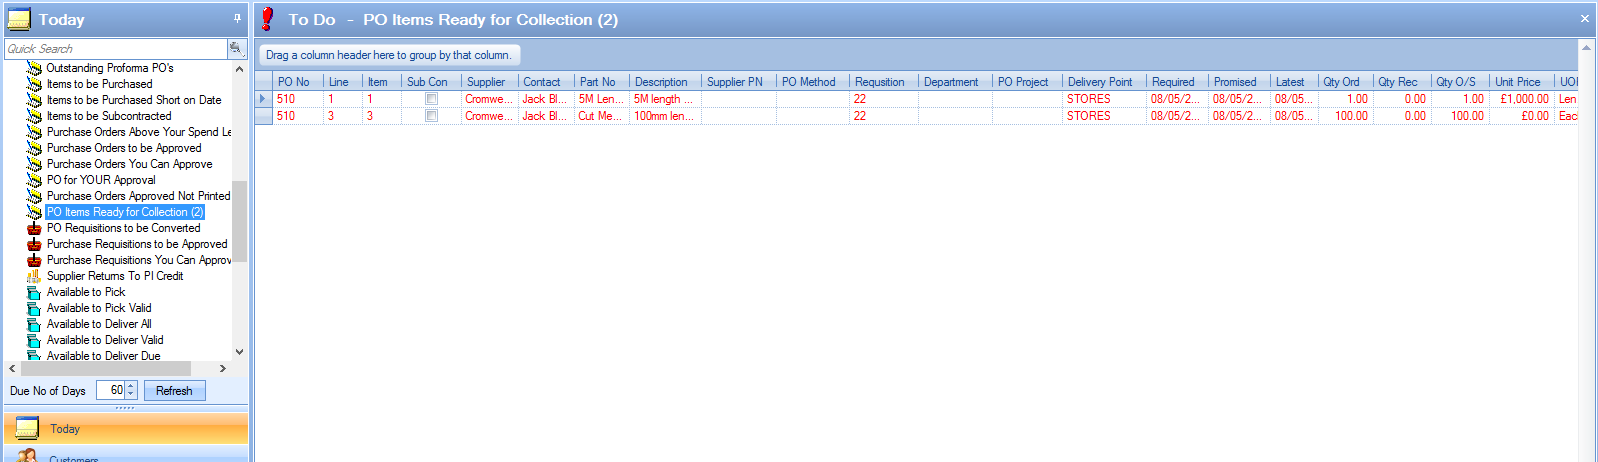
| Ready For Collection | If the goods are being collected from the supplier, and notification has been received from the supplier that they are ready for collection, the PO line can be updated to highlight this using the option highlighted below. |
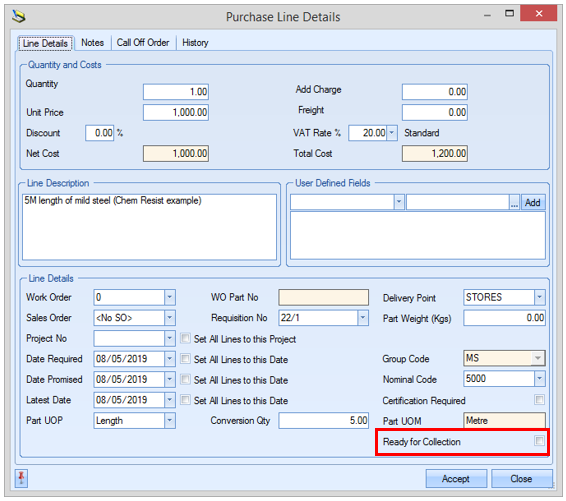
Clicking this option will highlight the PO line item on the Today screen, highlighting that the goods can be collected.
 |
| Once the goods have been collected from the supplier, the PO line can be updated to remove it from the screen above by unticking the READY FOR COLLECTION option on the PO line details. |
Purchase Line Call Offs
The user can also create a call-off schedule from this screen by selecting the Call Off Order tab. This will present the user with the following screen.
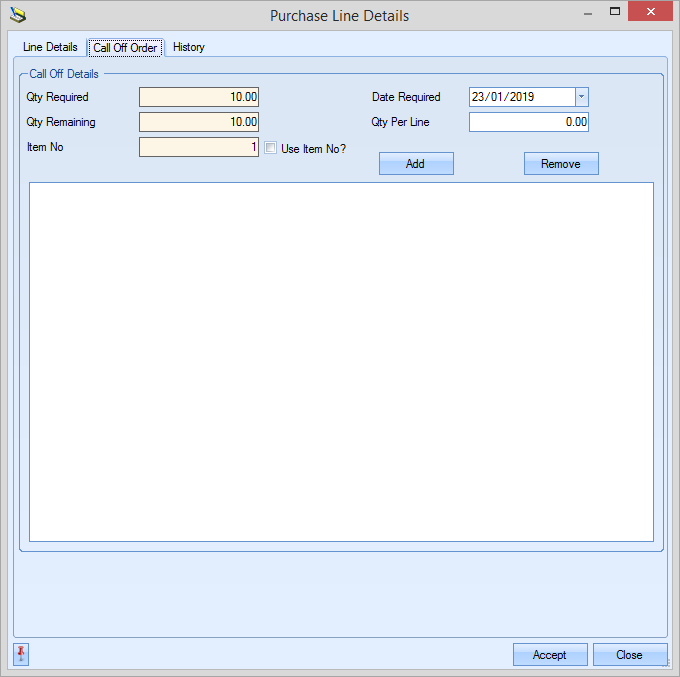
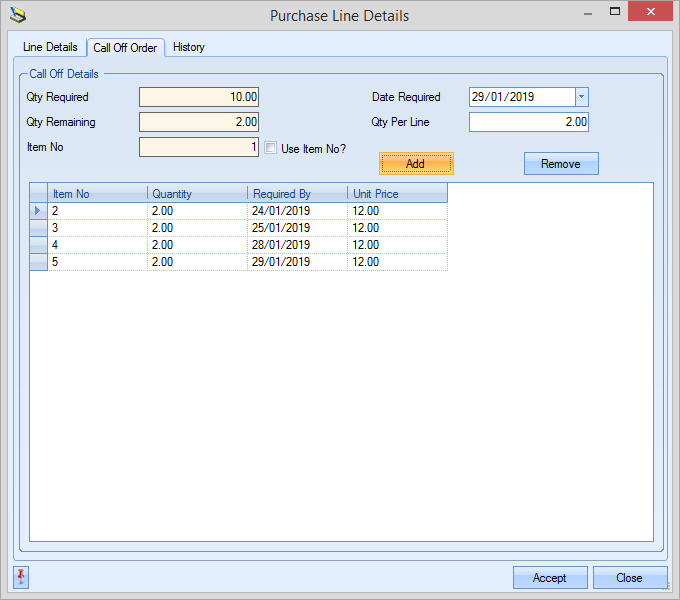
The purchase order line quantity is shown at the top as well as the outstanding quantity. The user can create call off quantities for specific dates by selecting the date required from the drop-down calendar, entering the required quantity for the selected date in the QTY PER LINE field and clicking on the ADD option. This is then listed in the section below as shown below.

As shown above, the QTY REMAINING field is reduced by the quantity scheduled. If the user needs to add additional call off quantities, they can repeat the above process for the remaining quantity until all the required dates are added.
Once all the dates and quantities have been specified, the user can save the call off schedule by clicking the ACCEPT option. This returns the user to the main purchase order screen and shows each call off line as separate purchase order lines with their respective required dates.
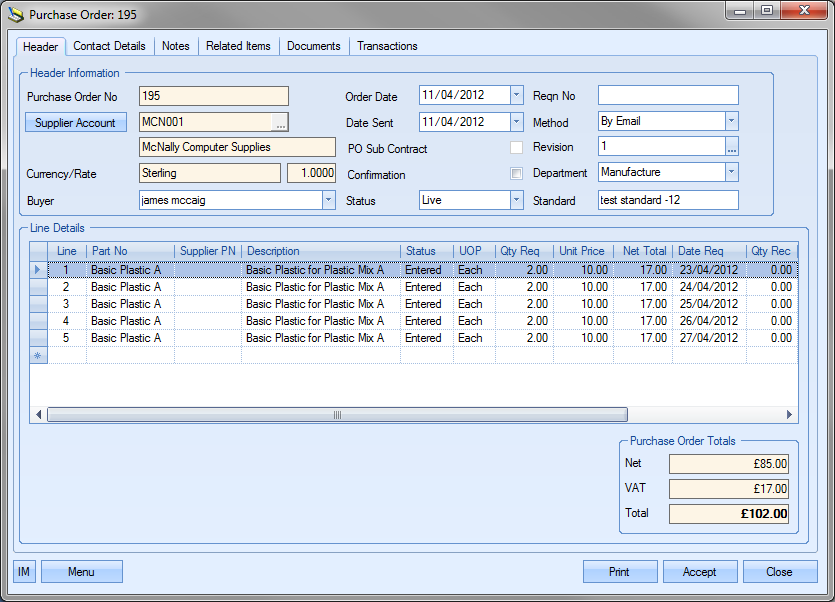
Clicking ACCEPT will save the PO with the new call off lines.
Purchase Line History
This tab shows some history of the line part number and the PO supplier. The user has a several options to view various historical information.
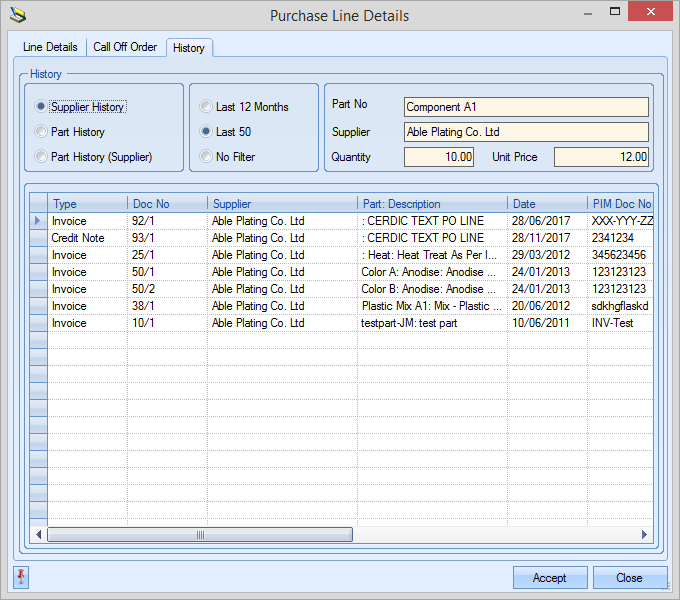
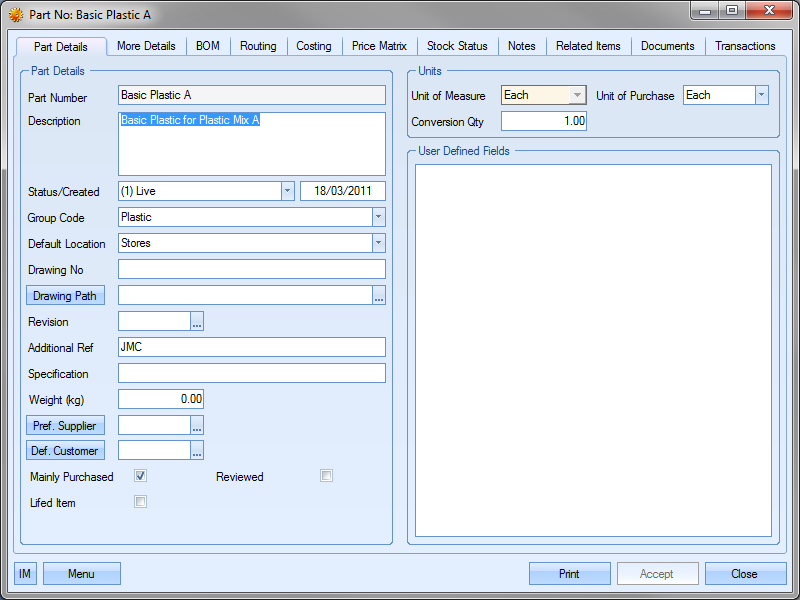
View Part
The View Part option presents the user with the inventory record for the part number on the selected purchase order line. If the purchase order is for subcontract work, then the associated WO part is displayed.
Copy Order
The Copy Order option allows the user to copy the line items from an existing purchase order. This can be useful when ordering a large number of items regularly. Once the user has created a new purchase order and selected a supplier, they can select a PO to copy the lines details from using this option.
The user will be presented with the following window. They can then enter a specific purchase order they wish to copy or search for one using the filters available.
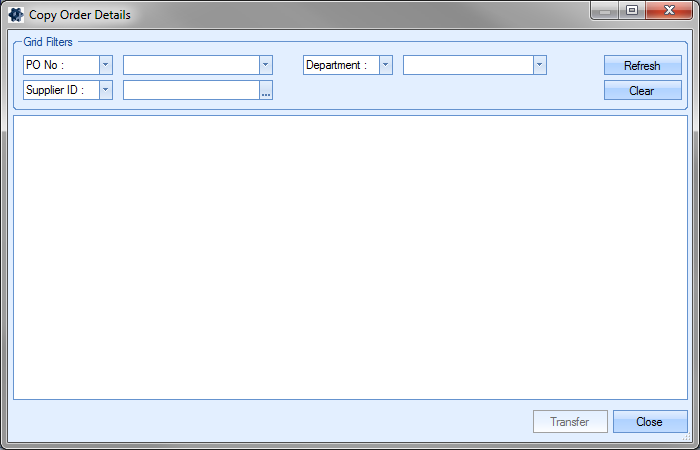
Clicking the REFRESH option presents the list of purchase orders that match the selected criteria.
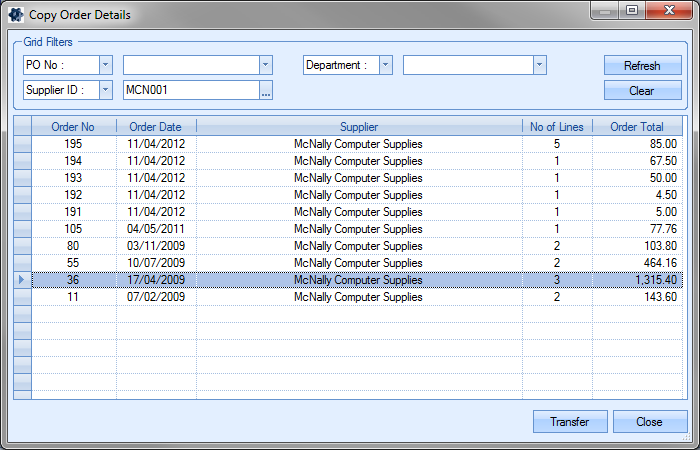
The user can select the purchase order required and click on the TRANSFER option. After confirmation, this will copy the line details to the new purchase order.
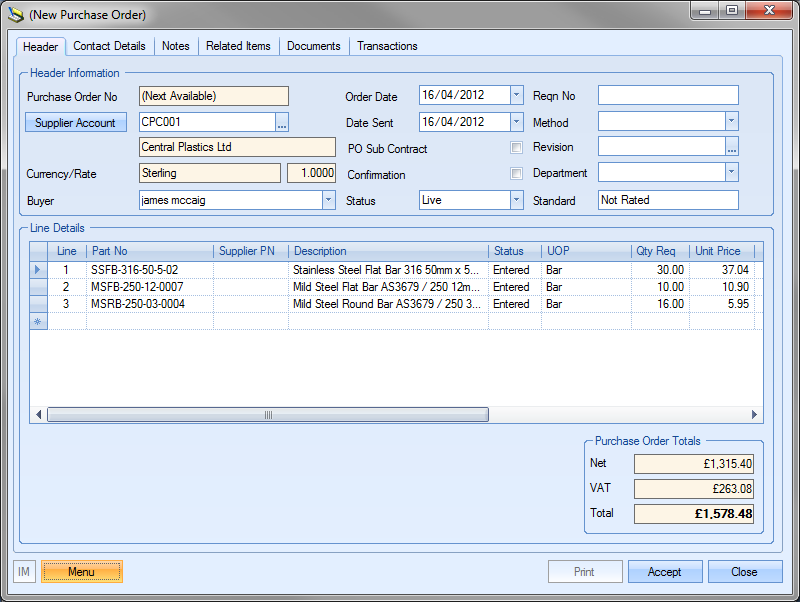
The user can then save the new purchase order with the copied details by clicking on the ACCEPT option.
Purchase Prices
The PURCHASE PRICES option in the menu options allows the user to see the price details of all purchase order lines together along with any current discount rates.
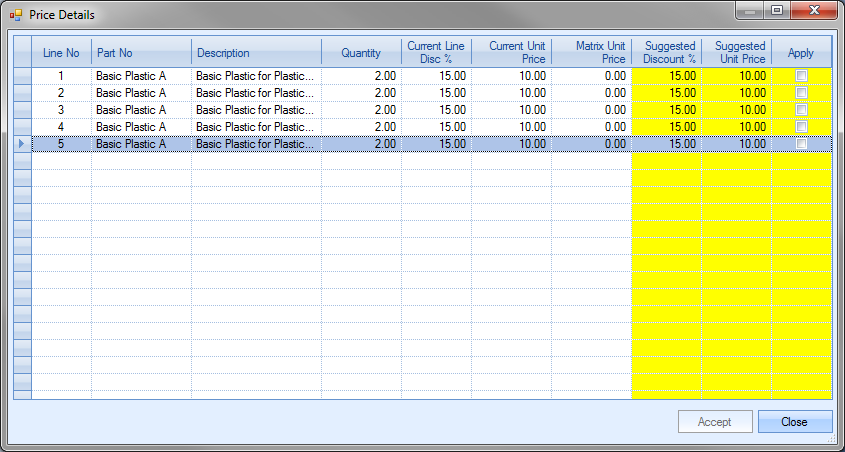
From here, the user can amend and update the purchase order line details for discount and unit price by simply amending the Suggested Discount % and the Suggested Unit Price fields and ticking the Apply tickbox. Clicking Accept will update the purchase order line details accordingly.
Receipt
The RECEIPT option allows the user to make a stock receipt against the purchase order. Selecting this option presents the user with the purchase order receipt screen.
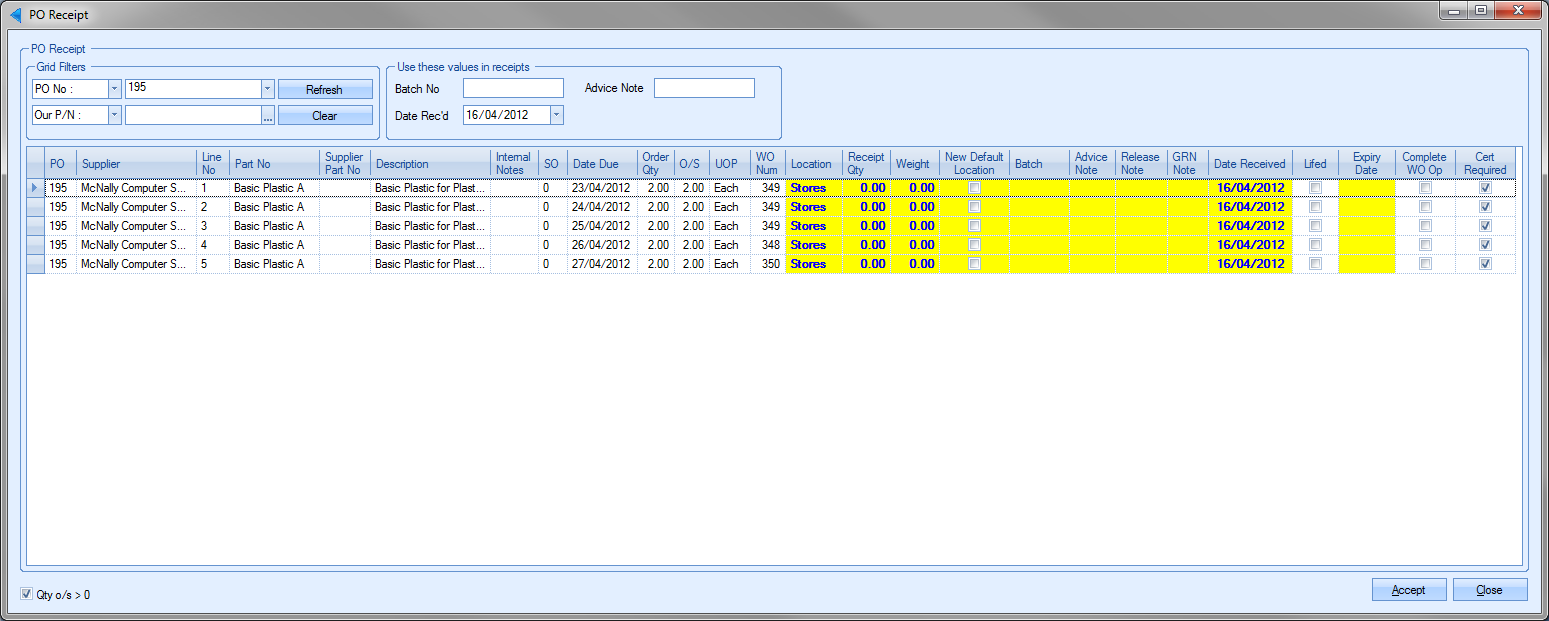
This presents the user with a list of all the outstanding purchase order lines. Lines with a status of ON HOLD will NOT be included on this screen. The user can then enter the receipt details against the appropriate line before clicking ACCEPT to record the receipt.
If the PO has been received earlier than expected than required and has been received earlier than the number of days set in the system options, the user is prompted to ask whether they wish to proceed with the receipt.
![]()
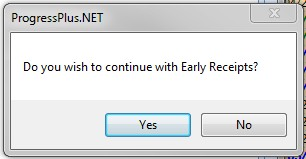
If the user selects the YES option, the receipt will be completed. If the user selects NO, the receipt will be halted and no inventory will be receipted into stock.
If the enhanced purchase order certification functionality is switched on, and the user is receipting order lines which have certification requirements which have not been marked as RECEIVED, the user will be presented with a warning to highlight this.
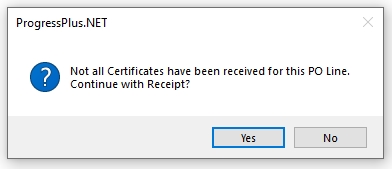
The user can proceed with the receipt of the goods by clicking YES, however, if the certificates are required for approval prior to receipt, this warning should indicate to the user they need to speak to the purchasing department/buyer before proceeding. For more information on the enhanced purchase order certification functionality, please refer to the Purchasing section of the manual.
Once all receipt requirements have been met, or the user is happy to proceed with the receipt, the system will generate a GRN record for the specific receipt(s), update the purchase order line details, as well as enter the purchase order receipt qty into inventory.
If the purchase order line was linked to a work order and the system option to issue goods from a purchase order is set, the user will be prompted to issue the receipted goods to any work orders that require that material.
![]()
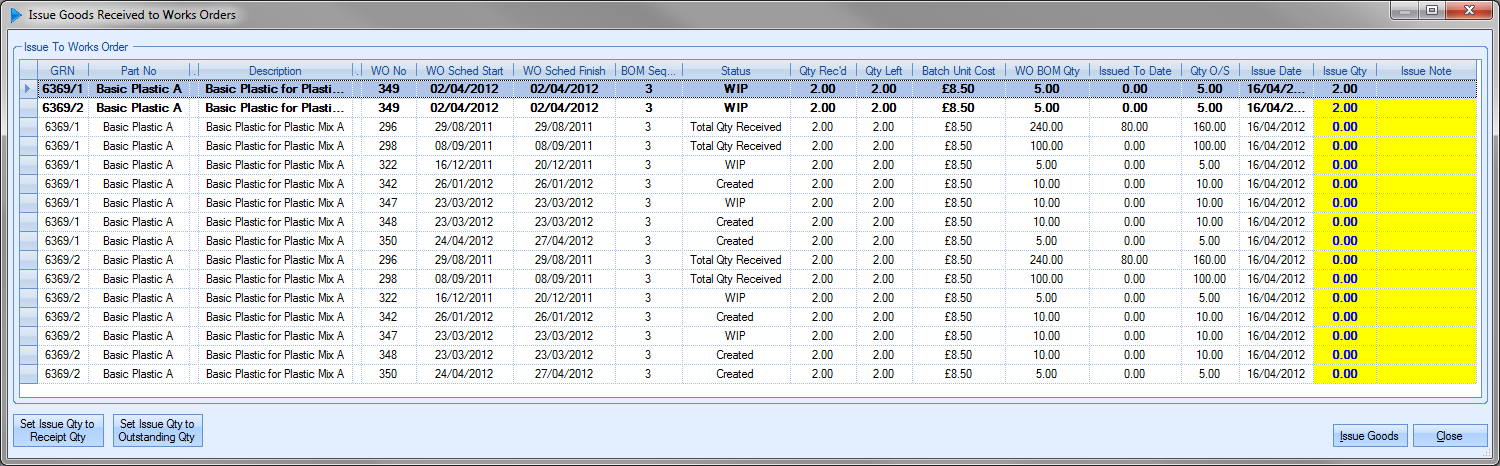
The user can issue the material to the work orders listed as required by entering the quantities against the Issue Qty field and then clicking the Issue Goods option. Alternatively, the user can use the option provided at the bottom of the window.
| Set Issue Qty to Receipt Qty: | This option updates the Issue Qty to match the quantity received from the supplier. If the quantity received is more than the outstanding qty, then this option will over issue the material to the work orders in question. |
| Set Issue Qty to O/S Qty: | This option updates the Issue Qty to match the outstanding quantity of the work order. This will only issue the qty required by the WO. |
Once the ISSUE QTY has been set, clicking the ISSUE GOODS option will remove the inventory from stock and issue it to the selected work orders.
The system can also be configured to allow the user to allocate any receipted units against an SOs that have an outstanding requirement. The system can be configured to do this using the system option below.
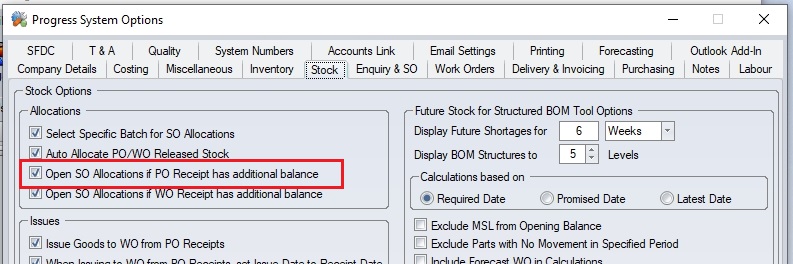
If the system is configured as such, the user will be presented with a screen similar to the following where they can assigned the receipted units to any SO waiting for the stock.
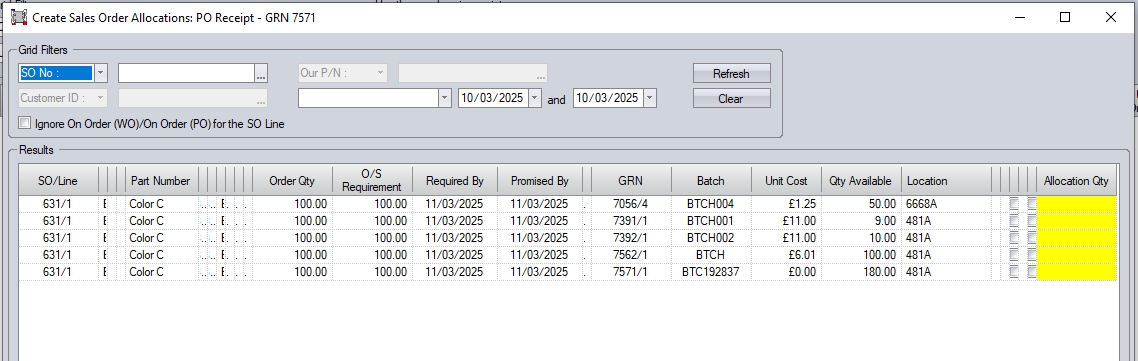
The user can use the filters available to find SO lines to allocate against, and also has an option to override existing POs linked to SO lines if permitted to.
Receipt (Ind. Batch)
This option allows the user to make a stock receipt against the purchase order in batch-sized quantities. This is the same screen that is available via the Inventory Receipts section of Progress. Selecting this option presents the user with the following screen. This is the standard PO Receipt (Ind. Batch) screen but is filtered for the PO the user was viewing. If the PO has multiple lines, then the screen will default to the first PO line with an outstanding quantity.
For more information on this option, please refer to the Inventory > Receipt section of the manual.
Supplier Return
This option allows the user to directly access the Supplier Return screen from the PO. Selecting this option will automatically filter the Supplier Return screen for the PO the user is currently viewing.
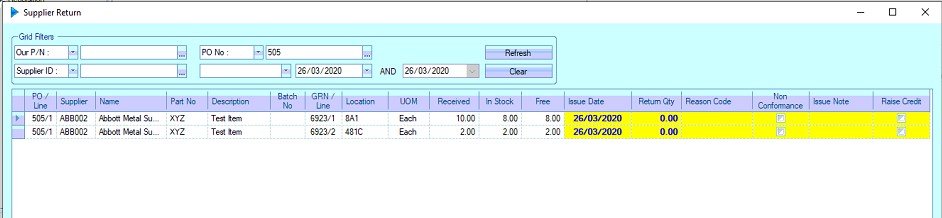
If authorised, the user can then carry out any supplier returns on any receipts received against the PO.
Prorata Freight/Add Charge
This option allows the user to set a line-by-line freight or additional charge value based on a total value specified by the supplier. When selected, the user is presented with the following window.
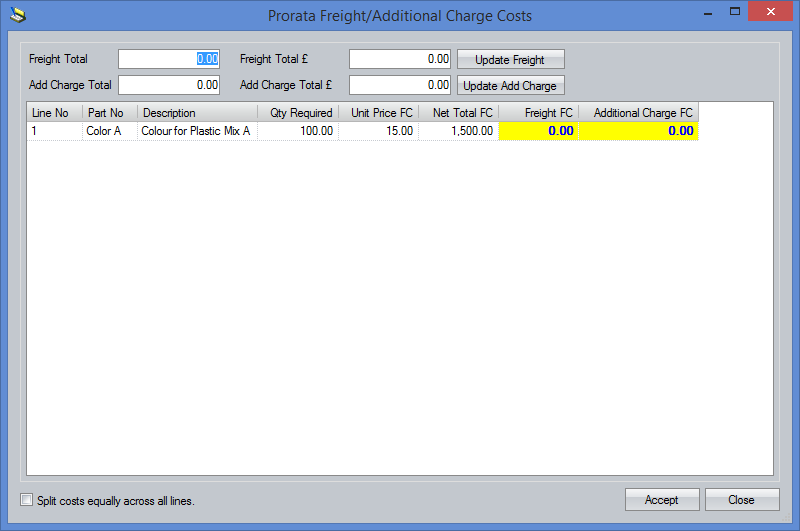
Each PO line will be displayed along with their own freight and additional charge values. The user can enter the total freight charge/additional charges quoted by the supplier into the relevant boxes at the top and then click the UPDATE FREIGHT or UPDATE ADD CHARGE options to spread the charges across all lines. By default, Progress will prorata this across all PO lines based on the NET value of each line, however, the user can spreqd the charges equally across all lines if they wish by ticking the SPLIT COSTS EQUALLY ACROSS ALL LINES option at the foot of the window.
Once the charges have been set across the PO, the user can click the ACCEPT option to save the charges.
Prorata Discount/Surcharge
This option allows the user to set a line-by-line discount or surcharge value based on a total discount or surcharge set by the supplier. When selected, the user is presented with the following window.
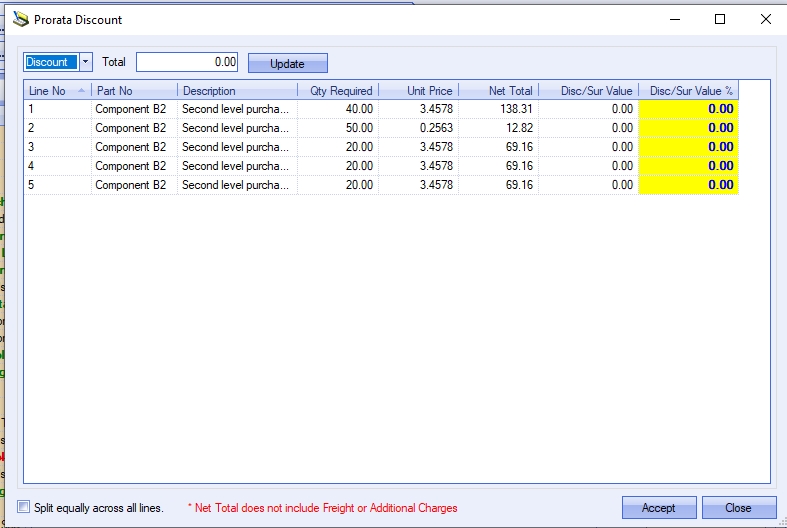
Just like the freight/add. charge screen, this allows the user to enter an overall discount or surcharge for the full PO and then spread it across all the PO lines. Again, they can do this on a pro-rata basis or they can spread the discount equally across all lines where possible using the option at the bottom of the screen. Once applied, the user can click ACCEPT option to save the changes.
Apply To All Lines
The final set of option available allow the user to update all PO lines with certain information. The options available are as follows:

These options will do the following:
Set On Hold Status to all Lines This will set all applicable PO lines to ON HOLD status
Set Cancel Status to all Lines This will set all applicable PO lines to CANCELLED status.
Set Complete Status to all Lines This will set all part-received PO lines to COMPLETE status - does not update ENTERED status lines.
Set Required Date to all Lines This will prompt the user for a date to set as the Required Date for all PO lines.
Set Promised Date to all Lines This will prompt the user for a date to set as the Promised Date for all PO lines.
Set Latest Date to all Lines This will prompt the user for a date to set as the Latest Date for all PO lines.
Set Discount to all Lines This will prompt the user for a % discount which will then be applied to all PO lines.
Set Surcharge to all Lines This will prompt the user for a % surcharge which will then be applied to all PO lines.
Set Project to all Lines This will prompt the user to select a valid project and apply it to all PO lines.
Set WO No to all Lines This will prompt the user to select a valid WO No and apply it to all PO lines.
Set Group Code to all Lines This will prompt the user to select a valid Group Code and apply it to all PO lines.
Set Delivery Point to all Lines This will prompt the user to select a valid stock location and apply it to all PO lines.
Set Nominal Code to all Lines This will prompt the user to select a valid nominal code and apply it to all PO lines.
After setting the appropriate value in each case, clicking the ACCEPT option will update the lines accordingly.
PO Import
This option allows the user to import PO line items from a spreadsheet. The user can also generate the import spreadsheet from this option too.
NOTE: This import process can only be used to create new PO lines; its not possible to export existing PO lines, make changes and then re-import. It is only available for standard purchase orders too; its not possible to import subcon PO lines via this method.
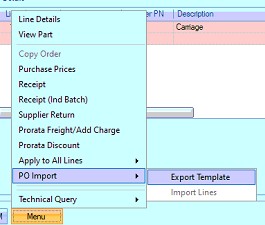
To generate the import spreadsheet, the user can click on the EXPORT TEMPLATE option. This will prompt the user for a file name, and then create a spreadsheet in the form required by Progress. This can be generate from within any standard PO and will export any details from the PO it is done within. These can be removed if not required for the PO, however, this process can be useful if repeat orders are placed for a large number of parts. The user can simply export from a previous PO, and them import the information into a new PO. If the PO is being raised specifically to fulfill a sales order line(s), the user can also enter the relevant sales order details to link the purchase order line to the associated sales order line.
An example spreadsheet is shown below.

The template created has the mandatory fields highlighted in yellow. The must be complete by the user for successful import. All of the fields should be self explanatory. The user can use this template to add all the items they need on their PO, completing the relevant information.
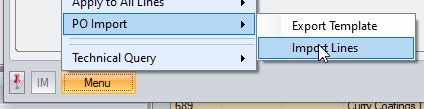
Once the spreadsheet has been completed by the user, it is now ready for import. The user can create their new purchase order as normal, selecting the relevant supplier, before selecting the Menu > PO Import > Import option.
The user will be prompted to select their import file before the system populates the purchase order with the details from the file.
The user can proceed with any additional lines required or simply click ACCEPT to save the details.
Text/Non-Inventory Purchase Orders
Progress can be used to raise purchase orders for non-inventory items as well as inventory items. To raise a text/non-inventory purchase order, the user will create a new purchase order and select the supplier as per normal process. Once the supplier details have been added, the user can enter the line items. As the items to be ordered do not have a part number set up in Progress we simply use the Description field to specify our requirements.
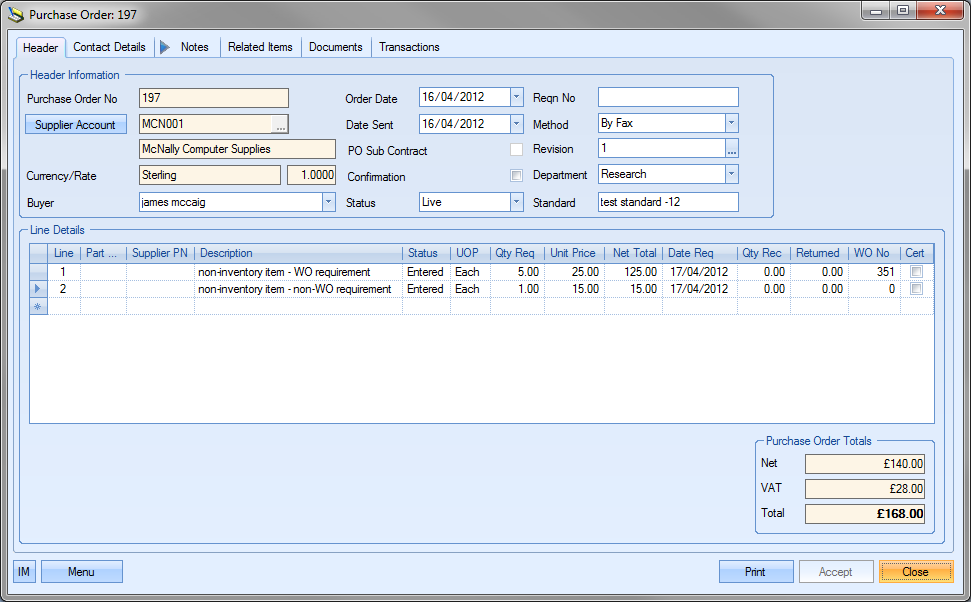
As can be seen above, the user can simply enter a description for the purchase requirement along with the usual quantity, price and required date information. If the purchase is specifically for a work order, this again can be specified on the purchase order line. Similarly, the user can use the PO Import process for creating PO lines, including text PO lines. Please refer to the section above that details this process.
When the purchase order is received from the supplier, receipt of the work order specific goods will automatically result in their issue to the work order specified.
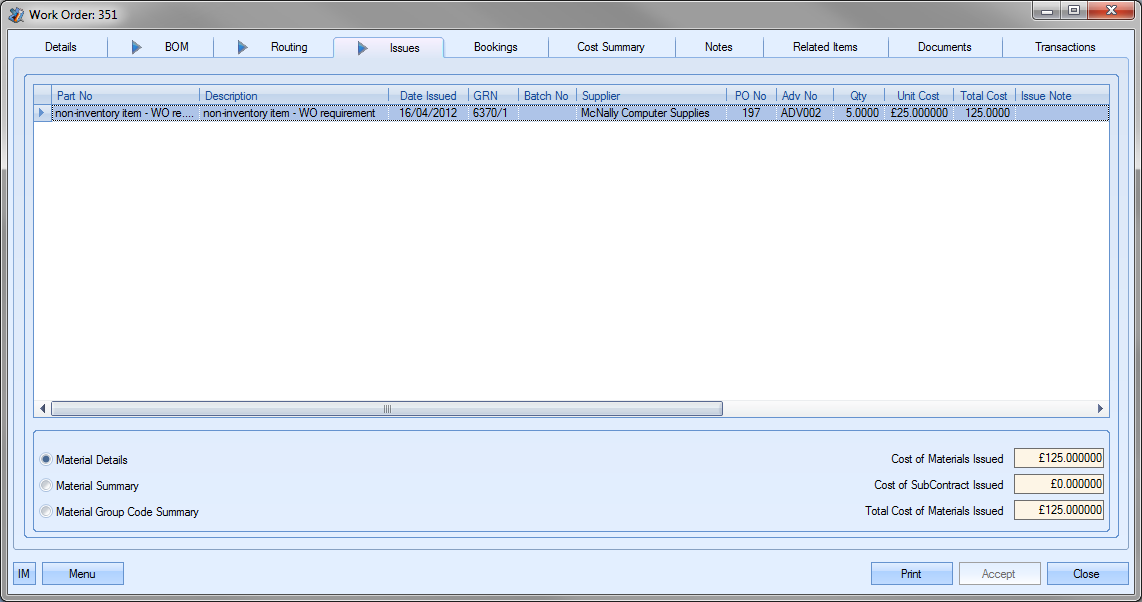
Non-inventory items received into stock that are not for a specific work order will show as being received, but will not show as inventory anywhere in Progress.
Blanket POs
This functionality allows the users to record a blanket quantity of an item against a PO. This could be a pre-agreed quantity with the supplier for a given period. The process of raising a blanket PO is much the same as a standard PO, so the PO would still be created against a supplier with the relevant part information entered. The blanket PO quantity is recorded in the PO line details as shown below.
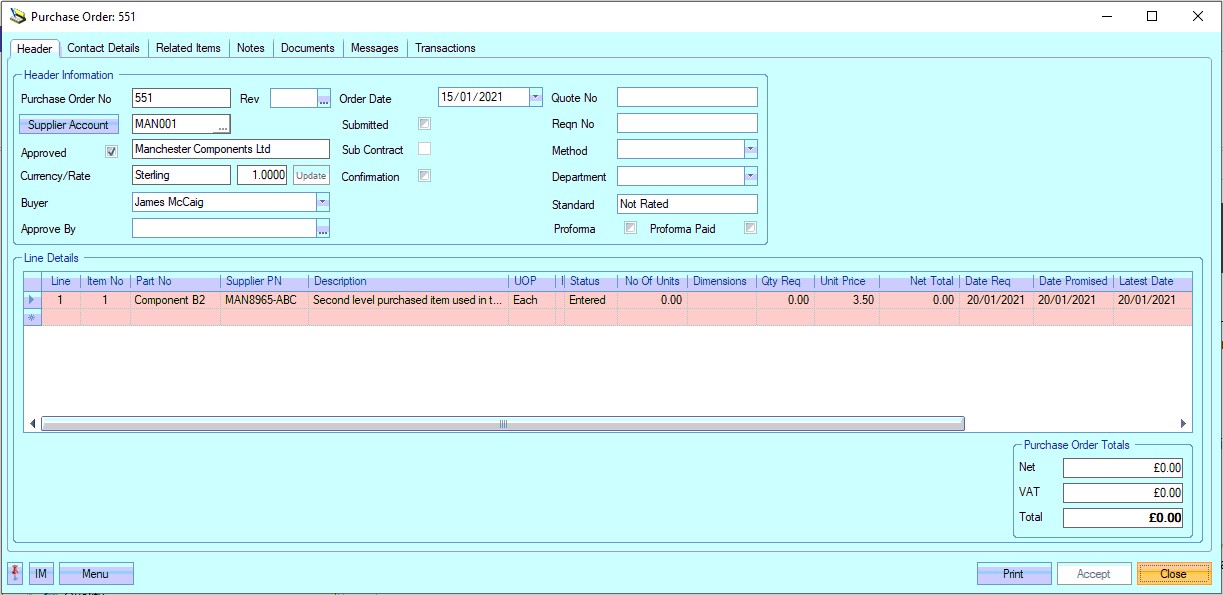
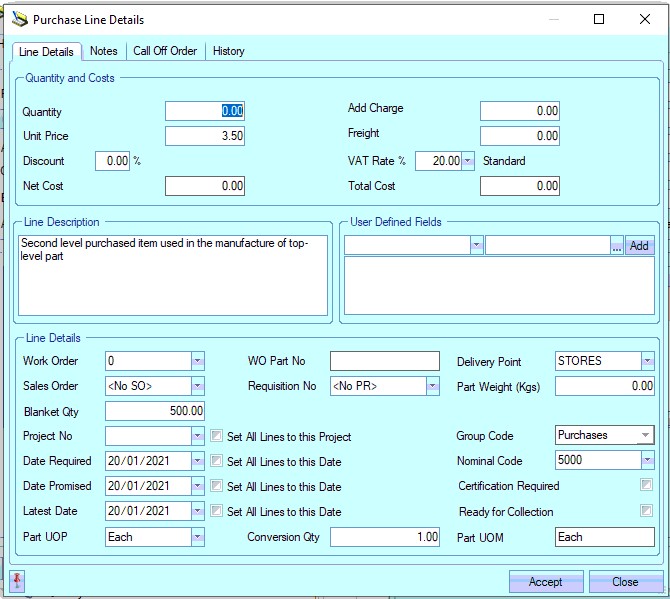
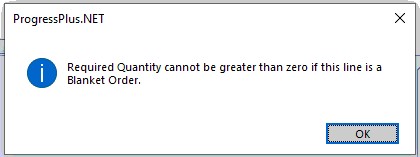
A blanket PO line has no quantity like a standard PO, as this is not a firm order of goods at this stage. As a result, the QTY REQ field on the line details is disabled/set to zero. Attempting to amend this to anything other than zero will result in a message to the user highlighting that this is a blanket PO.
When a standard PO is created, the system updates the parts' supply figures to recalculate the current shortage/surplus figure, however, blanket PO quantities are not considered part of the supply as they are not confirmed orders. This allows the user to record the blanket requirement against the supplier and send the supplier a PO from which all subsequent CONFIRMED orders will be raised against based on the pre-agreed purchase quantities.
Once created, blanket POs can be tracked via the Today > To Do > Blanket Purchase Orders screen.
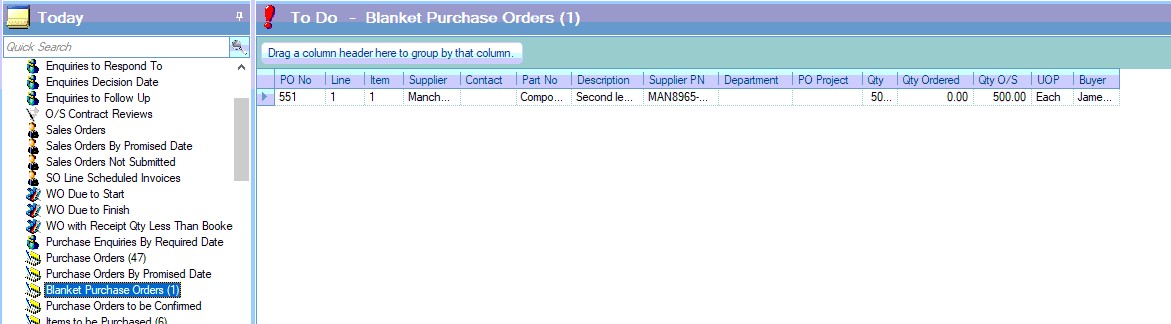
The Qty Ordered figure on this screen reflects the number of units ordered from the supplier since the the blanket PO was raised. Purchases from before the blanket PO was raised or POs raised against other suppliers are not considered.
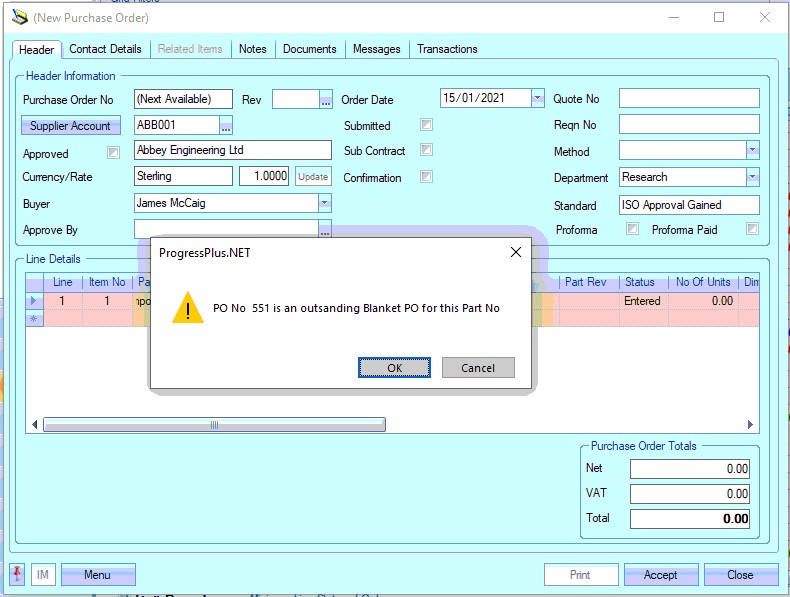
Once demand is generated for an item already on a blanket PO, the system will highlight this to the user whenever ever they attempt to raise a PO. This is simply to highlight that there is already an agreement in place with a supplier, allowing the user to check that the PO is being raised against the correct supplier,. It will allow the user to proceed and create the PO if they choose. This warning will be displayed on both the PO Shortage screen and also on new manual POs. It will also appear if the part is ordered against a different supplier too.

When a confirmed order needs to be placed, the user can add the details to the existing blanket PO as an additional line, or create a new PO for the supplier/part number. Since this line is not for a blanket quantity, the user would complete the Qty Req field as per normal. This will result in the part's stock surplus/shortage figure being updated accordingly, and will also update the Blanket Purchase Order screen to reflect the confirmed order.


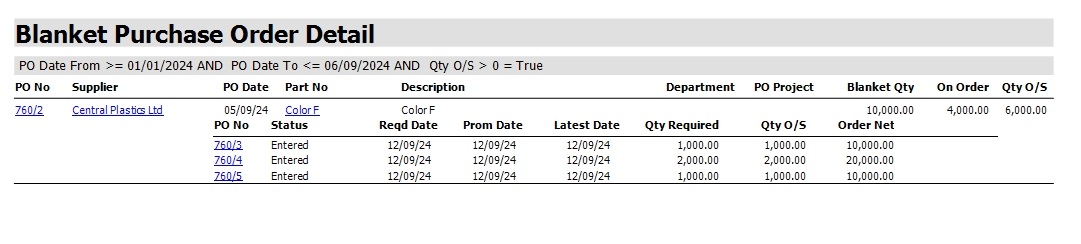
The user also has the Blanket PO Detail report (Reports > Purchasing) which can be used to view current blanket POs, and the outstanding subsequent PO raised too.
Sub-Contract Purchase Orders
The user can also create sub-contract purchase orders in Progress for routing operations that need to be done offsite. These purchase orders are not for physical items but for services and operations that cannot be carried out internally. To raise a text/non-inventory purchase order, the user will create a new purchase order and select the supplier as per normal process. Once the supplier details have been added, the user can mark the purchase order as a sub-contract purchase order by ticking the following option at the top of the purchase order screen.
![]()
Ticking this option changes the purchase order line details required to be completed by the user.

Instead of referring to part numbers, the subcon purchase order refers to a SubCon Code. This is the code that defines the required operation on the purchase order.
| Line No: | This is the purchase order line number. This is set by Progress. |
| SubCon Code: | This is the code created in Progress for the subcontract operation required. These codes are set up via the Maintenance menu. For more information on SubCon Codes, refer to the Maintenance section of this manual. |
| Description: | This is the description of the subcontract code chosen by the user. The description defaults to the SubCon Code description. |
| UOP: | This is the unit of purchase for the SubCon operation. Typically, this should be set to EACH. |
| Status: | This is the status of the purchase order line. Defaults to ENTERED status upon creation. The status of the line changes to indicate the status of the order depending where it is in the process of being completed. The statuses displayed are as follows: |
| ENTERED: Default status of new order line. Indicates order has been raised on system, but no other action has been taken. |
| PART RECEIVED: Indicates that the purchase order quantity has been partially received. |
| FULLY RECEIVED: Indicates that the quantity ordered has been fully received. |
| COMPLETE: Indicates the order line has been received and marked as complete. Completion is typically done after the purchase invoice has been created. |
| CANCELLED: Indicates purchase order line has been cancelled. |
| Qty Req: | This is the quantity on order. |
| Unit Price: | This is the purchase price for the cost of the work required. This can be per item or can be an overall cost. |
| Net Total: | This is a calculated field and is the total NET value of the purchase order line. Calculated as: |
| NET Price = Quantity* Unit Price |
| Date Req: | This is the date the items are required to be delivered by. |
| Qty Rec: | This is a calculated field and is based on the total quantity received against the purchase order line. |
| Returned: | This is a calculated field and is based on the total quantity returned to the supplier against this purchase order line. |
| WO No: | This is the work order SubCon operation is required for. |
| Op No: | This is the routing operation number that the SubCon op is required for. |
| Cert: | This tickbox indicates where a supplier certificate of conformity (CoC) is required upon receipt of goods. |
The line details screen for subcon POs is very similar to that of standard PO, however, the user has the ability to update the PO line EXTERNAL notes by refreshing from the WO. When the PO is initially created, the WO routing operation's OP INSTRUCTION is pulled through to the PO line EXTERNAL notes for reference and typically appears on the printed subcon PO as an instruction to the supplier what's to be done (shown below).
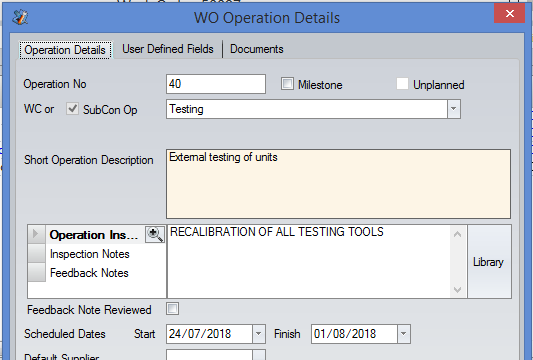

If the instruction on the WO is updated, the user can update the PO to reflect the changes using the REFRESH OP INSTRUCTIONS FROM WO option which is available via the line details MENU option (shown below).
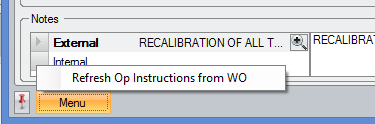
This option will pull the latest WO op instruction text through to the PO line EXTERNAL notes as shown below.
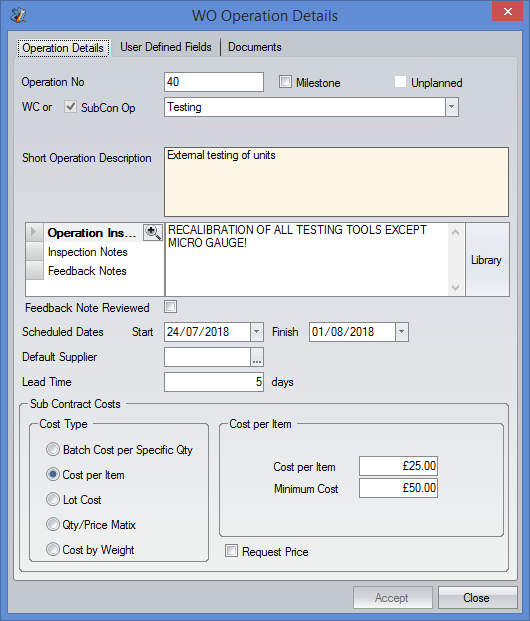
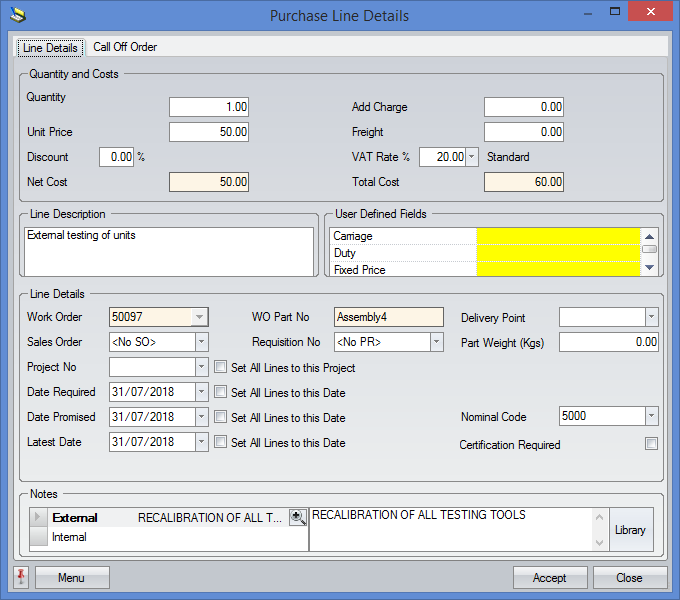
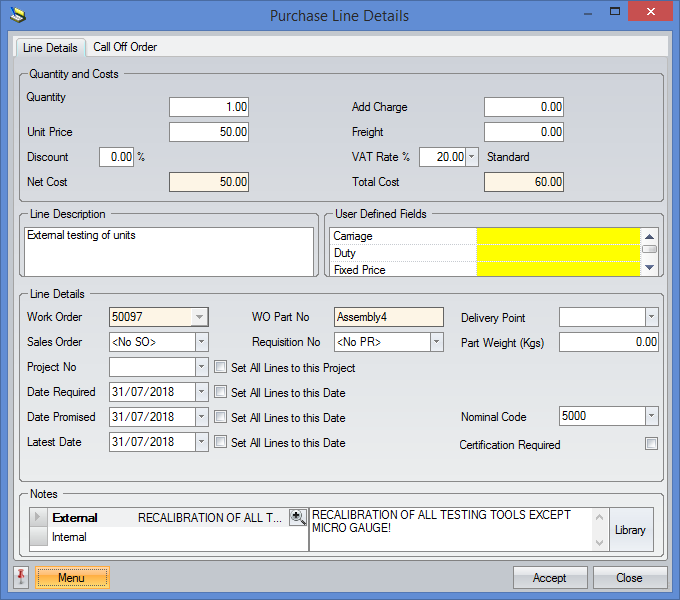
Once all the details have been entered, the user can print off a Sub Con purchase order using the Print option at the bottom of the screen.
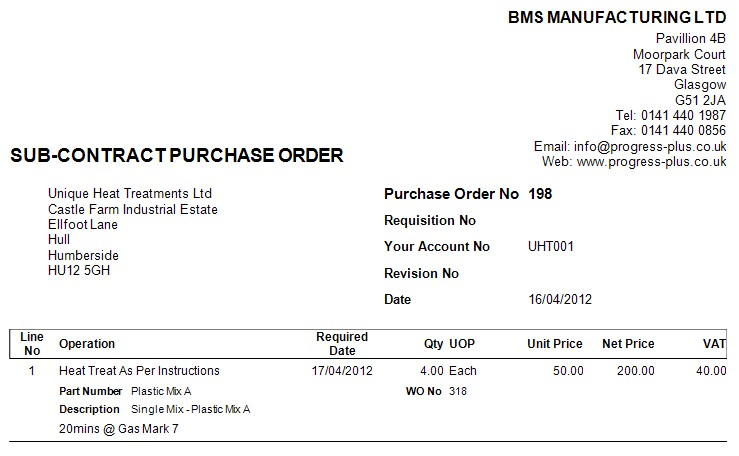
The user can also print off a despatch document for sending with the items being sent to the subcontractor. This can also be printed from the Print option.
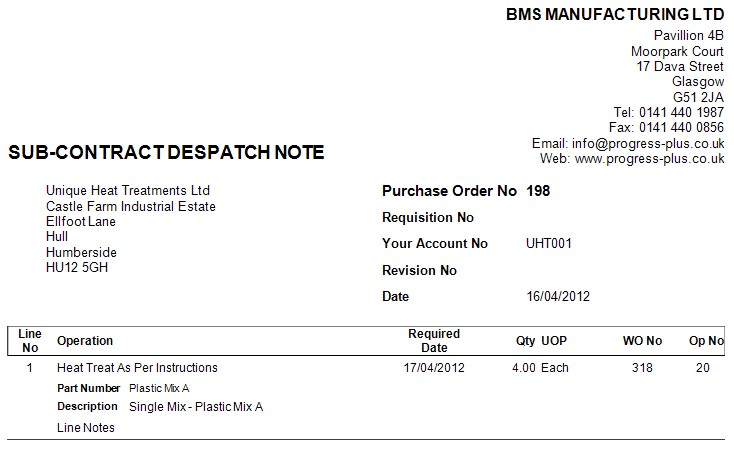
Once the items are received back from the subcon supplier, the PO is receipted as per usual. The user is presented with a similar receipt screen to that for purchased items.
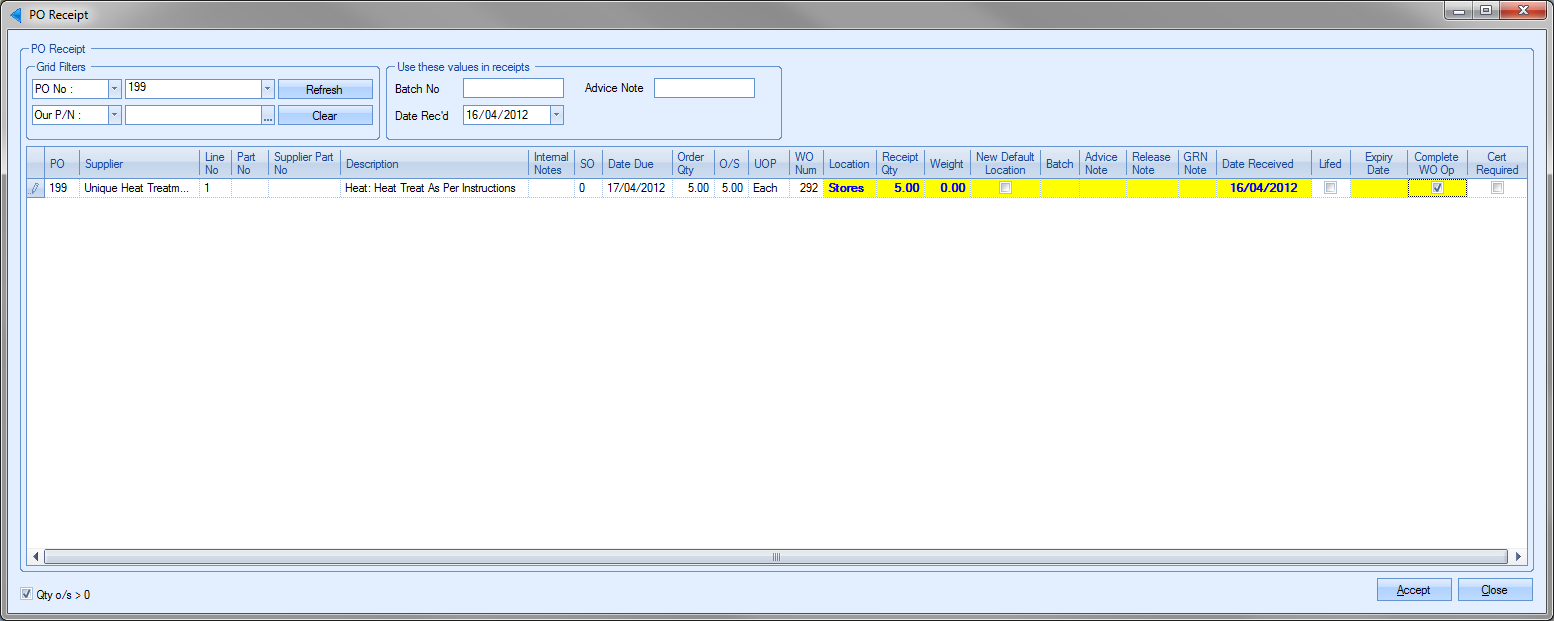
Again, the user can specify the details of the receipt, but can also mark the SubCon operation as complete if they are satisfied that the operation has been completed to the require standards. Once the user clicks Accept, as well as the purchase order being updated accordingly, the work order is also updated to reflect the receipt and completion of the SubCon operation.
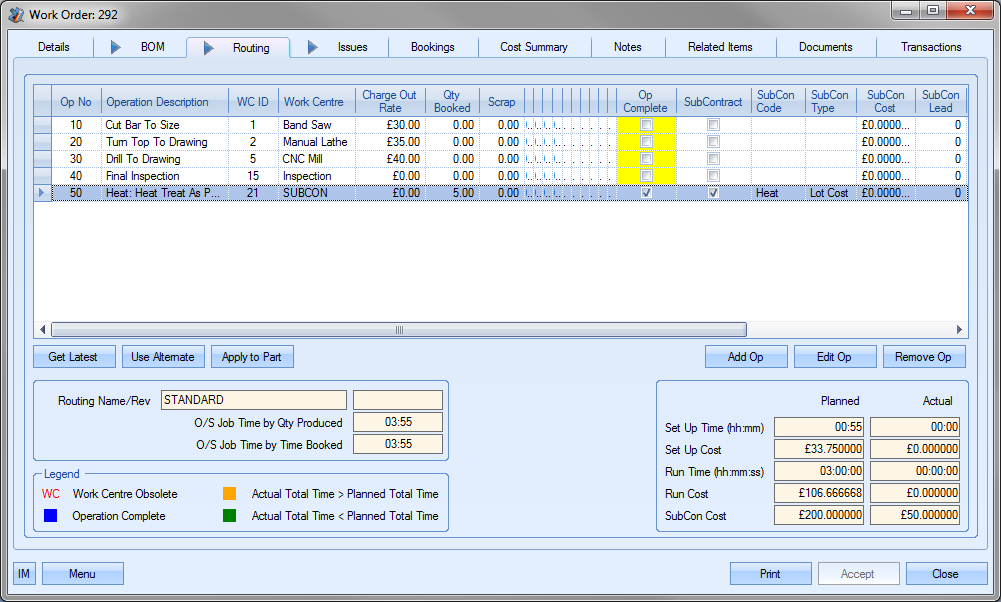
Purchase Order Controls
These options allow the user to control who can raise, review, approve and send POs from Progress Plus. These options are based on value limits.
Purchase Order Limits
The most basic restrictions on Purchase Orders are a “Spend” and “View” limits, which can be set in Admin under the users permissions.

The SPEND LIMIT value will prevent a PO being printed, if the PO value is higher than the users spend limit. The VIEW LIMIT value will prevent a PO being opened if the value is higher than the users view limit. There is also an option on the Today screen to flag 'Purchase Orders Above Your Spend Level'.
Purchase Order Approvals
The purpose of this function is to allow users to create POs but not send them until they have been approved by an authorised employee. It is switched on in admin, under the Purchasing system options. Once switched on, the individual users (or groups) can then have PO Approval limits assigned to determine what they can approve.
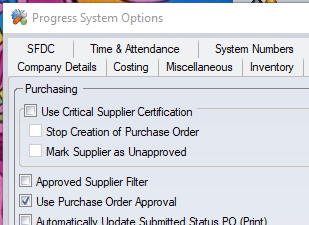
(System option to activate PO approvals)
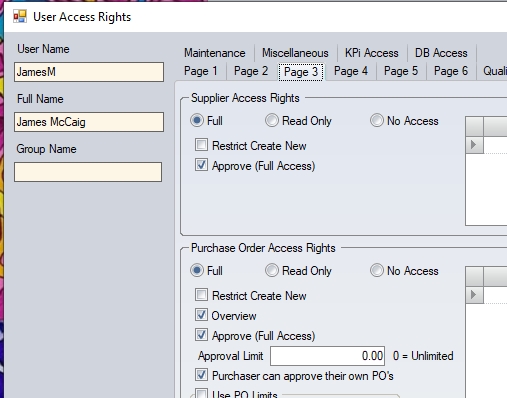
(User permissions allowing approval limits and approval of own POs)
Against each user there is an option to allow them to approve PO's and a value they can approve up to. If the value is set to zero they can approve any value. There is a tick box on each PO to show whether it has been approved or not and a PO which has not been approved cannot be printed.
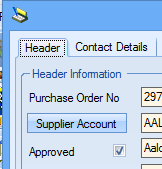
NOTE: PO Approval does not happen automatically. The user must tick the approval option to indicate approval, even if they do have approval authority.
A PO which has been approved but is then edited must be re-approved, but only if the PO value increases. POs where the the total value does not change or has been changed to decrease the total value (i.e. a cancelled PO line) do NOT need to be re-approved.
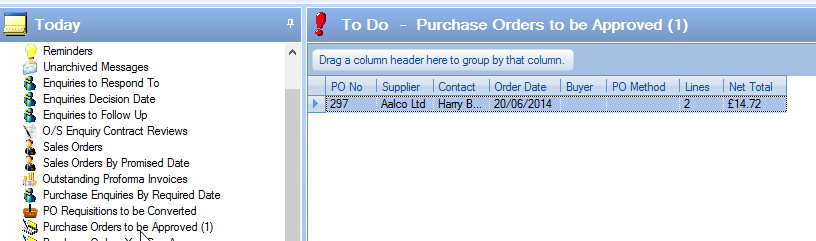
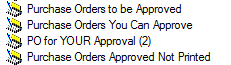
The Today screen has a number of related screens. These will show the following:
Purchase Orders to be Approved Shows POs awaiting the user's approval, with an option to show all employees.
Purchase Orders You Can Approve Shows POs up to your approval value which the user is authorised to approve.
PO for YOUR Approval Shows POs specifically assigned to the user for approval
Purchase Orders Approved Not Printed Shows POs the user has raised, have been approved, and can now be printed, with an option to show all employees.