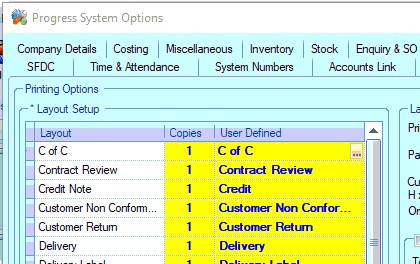
Layout Setup
This section permits the administrator to determine how many copies of the various layouts e.g. purchase orders, quotes etc. are printed each time the users choose one of these documents. The administrator can simply click onto the required layout in this form and update the number displayed in the Copies field.
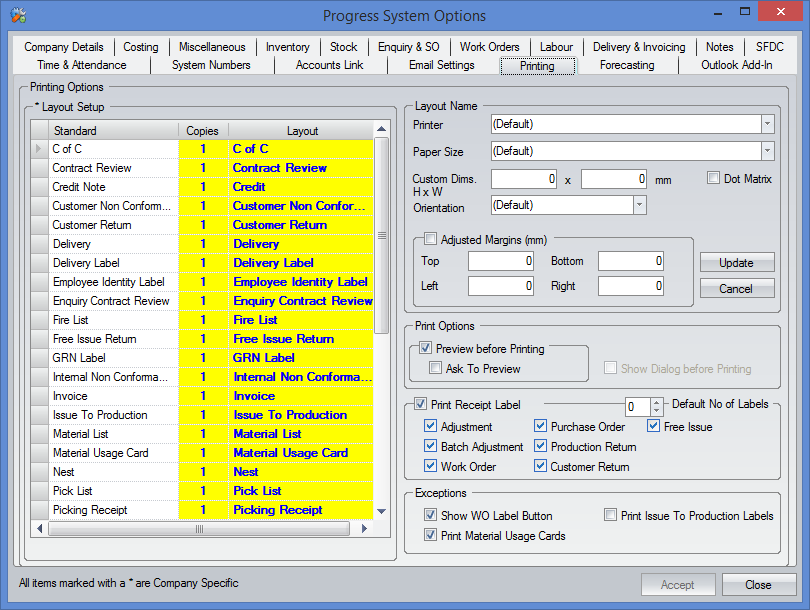
Layout Name
Documents will by system default print off on the user’s default printer, though the administrator can specify for items to print out on a specific printer e.g. in the case of delivery notes the user may be printing on pre-printed stationary which is loaded on a printer within the despatch department.

To select a specific printer the user must click onto the required layout e.g. Delivery and then choose the Printer from the lookup list in Layout Name. Please note that Progress Plus will only display printers currently available on the local network. Missing printer drivers, network permissions, sharing privileges etc. must be set up by the administrator within Microsoft Windows.
The user can also select paper size or any customised dimensions and paper orientation. If nothing is chosen the system will use the default settings as set up for the printer within Microsoft Windows.
Print Options
Preview Before Printing
With this option selected on and the Print button on a form pressed, the user will automatically be shown a preview of the selected document on screen.

Ask To Preview
With the Ask To Preview option selected on pressing the Print button on a form the user will be presented with a further message box.
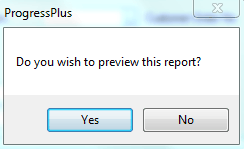
Pressing Yes to this option will preview the report on screen while selecting the No button will send the report to the specified printer.
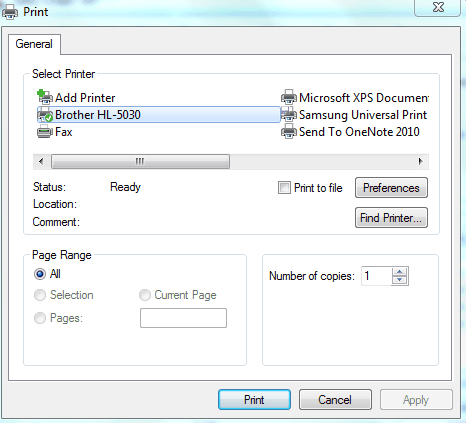
Show Dialog before Printing
A further printing option is the Show Dialog before Printing setting. In order for this to function to work the Preview Before Printing must be unselected. This option ensures that the standard Microsoft Windows Print dialogue box appears to allow users to select their own preferences.
Print Receipt Label
These options allow labels to be printed at selected inventory receipts in the system, to allow stock to be marked with all relevant details. The layout of the receipt can be designed to suit each individual company’s requirements and are printed when the GRN is confirmed.
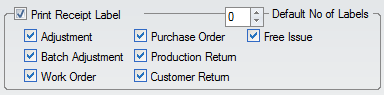
The user can choose which receipt types require labels to be printed as well as the default number of labels. The user can simply click on/off the required type.

Exceptions
These options allows the administrator to set other functions. After the administrator has completed any changes clicking the Accept button on the bottom of the form will save the updated information.

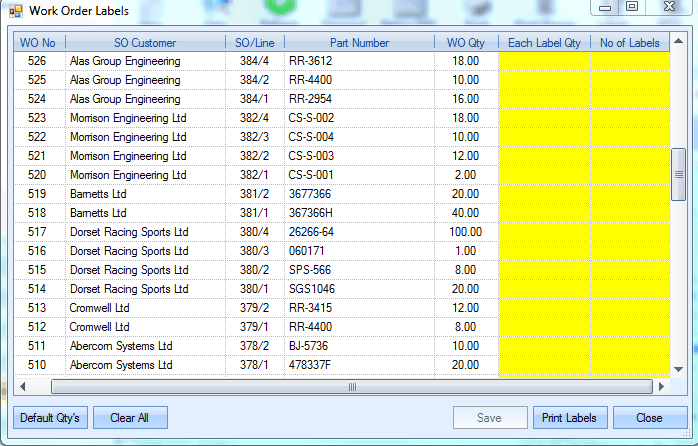
Show WO Label Button
When selected, this option will display the label icon on the Works Order browse screen, which displays the following screen and allows labels to be printed as required for all Works Orders. The user has the ability to enter a quantity of each label and specify the number of labels he or she requires to be printed. There is also a function on this form that, if selected to, will enter the default quantity for each works order.
Please refer to the Works Order manual for more information on Works Order labels.
Print Material Usage Cards
When activated, this option will display a tick box in the Adjustment Receipts and PO Receipts screens within the Inventory module.

The user can then choose to print off a usage card for the parts after receipts. This layout can be modified to suit the user’s requirements if desired. Details printed on usage cards normally include purchase order number, supplier and GRN information.
Print Issue To Production Labels
When ticked, this option will print labels after materials have been issued to a works order, which allows the users to trace material in the factory. Standard information normally displayed on an issue label include works order number, quantity and description details. This label layout can be modified to suit the user’s requirements if desired.
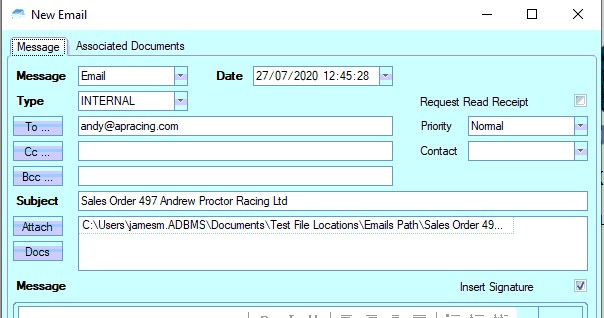
Email Subject Configurations
The administrator has the option of configuration the subject headings to all layouts when sending them out to suppliers/customers. This can be done by drilling into the USER DEFINED field listed on the left as shown below.
This presents the following screen. From here, the administrator can click on any of the highlighted options to add these to the subject heading of the email.
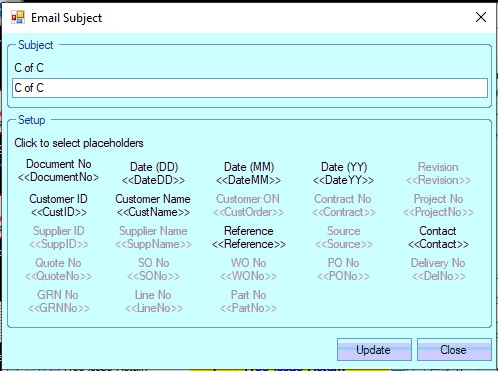
Each layout will have its own set of available options to add based on the relevant information associated with that document. Some examples are shown below.
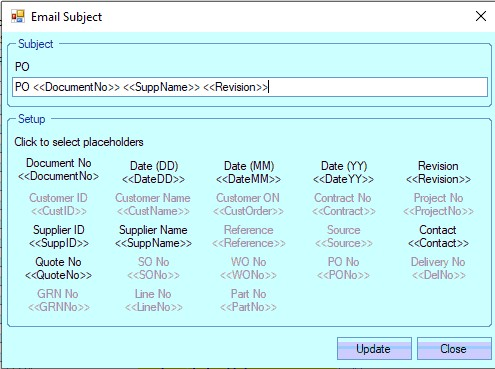
(Purchase Order)
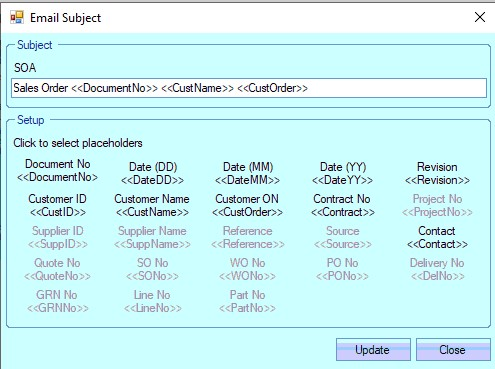
(Sales Order)
The administrator can also add their own text to the Subject if they wish. Once the desired Subject text has been specified, the administrator can save the changes using the UPDATE option.
When an email is sent with one of the documents listed above attached, the email subject will default to the specified format. A sales order example is shown below.